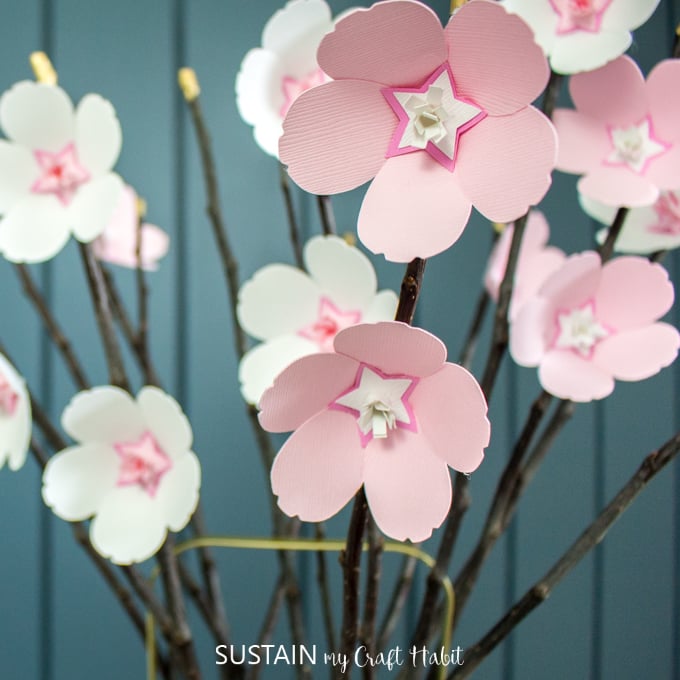
Sweet Cherry Blossom Paper Flowers with Cricut
With cherry blossoms only blooming for a few days in the Spring, we’ve happily captured the beauty of their blooms with these sweet paper flowers that’ll last us all year long.

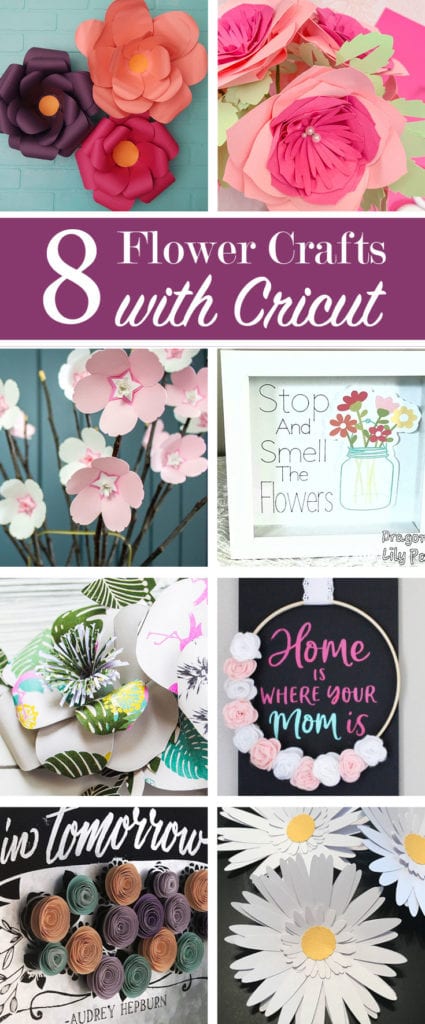
Today we’re joining in a fun new monthly challenge which inspires us to make crafts using our Cricut machine. This month’s theme is FLOWERS! Be sure to check out 7 additional flower crafts using Cricut at the end of this post.
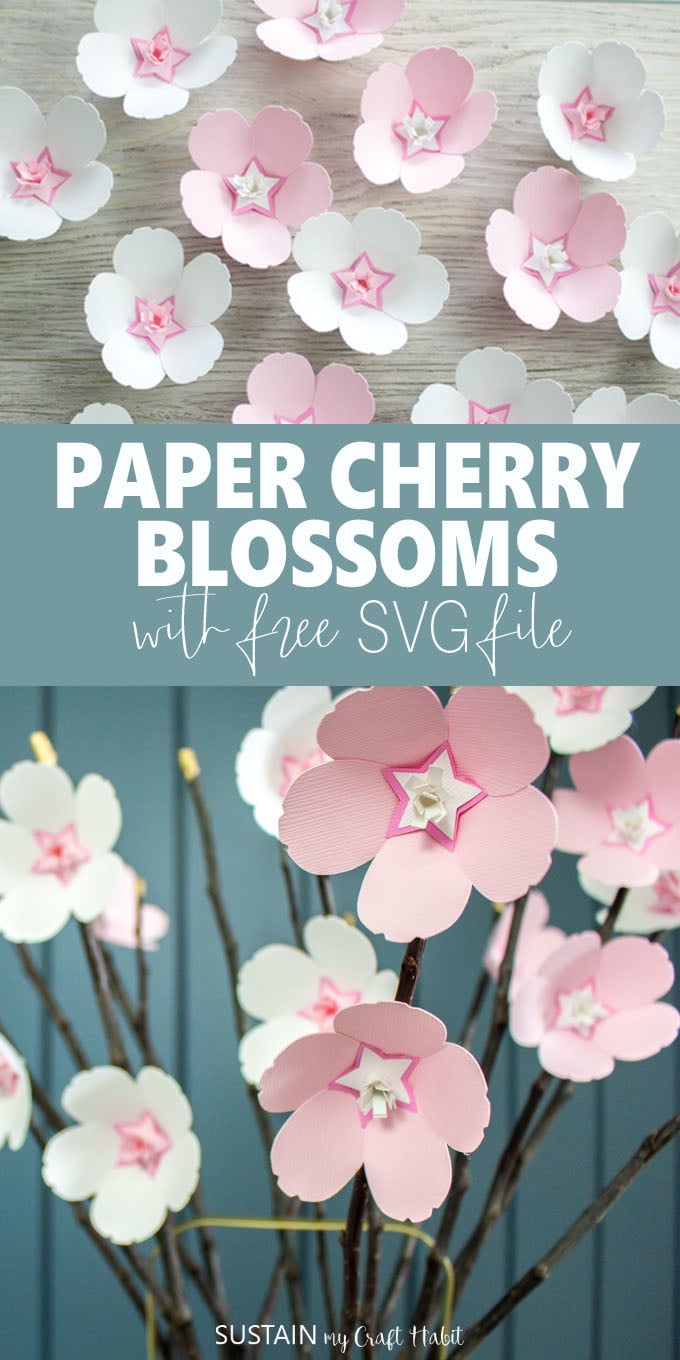
A Sweet Cherry Blossom Paper Flower Centerpiece
Cherry blossoms are one of our favorite signs of Spring. Heading to the park to take in the Cherry Blossom Festival is a huge yearly event near our home towns. It only lasts a few days but everyone in the greater area knows about it and many make an effort to go, despite all the traffic delays and crowds of people.
We even made this cherry blossom painted mug! The peacefulness and beauty of those blooms lined up along a serene walking trail makes the effort all worthwhile.
We created this delicate cherry blossom flower pattern as part of our felt flower pattern collection for Spring and in addition to our felt succulent pattern offering. Since these patterns are so versatile we were able to cut them out of paper using a Cricut in no time at all!
This is also a great craft for teens – they can make a whole bouquet for their room, a friend or a teacher. We also have these awesome paper crafts for teens to explore!
Whether large or small, paper flowers seem to be everywhere! We even made these paper daffodils and created a bunch of gorgeous giant paper flowers for a party we hosted last week.
Materials Needed:
Disclosure: We received the products used in this post at no charge from Cricut. Also, this post contains affiliate links for your shopping convenience. You can read our full disclosure statement here.
- Cardstock (light to medium weight) in White (color A), Dark Pink (color B) and Light Pink (color C)
- Cricut Maker
- Cricut standard grip Machine mat
- Cherry Blossom Paper Flower Pattern in SVG
- Hot Glue Gun with clear glue sticks
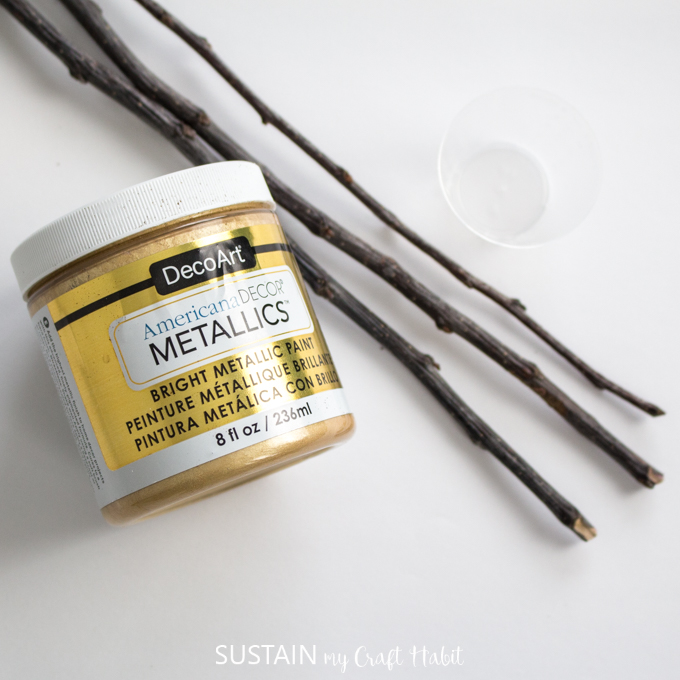
- Cut Twigs or Branches
- Gold Acrylic Paint (we used Decoart Metallics in Champagne Gold)
- Large ceramic or glass vase
Instructions:
Making Paper Cherry Blossoms with a Cricut Maker:
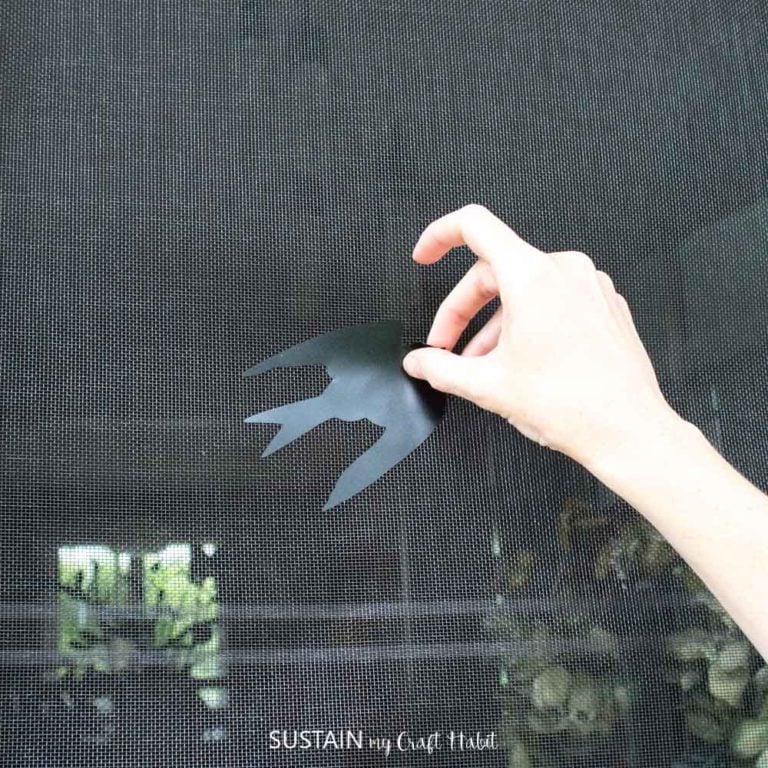
In Cricut’s Design Space, under new project, select to upload the downloaded Cherry Blossom Flower Pattern file from your computer.

Decide on the number of cherry blossom blooms you want to make and duplicate the pattern accordingly.
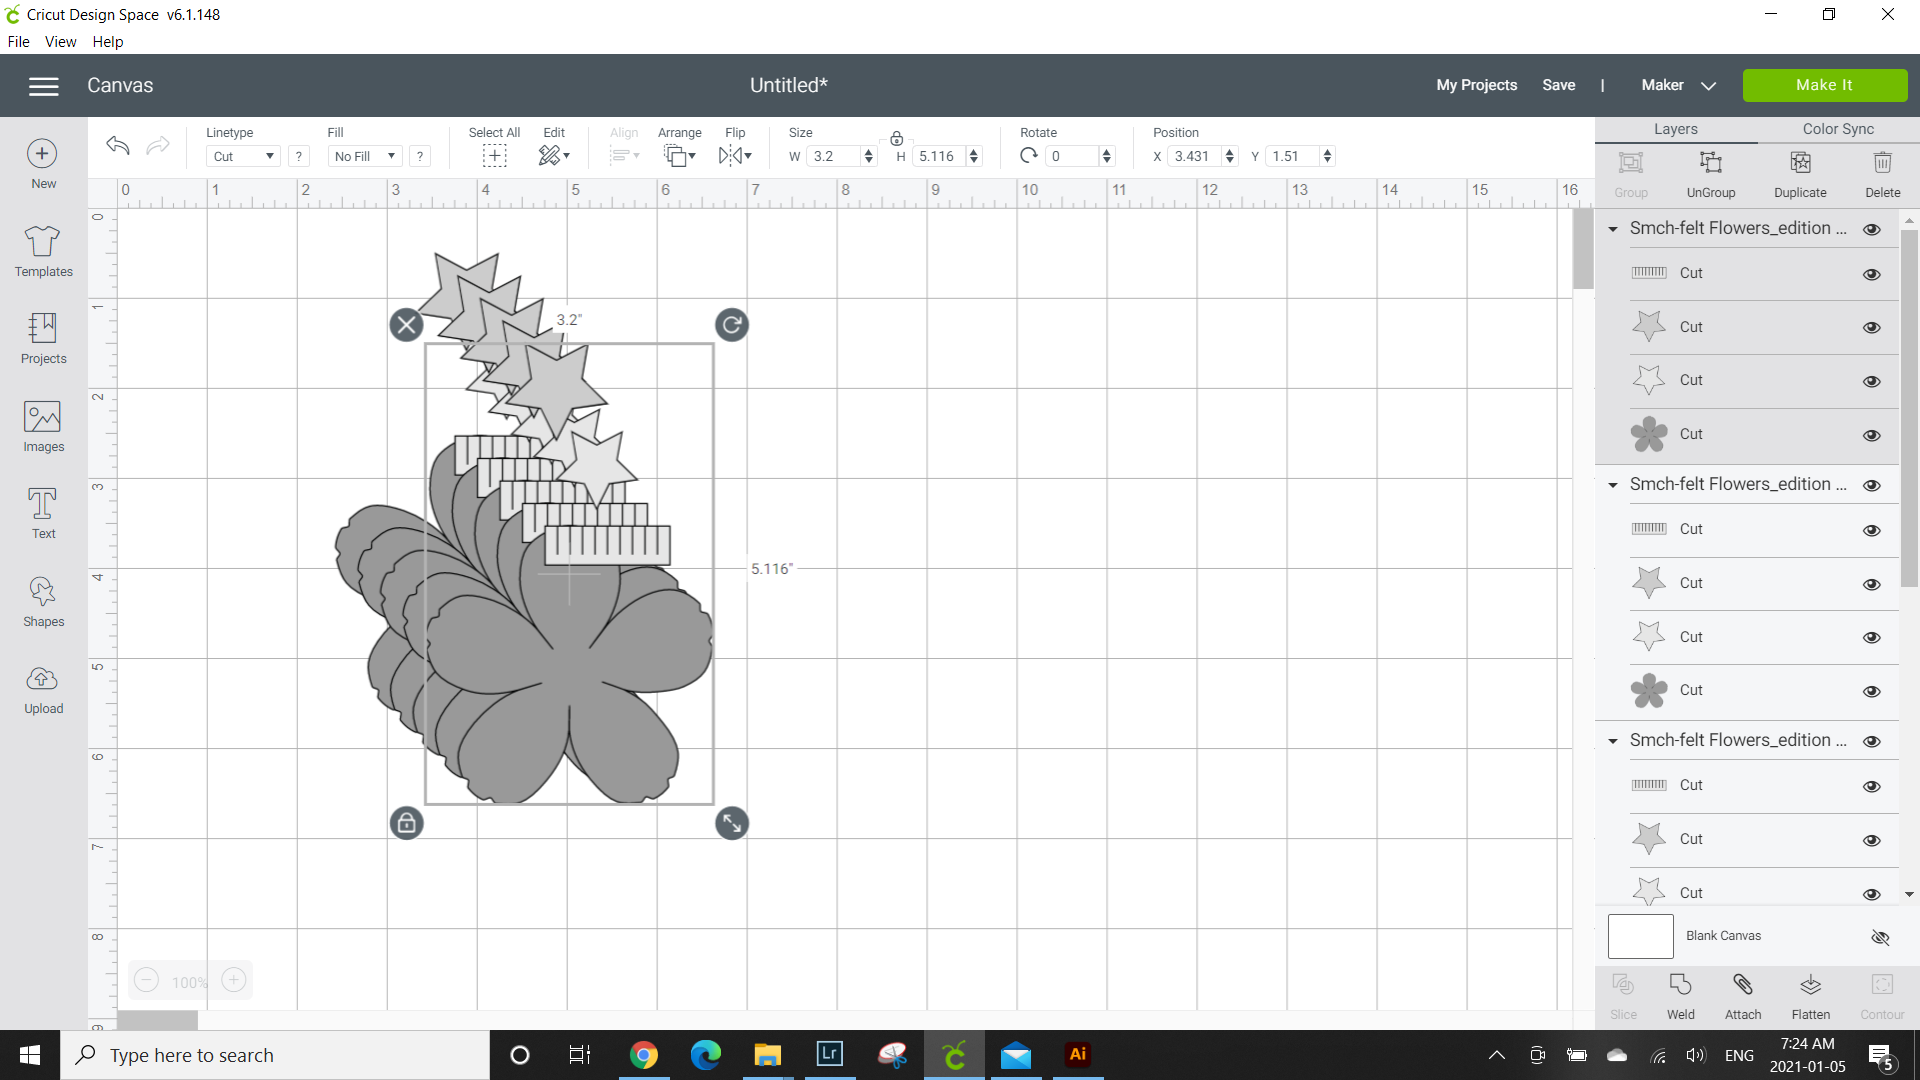
Click on the grouped pattern pieces and select ungroup to separate each pattern piece. Change the colors of the cherry blossom pieces to match your paper color if desired. Click on Make It. This takes you to an image of the cutting mat with the placed pattern pieces.
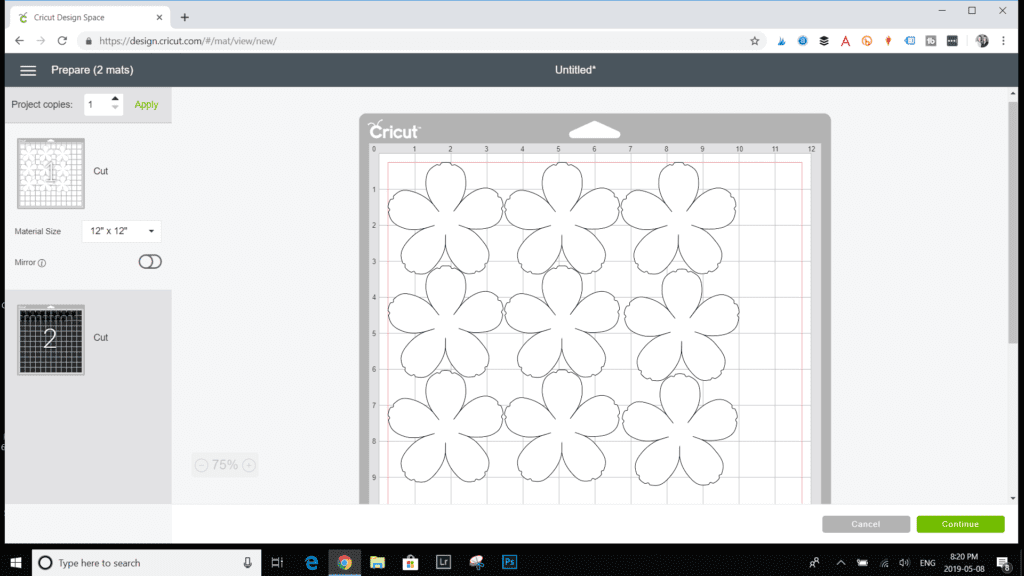
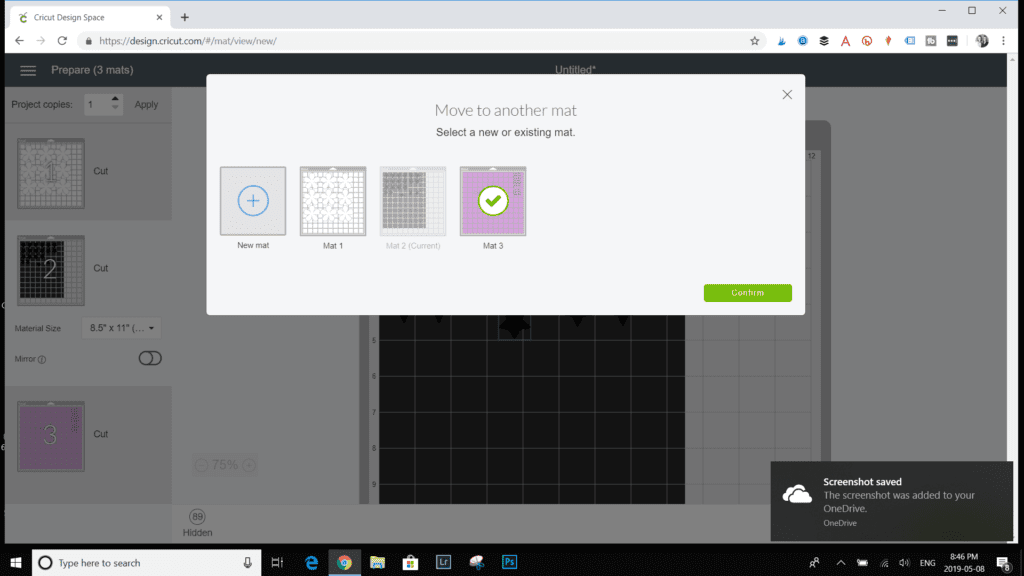
Each mat represents the cardstock paper color you plan to cut the pattern out on. To rearrange the pieces, right click on the pattern piece you want to edit and select move to another mat. Rearrange the pieces so that the petal pieces are on mat 1 (color A). Keep the larger star pieces are on mat 2 (color B). And lastly, move the smaller star and rectangular pieces to mat 3 (color C).
Select the paper size from the drop down menu. With mat 1 highlighted, select continue to begin cutting. Following the prompts on the screen, select the material type from the list and ensure the correct knife blade tool is inserted in the Cricut.
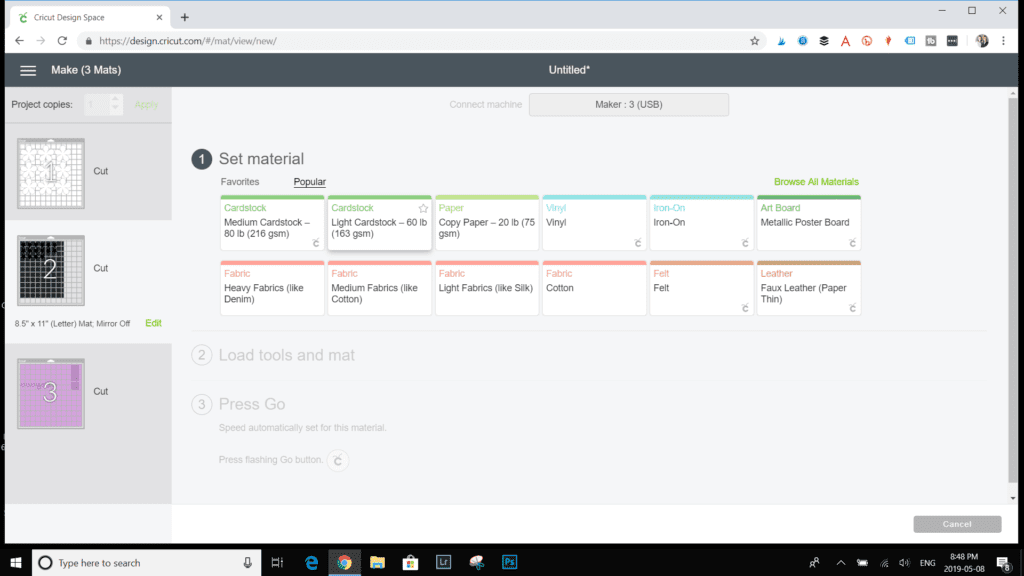
Select Continue.
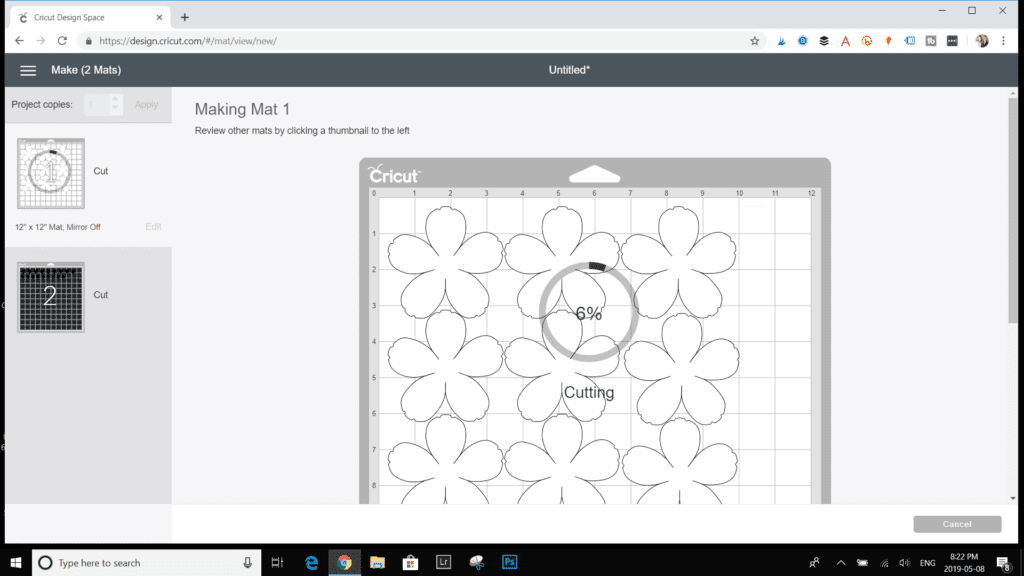
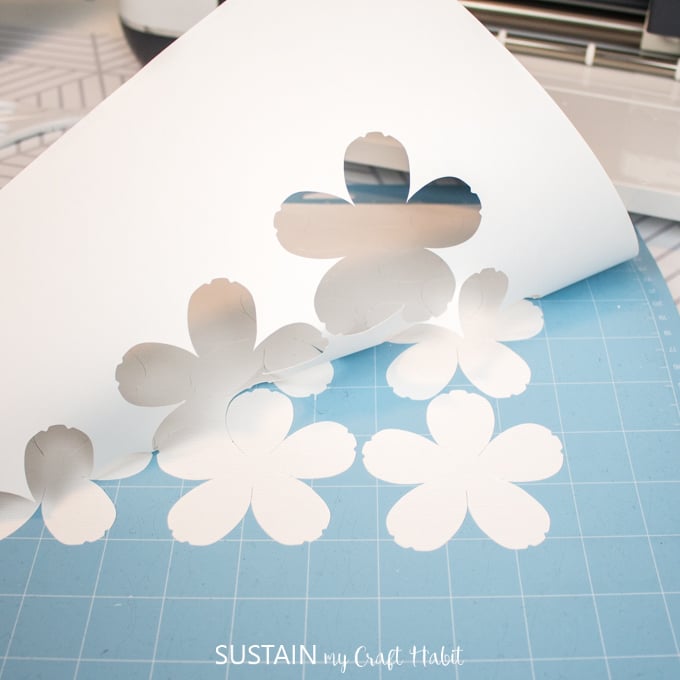
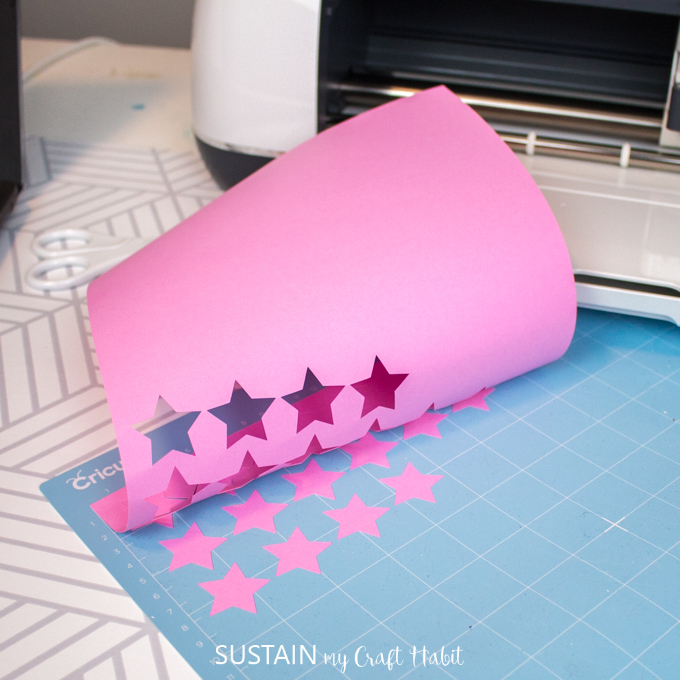
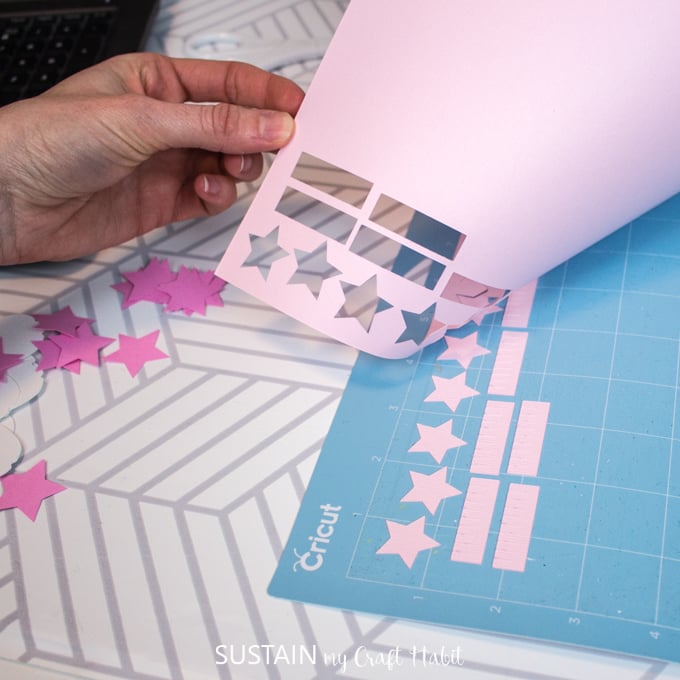
The Cricut will quickly and precisely out all the pieces on the mat. When it’s down, it will prompt you to unload mat. Remove the paper from the cutting mat avoiding contact with the surface of the mat. Put all the cut petals aside.
Place the second sheet of cardstock (in color B) and hit continue, following the prompts on the screen.
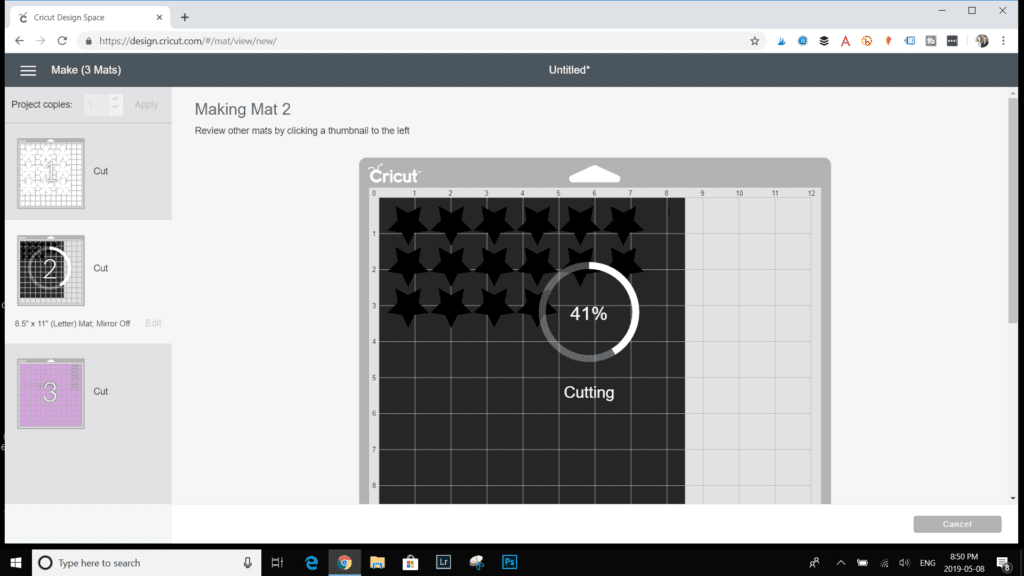
Remove the paper and cut pieces from the mat. Put the star shapes aside.
Repeat with the third and final mat.
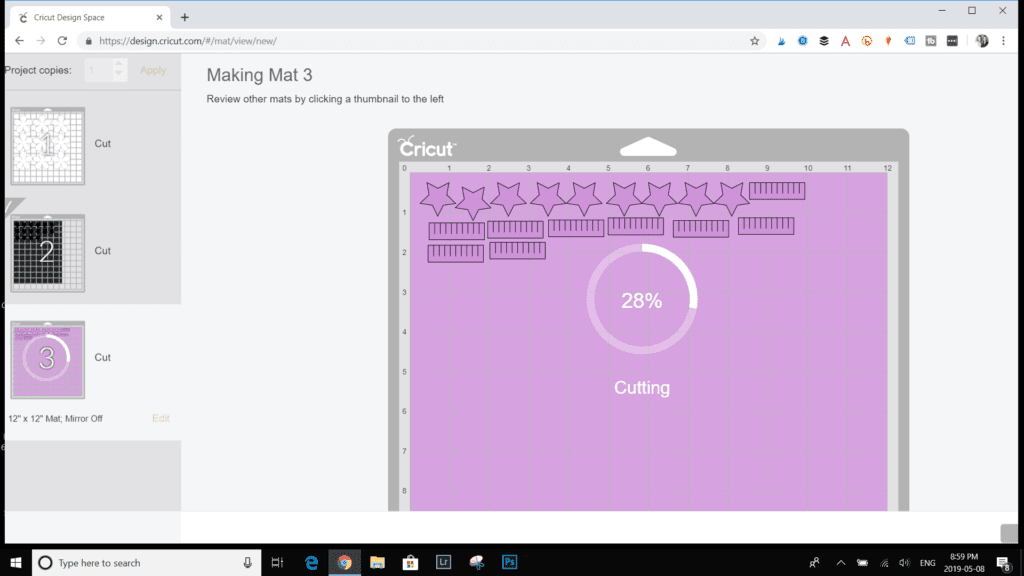
Remove the cut pieces from the mat to complete all your cherry blossom flower pieces.
Assembling the cherry blossom paper flowers:
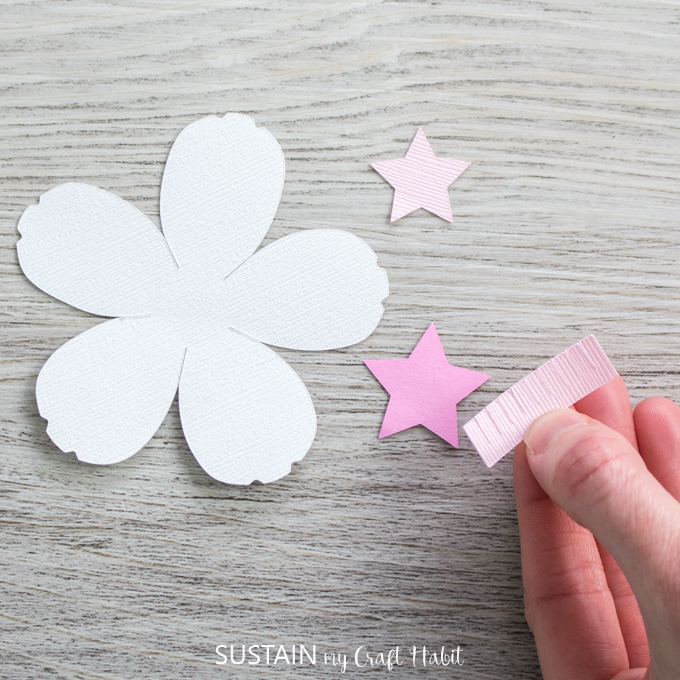
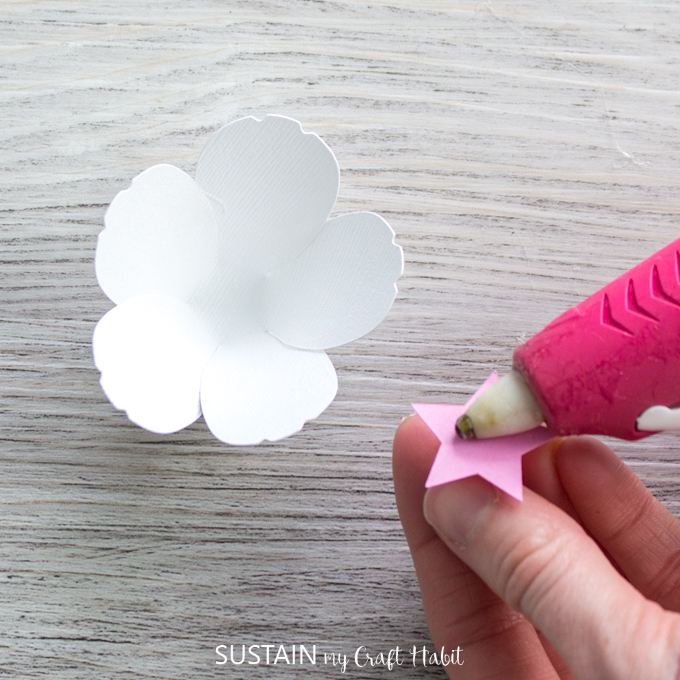
Take the cut rectangular piece and roll it crosswise until you have a small rolled up tube.
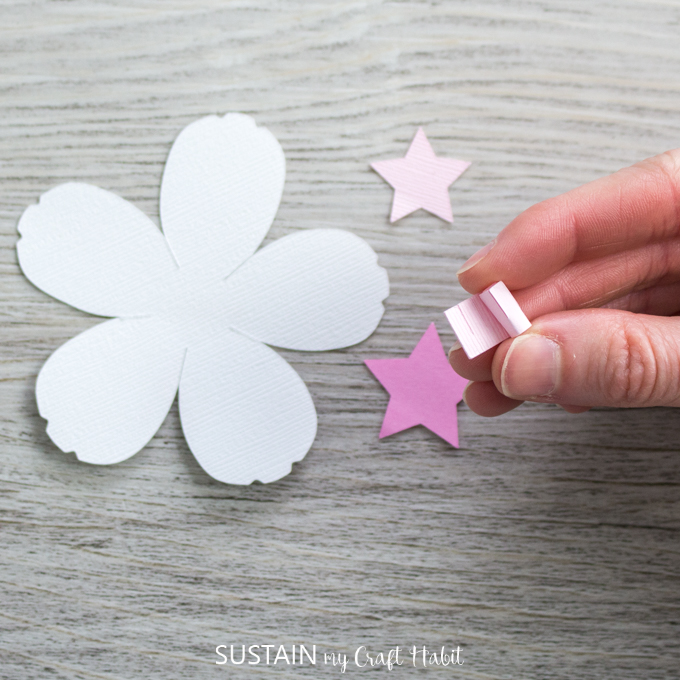
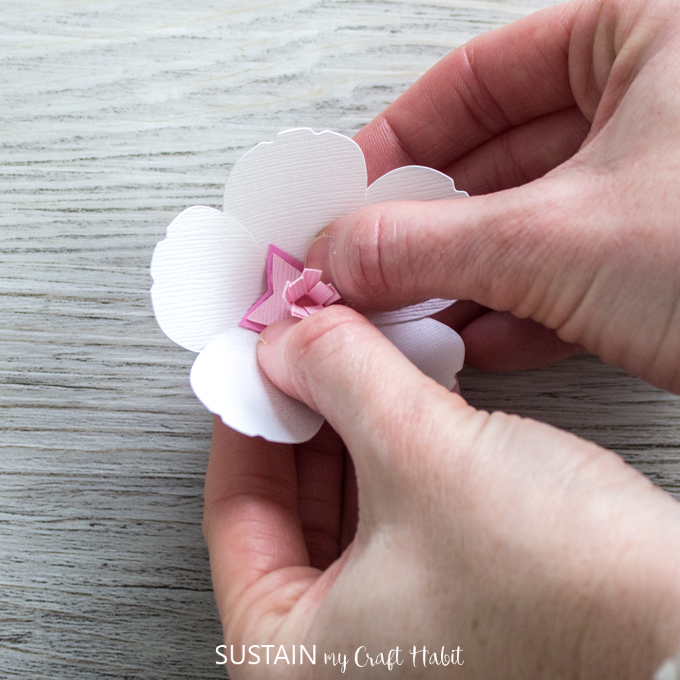
Apply hot glue to the bottom of the rolled up piece (the side without the cut fringe) and press it in place at the center of the small star piece. Apply hot glue to the bottom of the small star and press it onto the center of the larger star piece.
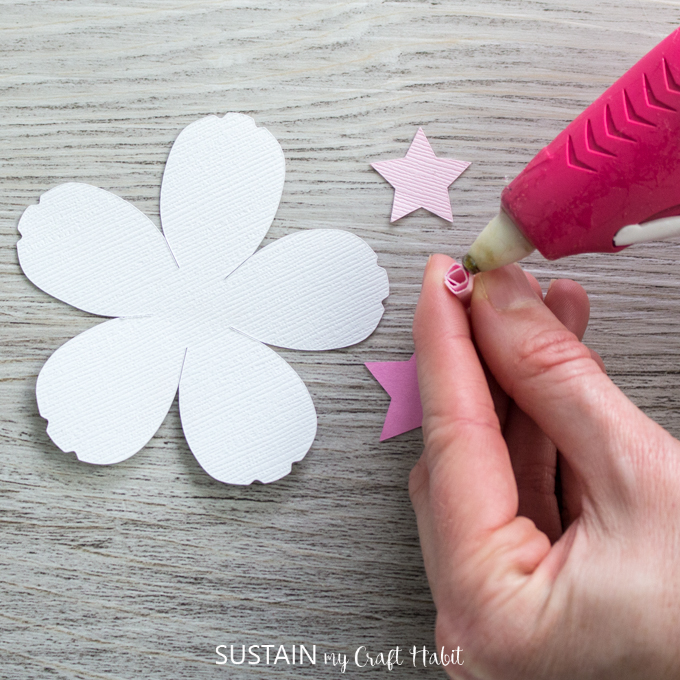
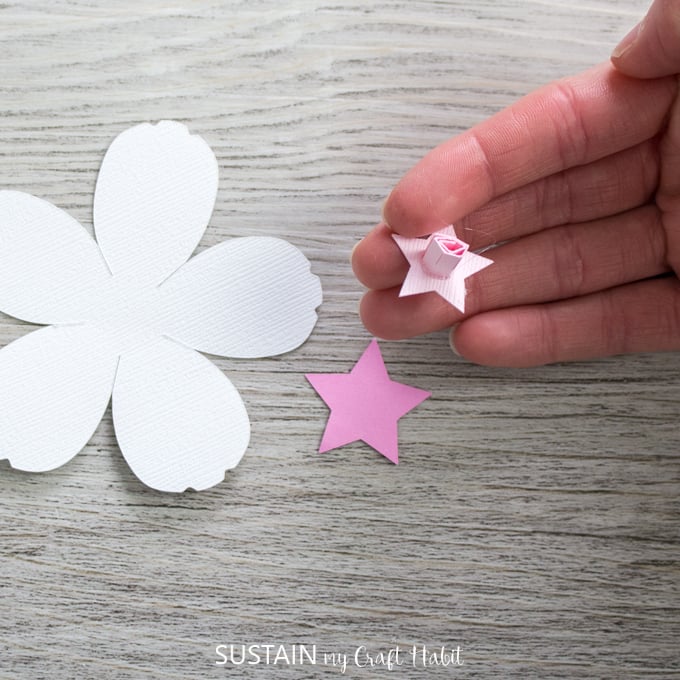
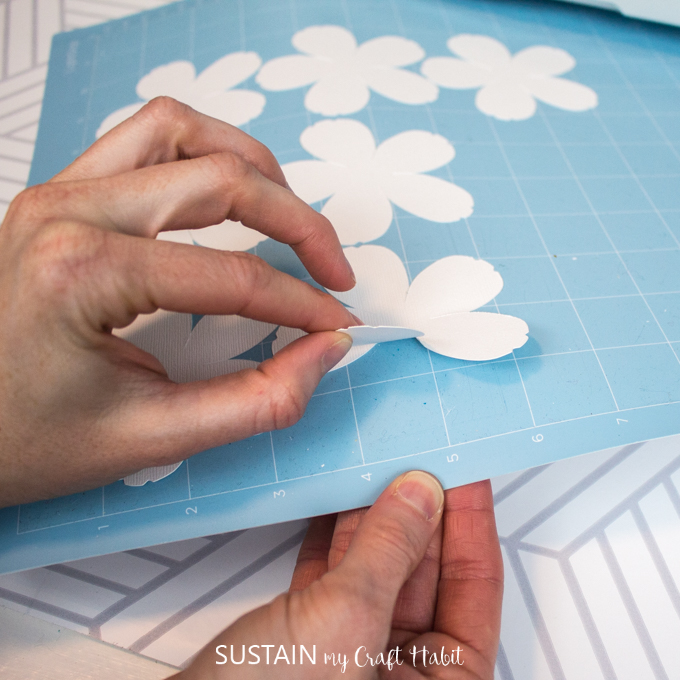
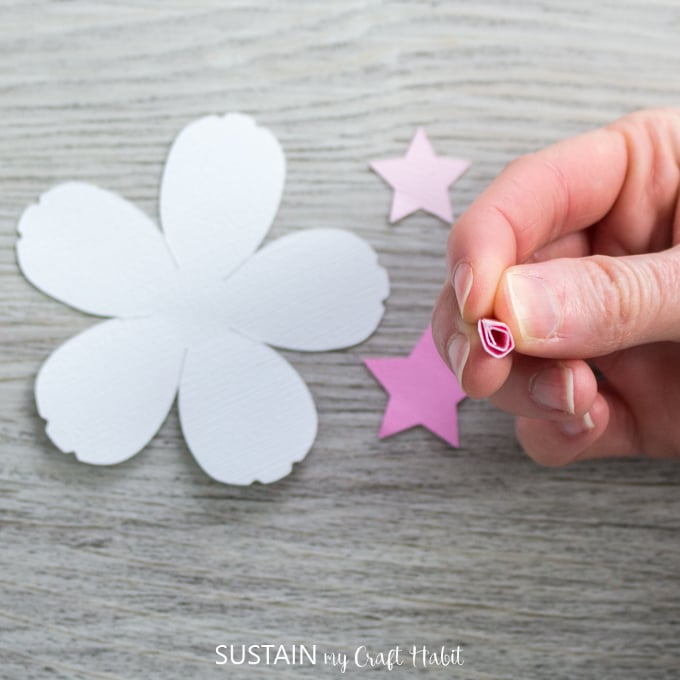
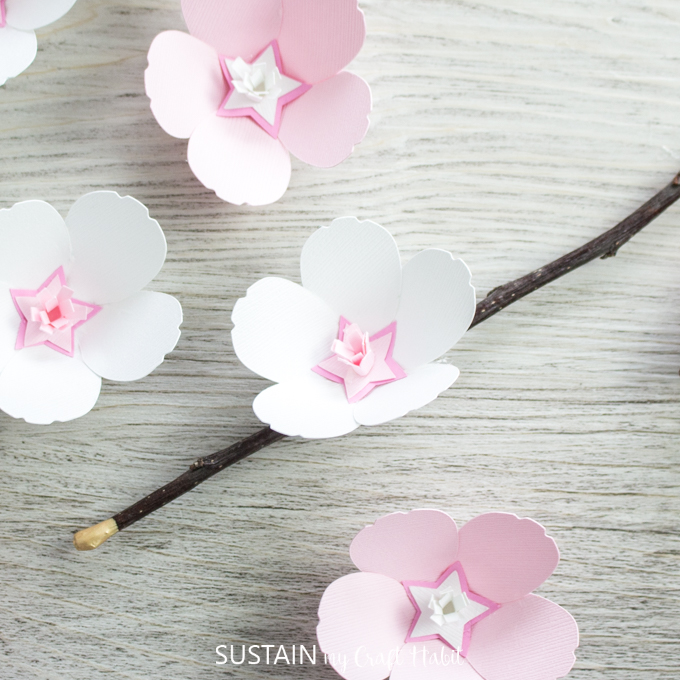
With your thumbs, gently fold down the cut fringes of the center piece as shown to resemble the look of a real cherry blossom.
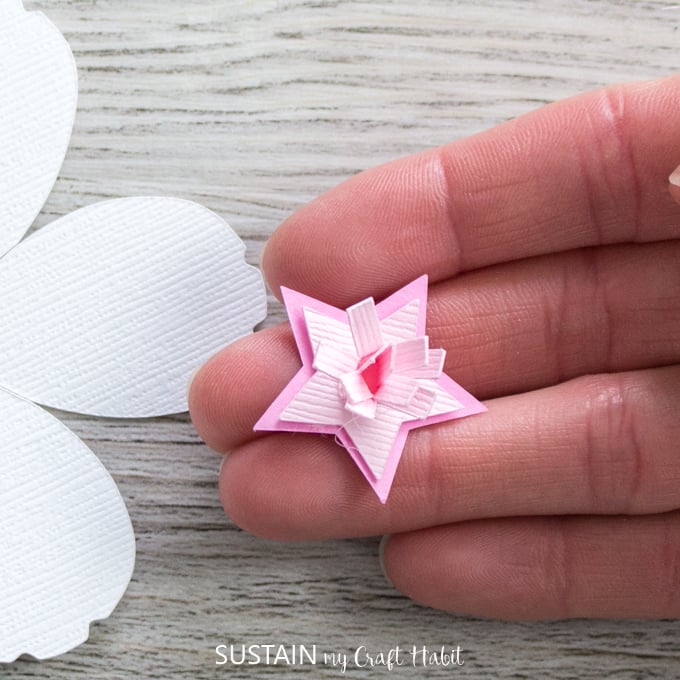
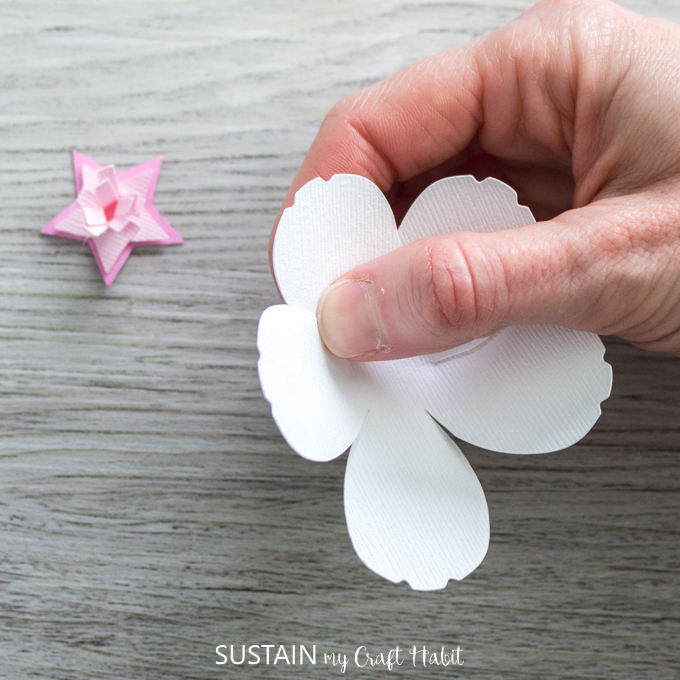
Take the flower petal piece and begin gluing the petals together. Working with one petal at a time, add a small bit of glue to the outer edge as shown and overlap that with the petal next to it.
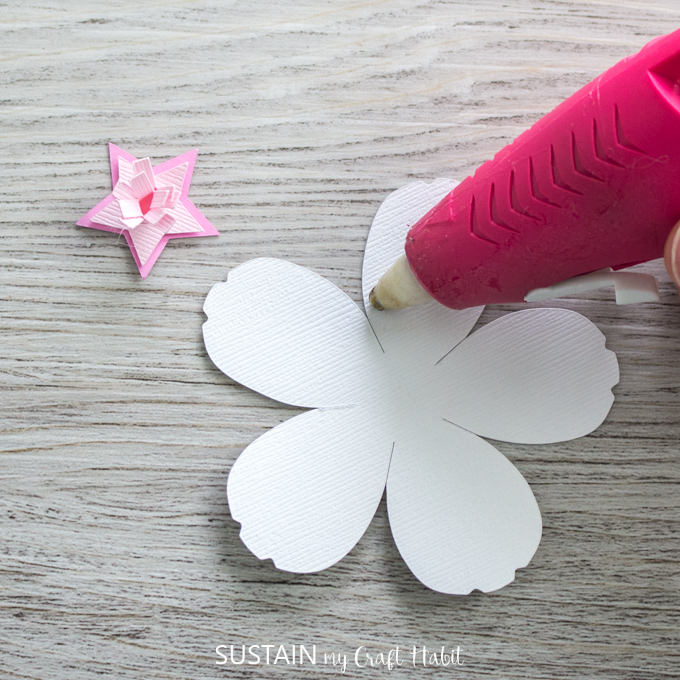
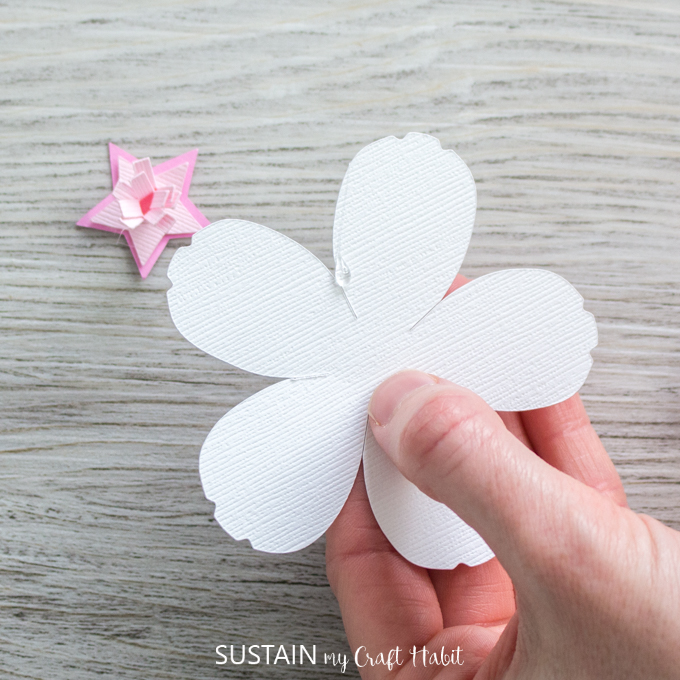
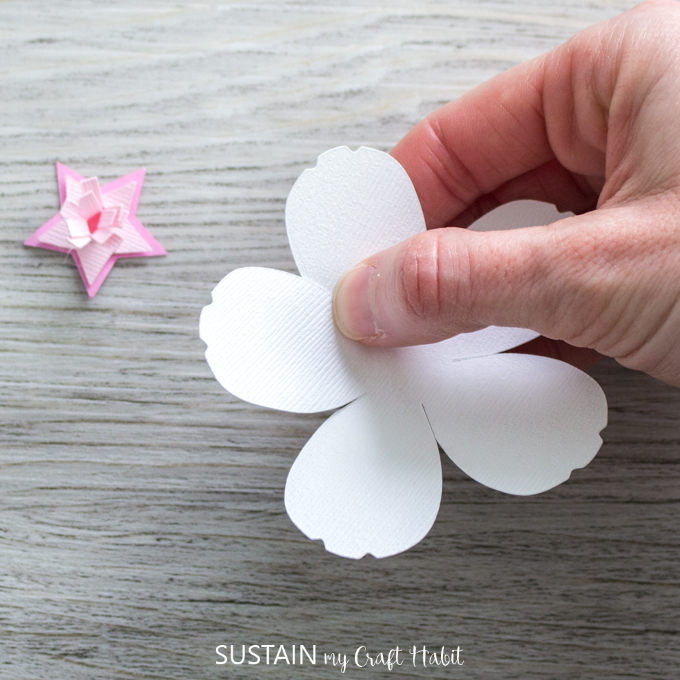
Continue this method all the way around until all petals are glued in place. When finished the piece will form a small bowl shape.
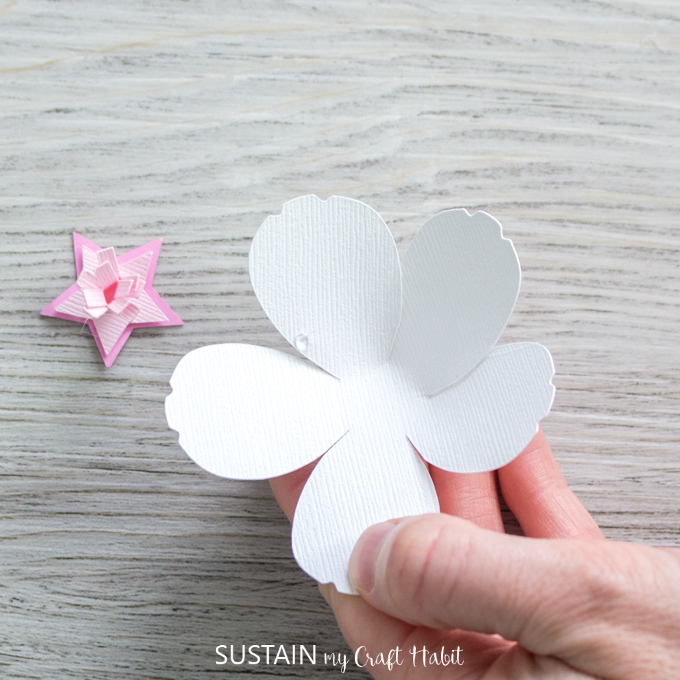
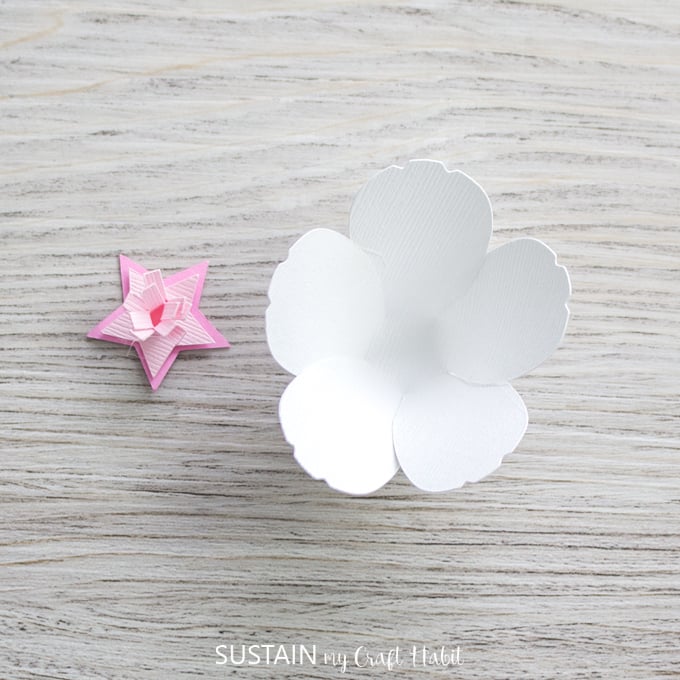
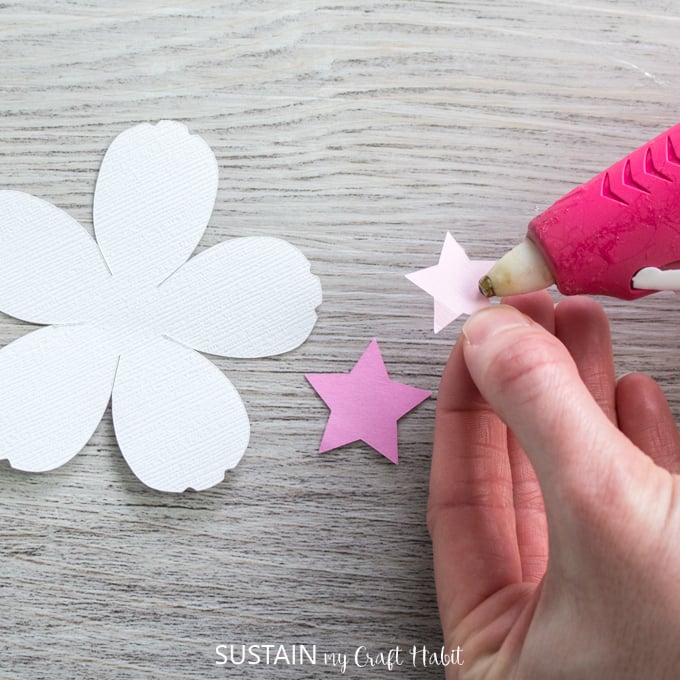
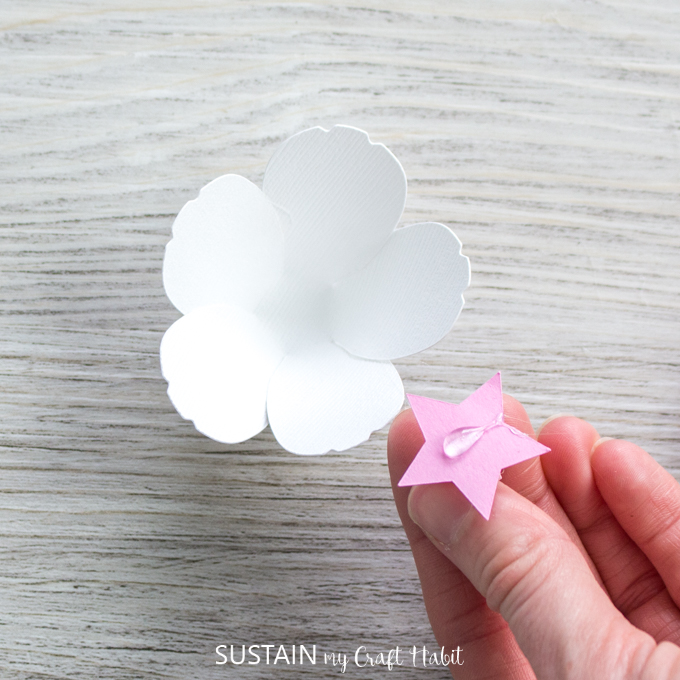
Add glue to bottom of the large star center piece and press it into place in the middle of the prepared flower pattern.
Continue with the other cut cherry blossoms until you have as many as you want.

Making a Centerpiece using Cherry Blossom Paper Flowers:
Dip the top ends of the branch or twig in a bit of gold paint. Leave to dry.

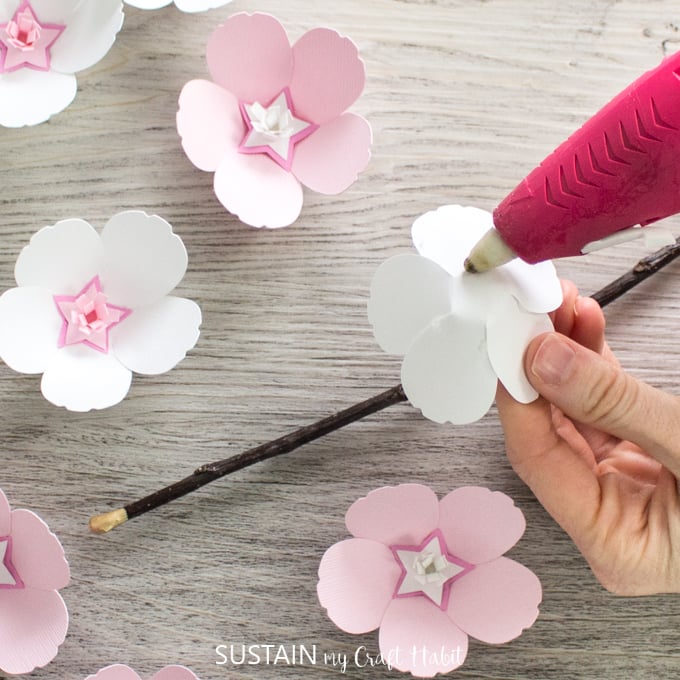
Add hot glue to the back side of each cherry blossom and press on to the prepared twig.
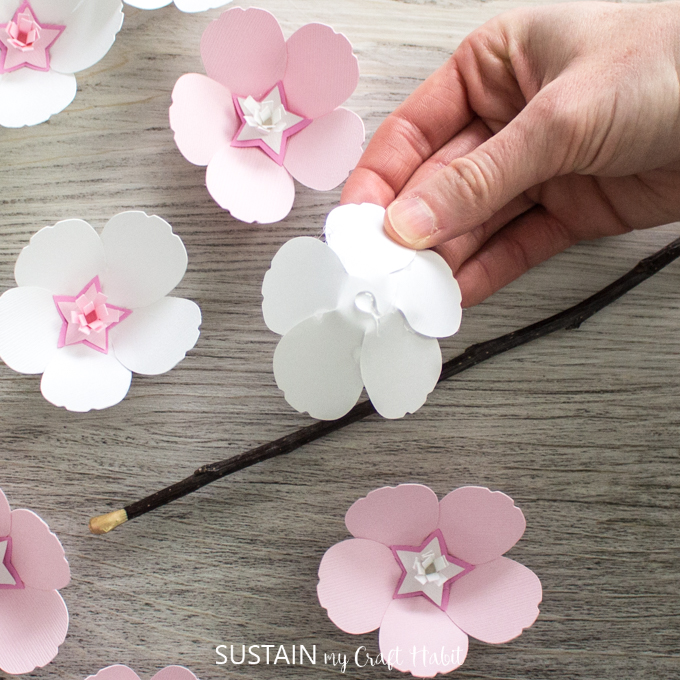
Arrange in a large vase and enjoy!
I love how this bouquet looks against the blue wall in my new bathroom. You can find the entire contemporary bathroom reveal here.

Now for more paper flower tutorials using Cricut, check out these fun ideas by our fellow creative blogging friends:

How to make large paper flowers from Weekend Craft • DIY Wedding Rehearsal Bouquet with your Cricut from Happily Ever After, etc • Cherry Blossom Centerpiece from Sustain My Craft Habit • Create 3D Art with Print, Cut and Draw Features of Cricut from Dragonfly & Lily Pads • Beautiful Patterned Paper Flowers from Upright and Caffeinated • Embroidery Hoop Sign With Felt Flowers from Our Crafty Mom • Paper Flowers Made with Cricut from Create & Babble • How to Make an Easy Paper Daisy from Cookies Coffee and Crafts
And if you’re new to Cricut crafting, be sure to check out these easy beginner Cricut projects!
We hope you enjoyed all these flower ideas! Stay tuned for next month when we’ll all be making something with a Patriotic theme!
Like it? Pin it for later!


Could you do this with the Cricut Explore Air 2?
Hi Sherri. Yes, absolutely! The SVG file will work with the Explore 2.
Jane
Hi! I am so excited to make these on my new Explore Air 2, however I’m getting stuck on this part: Be sure to weld the rectangular pattern piece together before duplicating the pattern to ensure all cut lines remain in tact. You can do this by highlighting the pattern, click and drag your mouse over the piece, then select “weld” from the bottom right corner.
How do I weld the rectangles by themselves? Everything I’m trying doesn’t give me the weld option or when it does, the rectangle becomes out of whack. Thank you!
Hi Angel, I’ve added a revised SVG pattern that will work without the need for welding the individual pieces together. Simply download the latest cherry blossom link and you will be good to go straight to cutting after uploading the file to your work space. Let us know if you have any other issues!
That is incredibly kind of you! Thank you!