

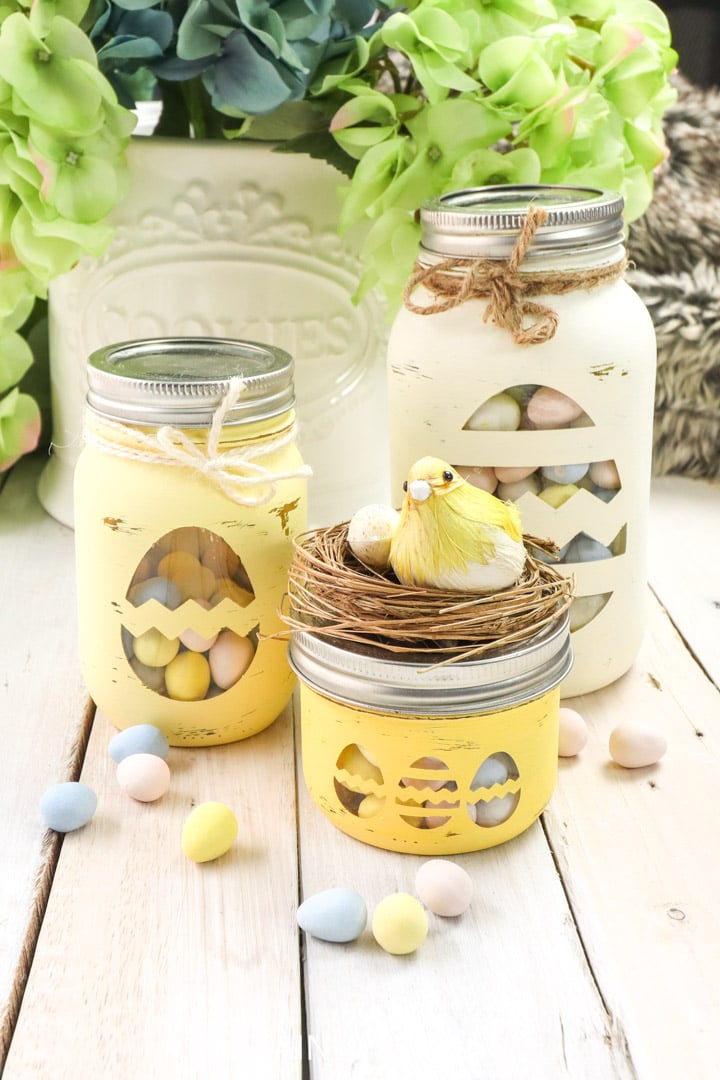
Hi friends! With Easter nearly here, we’ll show you how to turn some plain glass jars into pretty DIY Easter candy jars using a cutting machine, some yellow chalky paint and a cute decorative bird’s nest.

Making Easter Mason Jars
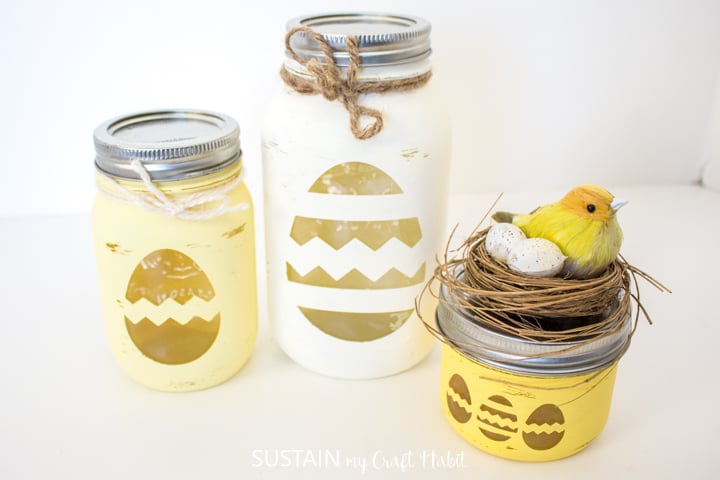
I was so excited to use my yellow Chalky paint to make these Easter jars. It’s not a color we normally use when we DIY, although we did use the same paint to refinish this fishscale stenciled side table for our beach-themed bedroom. As someone who prefers more of a muted color scheme, I remember feeling the same excitement of using a bright and cheerful color for the table in a way I wouldn’t normally do.

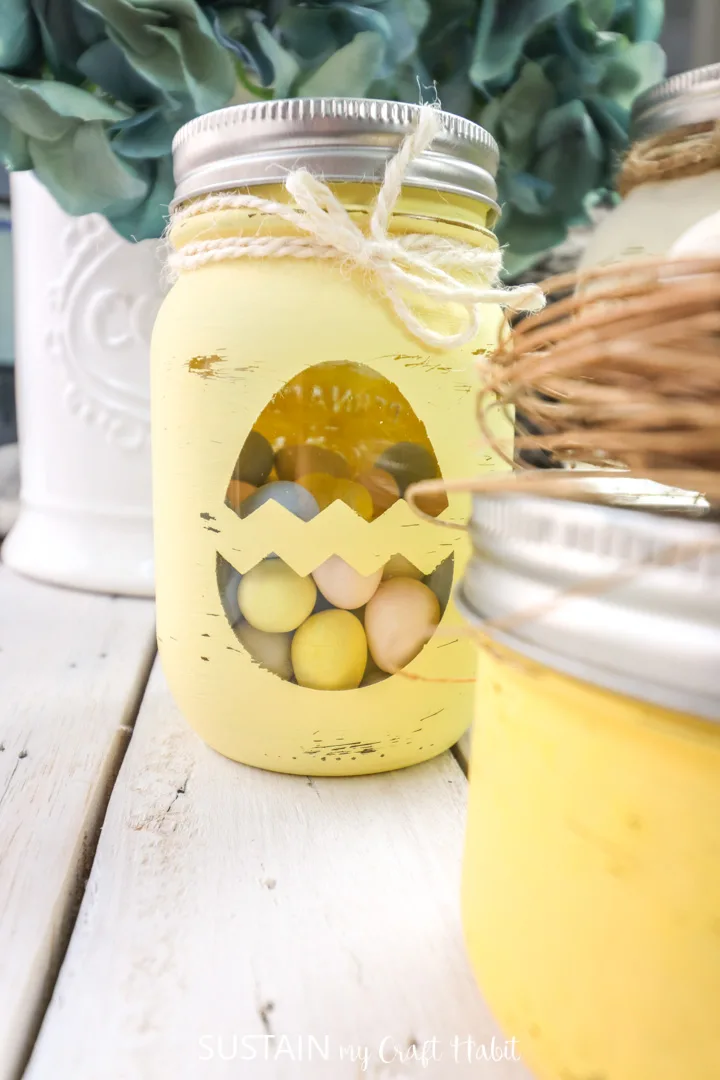
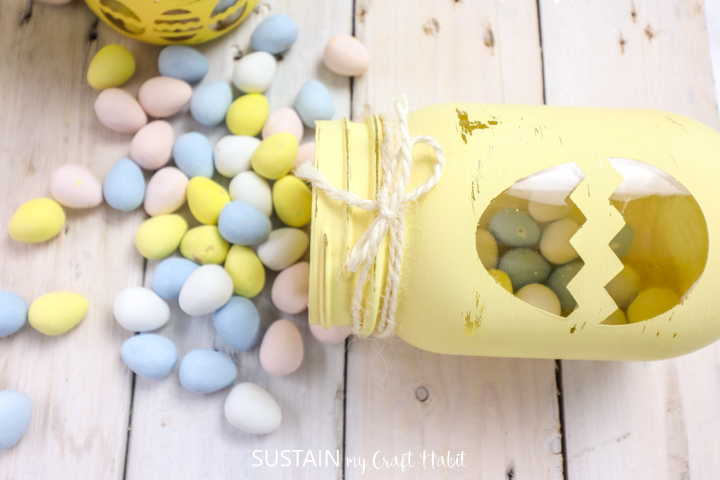
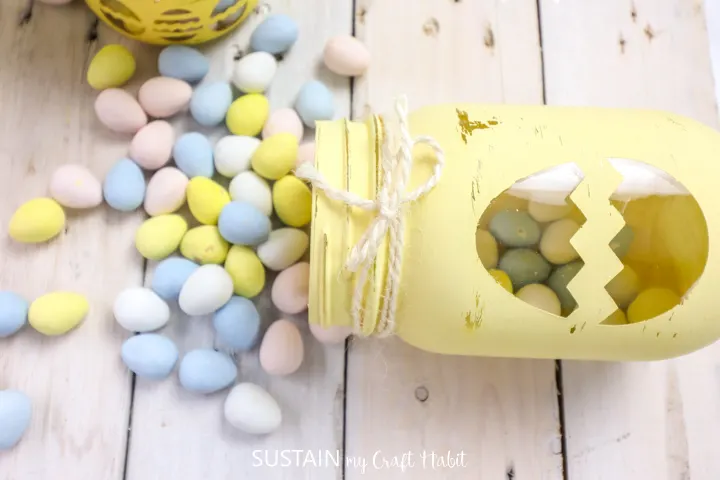
We filled these Easter jars with chocolate mini eggs; which are a huge hit in the house around this time of year. I like being able to see what’s inside the jars so we made a little Easter egg cutout in the front. The how-to is very similar to how we made this painted candle holder jar with a heart cut-out for Valentine’s Day last year. To make your own Easter jars, keep reading below or check out our video here:
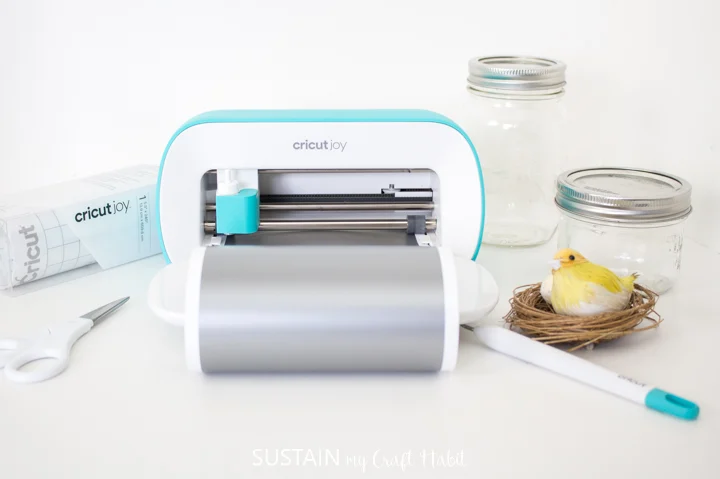
Materials Needed:
Disclosure: This post continues affiliate links for your shopping convenience. You can find our full disclosure policy here.
- Glass Jars in assorted sizes with lids
- Easter Egg SVG
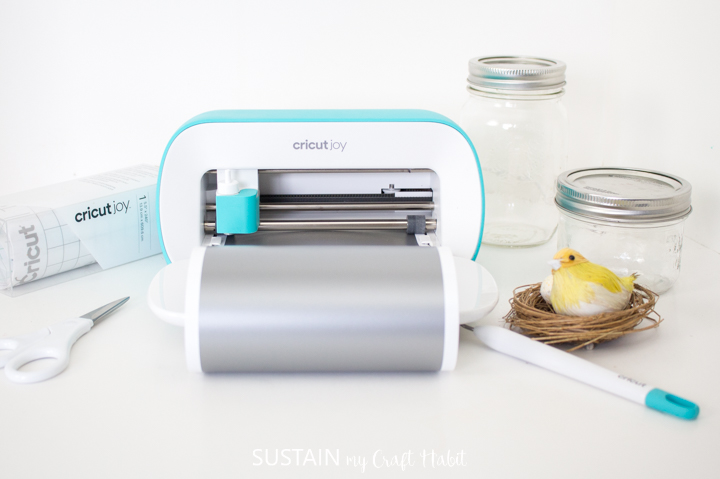
- Cricut Joy
- Smart Vinyl, Removable (in any color as it will be discarded, we used silver)
- Cricut Transfer Tape
- Scissors
- Weeding Tool (optional)
- Americana Decor Chalky Finish Chalk Paint in Rejuvenate, Delicate and Lace
- Paintbrush
- Twine
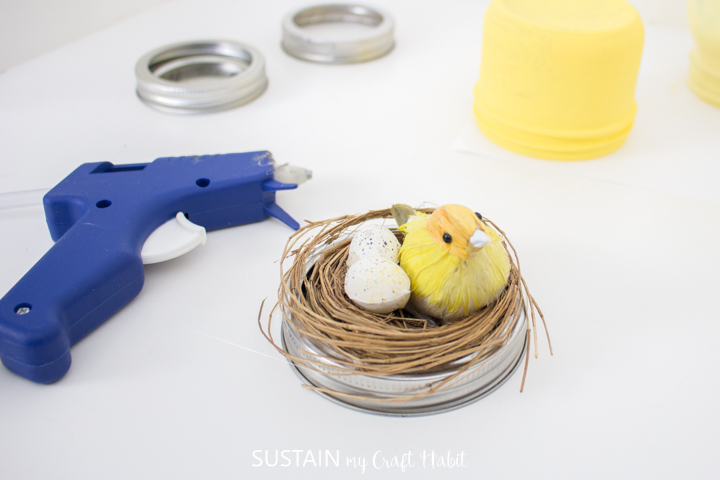
- Decorative bird on a nest
- Hot glue gun and clear glue sticks
- Sandpaper, 200grit


How to Make Pretty DIY Easter Candy Jars:
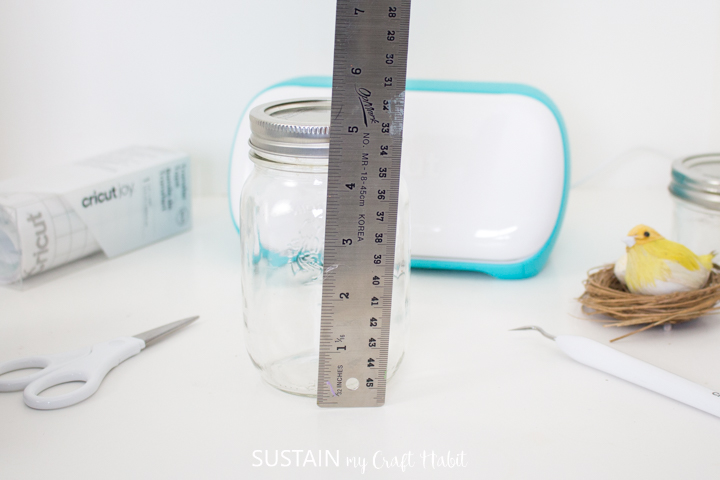
Thoroughly wash jars with soap and hot water and let them dry completely before using. It’s also a good idea to wipe the jars with rubbing alcohol to get rid of any greasy spots.
Preparing the vinyl image
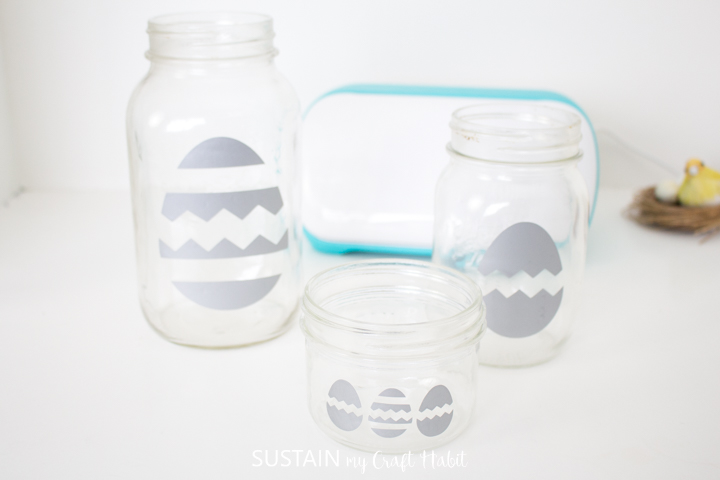
On a blank Design Space canvas, upload the Easter Egg SVG file and measure the glass jar and resize the eggs to fit on the jars as needed. We resized the largest to 3.75” high, the medium size to 2.25” high and the smallest eggs to 1” high.

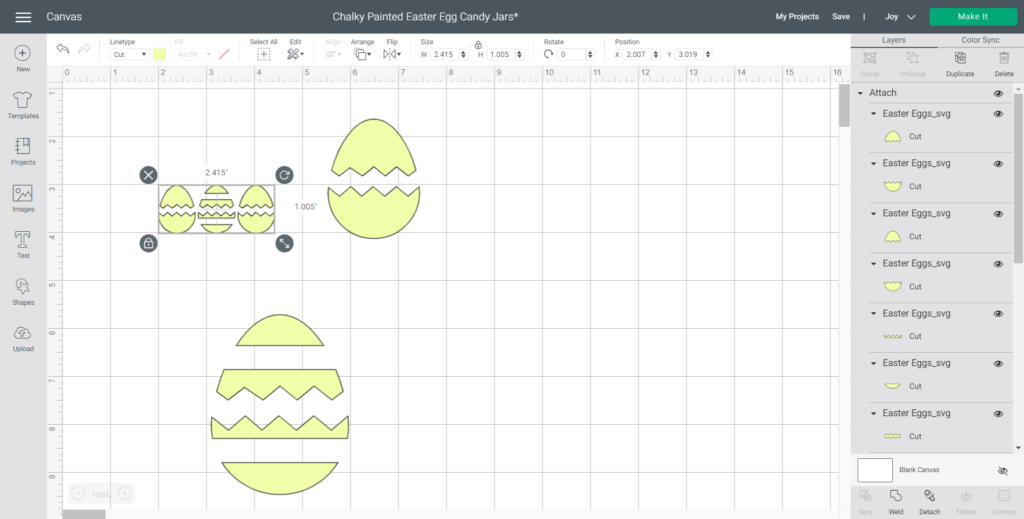
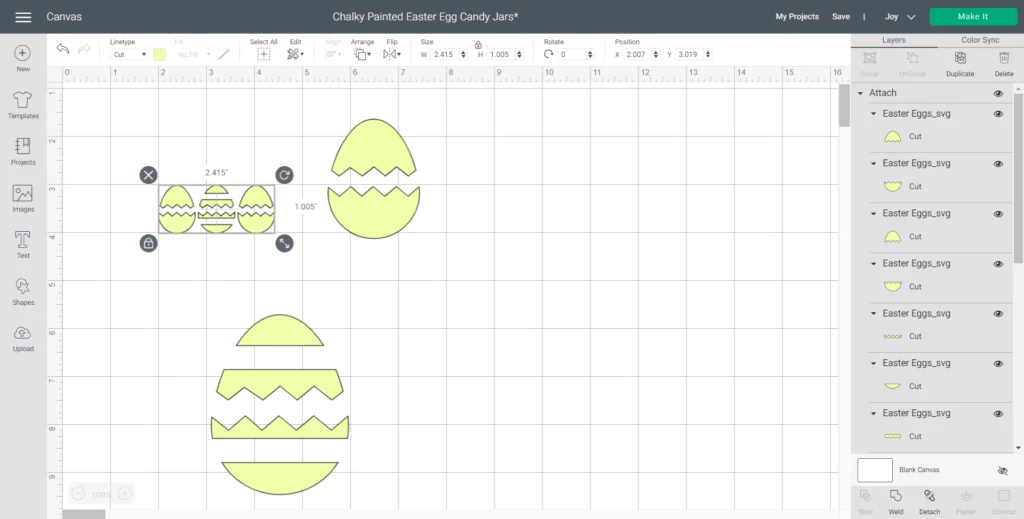
Select “Make It” in Design Space and choose to cut without a mat.
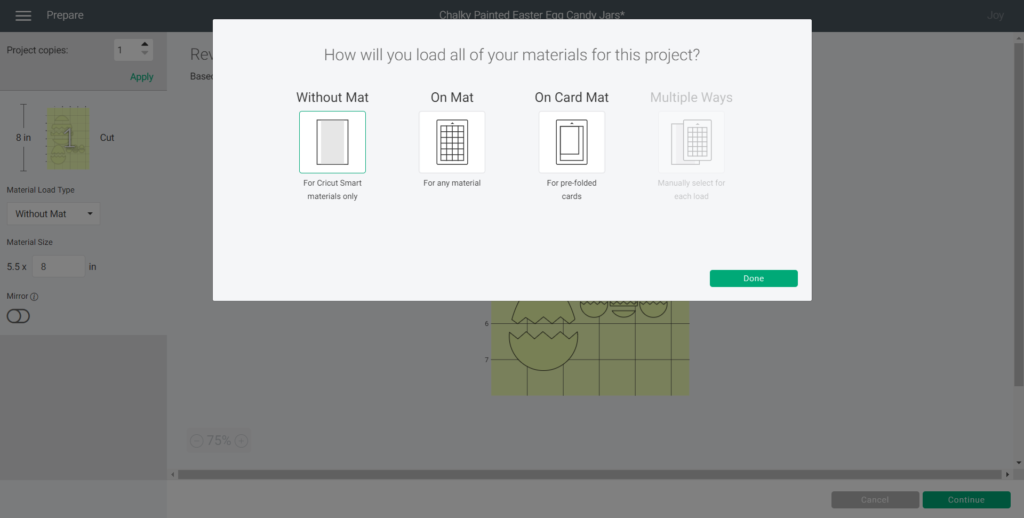
Set material type to Smart Vinyl, Removable. Follow prompts for loading mat into Cricut Joy and cutting the Smart Vinyl. When the cut is complete, unload the vinyl.
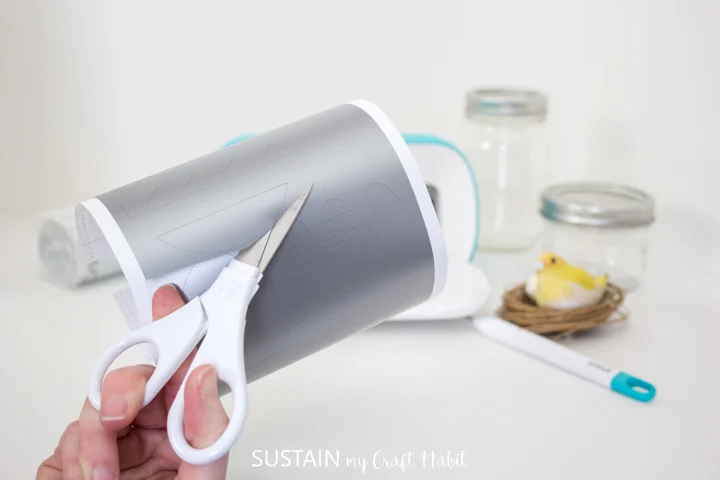
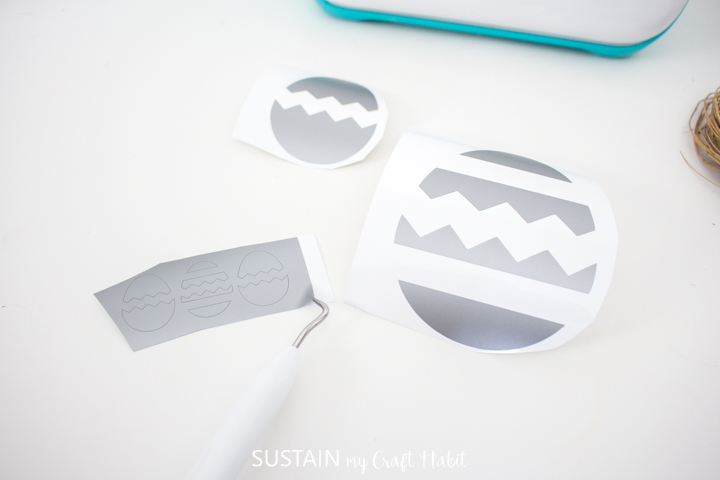
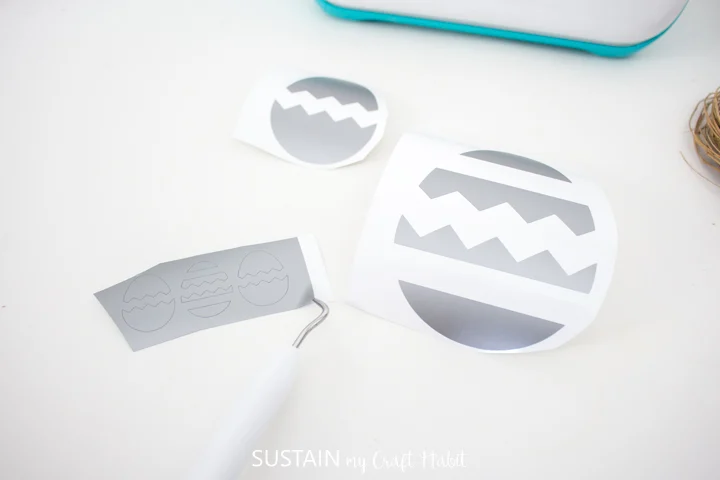
Cut around each egg image with a pair of scissors. Using the weeding tool or your fingernails, peel away the excess vinyl around the vinyl-cut images and discard.

Cut a piece of transfer tape a bit larger than the egg.
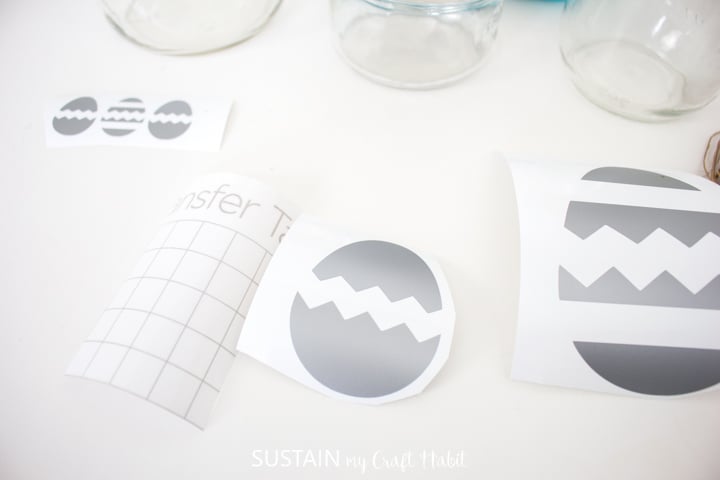
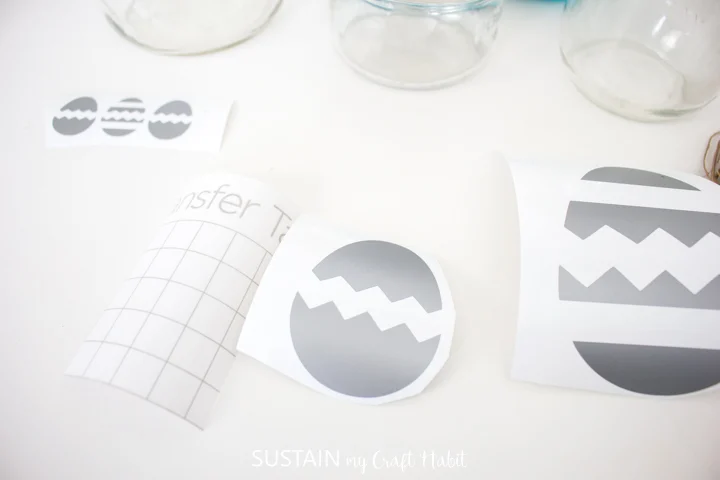
Peel away the transfer tape backing and place the transfer tape overtop of the vinyl image. Gently rub the vinyl to help it stick to the transfer tape.


Peel away the backing, leaving the egg adhered to the transfer tape.
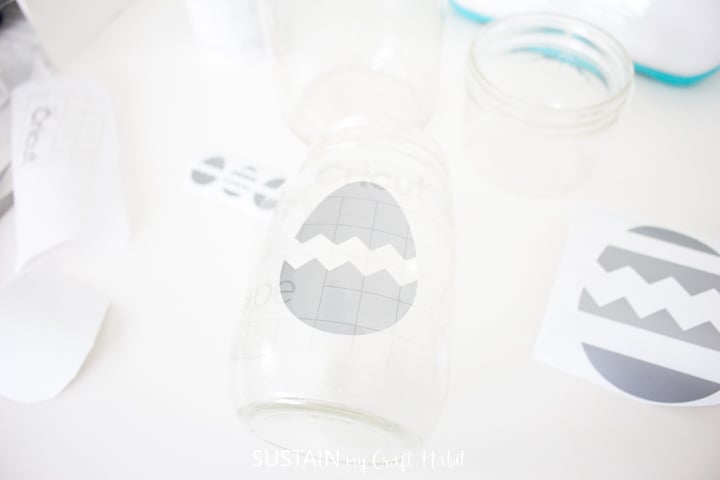

Position the egg and transfer tape on to the smooth side of a mason jar and press in place in the middle of the jar.
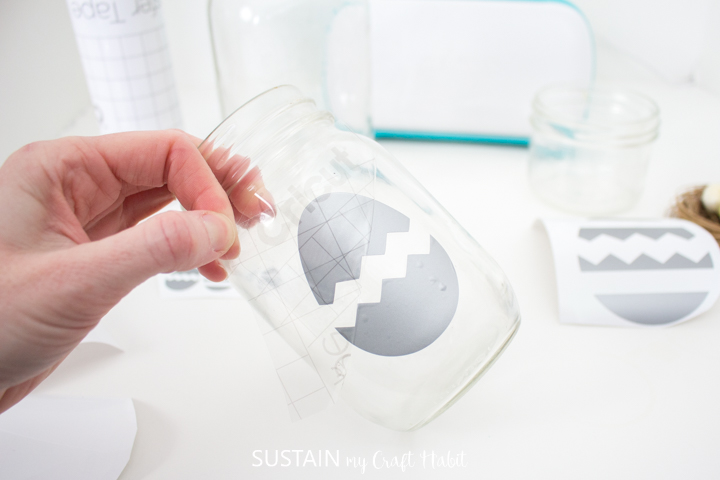
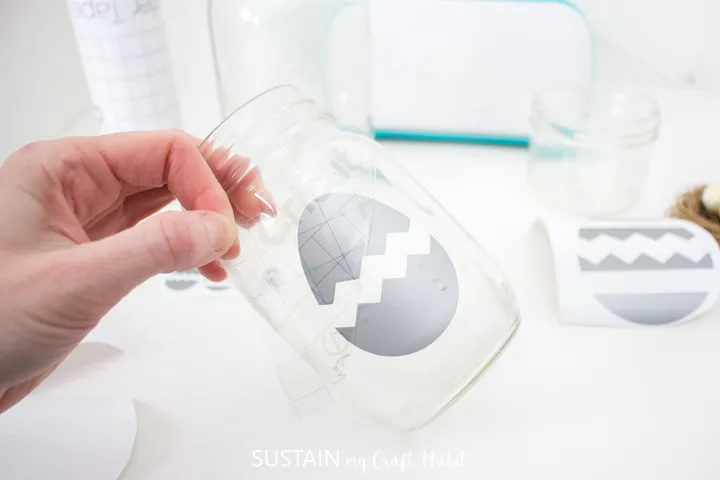
Slowly and carefully remove the transfer tape leaving the vinyl egg design on the jar.
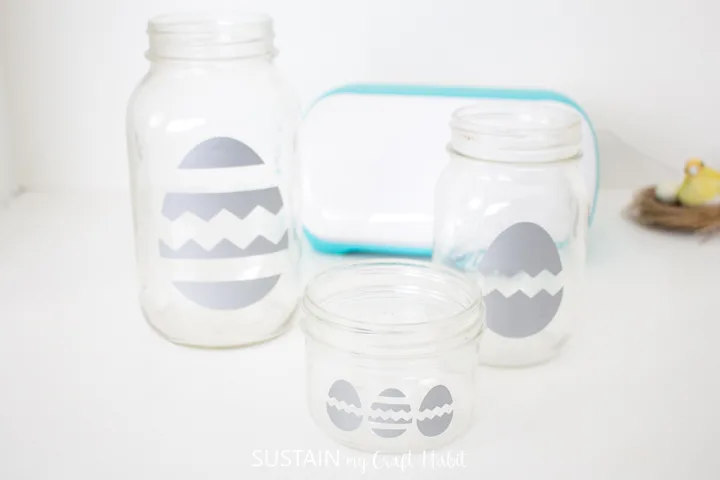
Similarly, position the other eggs on to the remaining glass jars.
Painting the Jars
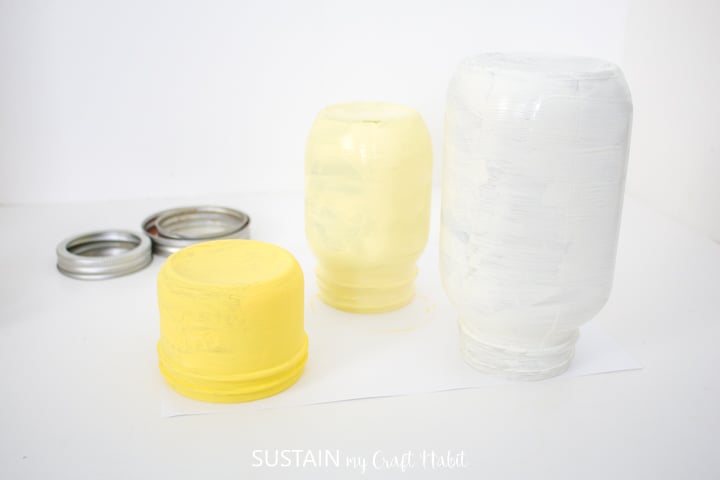
Using a medium sized paintbrush, apply Chalky Finish in Rejuvenate over the surface of the smallest jar including the vinyl eggs. Allow it to fully dry before applying a second coat of paint.
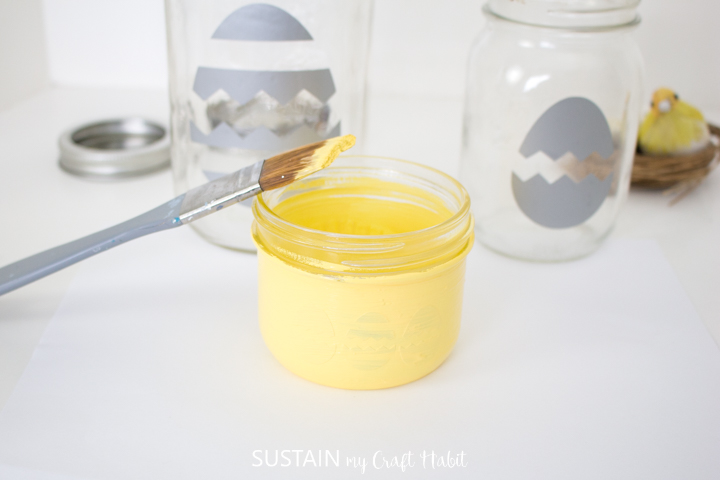
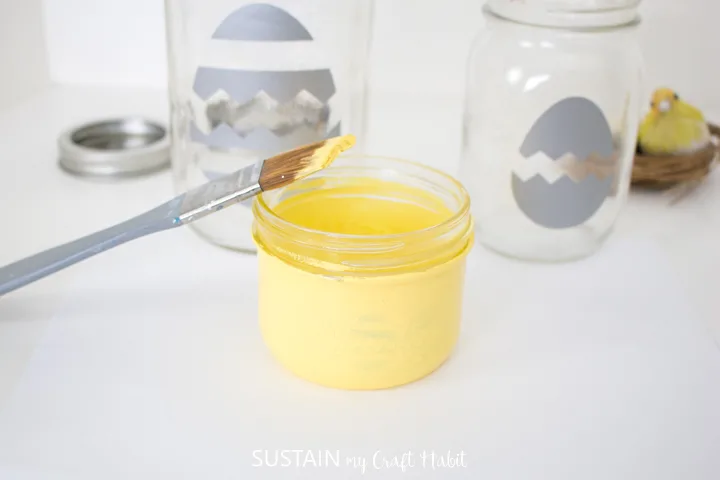
Paint the medium sized jar in Delicate and the largest jar in Lace color.

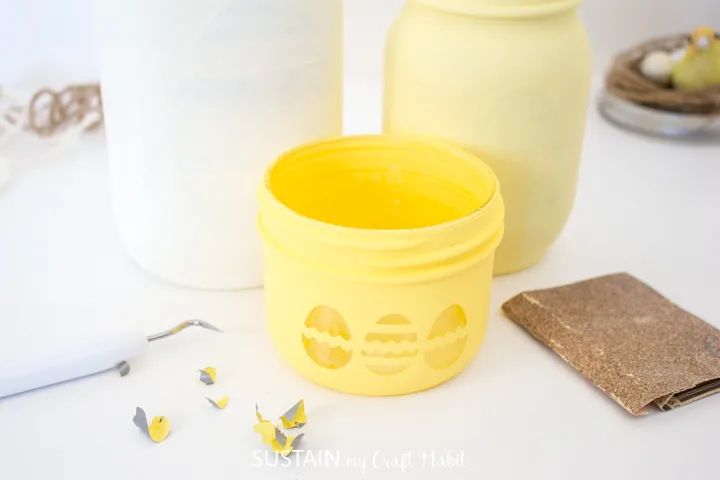
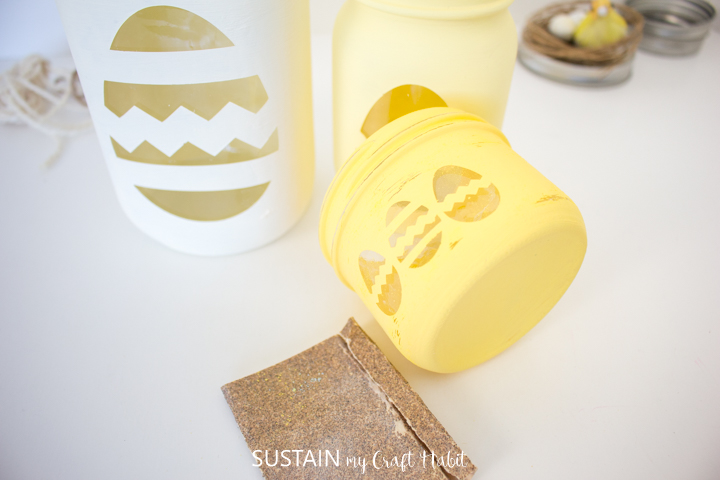
Once dry, use the weeding tool or your fingernails to pick away and peel off the vinyl egg shapes and discard.

Finishing Touches
Using a fine grit sandpaper, gently sand the painted jars to distress the edges.

To finish, apply a dab of glue to the top of the jar lid and press decorative bird’s nest on top and tie a piece of twine around the neck of the jars.


Fill with chocolate eggs or other Easter treats to enjoy!
More Easter Crafting!
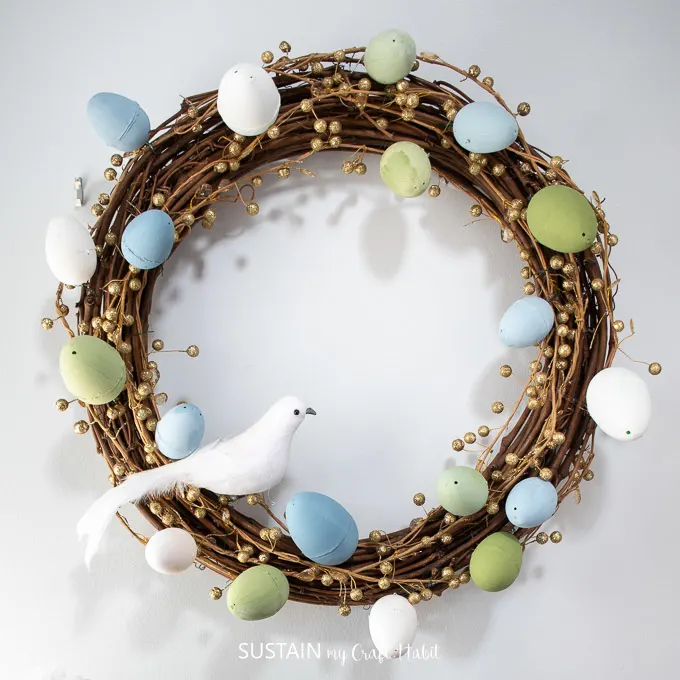
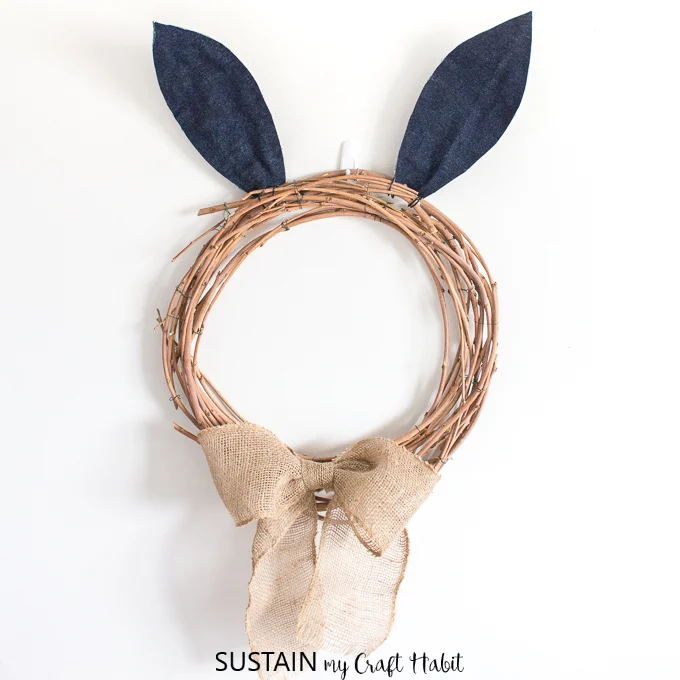
If you’re looking for more Easter crafts check out this chalky painted Easter wreath, bunny Easter garland or this simple Easter wreath.
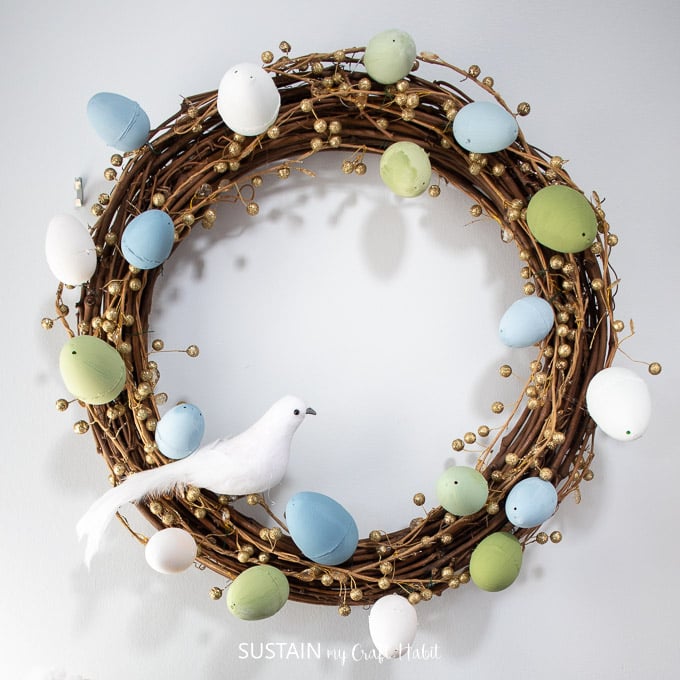

Wreath with Chalky Painted Plastic Eggs 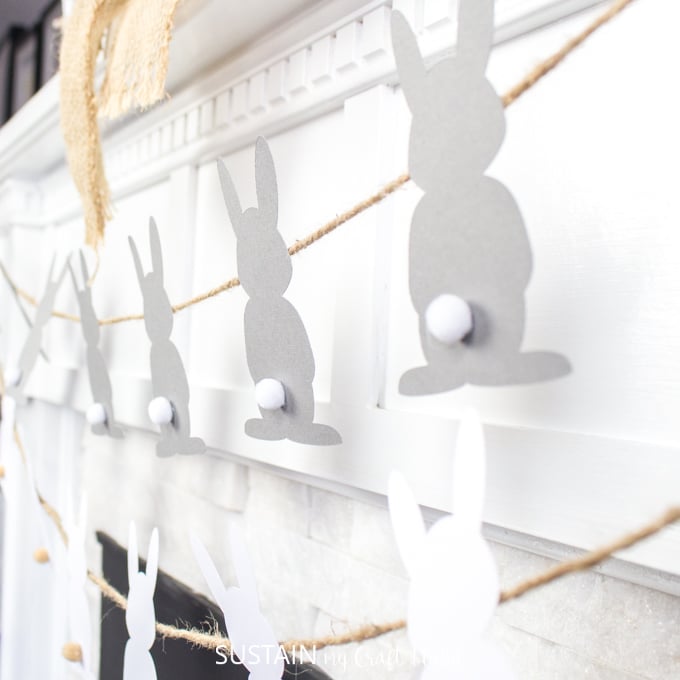
DIY Easter Garland with Paper Bunnies 
Spring Wreath with Bunny Ears

Like it? Pin it for later!


Pretty DIY Easter Candy Jars
Materials
- Glass Jars in assorted sizes with lids
- Easter Egg SVG
- Cricut Joy
- Smart Vinyl Removable (in any color as it will be discarded, we used silver)
- Cricut Transfer Tape
- Scissors
- Weeding Tool optional
- Americana Decor Chalky Finish Chalk Paint in Rejuvenate, Delicate and Lace
- Paintbrush
- Twine
- Decorative bird on a nest
- Hot glue gun and clear glue sticks
- Sandpaper 200grit
Instructions
- On a blank Design Space canvas, upload the Easter Egg SVG file.
- Measure the glass jar and resize the eggs to fit on the jars as needed.
- Select “Make It” in Design Space and choose to cut without a mat.
- Follow prompts for loading mat into Cricut Joy and cutting the Smart Vinyl.
- Cut around each egg image with a pair of scissors.
- Peel away a piece of transfer tape backing and place the transfer tape overtop of the vinyl image. Gently rub the vinyl to help it stick to the transfer tape.
- Peel away the backing, leaving the egg adhered to the transfer tape.
- Position the egg and transfer tape on to the smooth side of a mason jar and press in place in the middle of the jar.
- Slowly and carefully remove the transfer tape leaving the vinyl egg design on the jar.
- Similarly, position the other eggs on to the remaining glass jars.
- Using a medium sized paintbrush, apply Chalky Finish in Rejuvenate over the surface of the smallest jar including the vinyl eggs.
- Paint the medium sized jar in Delicate and the largest jar in Lace color.
- Once dry, use the weeding tool or your fingernails to pick away and peel off the vinyl egg shapes and discard.
- Using a fine grit sandpaper, gently sand the painted jars to distress the edges.
- To finish, apply a dab of glue to the top of the jar lid and press decorative bird’s nest on top and tie a piece of twine around the neck of the jars.
- Fill with Easter treats and chocolate eggs.
Kate
Thursday 25th of March 2021
Super cute, thanks for sharing!