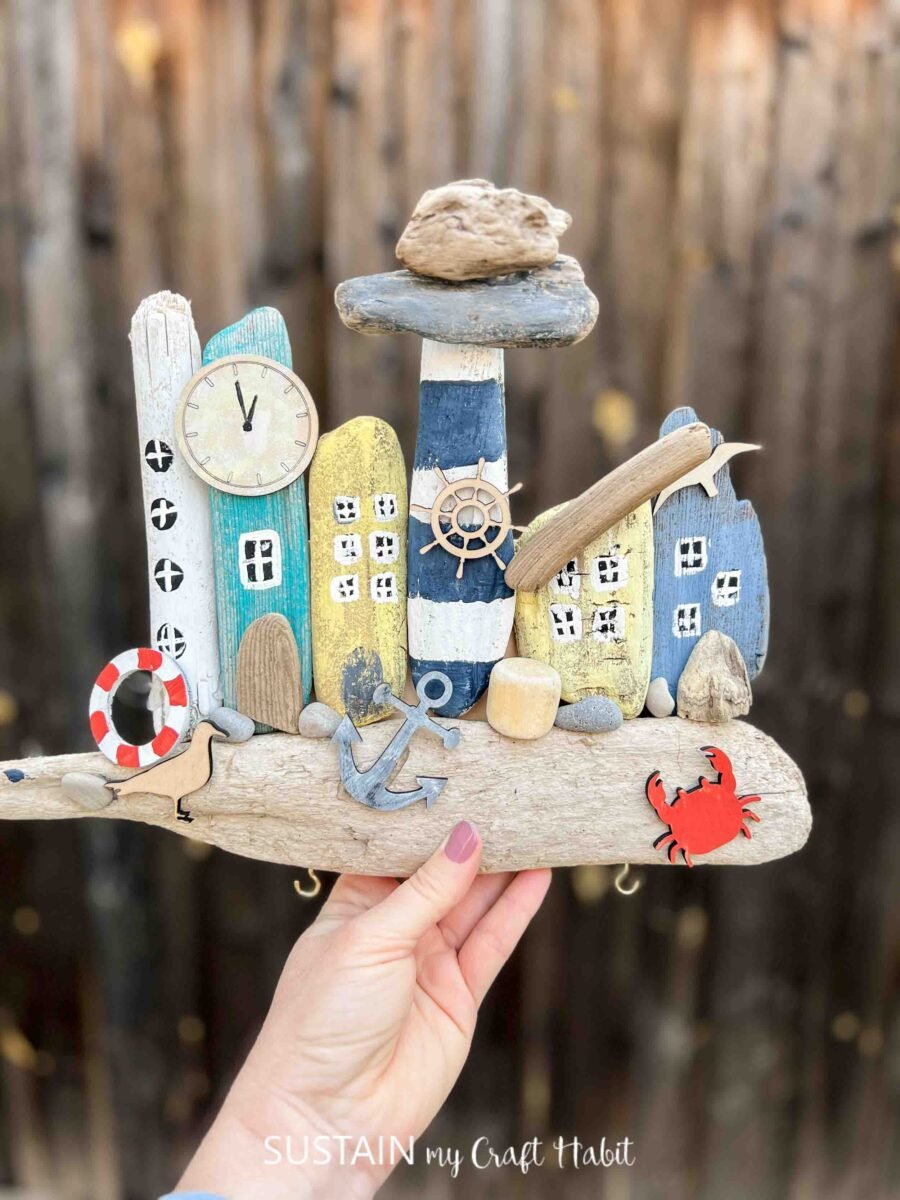
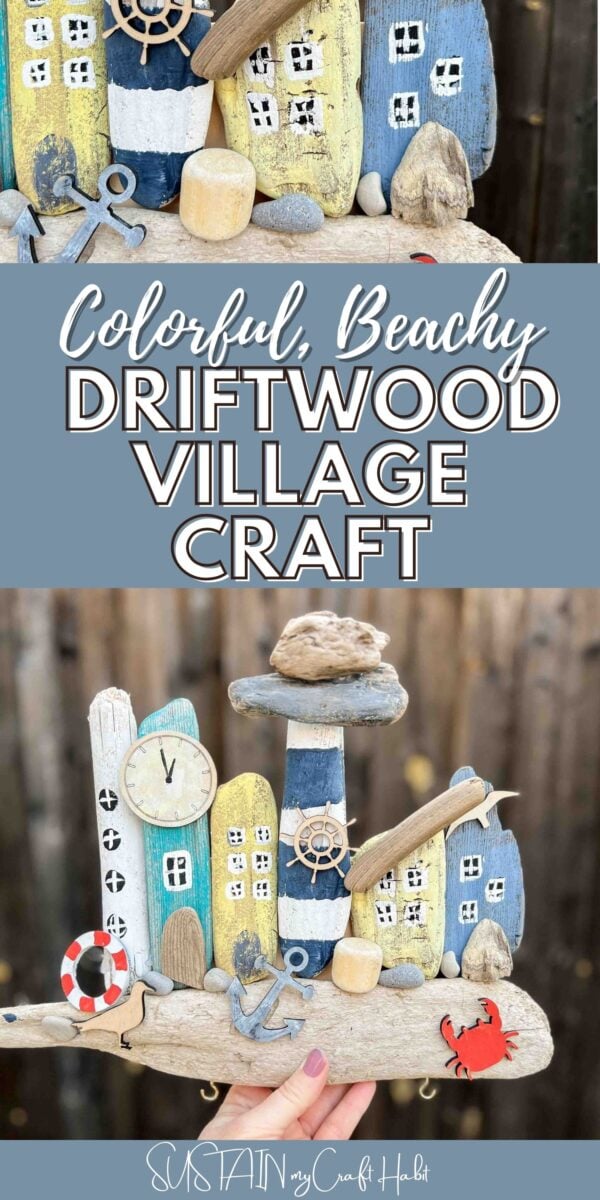
Colorful Beachy Driftwood Village Craft
Feeling beachy? Then this coastal-inspured driftwood village craft is just the thing you need. Find out how to make your very own driftwood village with our step by step instructions and complete list of materials.
Creative Driftwood Village Craft Idea
Despite having made hundreds of crafts using driftwood over the years, it still amazes me how much fun it is to create with driftwood. And this latest craft is no exception! We initially assembled the craft as part of our monthly craft kit subscription and soon we’ll be offering the completed kit in our Sustain My Craft Habit Etsy shop.

But if you want to gather the supplies yourself, see the materials list below and get crafting! One of the things I love the most is that each piece is unique and different: no two driftwood villages are the same!
Join our crafting community to find more nature-inspired DIYs and upcycled craft ideas. It feels good to repurpose, upcycle and create with nature!
More Craft-Ready Craft Kits
If you enjoy the ease of craft kits, then check out our other nature-inspired craft boxes.


Materials Needed
Disclosure: This post contains affiliate links for your shopping convenience. Should you choose to purchase through them, we will make a small commission at no extra cost to you. You can read our full disclosure policy here.
- 4”x8” wood panel
- Driftwood pieces assorted in shape and size
- assorted pebbles and rope
- Paints in blues, yellow, white , black and red
Paint brushes - Laser cut coastal wood embellishments (if you have your own laser cutter, you can grab the nautical-themed svg files from our Craft Habit Graphics SVG Etsy shop)
- 2 eyehooks
Hot glue gun
How to Make a Colorful Beachy Driftwood Village Craft
We’re happy to share this video of how to make the driftwood village. If you prefer the photo tutorial, continue reading below.
Place the wood panel on flat surface & position driftwood pieces over top playing around with the placement. Do not glue pieces yet.

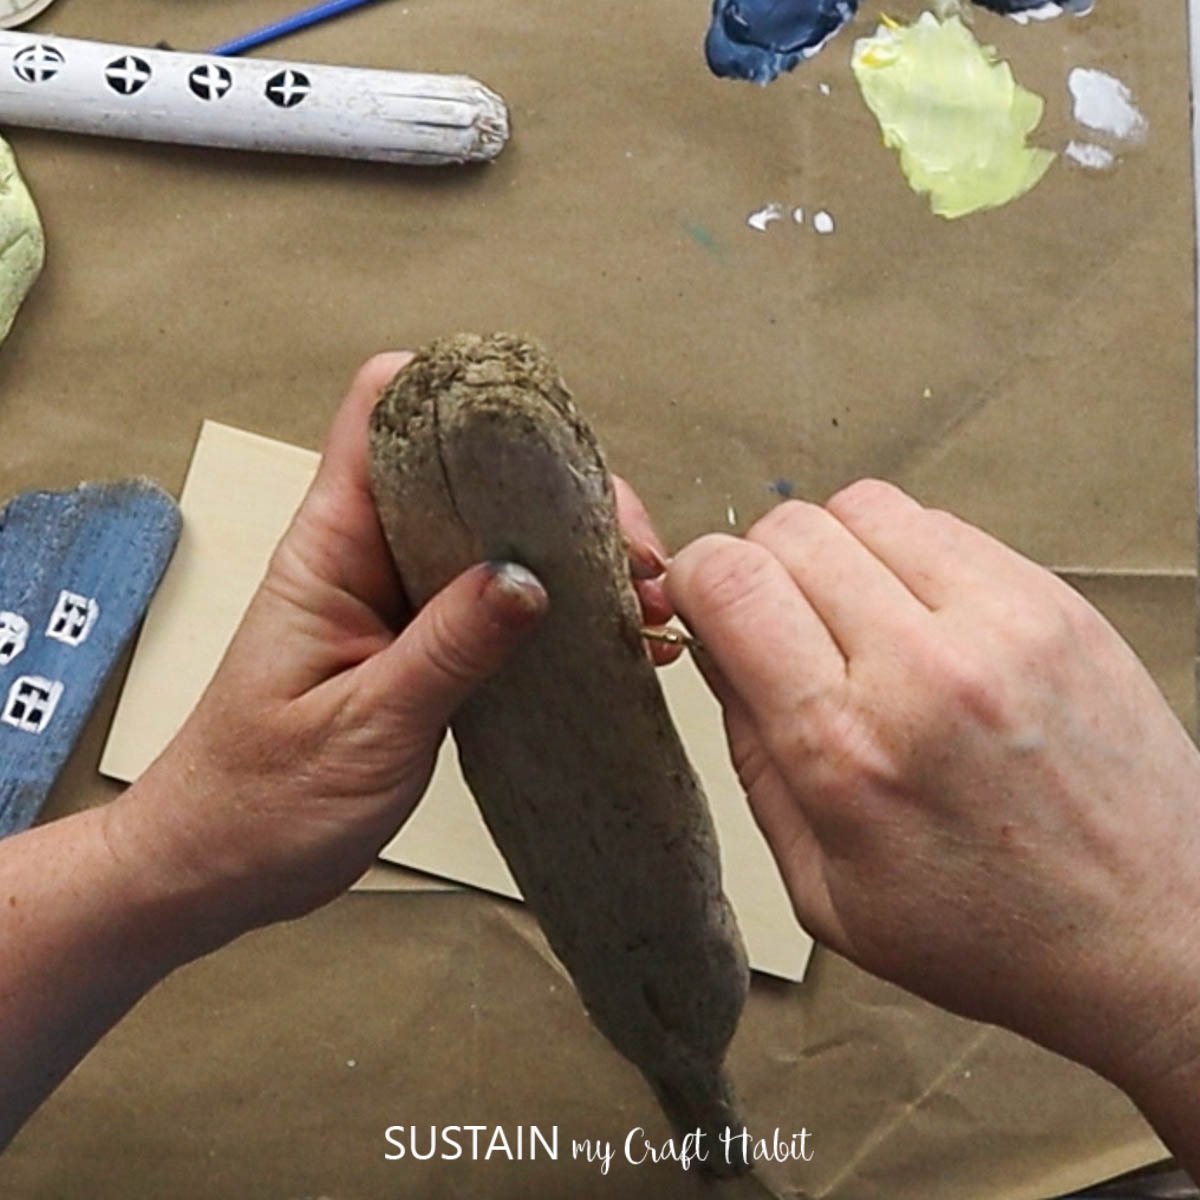
Insert eyehooks into the bottom edge of the larger driftwood piece that runs perpendicular to the other driftwood.
Using a paint brush, paint each of the driftwood pieces in different colors to mimic a row of colorful beachy houses.

Paint a nautical stripe on one of the white painted driftwood pieces and paint the laser cut pieces in any color of your choosing.

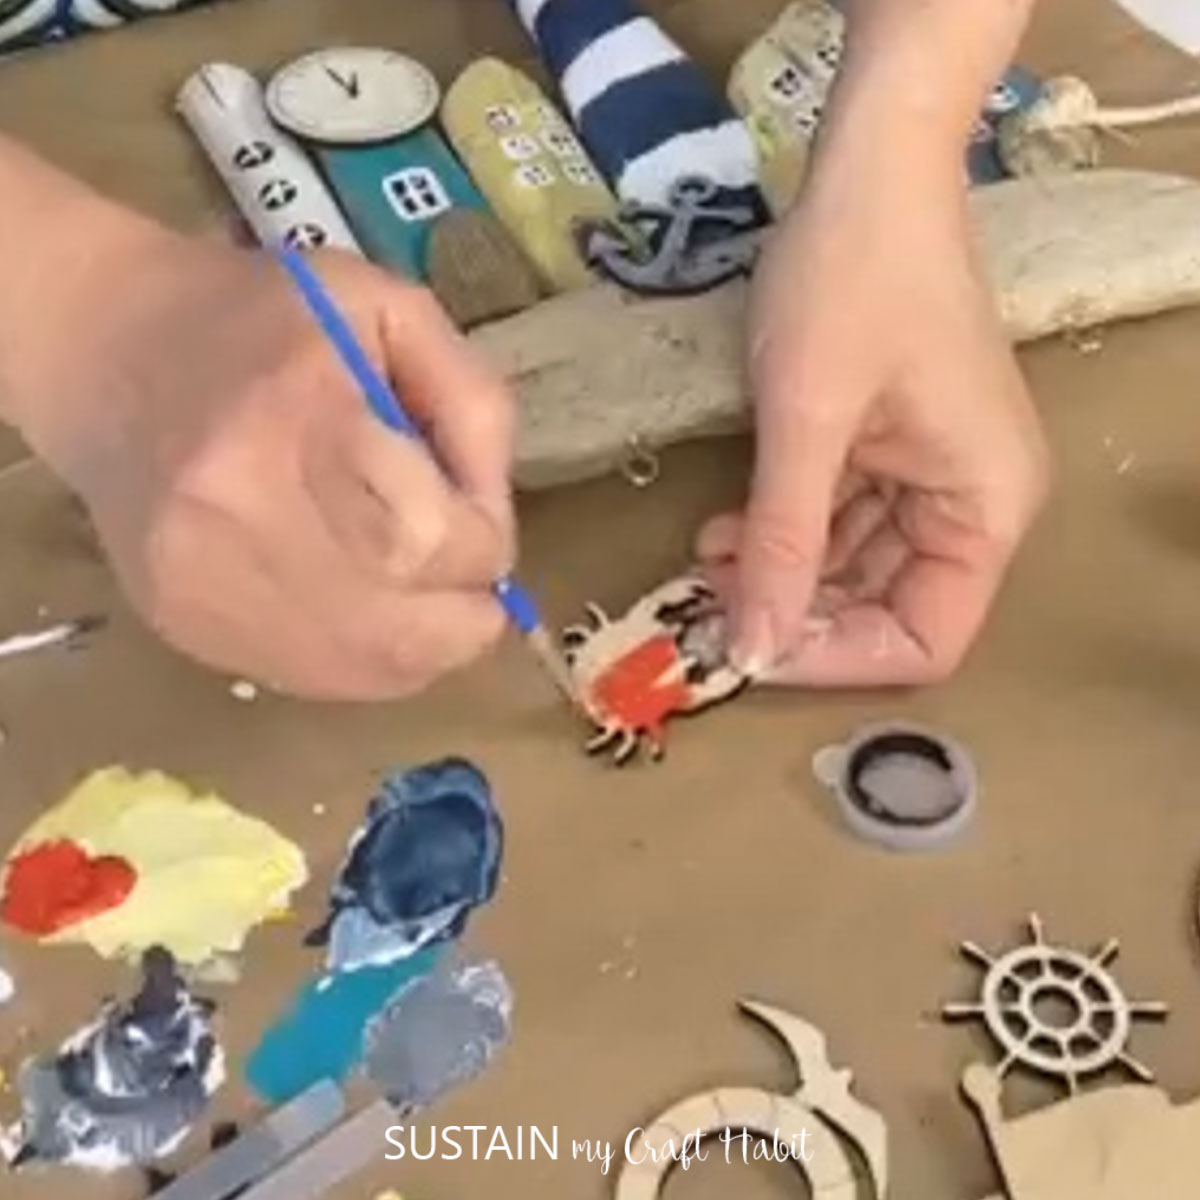
Add the fine details (such as windows and doors) to the painted driftwood pieces using a fine tip brush & black and white paint.

Once paint is dry, attach the pieces to the base with a hot glue gun.

Lastly, attach the pebbles and other embellishments to complete the driftwood village. How adorable is the finished craft? I can’t wait to hang it up on my wall to display.

More Beachy Driftwood Crafts
Remember when I mentioned all of the driftwood crafts we’ve made? Well here are just a few of our favorites (but honestly it’s very to chose a favorite)!
- Driftwood Tree Art
- Coastal Lighthouse Driftwood Craft
- Driftwood Wreath
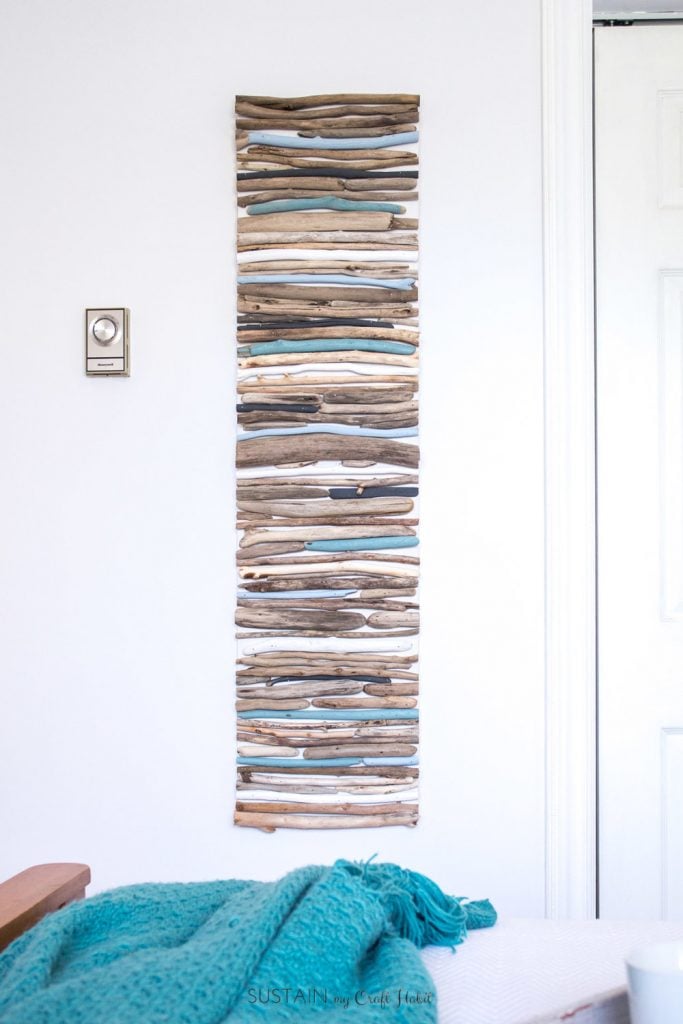
- Driftwood Wall Art
- Make a Clock with Driftwood


Thankyou so much for stopping by to visit us here on the blog. If you want to receive a ton of inspiration and money saving ideas for decorating, gift-giving and crafting, join HERE!
Like it? Pin it for later!

Colorful Beachy Driftwood Village Craft
Materials
- 4”x8” Wood panel
- Driftwood pieces
- Assorted pebbles and rope
- Paints in blues, yellow, white, black and red
- Paint brushes
- Laser cut coastal wood embellishments
- 2 eyehooks
- Hot glue gun
Instructions
- Place the wood panel on flat surface & position driftwood pieces over top playing around with the placement. Do not glue pieces yet.
- Insert eyehooks into the bottom edge of the larger driftwood piece that runs perpendicular to the other driftwood.
- Using a paint brush, paint each of the driftwood pieces in different colors to mimic a row of colorful beachy houses.
- Paint a nautical stripe on one of the white painted driftwood pieces and paint the laser cut pieces in any color of your choosing.
- Add the fine details (such as windows and doors) to the painted driftwood pieces using a fine tip brush & black and white paint.
- Once paint is dry, attach the pieces to the base with a hot glue gun. Lastly, attach the pebbles and other embellishments to complete the driftwood village.