

Are you looking for a fun and easy DIY treat bag idea for Valentine’s Day? Well, no need to look any further because today, we are going to show you how to create your own Valentine’s Day packaging with the help of a Munbyn thermal label printer.
This post is sponsored by Munbyn. All opinions are our own.

Whether you’re a huge fan of Valentines or not so much, the fact is that it’s a great time to show someone how much you care. And this small gesture can be done quickly, easily and even on a budget!
Why Will I Love Making Valentines Goodie Bags?
Not only is it a thoughtful gift idea, it’s a fun AND easy craft to make at home. Each treat bag can be personalized for the receiver so you can truly get as creative as you like. Also, using the Munbyn bluetooth label printer to make unique stickers at home will ensure the finished goodie bags will look very impressive!
Simply gather some sweets, plain paper bags, colorful ribbon and your Munbyn Thermal Printer along with these lovely heart shaped Valentine’s Day labels and get started!

We love the idea of giving these goodie bags to friends for galentines, kids and grandkids, nieces and nephews and even classmates! Who else would you want to treat with a goodie-filled Valentine’s Day gift bag?

What Is a Munbyn Thermal Printer?
MUNBYN offers a range of products that can be used for crafting purposes. Their bluetooth thermal label printers are often used to print custom labels, stickers, and other decorative elements. These printers are compatible with various software programs, allowing you to design and print your own DIY labels and stickers at home.
By using MUNBYN products, craft enthusiasts can create personalized and professional-looking sticker labels for their projects, organize their craft supplies, and add a unique touch to their creations.

Win Your Own Munbyn Thermal Label Printer!
****GIVEAWAY CLOSED: CONGRATULATIONS DONNA P!****
We’re so excited to partner with Munbyn on this giveaway: one lucky winner will receive a Munbyn bluetooth label printer and a roll of labels!!! To enter:
- Visit Munbyn’s event page to view the Valentine’s Day Popular label templates.
- Choose a favorite label template and then return here to this giveaway post.
- Leave the name of your favorite template in the comments below.
That’s it! Please note that participation in the giveaway is open to residents of the US only and closes Feb. 14th, 2024.
While there check out Munbyn’s label template design campaign. Participants who upload their label design on the Munbyn Print App have a chance to win a $50 gift card.
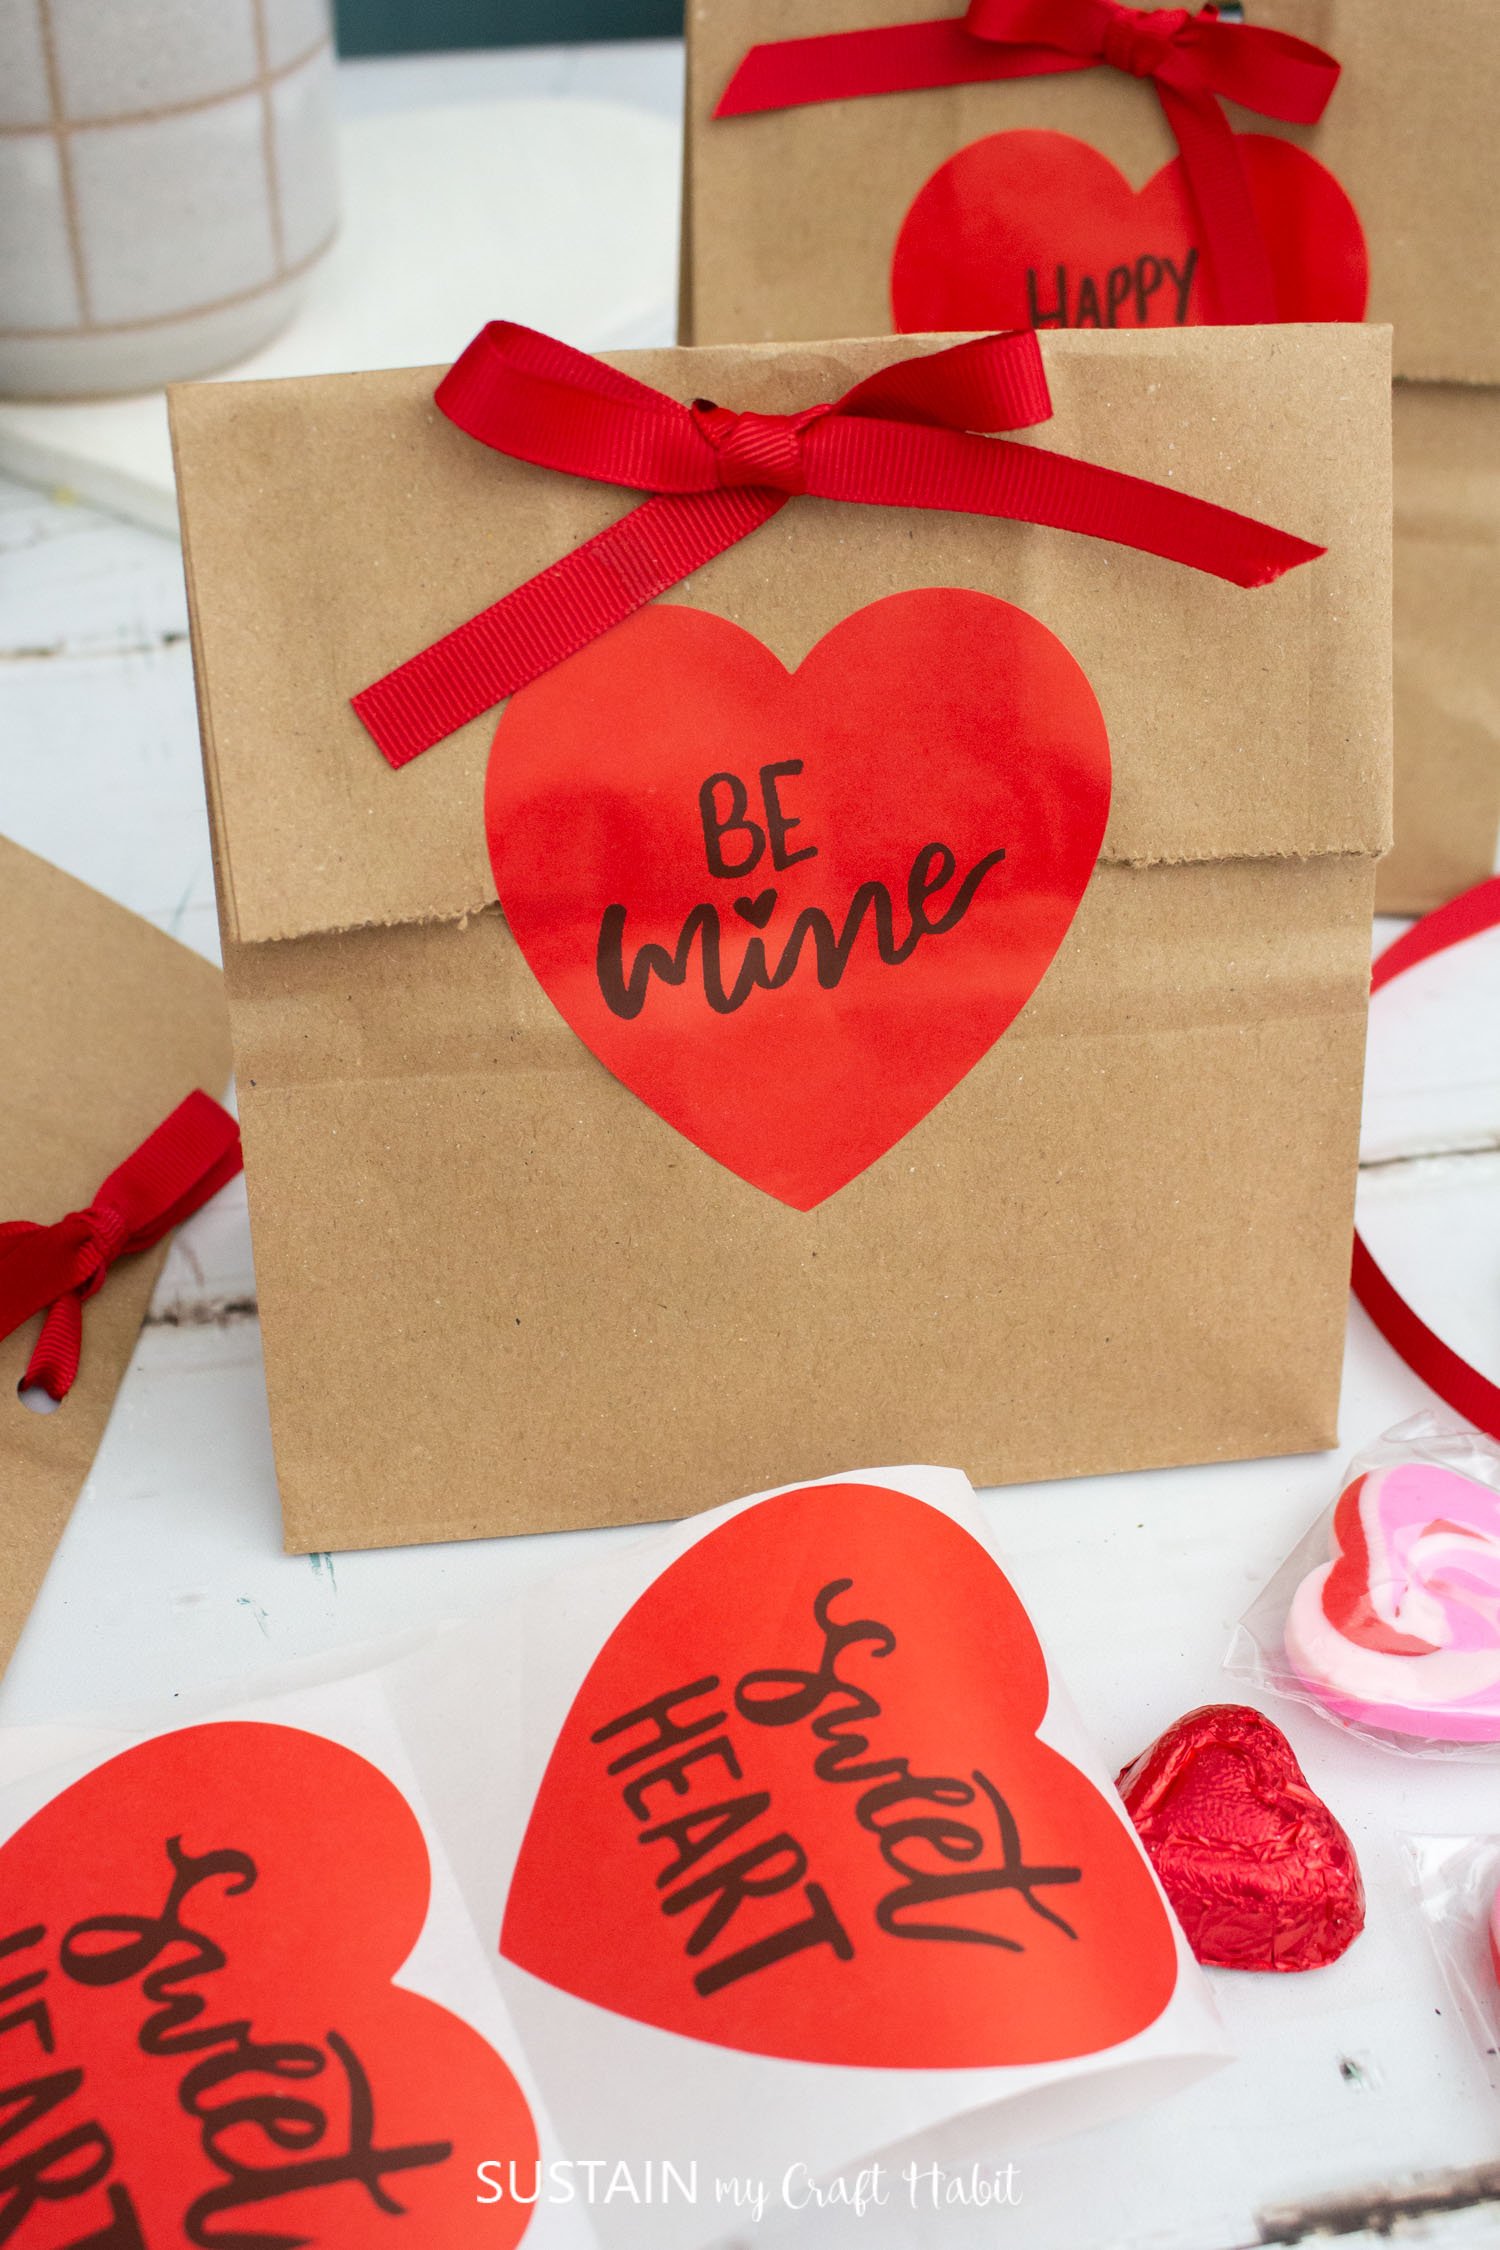
How to Make your Own Valentines Goodie Bags
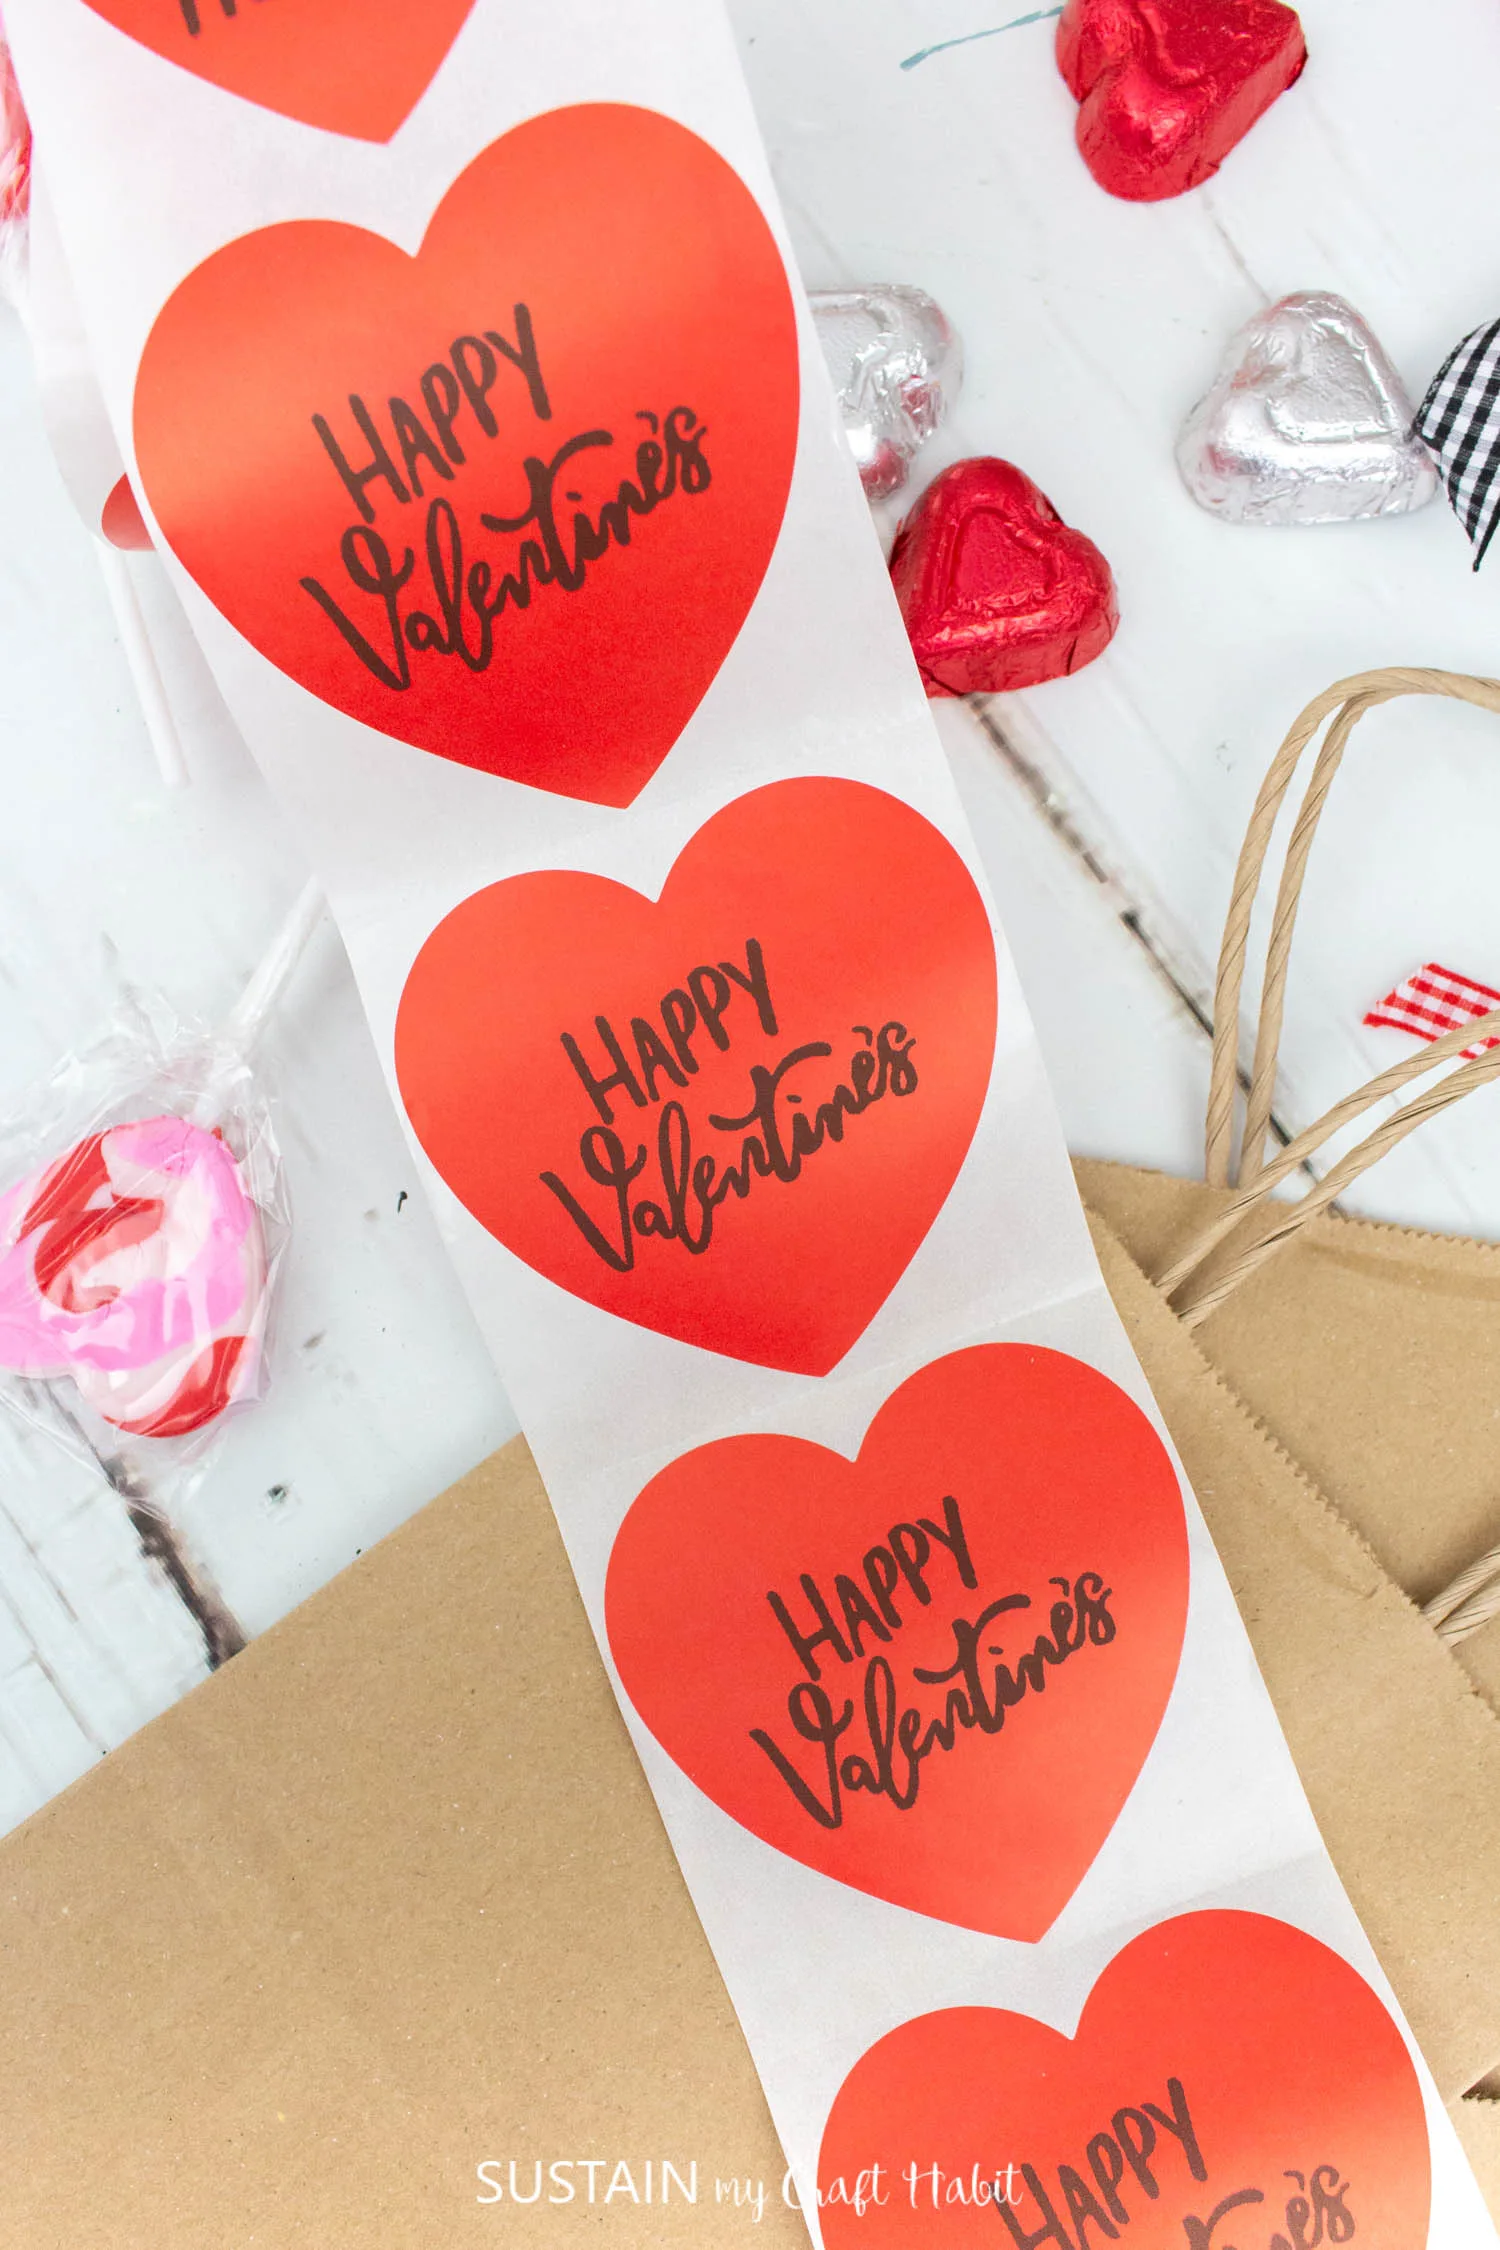
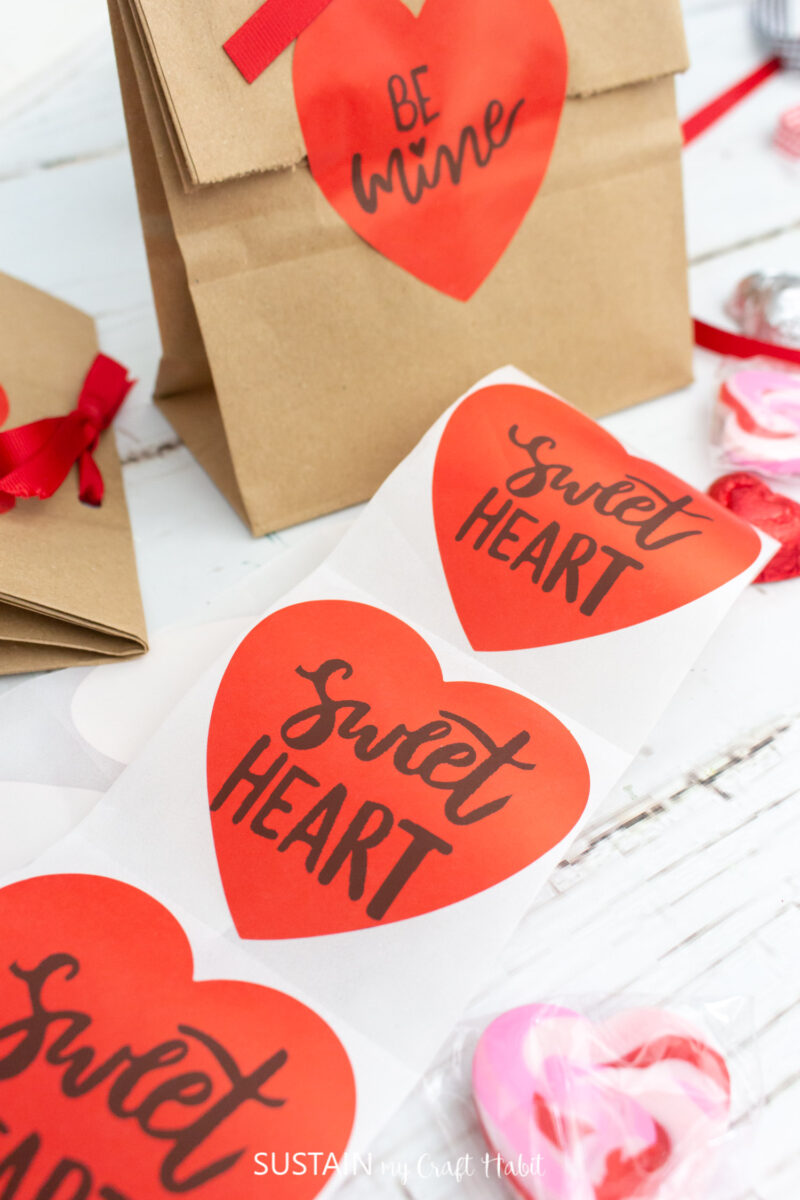
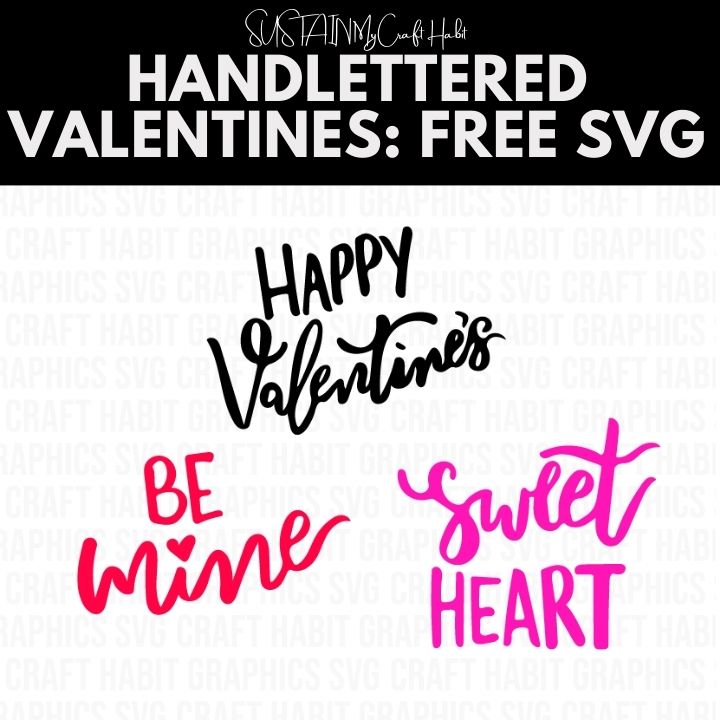
You can grab these FREE hand lettered Valentines phrases in SVG and PNG from our Sustain My Craft Habit digital Shop. We used these same designs to make sweet candy jars in a previous craft.

Materials Needed:
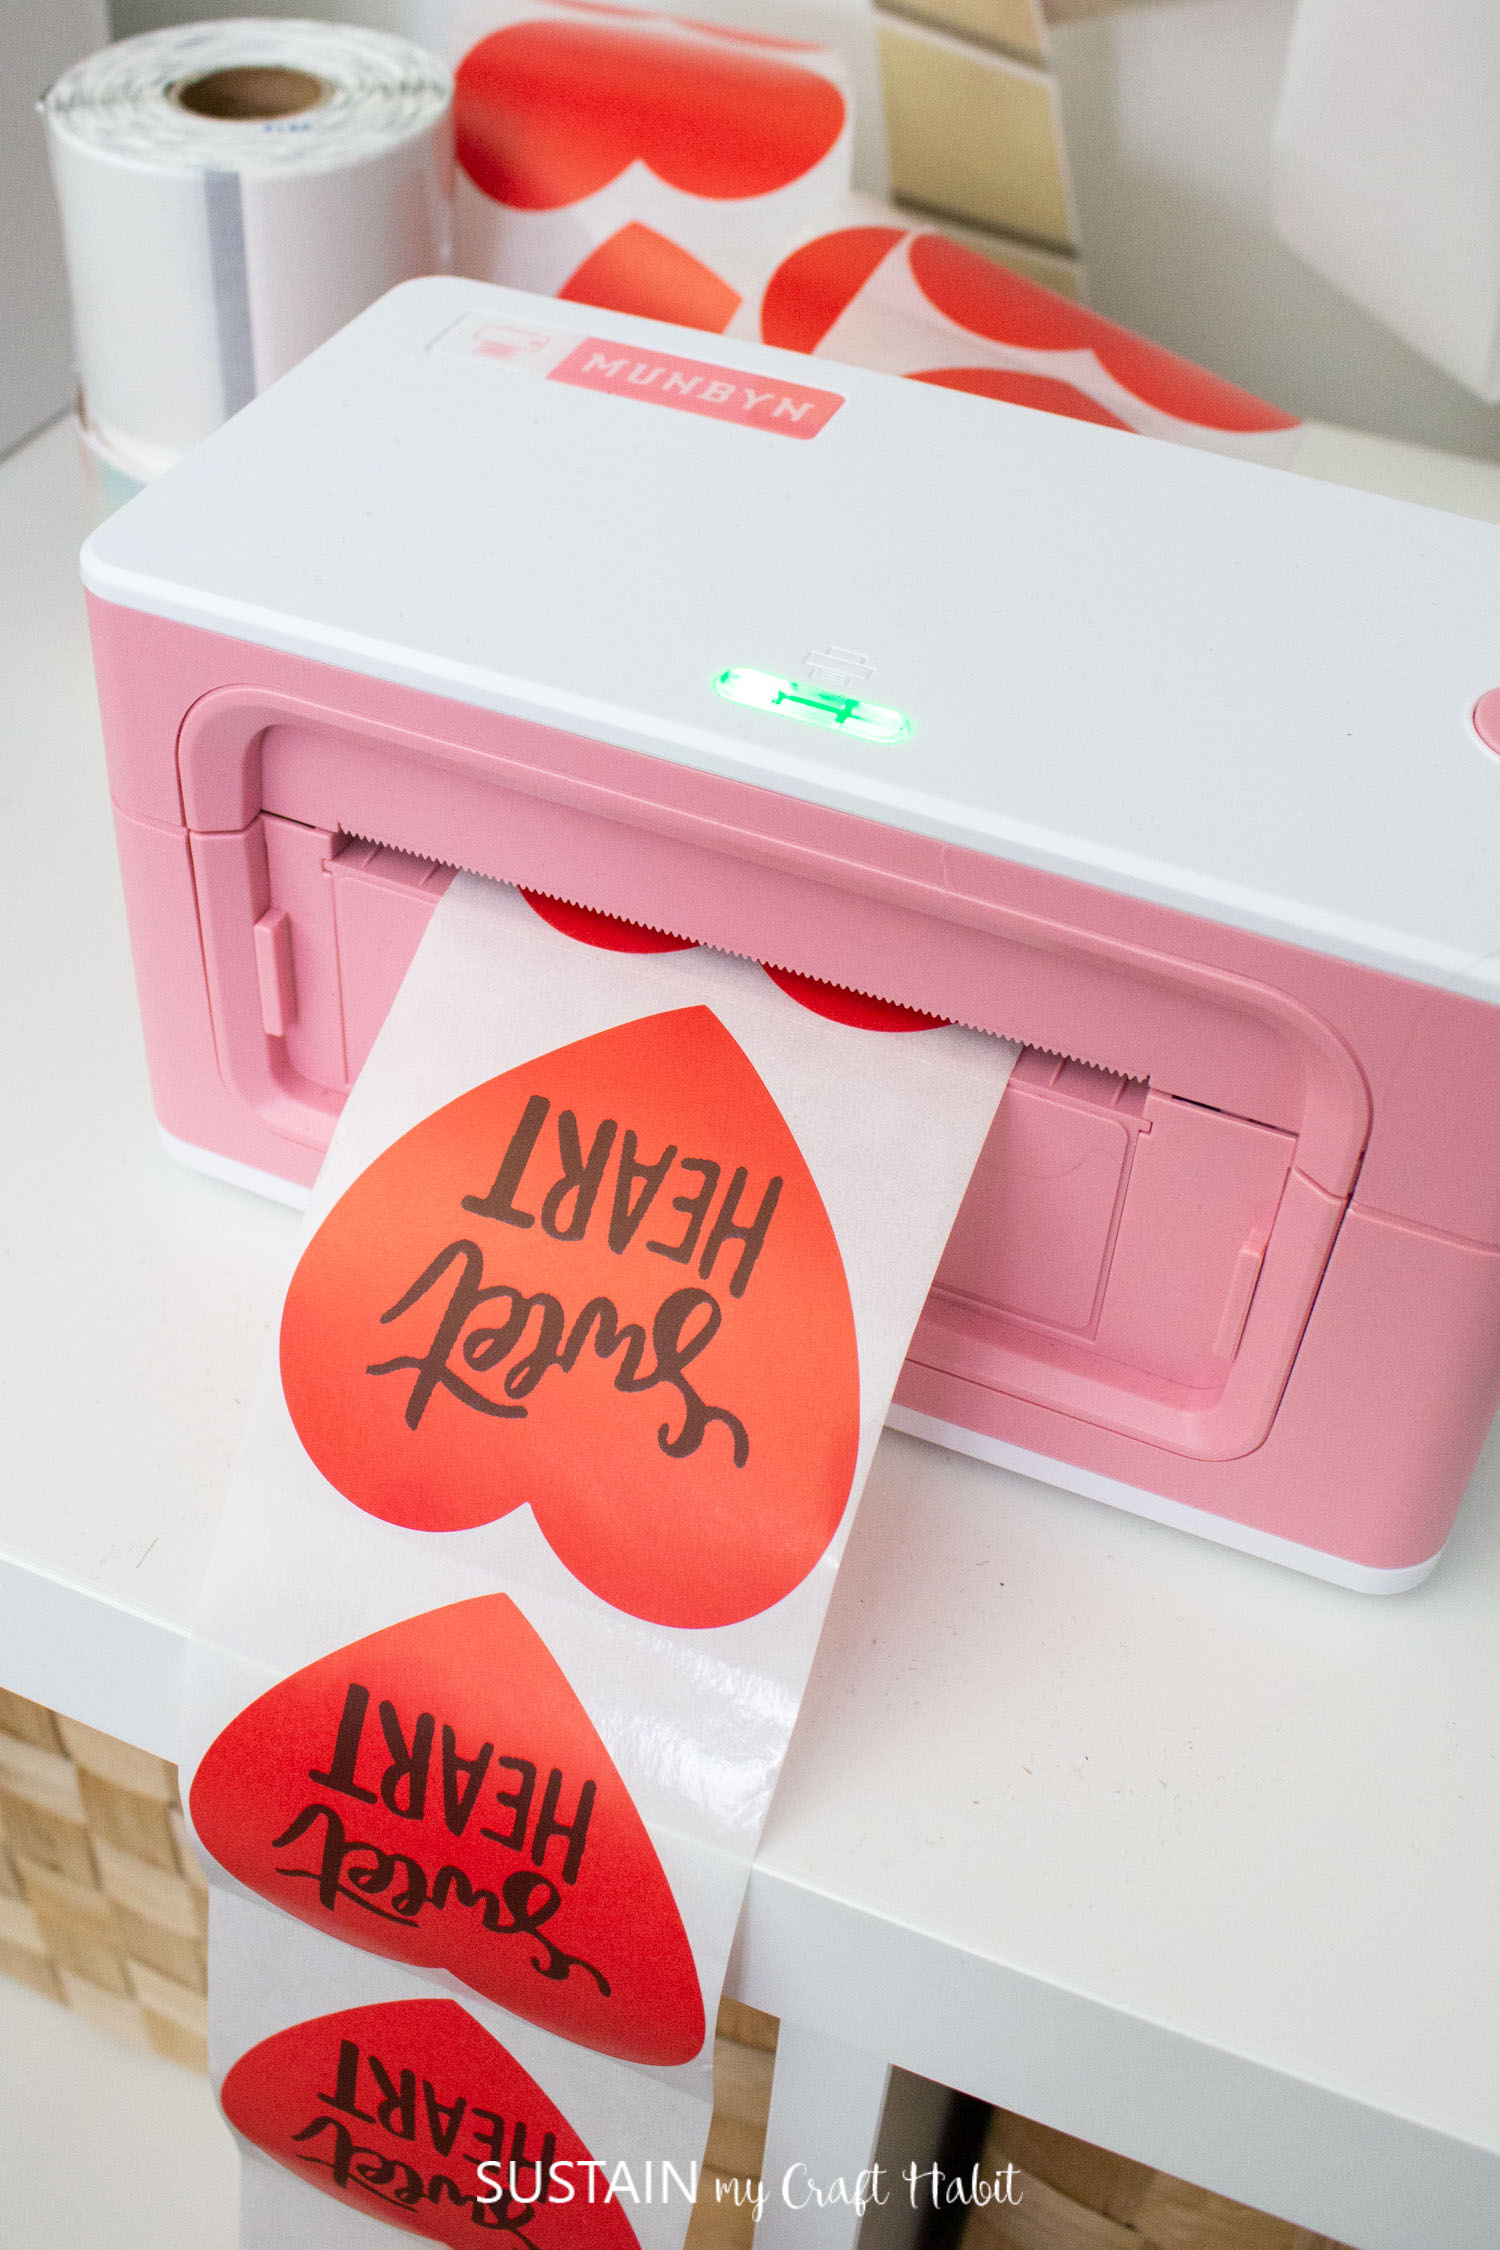
- Munbyn Thermal Label Printer
- 3″ heart-shaped thermal label stickers
- Hand Lettered Valentines Phrases PNG
- Brown paper lunch bags
- Hole punch, scissors
- 1/8″ wide red ribbon
Use our exclusive coupon code BLOG15OFF for 15% off your Munbyn order
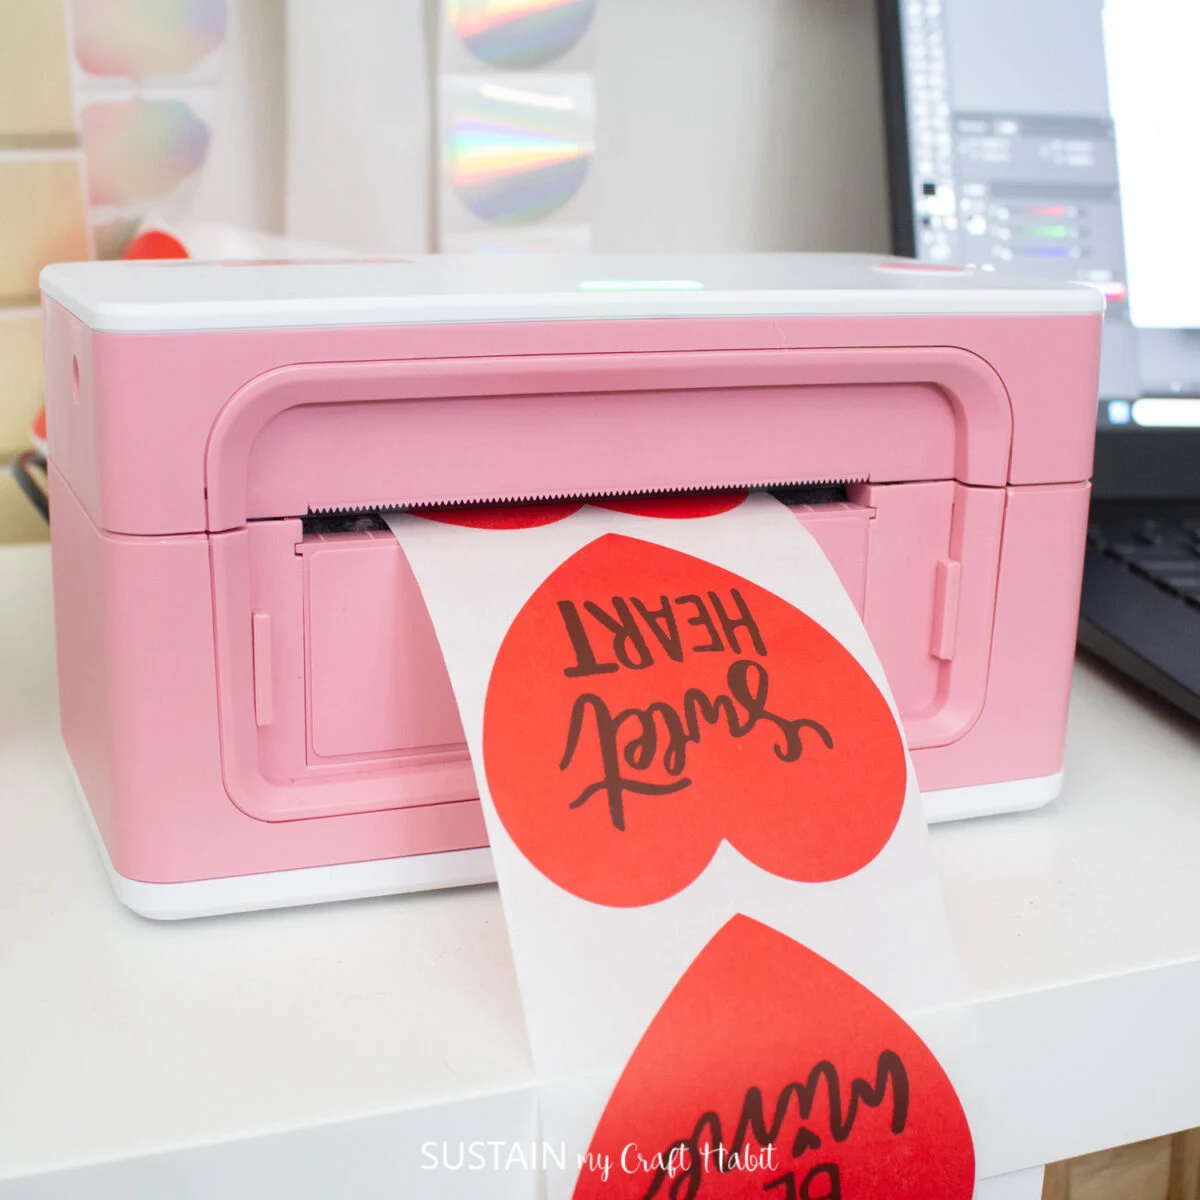
Instructions for Making Stickers using Munbyn Thermal Printer
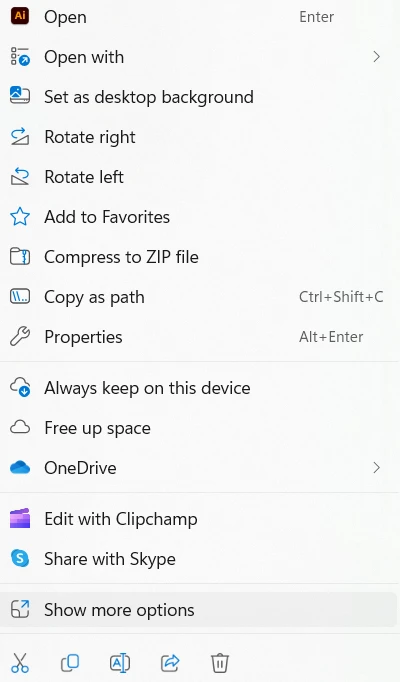
Using a laptop computer (or mobile device with the Munbyn Print App), right click on the PNG file you wish to print.
Select “Show more options” from the drop down menu.

Then select “Print”. A pop-up will appear: be sure to select the MUNBYN printer from the printer menu and adjust the media size to match the label sticker size you are using. In this case, I chose to keep the design smaller so I chose 2”x2” (51mmx51mm) size paper (instead of 3”x3”).
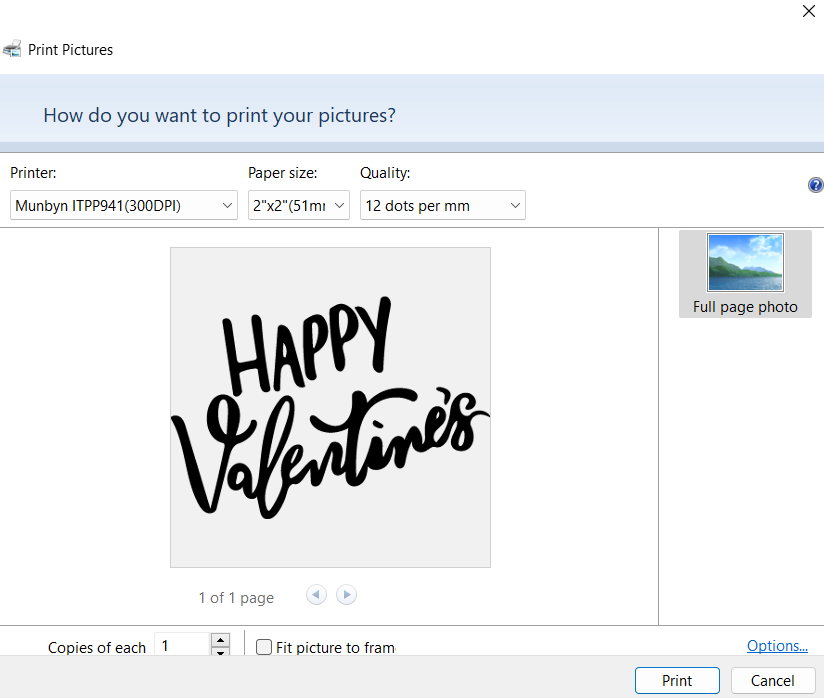

Print one copy as a test to ensure positioning is centered. If you find the design has printed askew, then you will need to adjust the “position adjustment”. It took me a few tries to get the right setting.
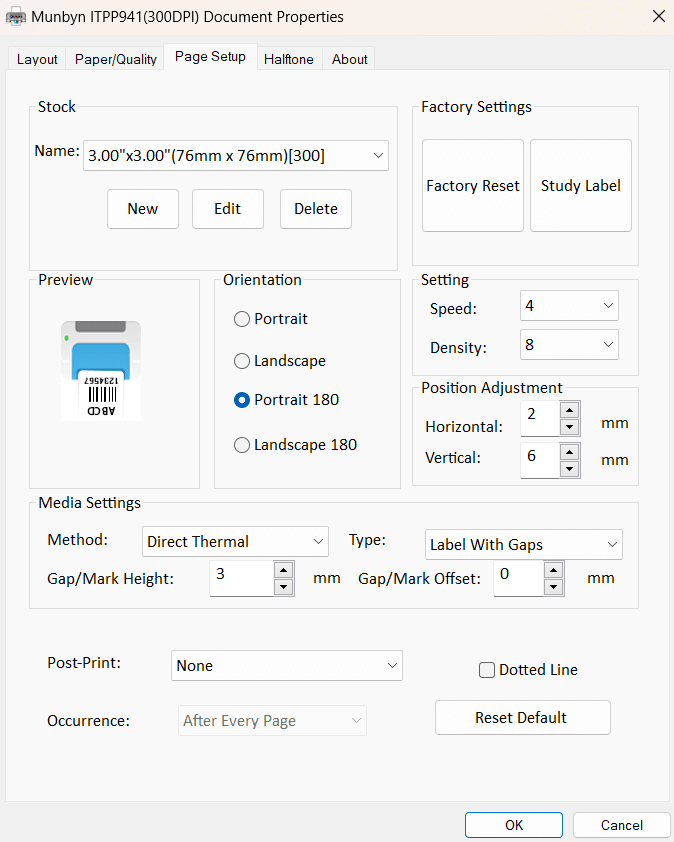
In order to do this, first click on the “options” button and then the “printer properties” button and head to the “page setup” tab. Depending on your test print, marginally adjust the horizontal and vertical positioning. The print again to confirm the placement is fixed.

Once the placement is perfected, adjust the number of copies you wish to print and then click on “print”. In fact, the thermal label printer can handle large quantities printing up to 72 labels per minute which will save you lots of time so you can keep creating.

Assembling Valentines Treat Bags
Remove the paper bag handles from the top of the bags.
Fold over about ⅓ of the top and crease. Using a hole punch, add two holes at the center of the folded bag through all layers.


Fill the bag with yummy treats such as wrapped chocolates, candies, caramels and lolli-pops.
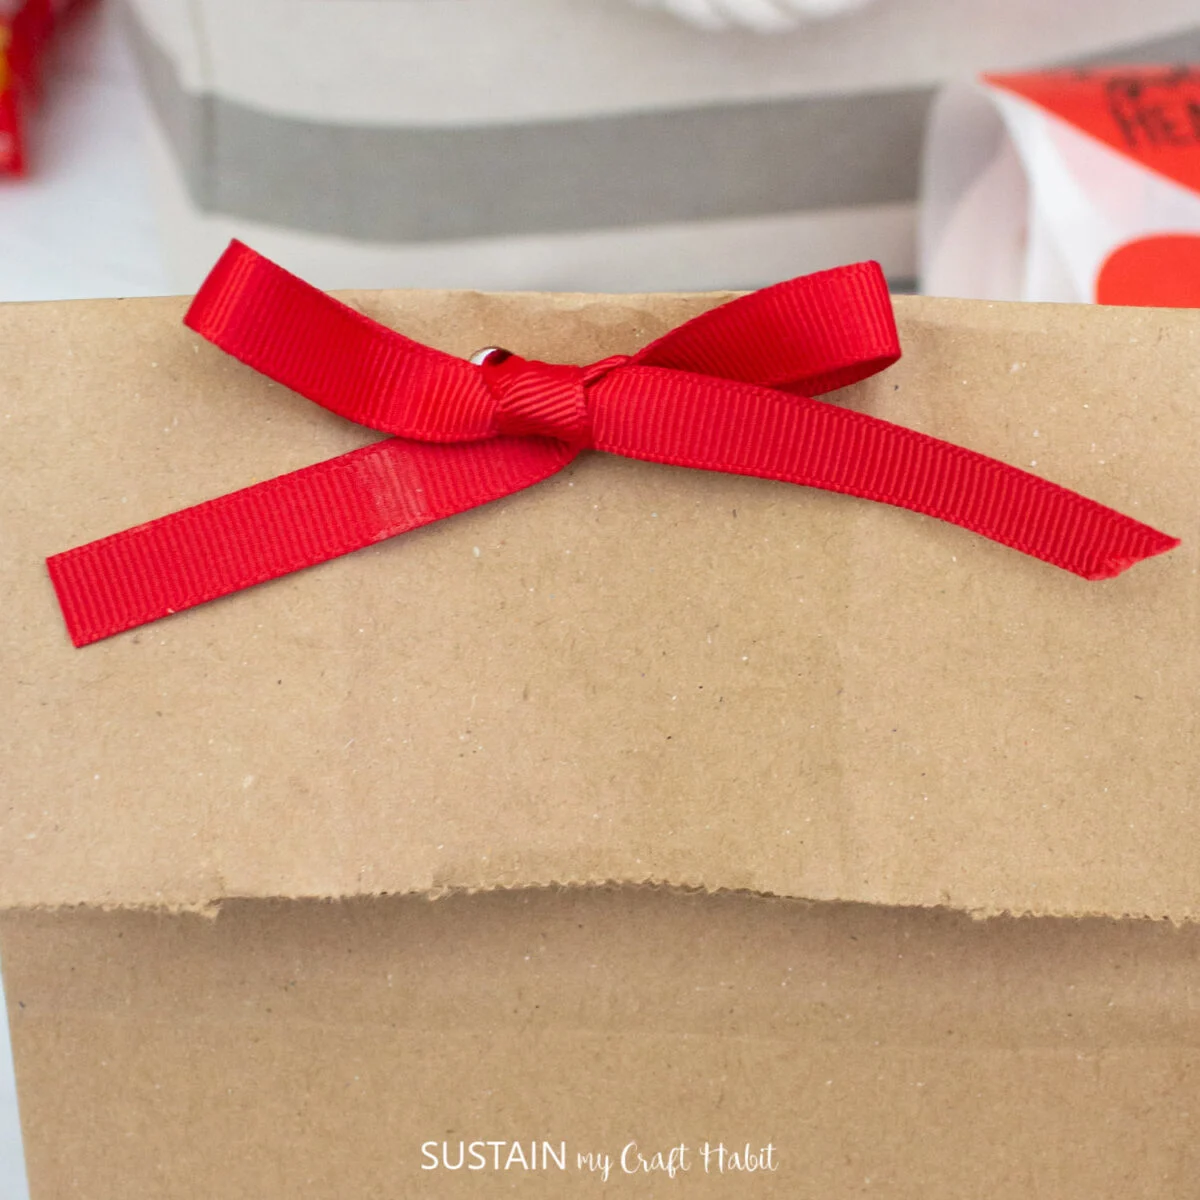
Cut a piece of ribbon, approximately 8” long and thread it through the holes.
Tie the ribbon ends into a bow.

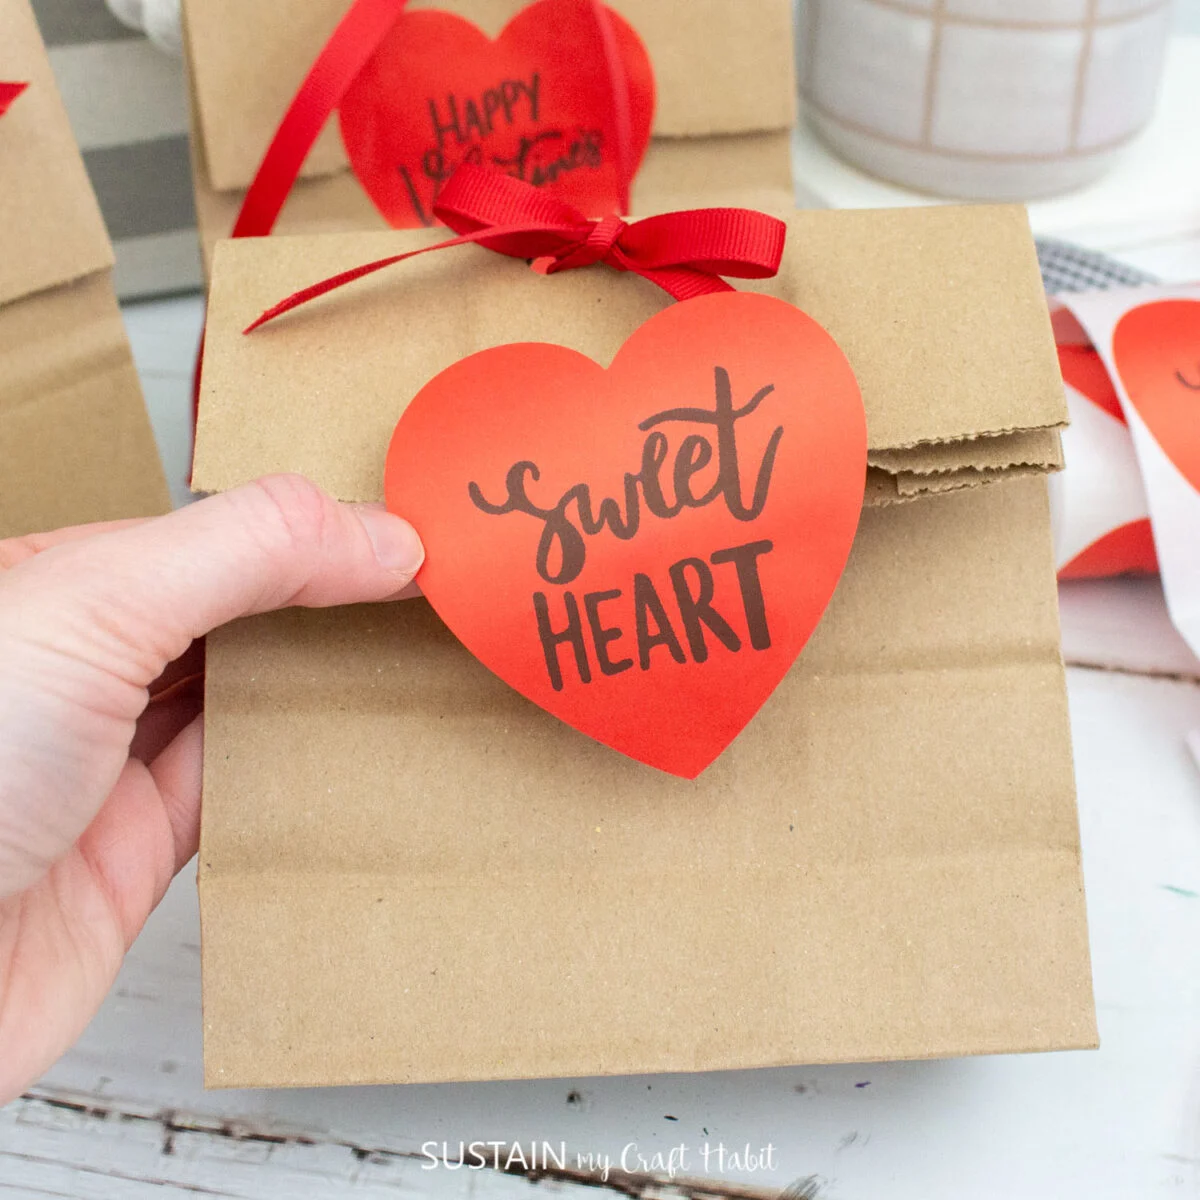
And lastly, add a heart shaped sticker with a printed Valentines phrase on to the bag to seal the opening.

Use our exclusive coupon code BLOG15OFF for 15% off your Munbyn order
The Munbyn Bluetooth thermal printer really comes in handy for all your DIY sticker needs. Check out these other projects we made at home:


Creating Stickers at Home
Once you start making your own DIY stickers with MUNBYN, you won’t want to stop. With an endless amount of creative ideas and sticker label shapes, sizes and colours, you’ll be excited to share your fun and new creations!
Like it? Pin it for later!

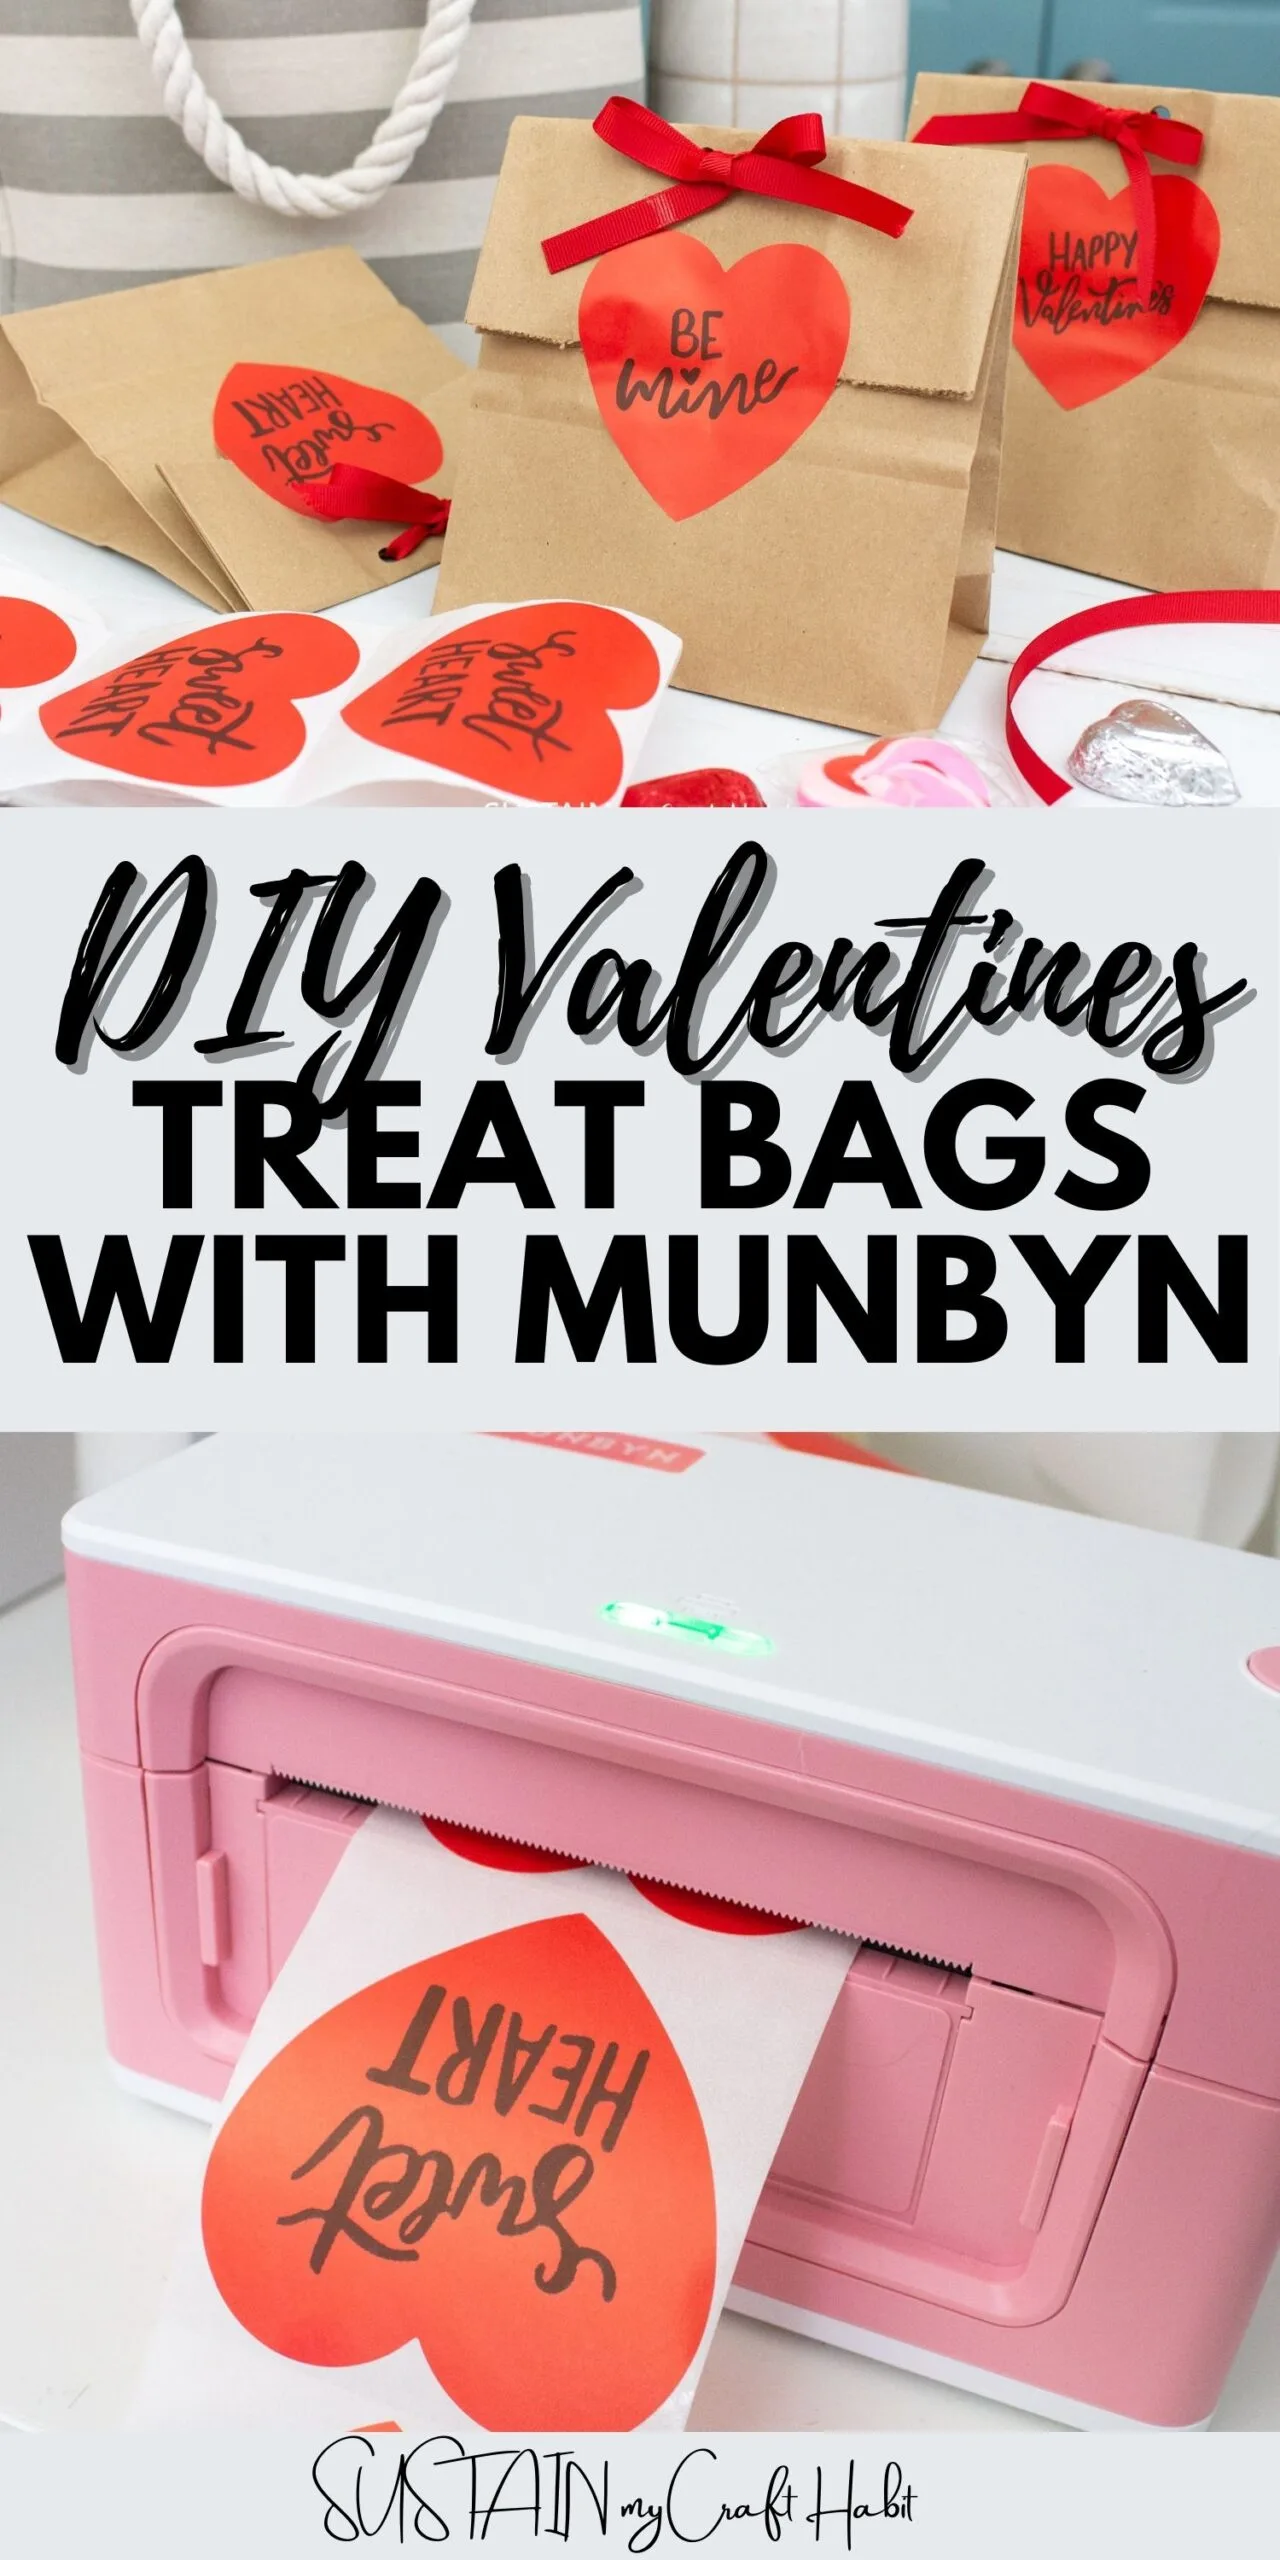


DIY Valentines Treat Bags with Munbyn
Materials
- Munbyn Thermal Label Printer
- 3" Heart-shaped thermal label stickers
- Hand Lettered Valentines Phrases PNG
- Brown paper lunch bags
- Hole punch scissors
- Red ribbon 1/8" wide
Instructions
Making Stickers using Munbyn Thermal Printer
- Using a laptop computer (or mobile device with the Munbyn Print App), right click on the PNG file you wish to print.
- Select “Show more options” from the drop down menu.
- Then select “Print”. A pop-up will appear: be sure to select the MUNBYN printer from the printer menu and adjust the media size to match the label sticker size you are using.
- Adjust the number of copies you wish to print and then click on “print”.
Assembling Valentines Treat Bags
- Remove the paper bag handles from the top of the bags.
- Fold over about ⅓ of the top and crease. Using a hole punch, add two holes at the center of the folded bag through all layers.
- Fill the bag with yummy treats such as wrapped chocolates, candies, caramels and lolli-pops.
- Cut a piece of ribbon, approximately 8” long and thread it through the holes.
- Tie the ribbon ends into a bow.
- And lastly, add a heart shaped sticker with a printed Valentines phrase on to the bag to seal the opening.
leah
Thursday 8th of February 2024
Made with Love, because who doesn't love sparkle!
Donna
Tuesday 6th of February 2024
MUNBYN Rainbow Scalloped Round Thermal Sticker Labels
Jane and Sonja
Monday 19th of February 2024
Congratulations Donna! We've selected your name is the winner of this giveaway! -Jane & Sonja
Kim
Monday 5th of February 2024
Oh my goodness so many cute ones! I think I’d choose the Valentine Day Rounds!
Patty W.
Monday 5th of February 2024
I love the "Made with Love" label. I several small children in my family that I make things for and this would make them so much more special. This is a cute printer! Would love to add it to my crafting.
Liberty
Monday 5th of February 2024
I like the Made with Love template. Wow-- I've never seen such a cute label printer like this one!