DIY Beach Glass Trees
Add a little sparkle to winter and beyond with these pretty beach glass trees. A great way to use up that sea glass you’ve collected all summer long!
Pretty DIY Beach Glass Trees
Collecting sea glass is a favorite activity for us throughout the summer at the cottage. Technically, it would be called beach glass since we’re at the lake (and not the sea) but we’ve gotten accustomed to saying seaglass over the years.
Each of the kids takes a little baggie with them to hold all their finds until they can sort them by color when they return home. We could undoubtedly walk for hours combing the beach for treasures.
We have plenty of DIY tutorials for making driftwood crafts (another supply we scavenge) such as:
- our driftwood crab art,
- driftwood reindeer ornaments,
- full-size driftwood Christmas tree,
- DIY driftwood mirror, and more!
So we were very excited to finally make something with our beach glass collection. If you don’t have enough beach glass in your collection, you can buy it on Amazon or at a local nursery or craft store.
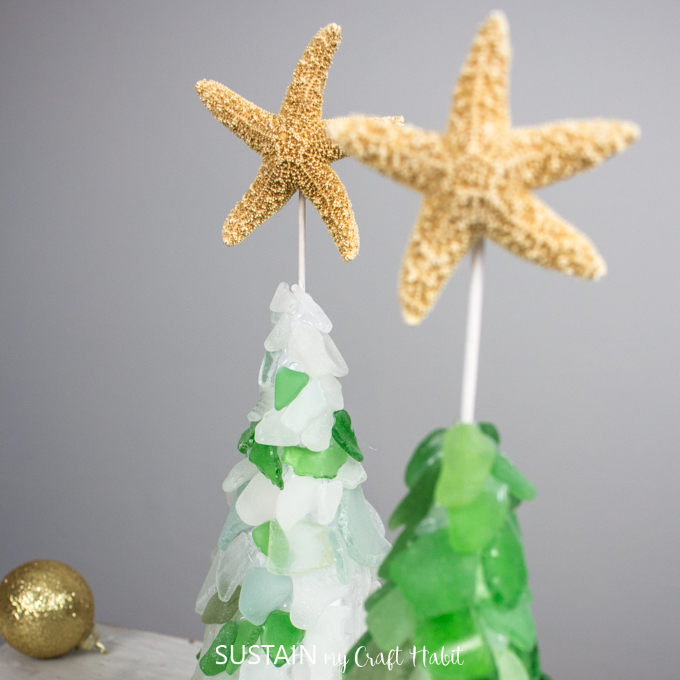
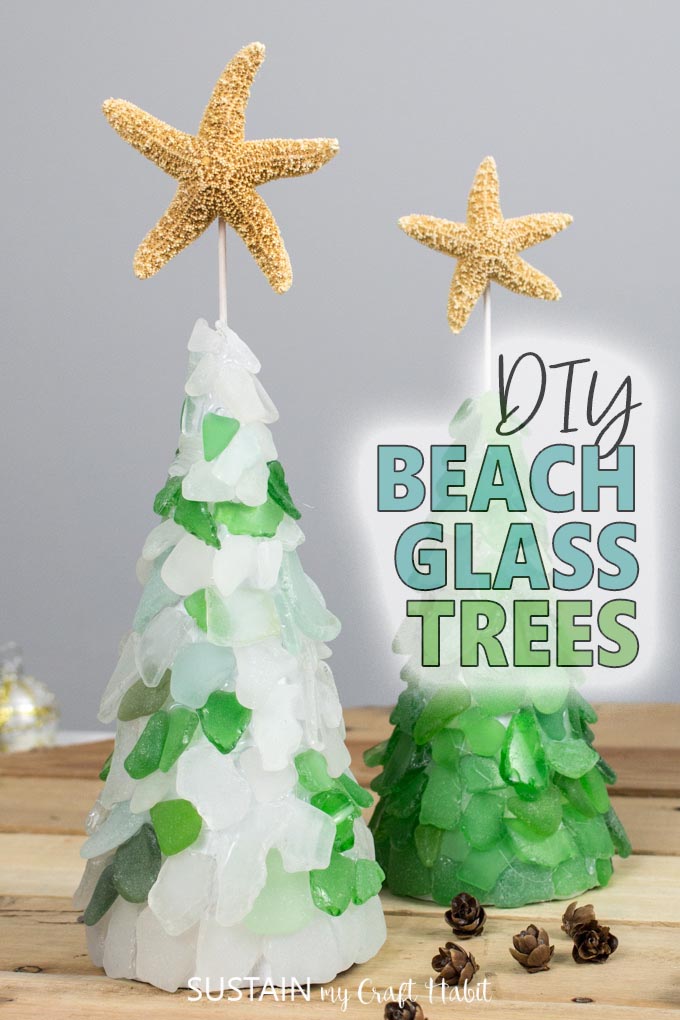
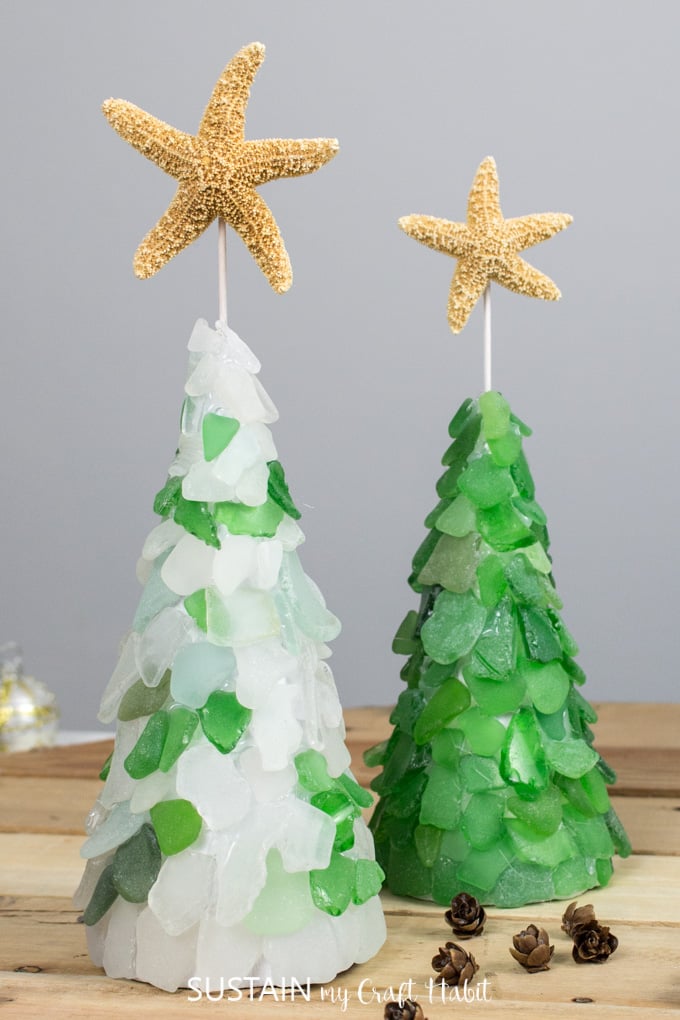
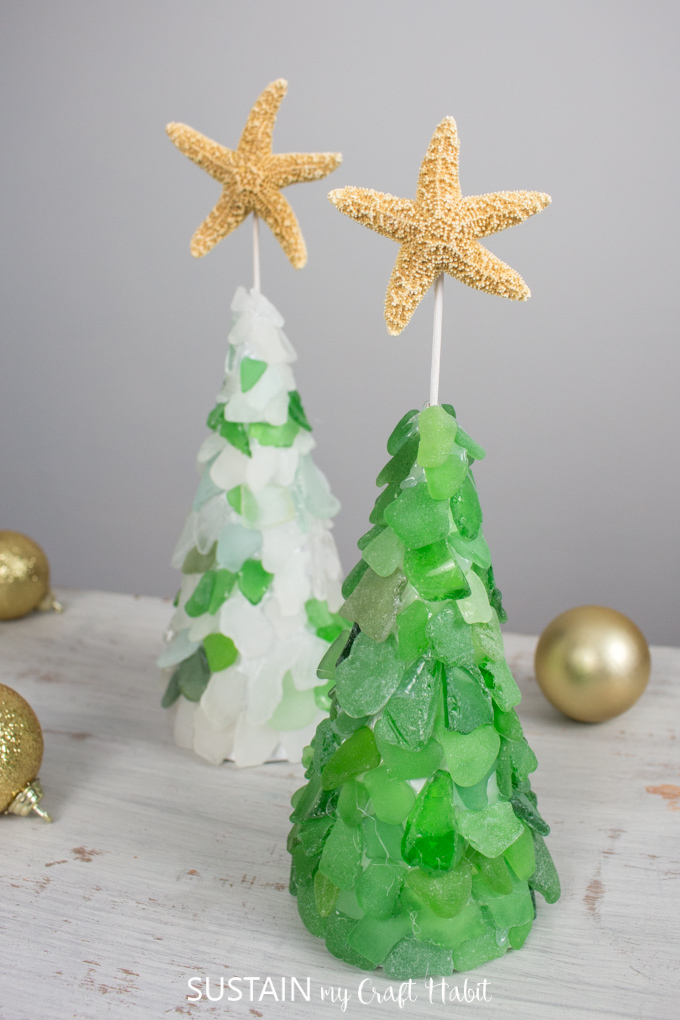
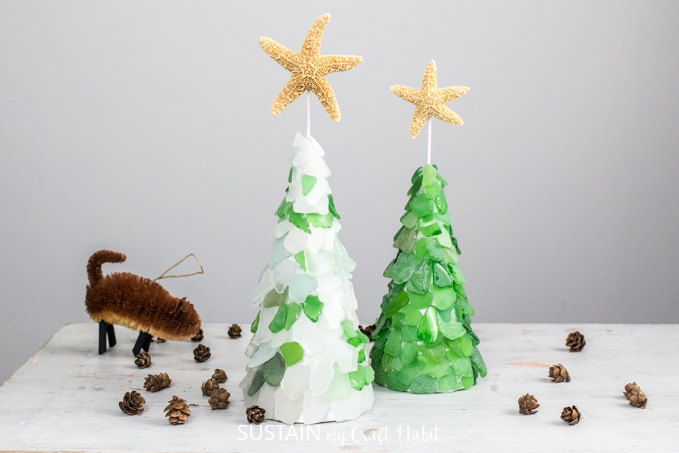
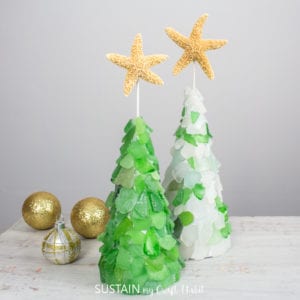
We love the way these beach glass trees turned out. They are cutsie and fun with the starfish topper but also elegant with all the natural glass.
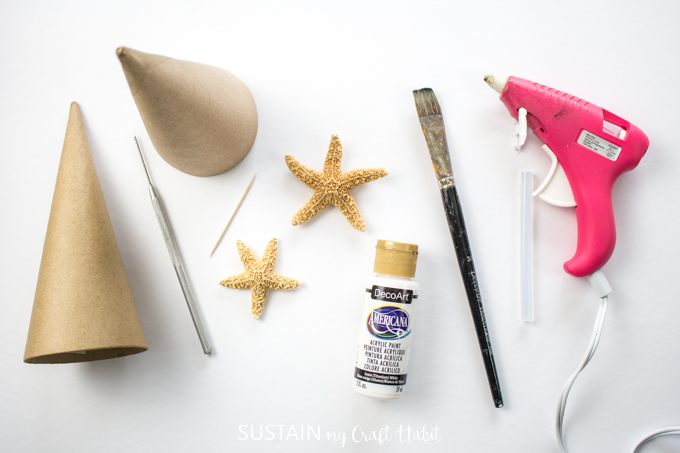
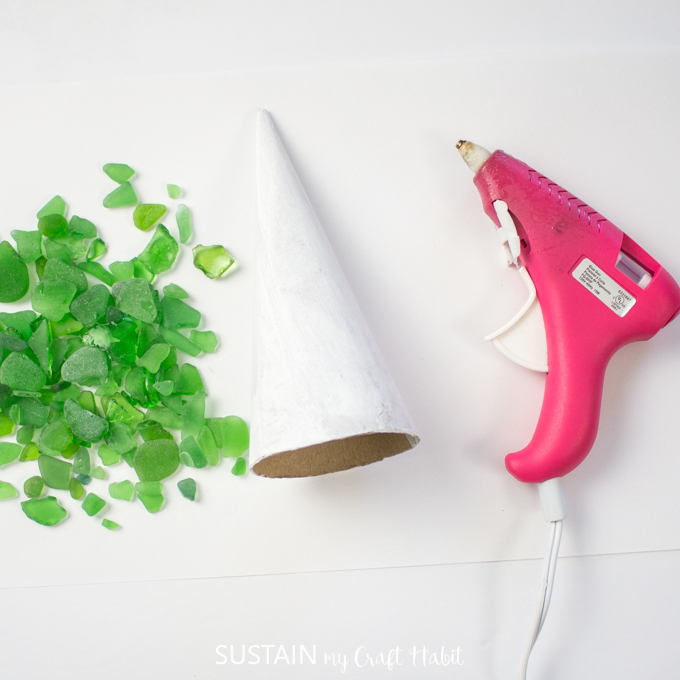
Materials needed to make a Beach Glass Trees:
- Beach glass in assorted shapes, sizes and colors
- Paper Mache Cardboard Cones, 7” high, set of 2
- Starfish embellishments (1 for each tree)
- Toothpicks (1 for each tree)
- Hot glue gun with clear glue sticks
- Americana Acrylics in Snow White
- ¾” flat paintbrush
- Awl or other sharp pointed tool
- Tape, scissors
How to make a DIY Beach Glass Tree:
Preparing the Cones
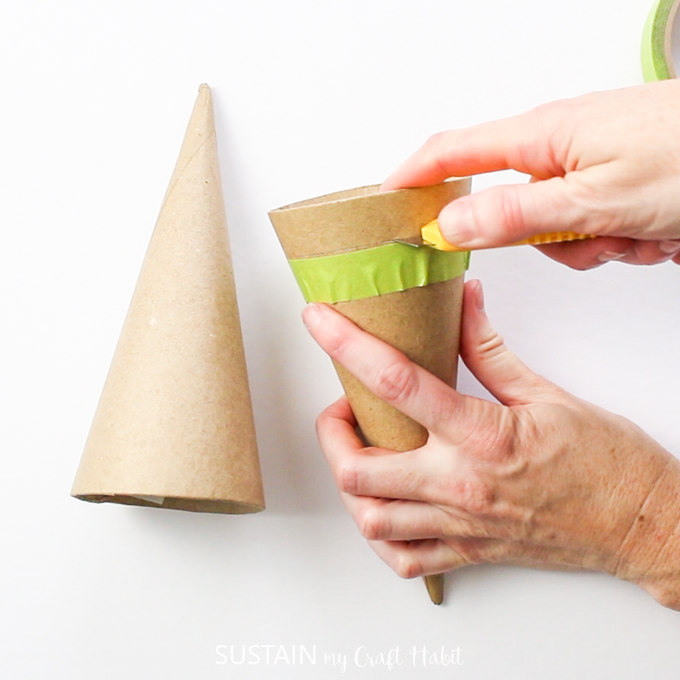
If you can’t find a different sized paper mache cones, you can make your own by simply cutting off some of the height at the bottom of one of the cones.
Wrap a piece of tape approximately ¾” from the base.
Using a utility knife or a good pair of scissors, cut along the taped edge to reduce the height of the cone.
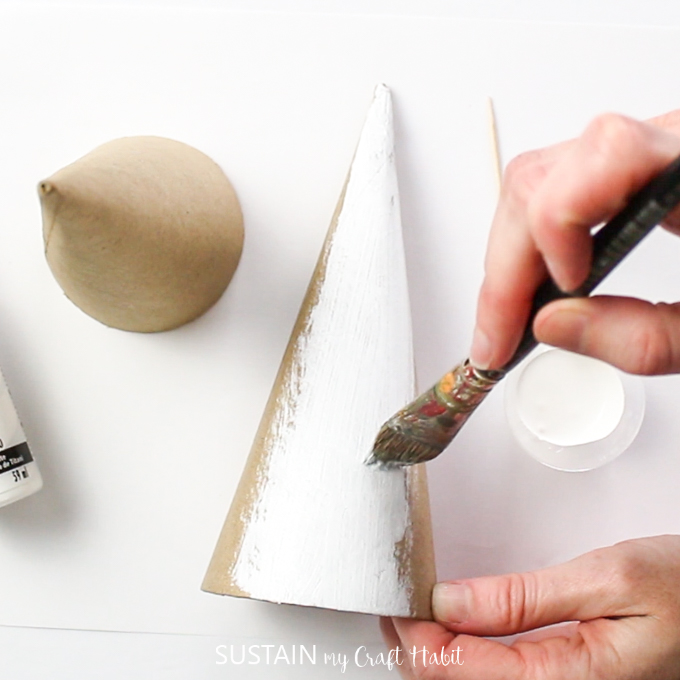
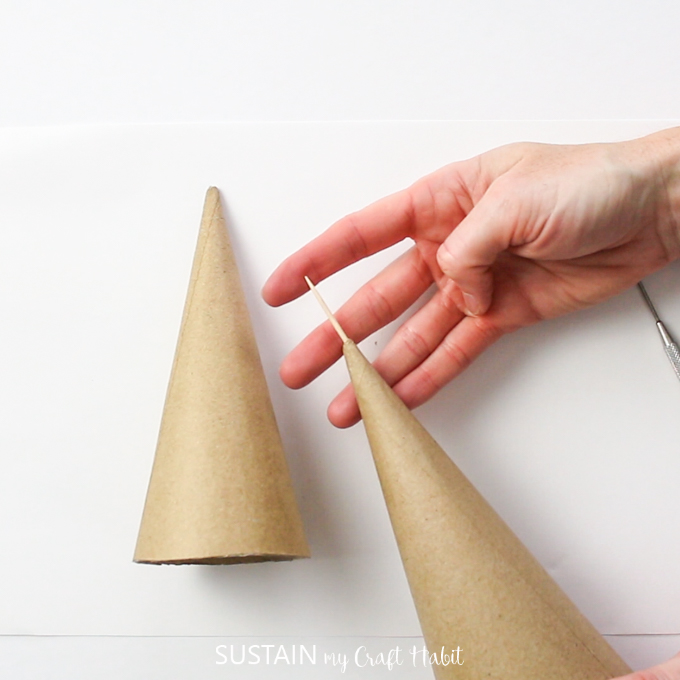
Next, paint the cones and toothpicks using an acrylic paint in white. Leave the paint to dry fully before moving on to the next step.
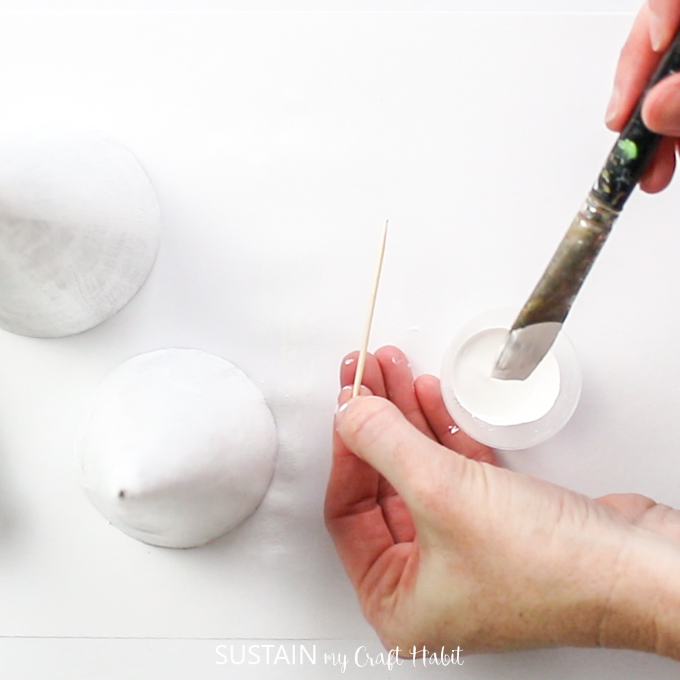
Poke a hole through the top of the cone using a sharp pointed tool such as an awl or a wooden skewer. The toothpick is likely not strong enough to break through the paper mache.


Preparing the Star:
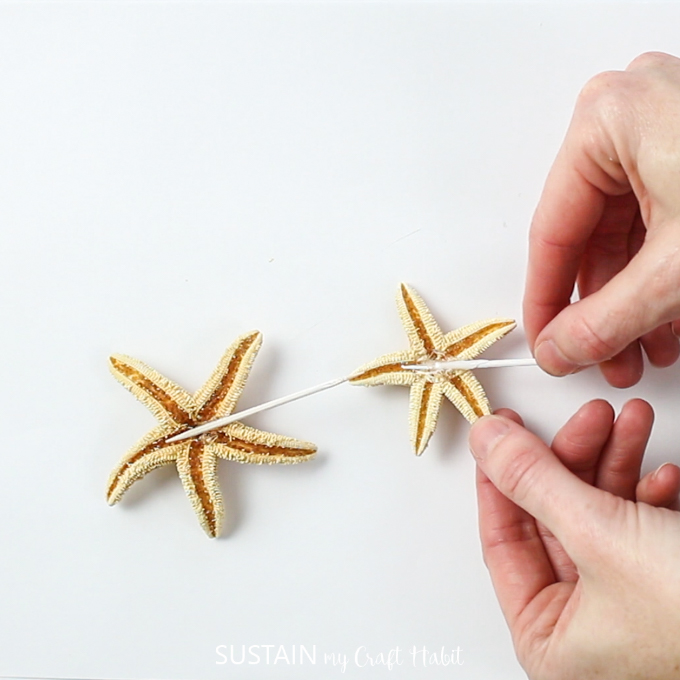
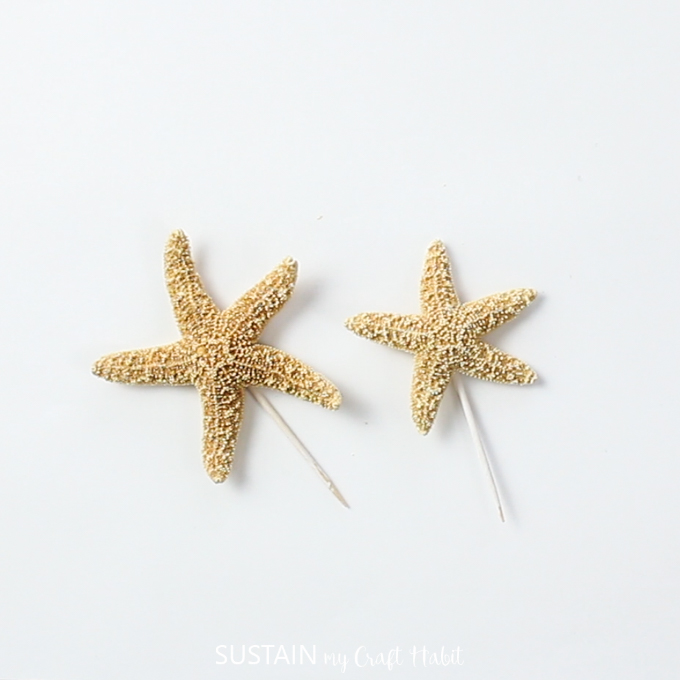
Turn the starfish embellishments with the back side facing up.
Apply a dab of glue to the back side of the starfish and place one of the painted toothpicks down on top so one end hangs past the starfish. Hold the toothpick in place until the glue sets. Put aside for the time being.
Applying the Seaglass
If you’re using actual sea glass collected at the beach, be sure to thoroughly wash and dry the beach glass before gluing.
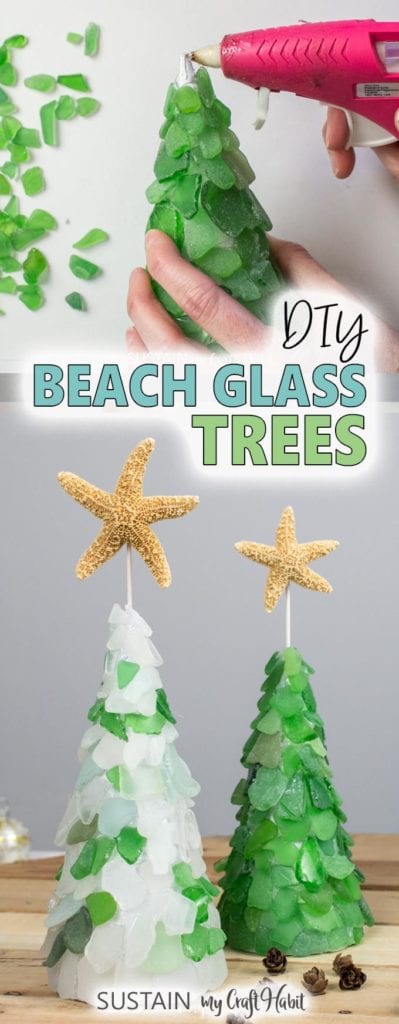
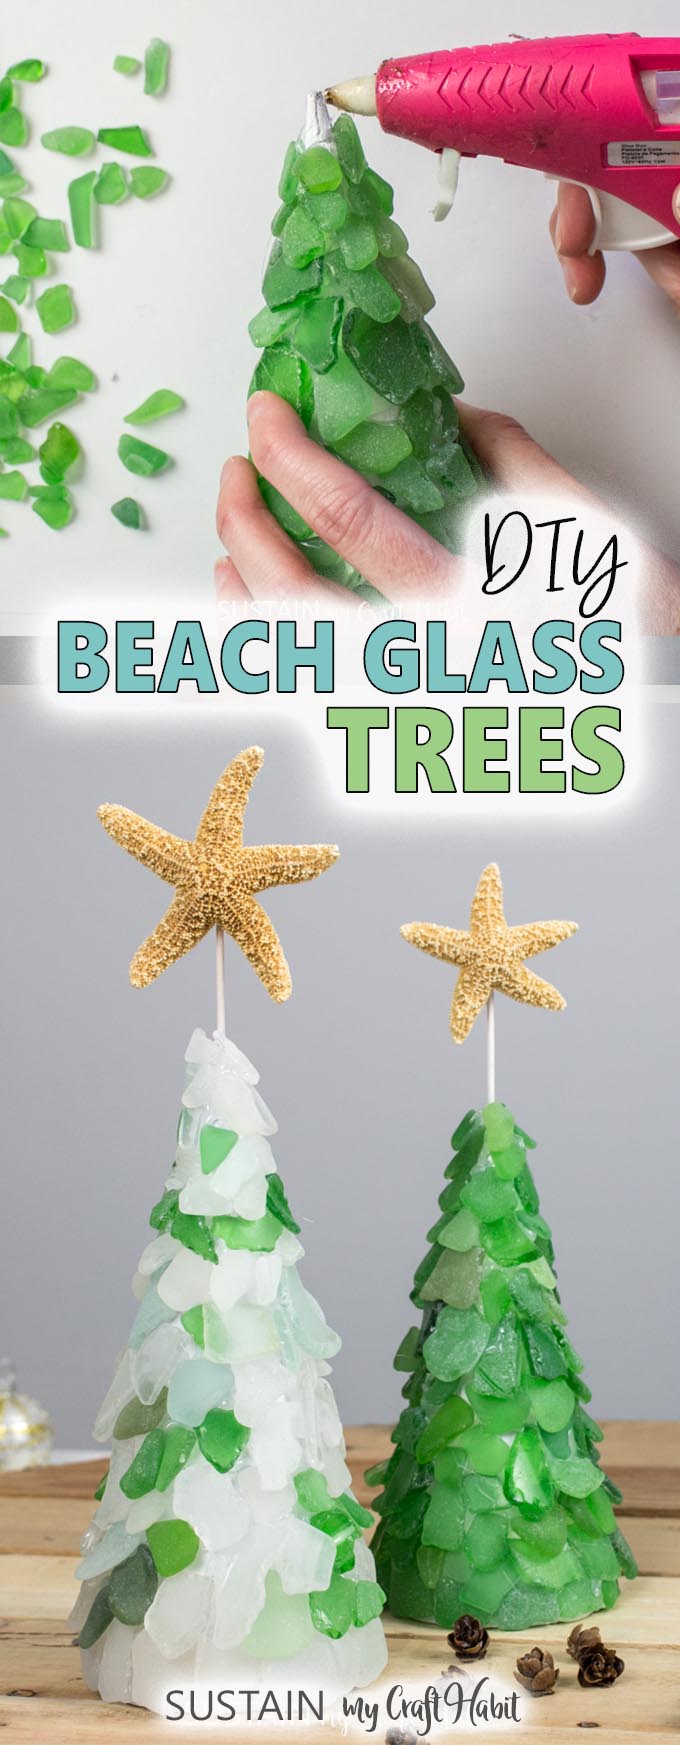
Preheat the hot glue gun and remember to work quickly as the glue from the glue gun sets quickly but work carefully to avoid injury from the hot glue.
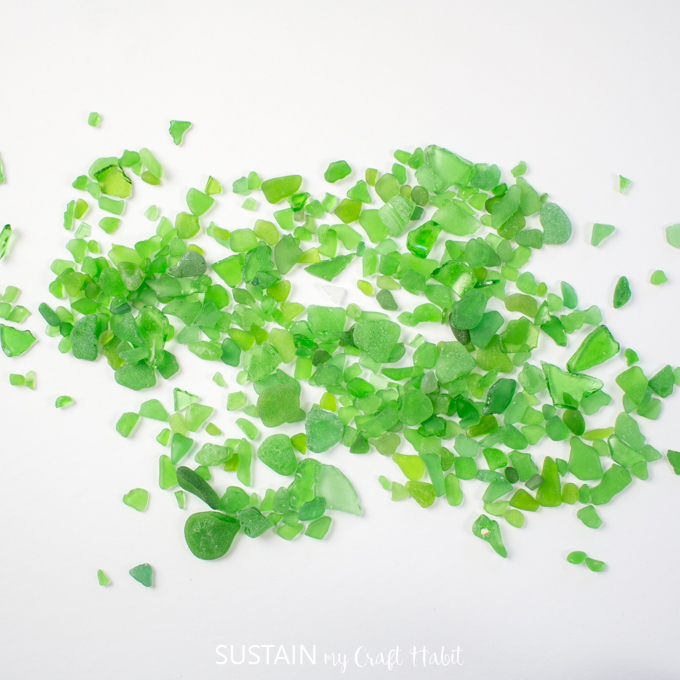
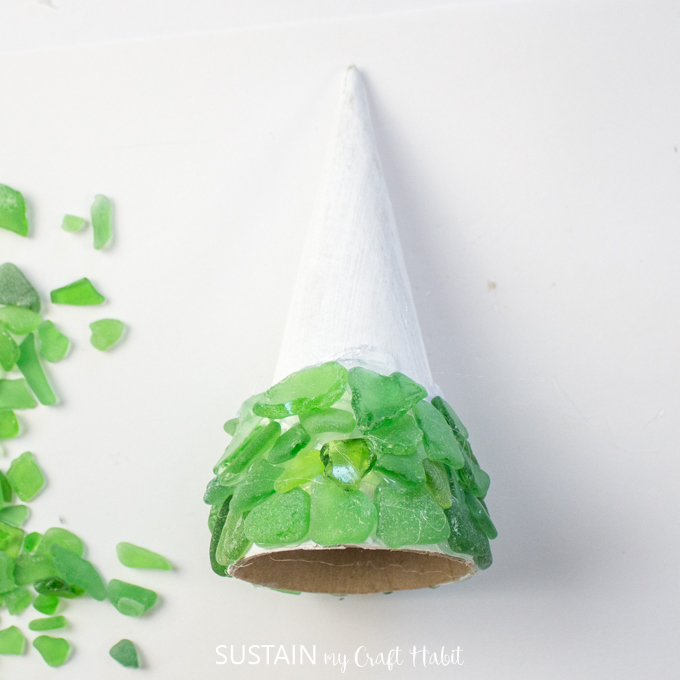
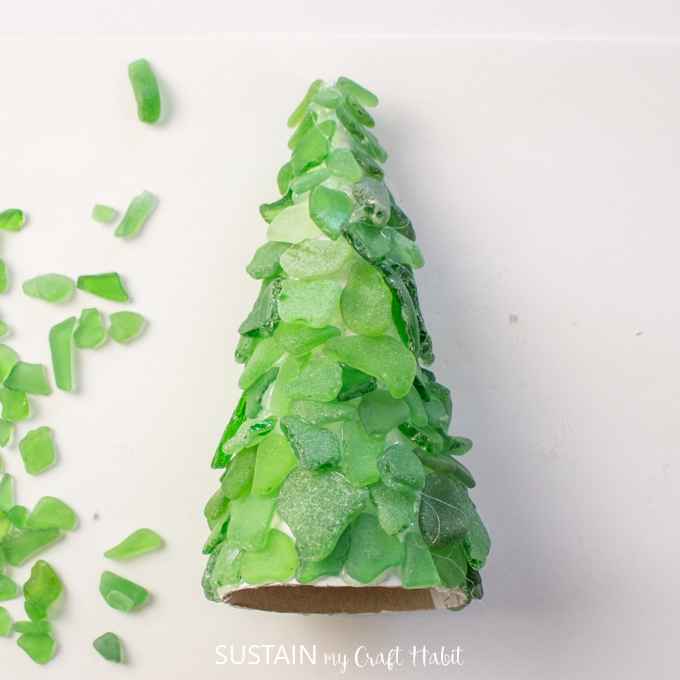
For this first tree, we used only green beach glass.
Starting at the base of the cone, apply a dab of glue as shown and press one piece of beach glass over the glue. Don’t extend the glass past the base of the cone.
Continue around the rim of the cone gluing one beach glass piece at a time.
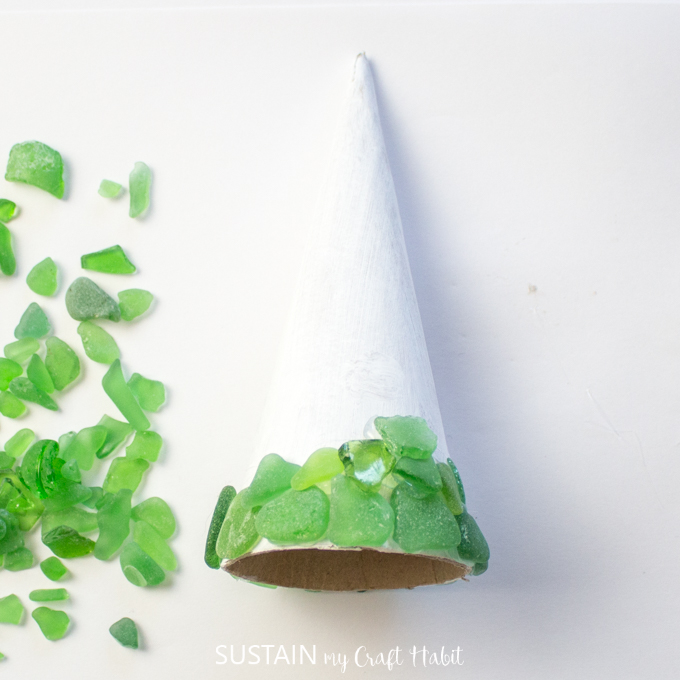
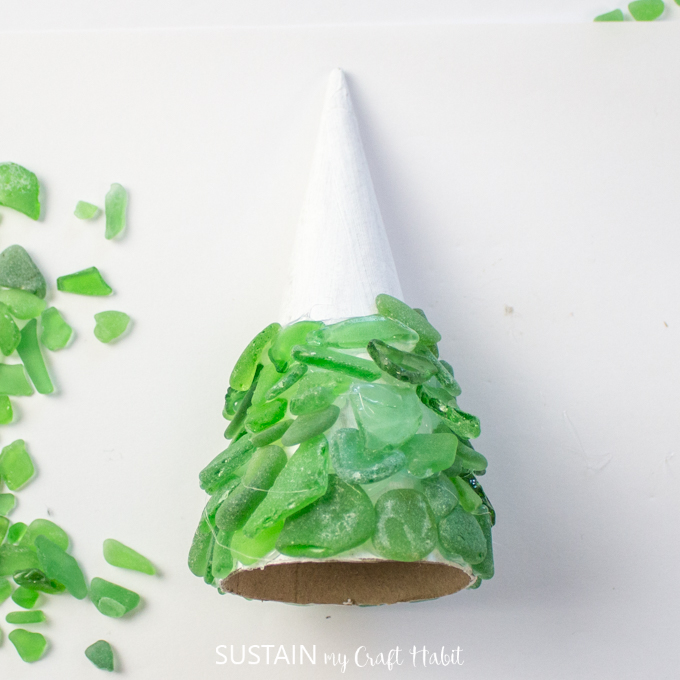
For the second row, overlap the bottom edge of the pieces with the top of each piece of beach glass from the previous row.
Continue working one sea glass piece at a time and one row at a time.
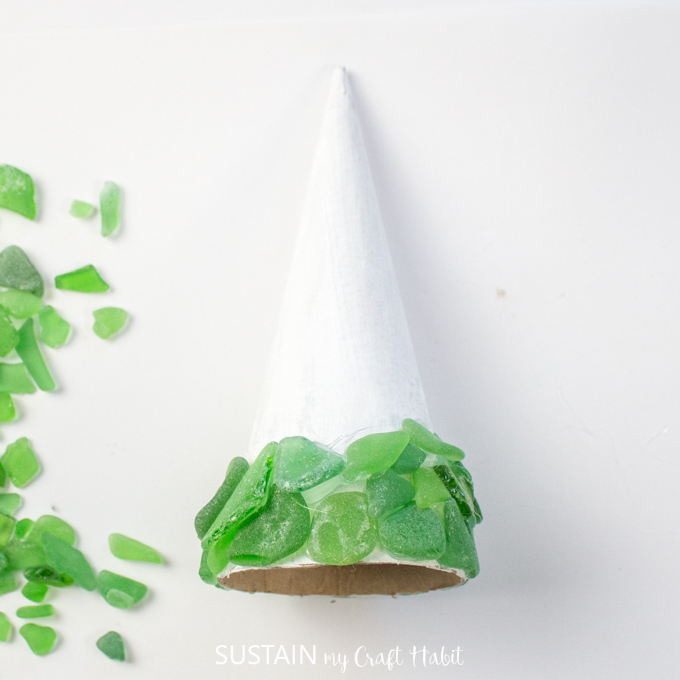
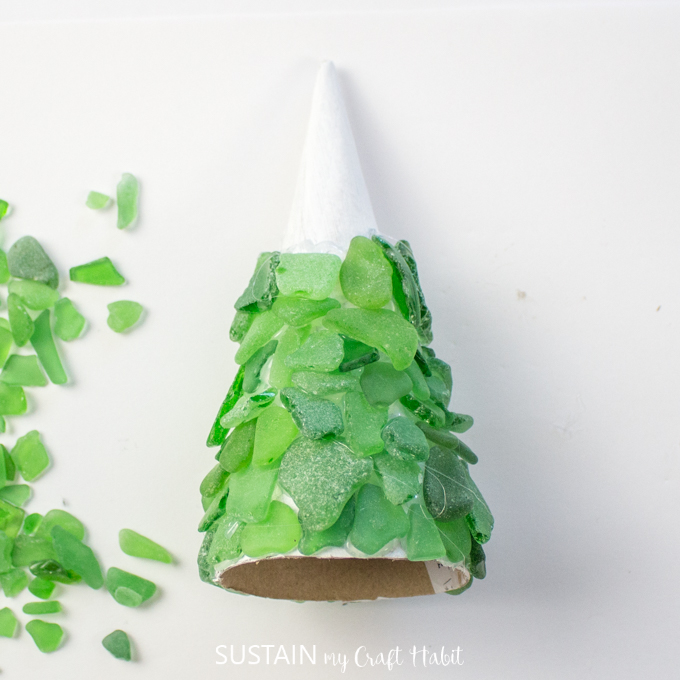
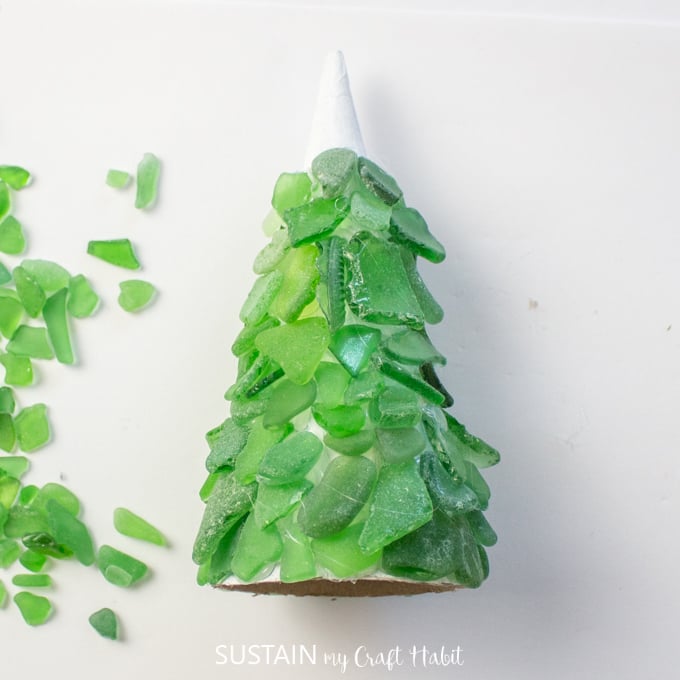
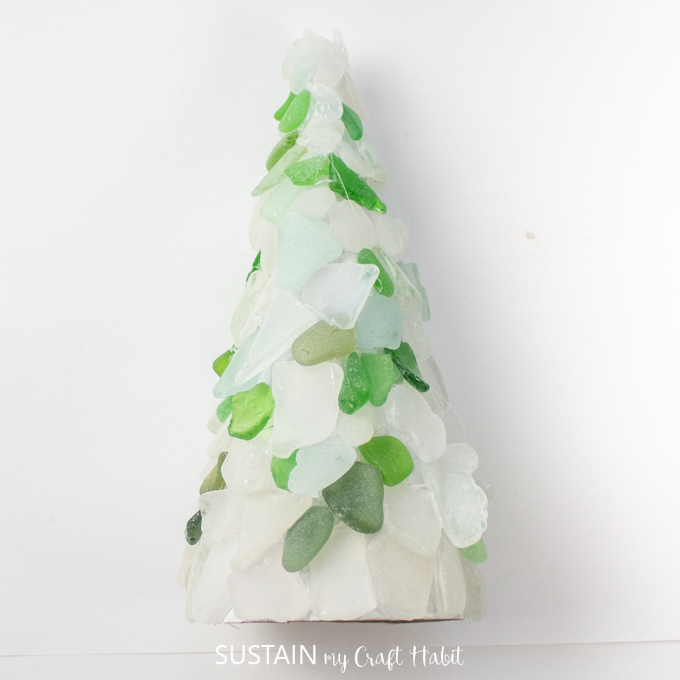
Work your way up to the top of the cone, using different sea glass sizes and colors.
For our second tree, we used a mix of white, green and blue beach glass but you can use any combination you like.
Finishing the Beach Glass Tree:
Once the glue has fully set, clean off any loose glue strands.
Lastly, place the star on the top of each tree by inserting the end of the toothpick into the hole at the top of the cone.

That’s it! Adorable, beachy trees, perfect for your Christmas decorating or as a pretty accessory for the cottage.
They also make thoughtful one-of-a-kind gift ideas for any beach-loving friend.
What do you do with your seaglass?
We originally shared this project idea on Crafts by Amanda
Like it? Pin it for later!
Beach Glass Christmas Tree
Materials
- Seaglass in assorted sizes and colors
- Paper Mache Cardboard Cones 7” high, set of 2
- Starfish embellishments 1 for each tree
- Toothpicks 1 for each tree
- Hot glue gun with clear glue sticks
- Americana Acrylics in snow white
- ¾" flat paintbrush
- Awl or other sharp pointed tool
Instructions
- Preparing the Cones, Wrap a piece of scotch tape approximately ¾” from the base.
- Using a utility knife or a good pair of scissors, cut along the taped edge to reduce the height of the cone.
- Next, paint the cones and toothpicks using an acrylic paint in white. Leave the paint to dry fully before moving on to the next step.
- Poke a hole through the top of the cone using a sharp pointed tool such as an awl or a wooden skewer. The toothpick is likely not strong enough to break through the paper mache.
- Preparing the Star, apply a dab of glue to the back side of the starfish and place one of the painted toothpicks down on top so one end hangs past the starfish. Hold the toothpick in place until the glue sets. Put aside for the time being.
- Applying the Seaglass, preheat the hot glue gun and remember to work quickly as the glue from the glue gun sets quickly but work carefully to avoid injury from the hot glue.
- Starting at the base of the cone, apply a dab of glue as shown and press one piece of seaglass over the glue. Don’t extend the seaglass past the base of the cone.
- Continue around the rim of the cone glueing one seaglass at a time.
- For the second row of seaglass, overlap the bottom edge of the pieces with the top each of the seaglas from the previous row.
- Work your way up to the top of the cone, using different seaglass sizes and colors.
- Finishing the Seaglass Christmas Tree: once the glue has fully set, clean off any loose glue strands.
- Lastly, place the star on the top of each tree by inserting the end of the toothpick into the hole at the top of the cone