

This simple DIY hydrangea resin pendant is a nice reminder of warm summer days year-round. If you’ve ever wondered about how to make resin jewelry with flowers, this is likely the easiest project you can try! We’re sharing our step-by-step tutorial along with techniques for preserving flowers in resin.
DIY Resin Jewelry with Dried Flowers
Disclosure: This project is sponsored by ETI-USA and the Resin Crafts Blog. All opinions are our own. Also, this post contains affiliate links for you shopping convenience. You can read our full disclosure statement here.
A few weeks ago I went around collecting some petals and blooms from all the flowers in my garden. I placed them between some pages of a heavy book and almost forgot about them.
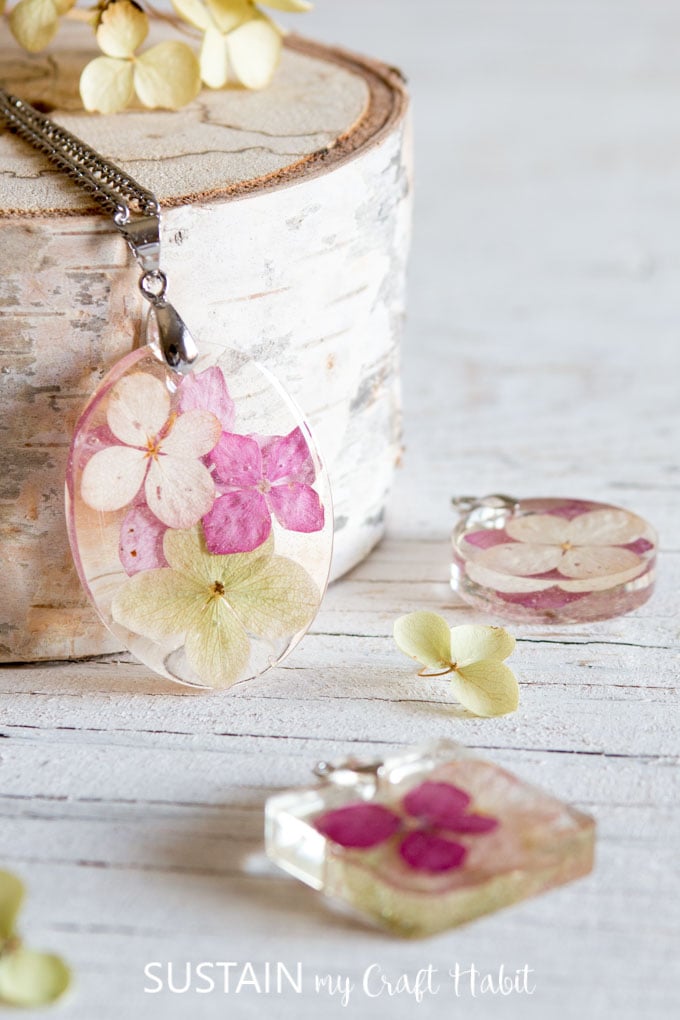
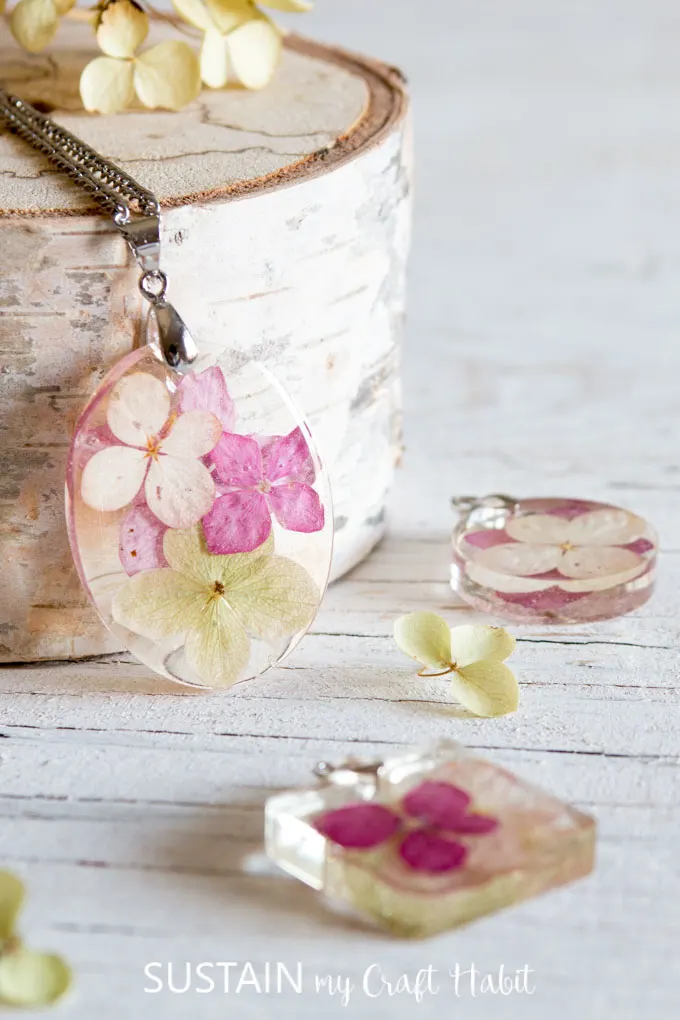
As I was moving them around I came across a bunch that were actually from last year. Several different colors from my hydrangea bush from pink to purple and green that I had placed between some paper towels. I was pretty pleased that the color kept so well and I thought that they would make a really pretty resin pendant.
We can’t believe that it’s been almost a year and a half already since we joined the Resin Crafts Blog Ambassador Team. In that time we’ve had so much fun testing our creativity and coming up with different ways to use a variety of ETI-USA products.
Some of our favorites to date have been our DIY driftwood serving tray and our hand-lettered wood slice keychains. But really our favorite use for the resin is to capture a little bit of nature and preserve it to enjoy all year round.
Resin jewelry especially makes such an impressive yet relatively inexpensive gift idea for anyone on your list for the holidays, birthdays, teachers gifts and even for weddings. For about $50 we picked up all the supplies needed off of Amazon to make at least 50 different jewelry pieces.
How to Preserve Flowers in Resin
There are many reasons to preserve flowers in resin including capturing special memories (ie. a wedding bouquet) or simply to carry a bit of summer with you year round.
The trick to preserving flowers in resin is making sure they are completely dried first! There are several ways to accomplish this:
- Air dry – hang larger flowers in a dark area with good air flow for a couple of weeks;
- Pressed in a book – flatten thinner flowers between the pages of a book, place a heavy object on top and let dry for a couple of weeks;
- Pressed with an iron – as we talked about in our post on creative ways to use the Cricut EasyPress, you can use an iron to press and dry flower petals;
- Dessicating powder – this works great if you need to retain the 3D quality of the flower but takes several days. You can speed it up by using the microwave;
Once your flowers are completely dried, then you can begin resin crafting. If there is any moisture at all in the flower, it will react with the resin and chance color (usually to an ugly brown) within a couple of weeks.
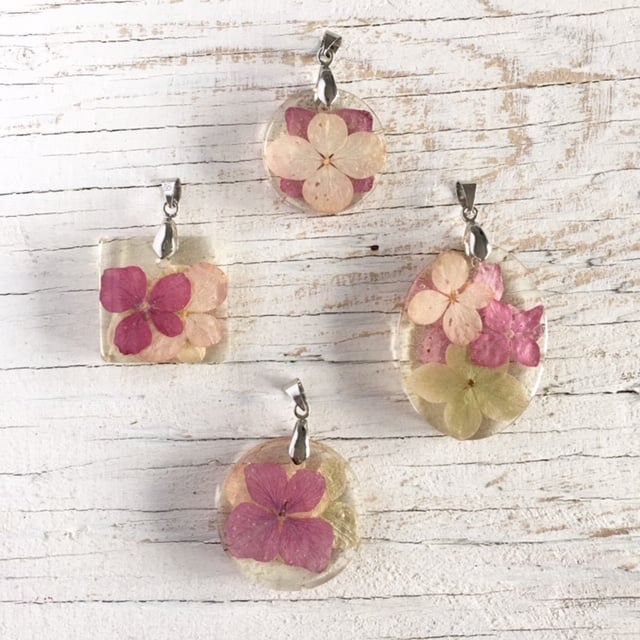
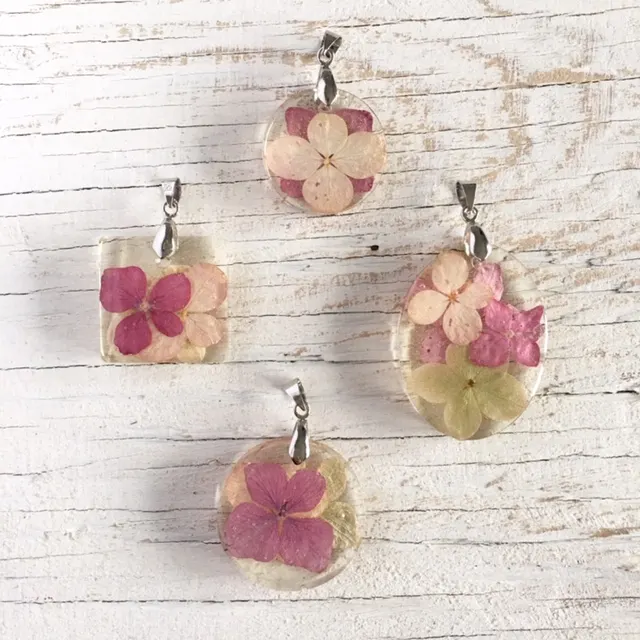
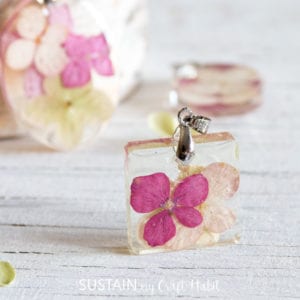
You can embed any dried flower and add color (or even glitter) to the resin for an endless number of project possibilities. For example, we make beautiful DIY lavender flower pendants and pretty floral fridge magnets. For this jewelry project, however, we chose to keep it simple and let the natural beauty of the hydrangea flowers shine.
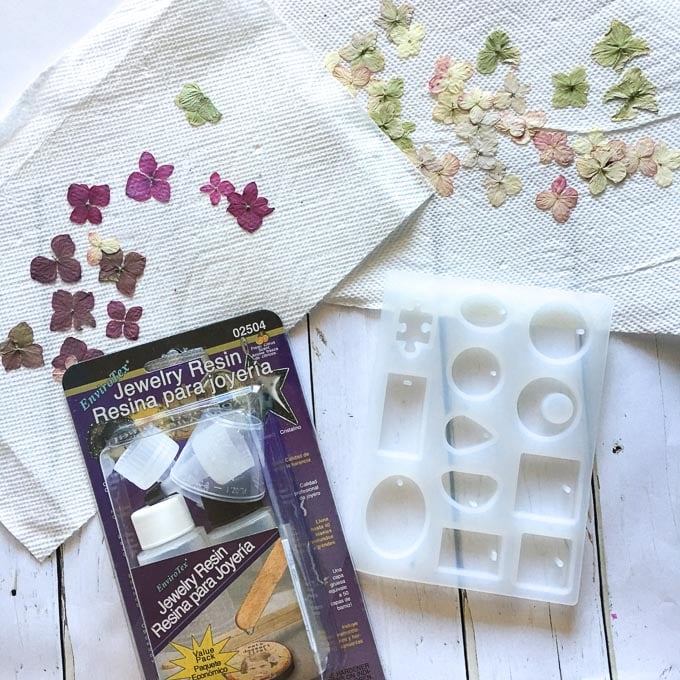
Materials needed to make these resin pendants with flowers:
- Envirotex Jewelry Resin (use our code CRAFTHABIT10 for 10% off your order!)
- Plastic measuring cups
- Silicone Resin Jewelry Molds (this starter kit has a great selection of molds and accessories and provides beautiful results)
- Pressed and dried hydrangea flowers (your own or purchase pressed flowers here)
- Gloves, wooden craft sticks, toothpicks, paper towels, small paint brush, straw
- Pendant bails

How to make a pressed flowers necklace:
Check the size of the dried hydrangeas to ensure they’ll fit inside the jewelry mold.
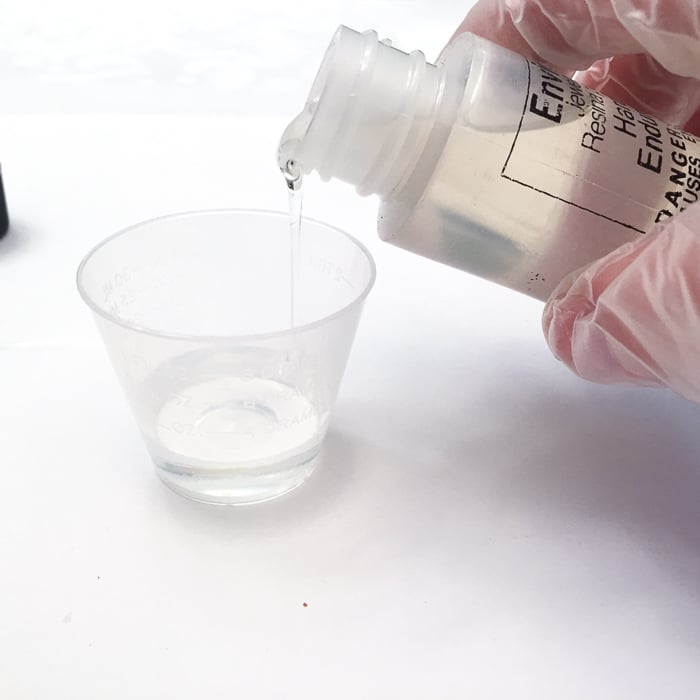
For best results be sure to read the manufacturers instructions provided in the EnviroTex Jewelry Resin packaging. Work in a well ventilated area using gloves and a respirator.
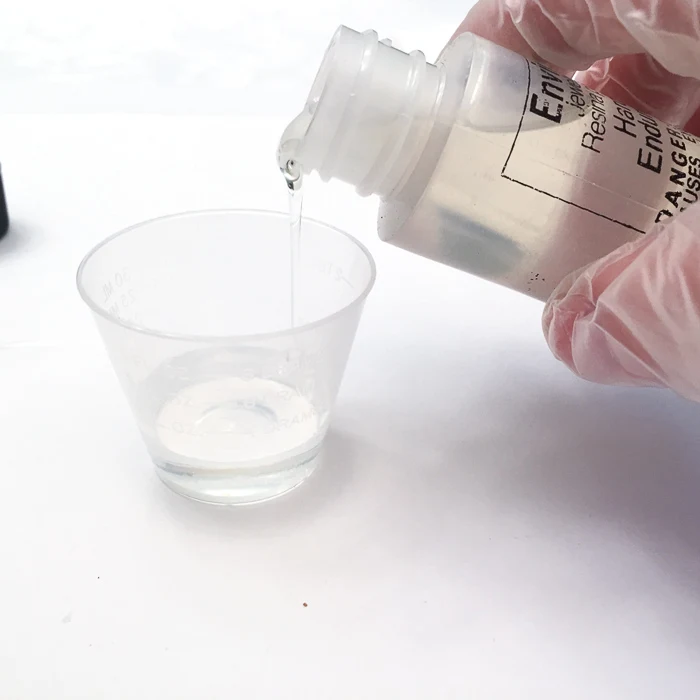
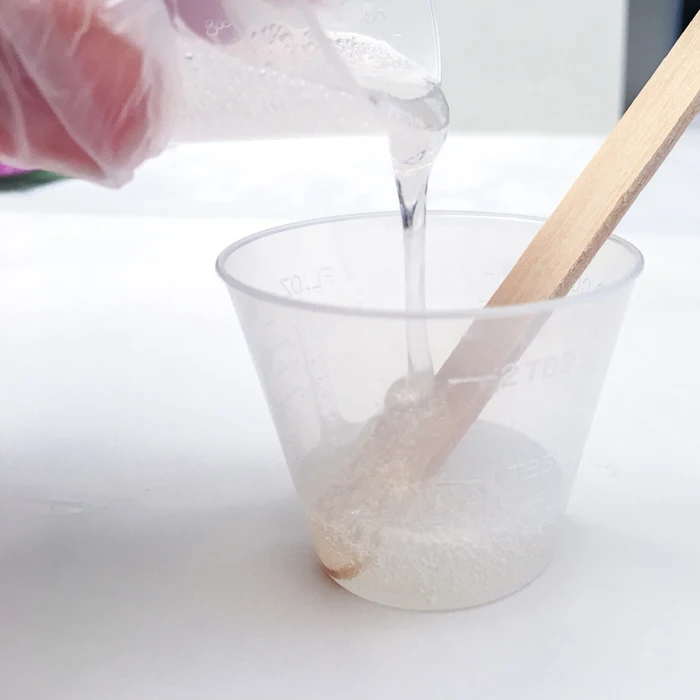
Mix exactly equal amounts of Resin and Hardener into one measuring cup. Stir continuously for 2 minutes, scraping the sides of the container.
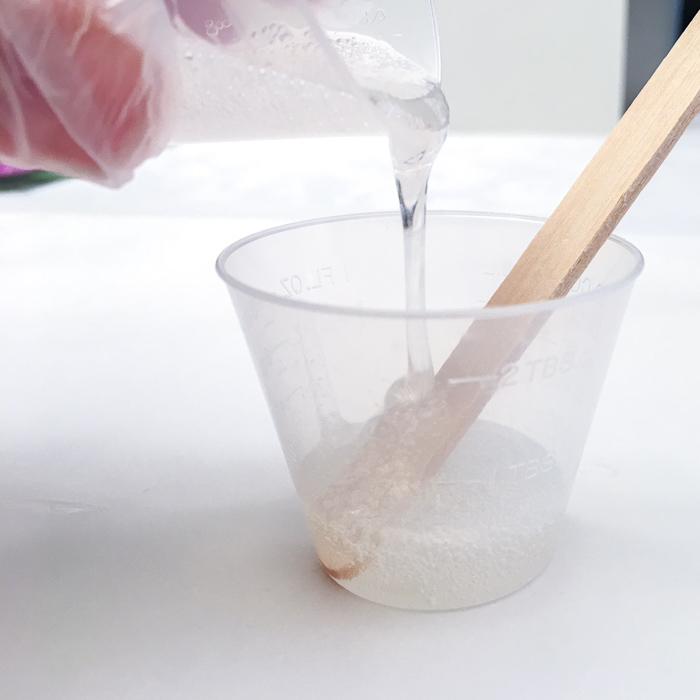
Pour the mixed resin into a second cup and stir for an additional minute, scraping the sides of the container and stir stick.
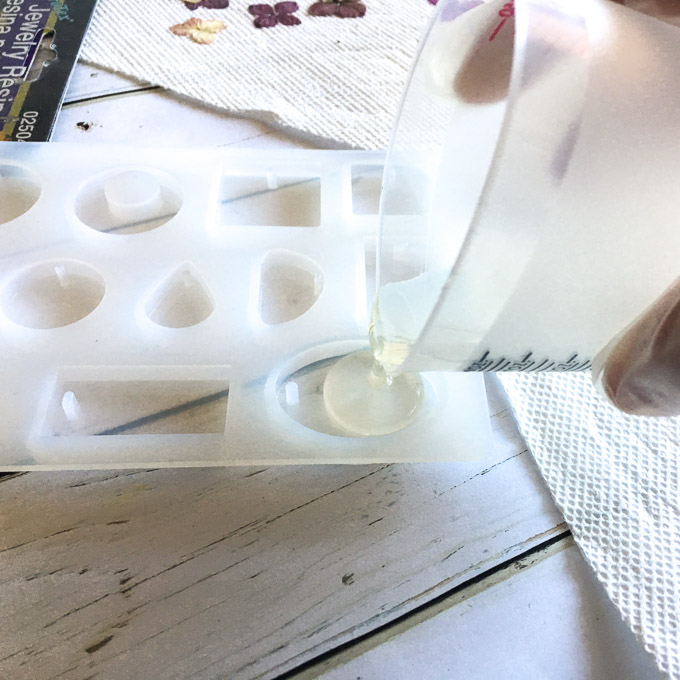
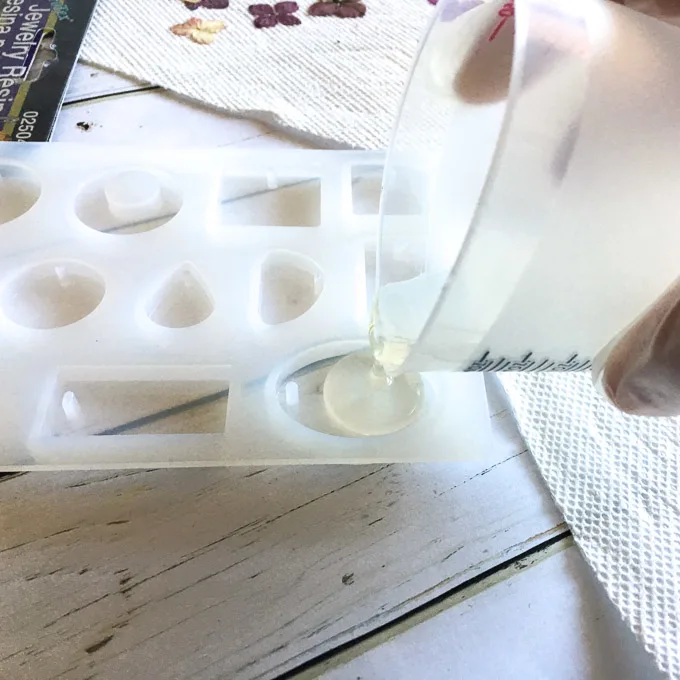
Using the stir stick, carefully dip your stick into the EnviroTex mixture and then pour a small amount of resin into the jewelry resin mold.
Place and arrange the hydrangeas inside the poured resin. Be sure to check for bubbles around the base of the flower and dislodge with a toothpick of necessary.

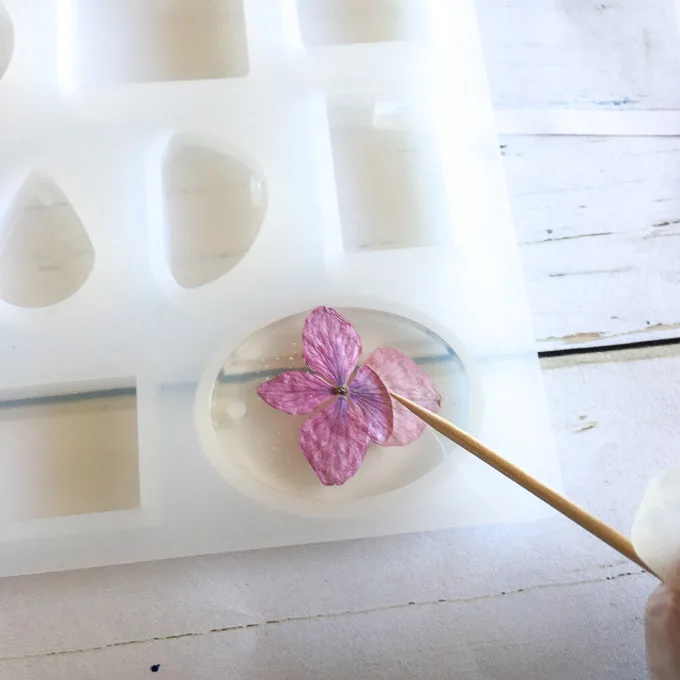
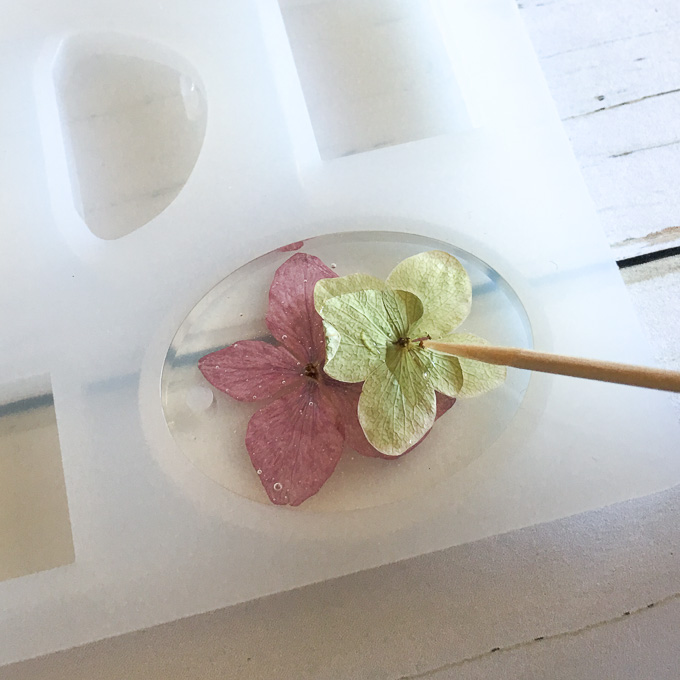
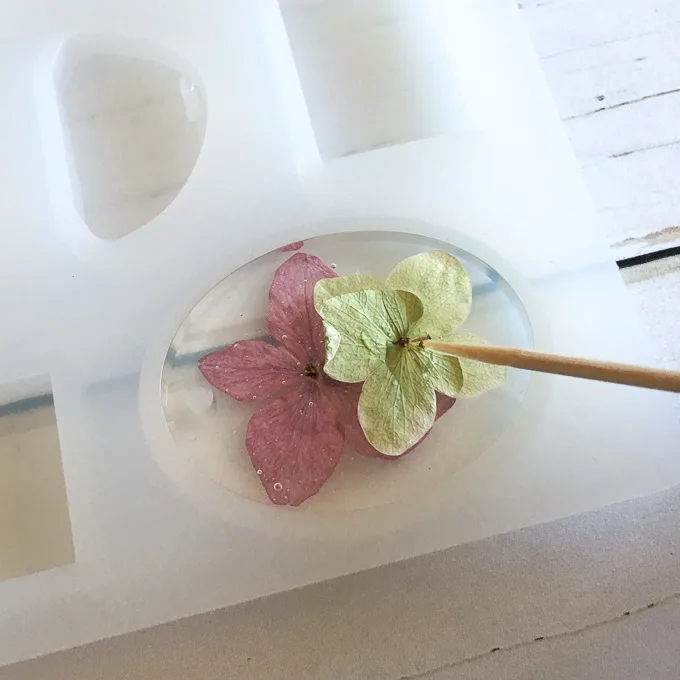
Cover to keep dust from settling in. After about 25 minutes, remove any air bubbles that have risen to the surface by gently blowing over the piece through a straw. Repeat if necessary after another 15 minutes. Cover and allow to fully cure overnight.
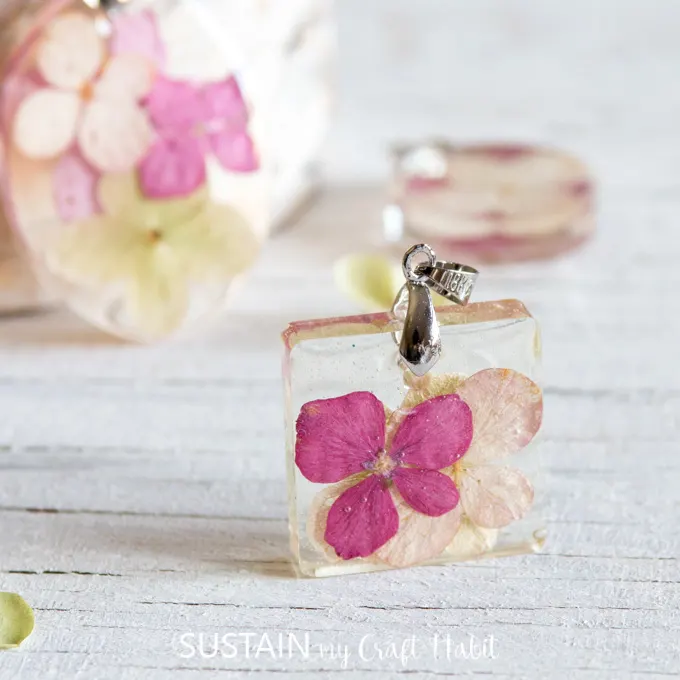
Remove from jewelry mold. Add a pretty jewelry bail to the top of each pendant.

We hope you’ve found this tutorial on how to make resin jewelry with dried flowers helpful. Epoxy resin is so versatile for all your DIY home decor, crafting and jewelry-making needs.
Be sure to hop over to the Resin Crafts Blog to find hundreds of different resin crafting tutorials for inspiration.
Have you tried making jewelry with resin?
Like it? Pin it for later!

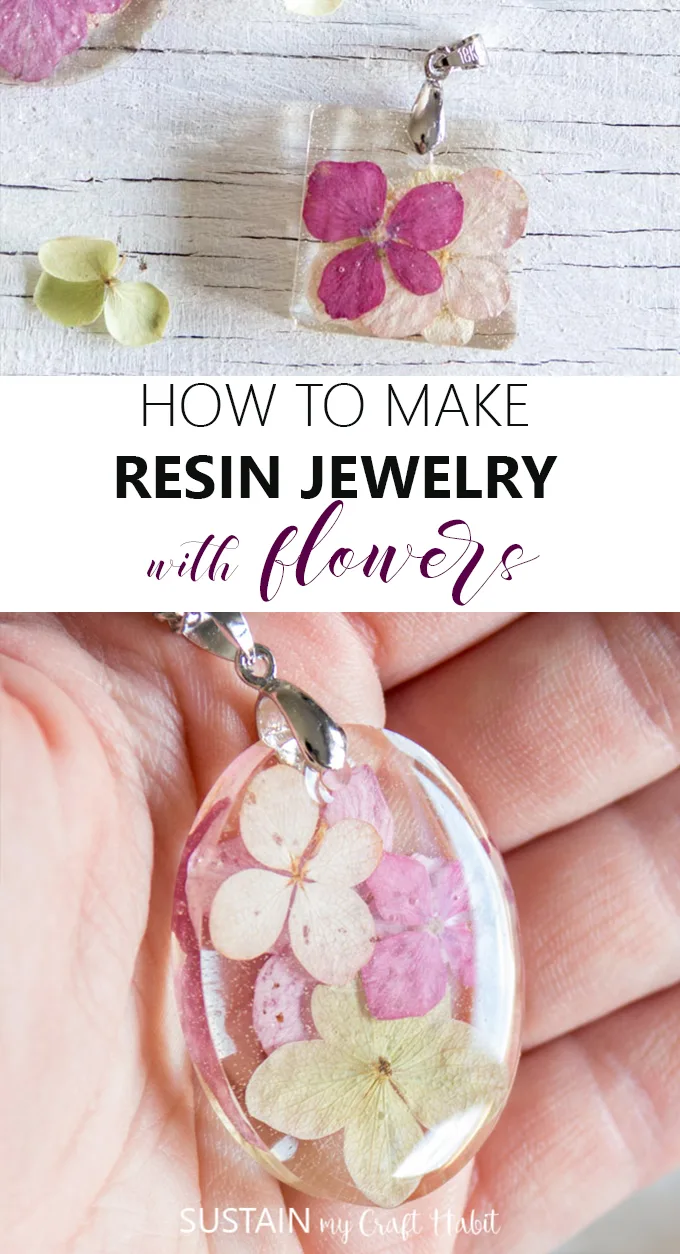

How to Make Resin Jewelry with Flowers
Equipment
- Plastic measuring cups
- Silicone Resin Jewelry Molds
- Pressed and dried hydrangea flowers
- Gloves
- Wooden craft sticks
- Toothpicks
- Paper towels
- Small paint brush
- Straw or small kitchen torch
- Pendant bails
Instructions
- Mix exactly equal amounts of Resin and Hardener into one measuring cup. Stir continuously for 2 minutes, scraping the sides of the container.
- Pour the mixed resin into a second cup and stir for an additional minute, scraping the sides of the container and stir stick.
- Using the stir stick, carefully dip your stick into the EnviroTex mixture and then pour a small amount of resin into the jewelry resin mold.
- Place and arrange the hydrangeas inside the poured resin. Be sure to check for bubbles around the base of the flower and dislodge with a toothpick of necessary.
- Cover to keep dust from settling in. After about 25 minutes, remove any air bubbles. Repeat if necessary.
- Cover and allow to fully cure overnight.
- Remove from jewelry mold. Add a pretty jewelry bail to the top of each pendant.
Emily Wilson
Thursday 10th of October 2019
Great article Jane and Sonja! I completely agree with you, ICE resin jewelry is an inexpensive, yet impressive gift. Working in a dust free area and wearing gloves is a great rule of thumb when making resin jewelry.
Tomika
Saturday 28th of September 2019
This project looks so awesome. I am trying to get my nerve up to try doing more with epoxy. I want to get started with this type of stuff rather than just wood furniture and such that I normally use resin for. As someone who likes to be informed before any project, I have to say thank you for such an informative article :).
Kari
Sunday 17th of March 2019
Did one package of the jewelry resin allow yiu to make approximately 50 pieces or did you have to purchase multiple? Can you use any EnviroTex resin?
Crissy
Wednesday 24th of October 2018
Hi Sonja and Jane! Thanks for sharing your link to this post. I absolutely love this idea! As I mentioned to you, I love pressing flowers and bought resin to try my hand at some flower-resin crafts. This is the perfect way to combine the two! I can't wait to try my hand at this. Pinning! xo
Linda aka Crafty Gardener
Wednesday 24th of October 2018
I love this idea and must look onto the kits.