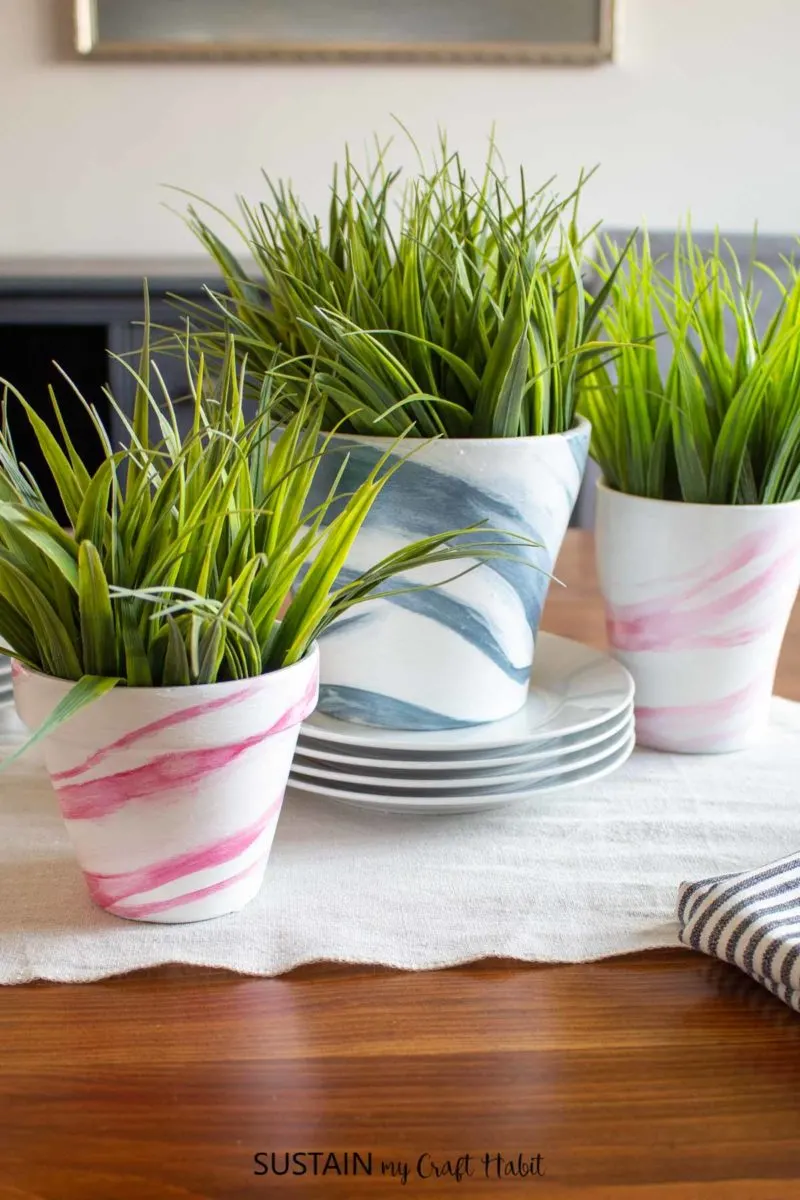
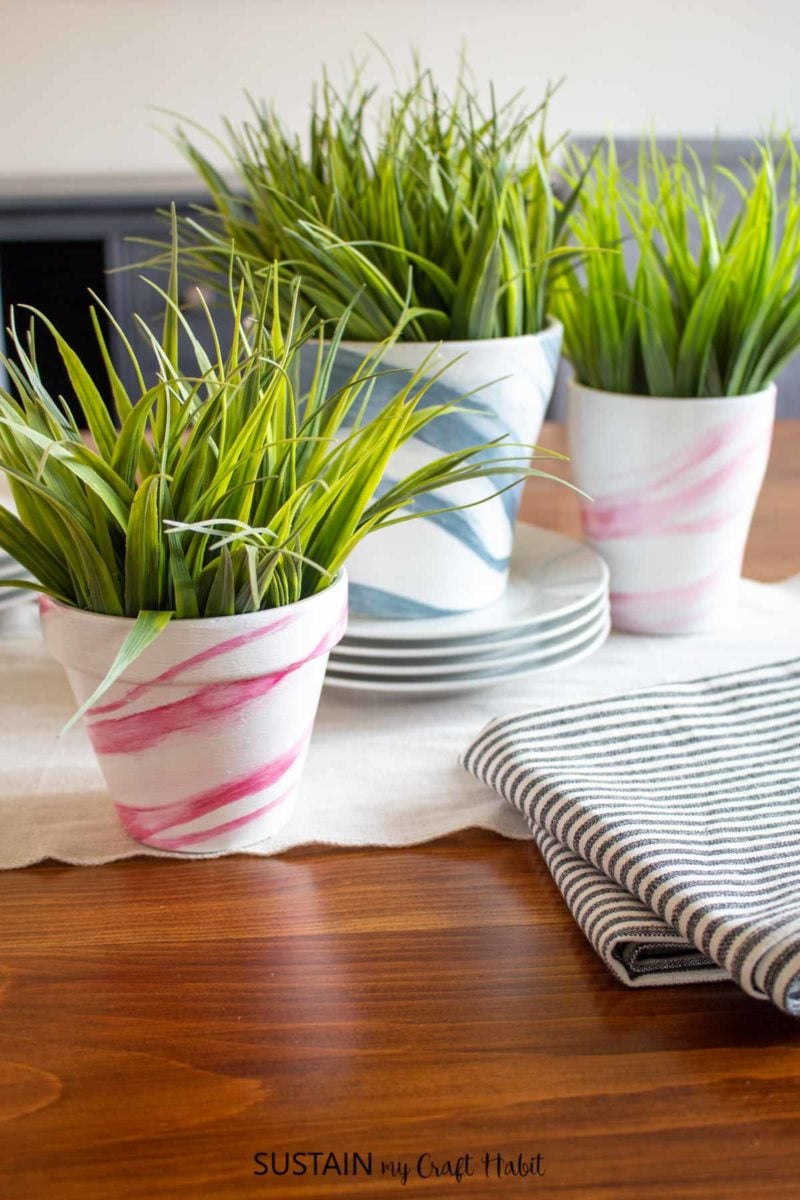
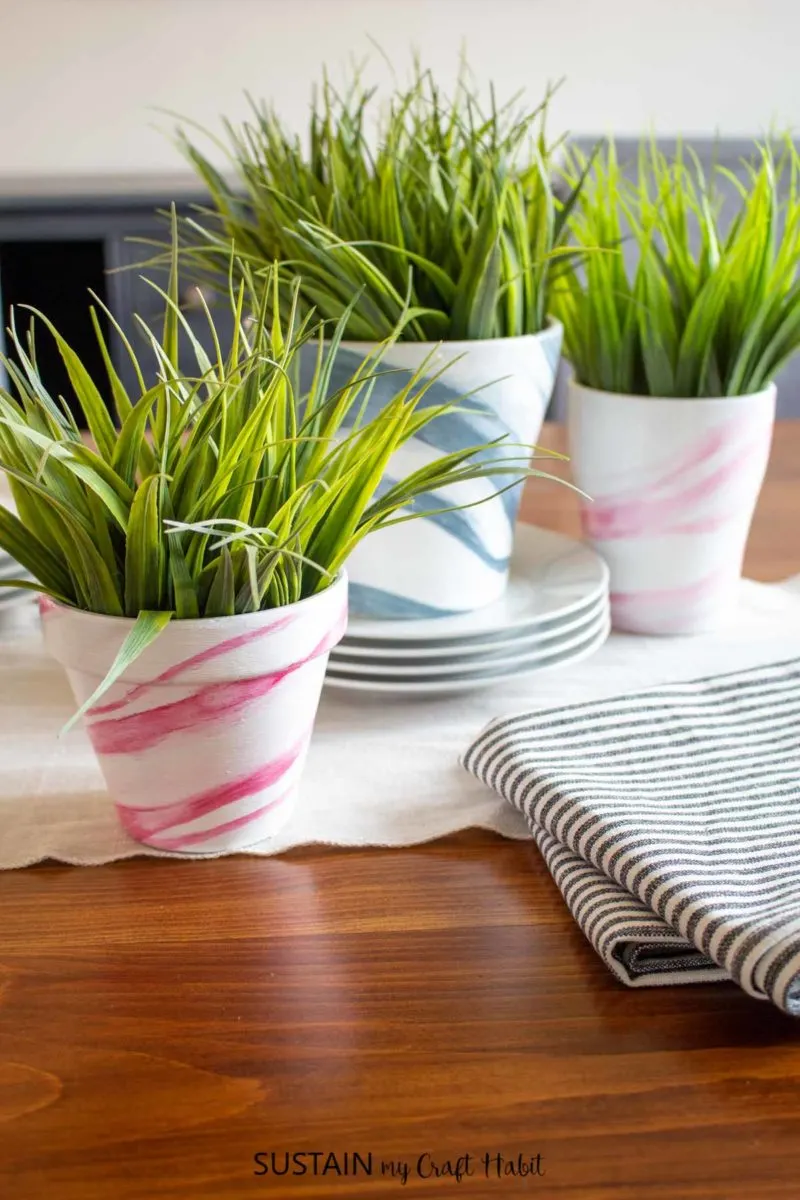
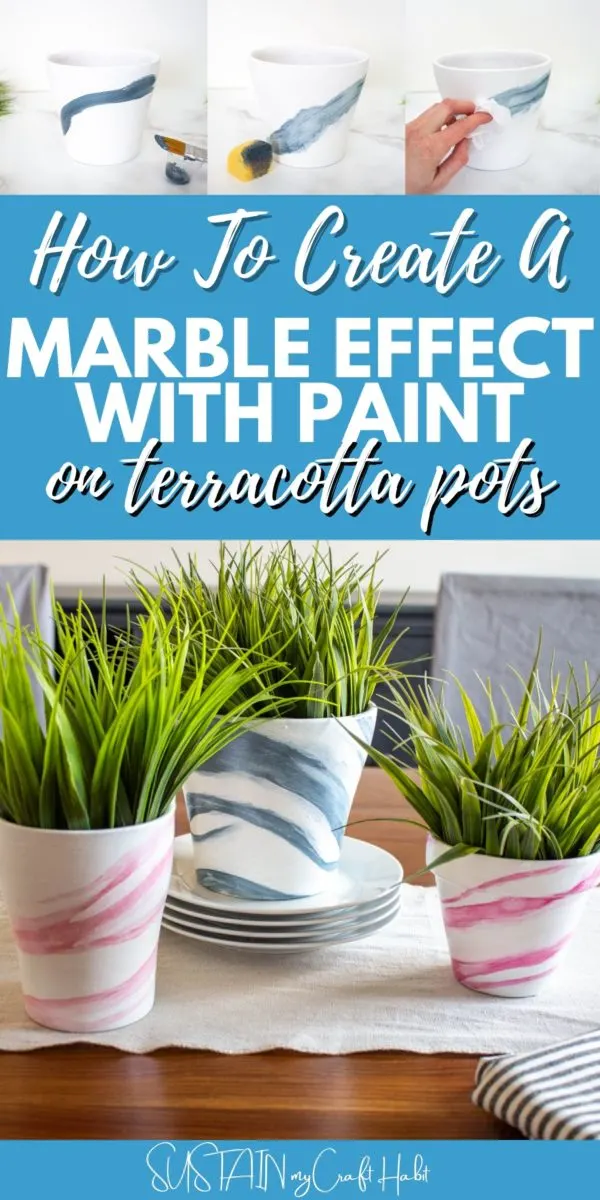
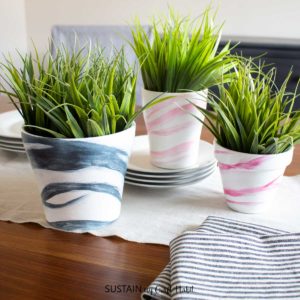
Hi creative friends! Today we’re creating the look of marble on a set of inexpensive terracotta pots using a mix of matte and metallic paints. After finishing these pots and seeing how great they turned out, I’m left wondering what other surfaces I could create a similar marble effect on!

Creating the Look of Marble with Paint
I was inspired to DIY a marble effect on my inexpensive terracotta pots after seeing a pretty marbled vase at Anthropolgie earlier this year. Since the pot itself was handcrafted, I thought to give a similar technique a try! And after some research online, I came across an artist creating a marble effect with paint on a large focal wall. It was pretty incredible!

And although I styled them with faux grasses, I sealed the terracotta pots before hand (and after) just in case I ever wanted to use the pots for fresh plants and flowers. Terracotta absorbs all moisture when wet so it’s important to not forget this step when crafting with this type of a surface. Otherwise, the paint will crack and peel over time.
Materials Needed:
Disclosure: This post continues affiliate links for your shopping convenience. You can find our full disclosure policy here.
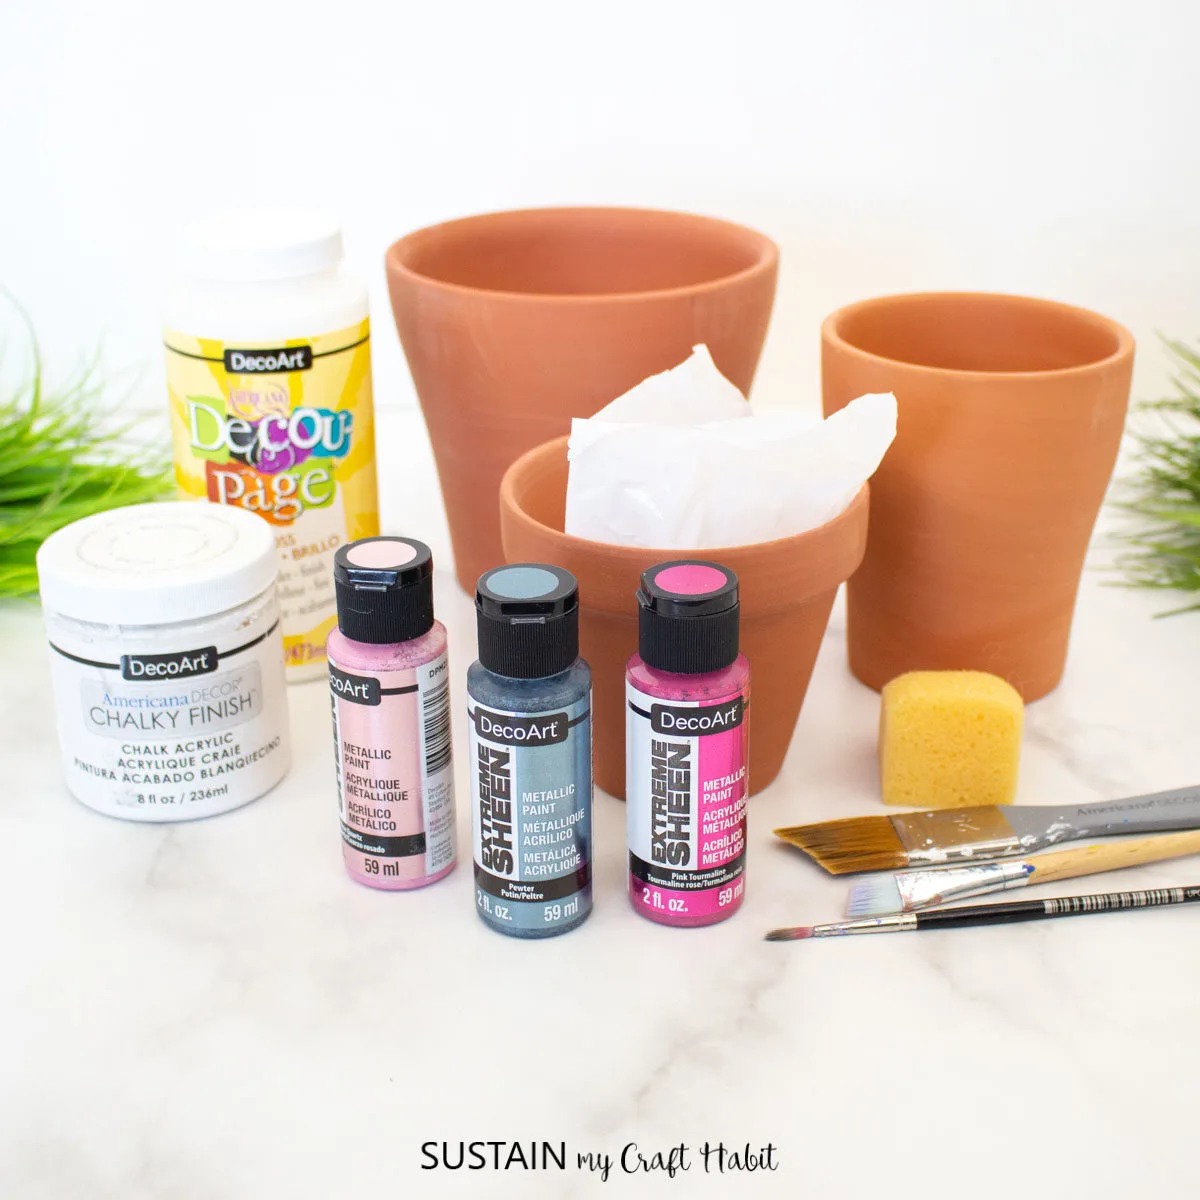
- Set of 3 terracotta pots in different sizes and shapes
- Extreme Sheen in Pewter, Rose Quartz, Pink Tourmaline
- Americana Decor Chalky Finish in Everlasting
- Americana Multi Purpose Sealer
- 1” angled paint brush
- Fine tip angled brush
- Small sponge
- Small Plastic bag

How to Create a Marble Effect with Paint on Pots:
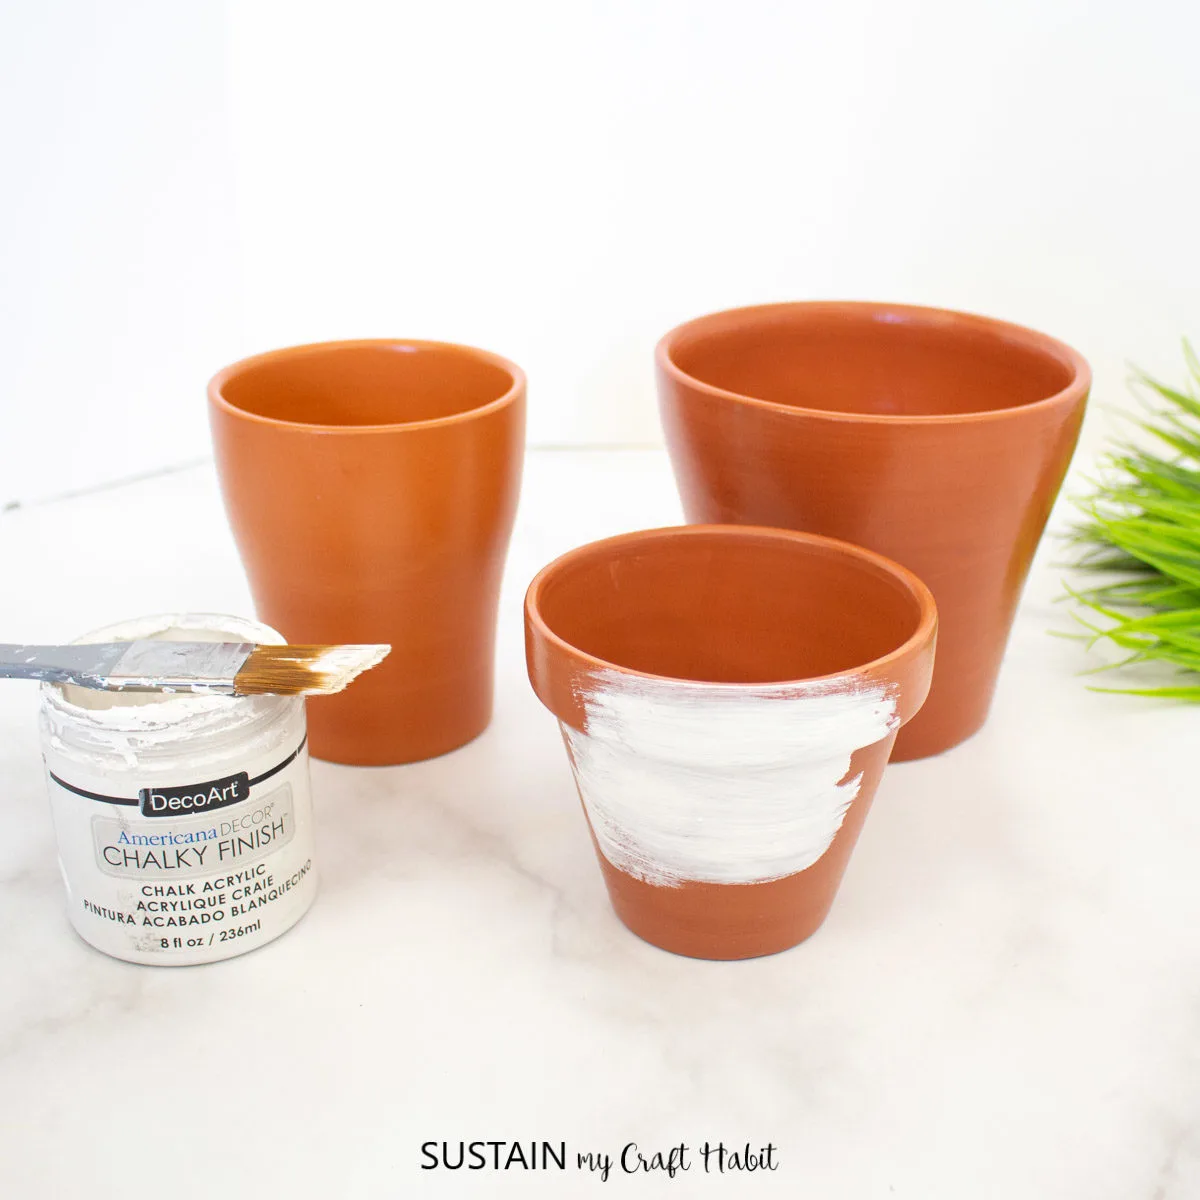
Firstly, apply a coat of sealer to the inside and outside of the terracotta pots and leave them to dry fully.
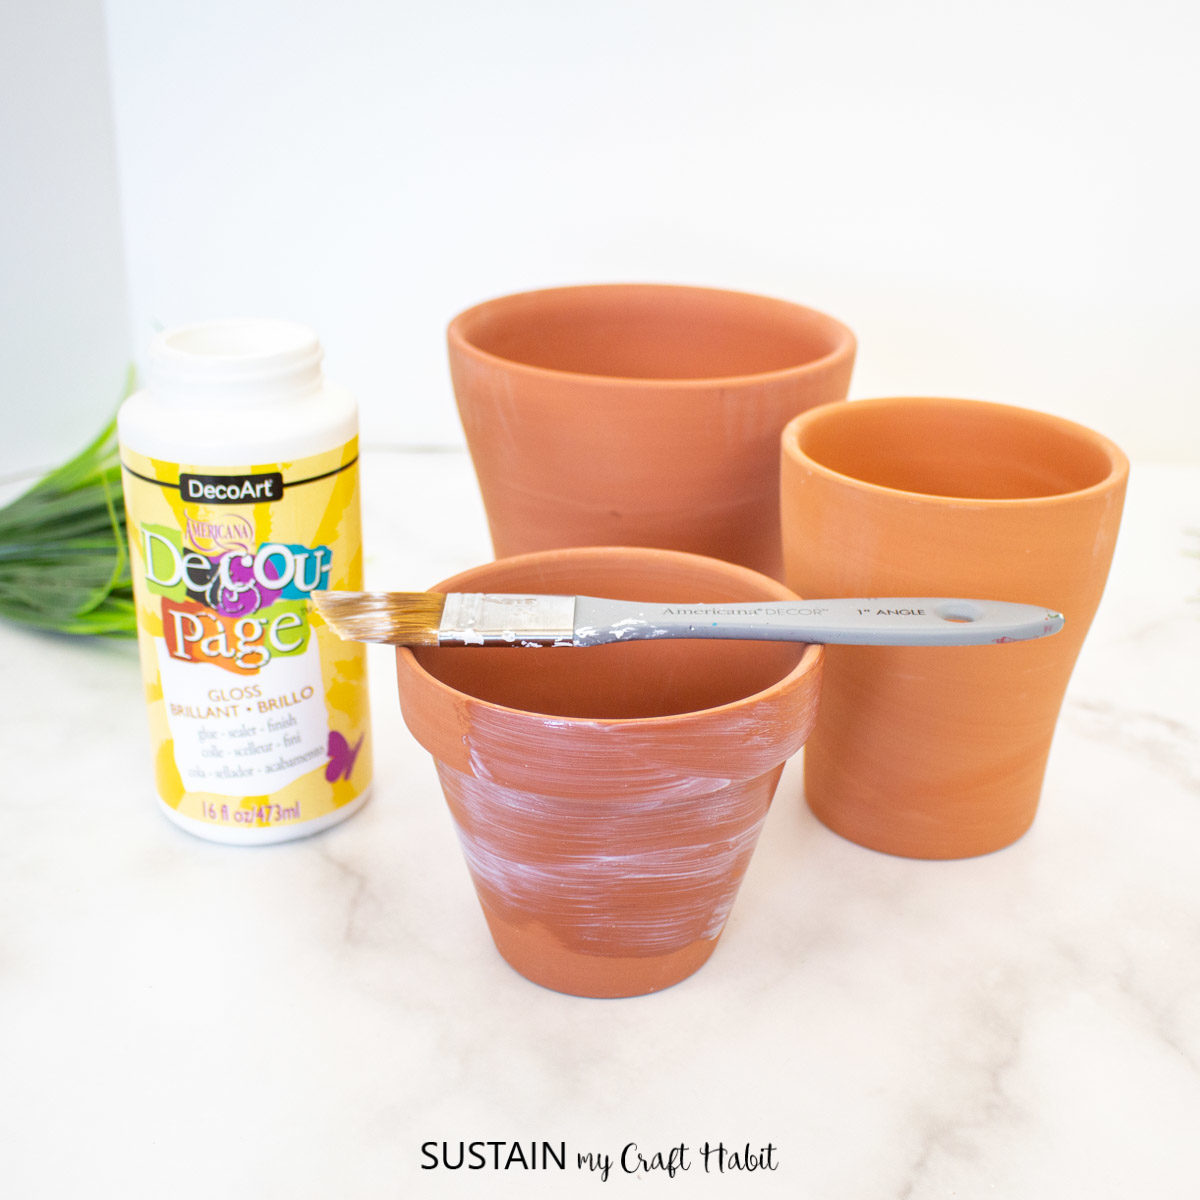

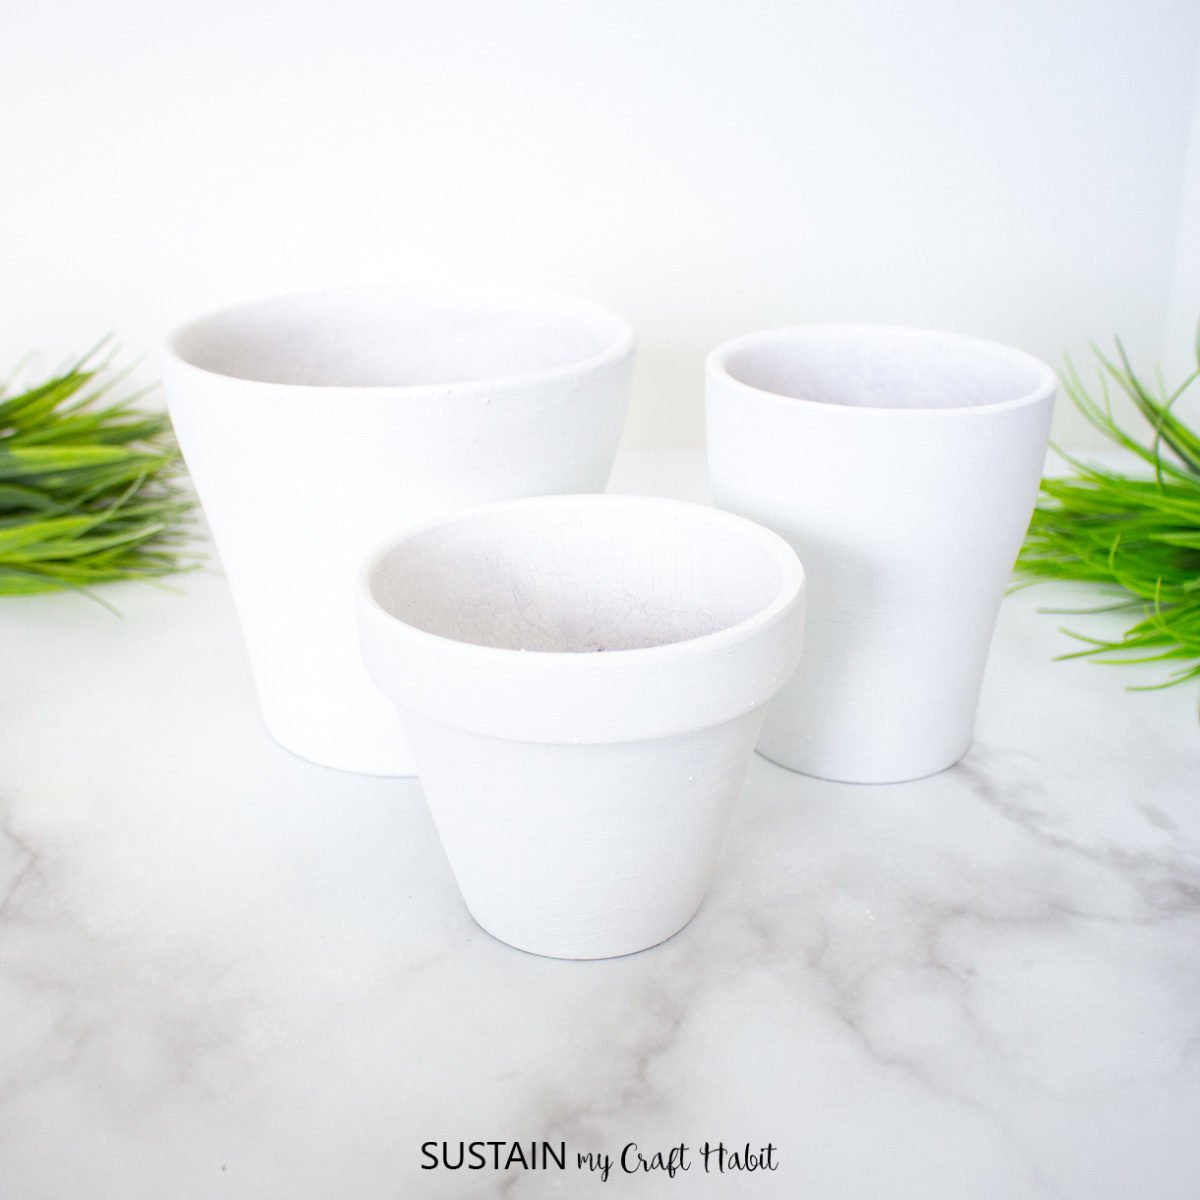
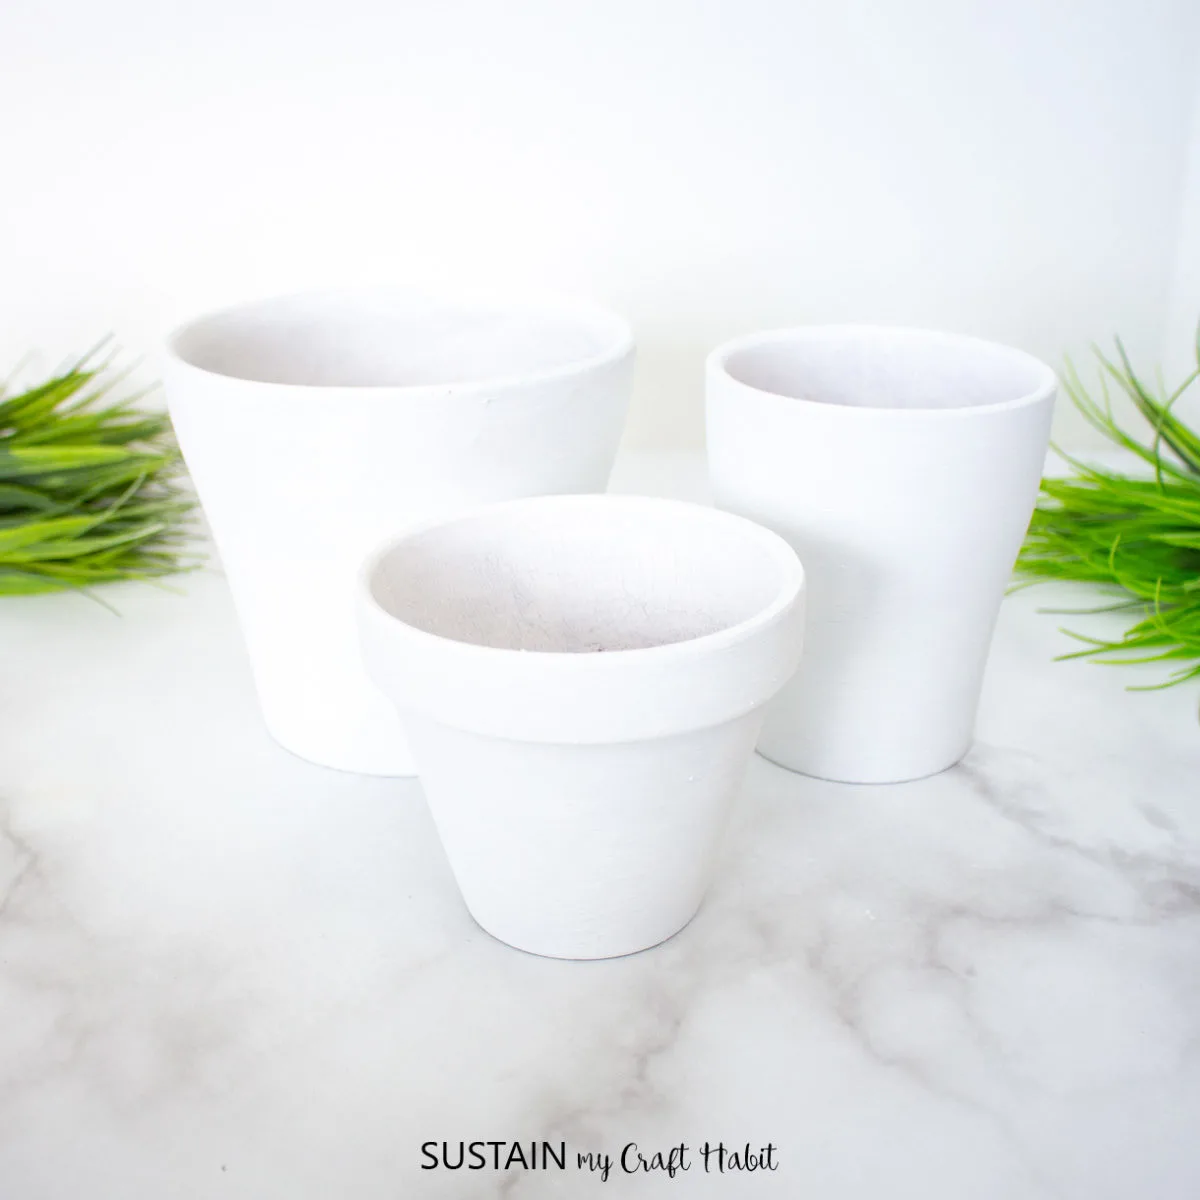
Paint the terracotta pots in Chalky Finish Everlasting (or any acrylic white paint will do). Let the paint dry fully and then apply a second coat of paint for better coverage. Leave the pots to dry fully and then add additional coats if desired.

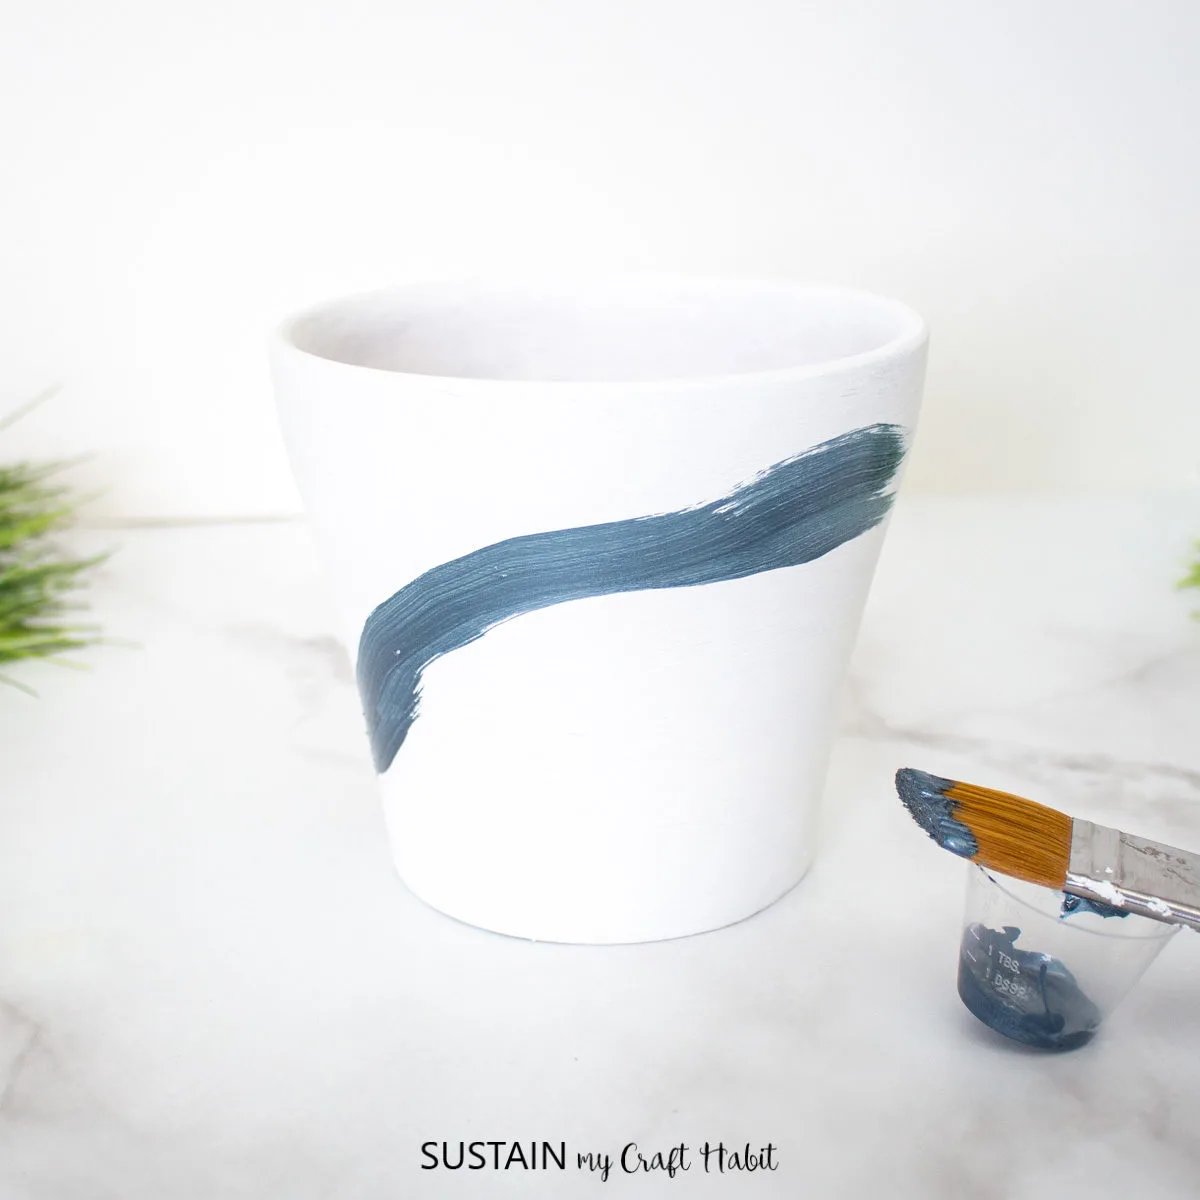
Work on one pot at a time and also work quickly between the marbling steps. The paint needs to be wet as your work through the steps.
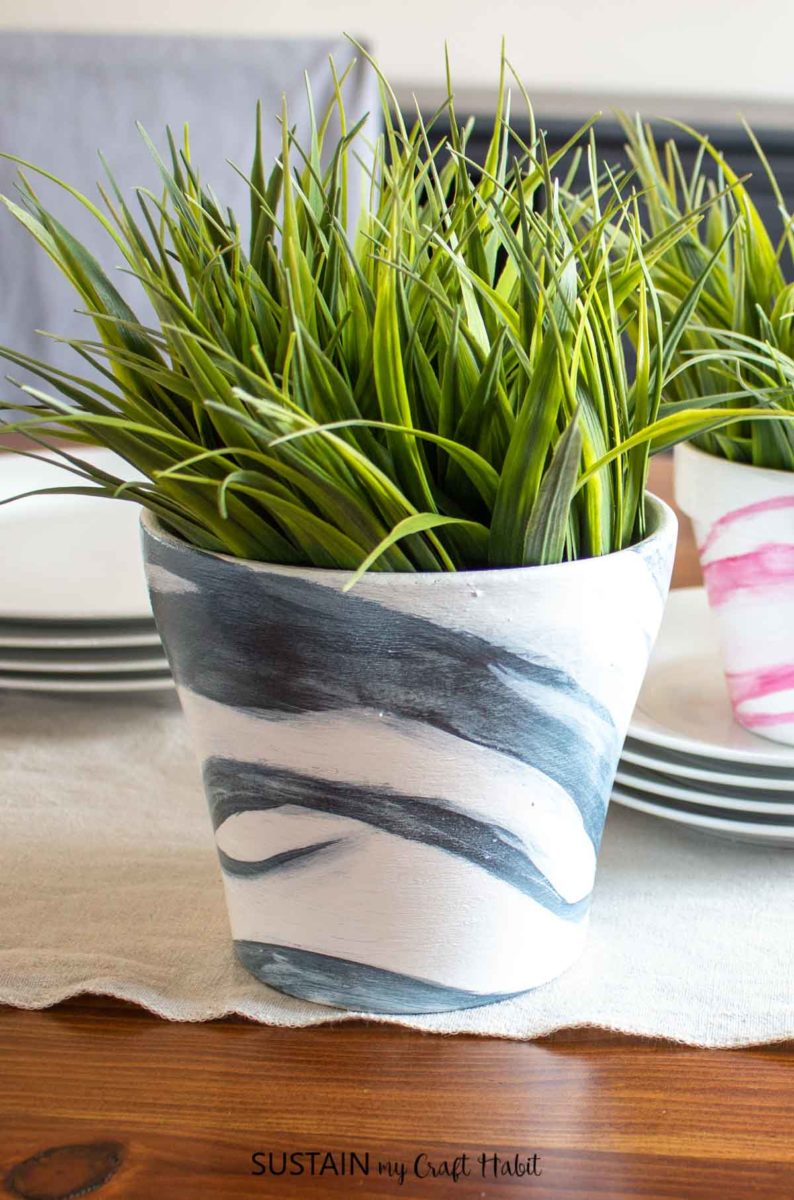
Using a 1” angled brush apply a coat of Extreme Sheen in Pewter in a single flowing stroke around the entire pot.
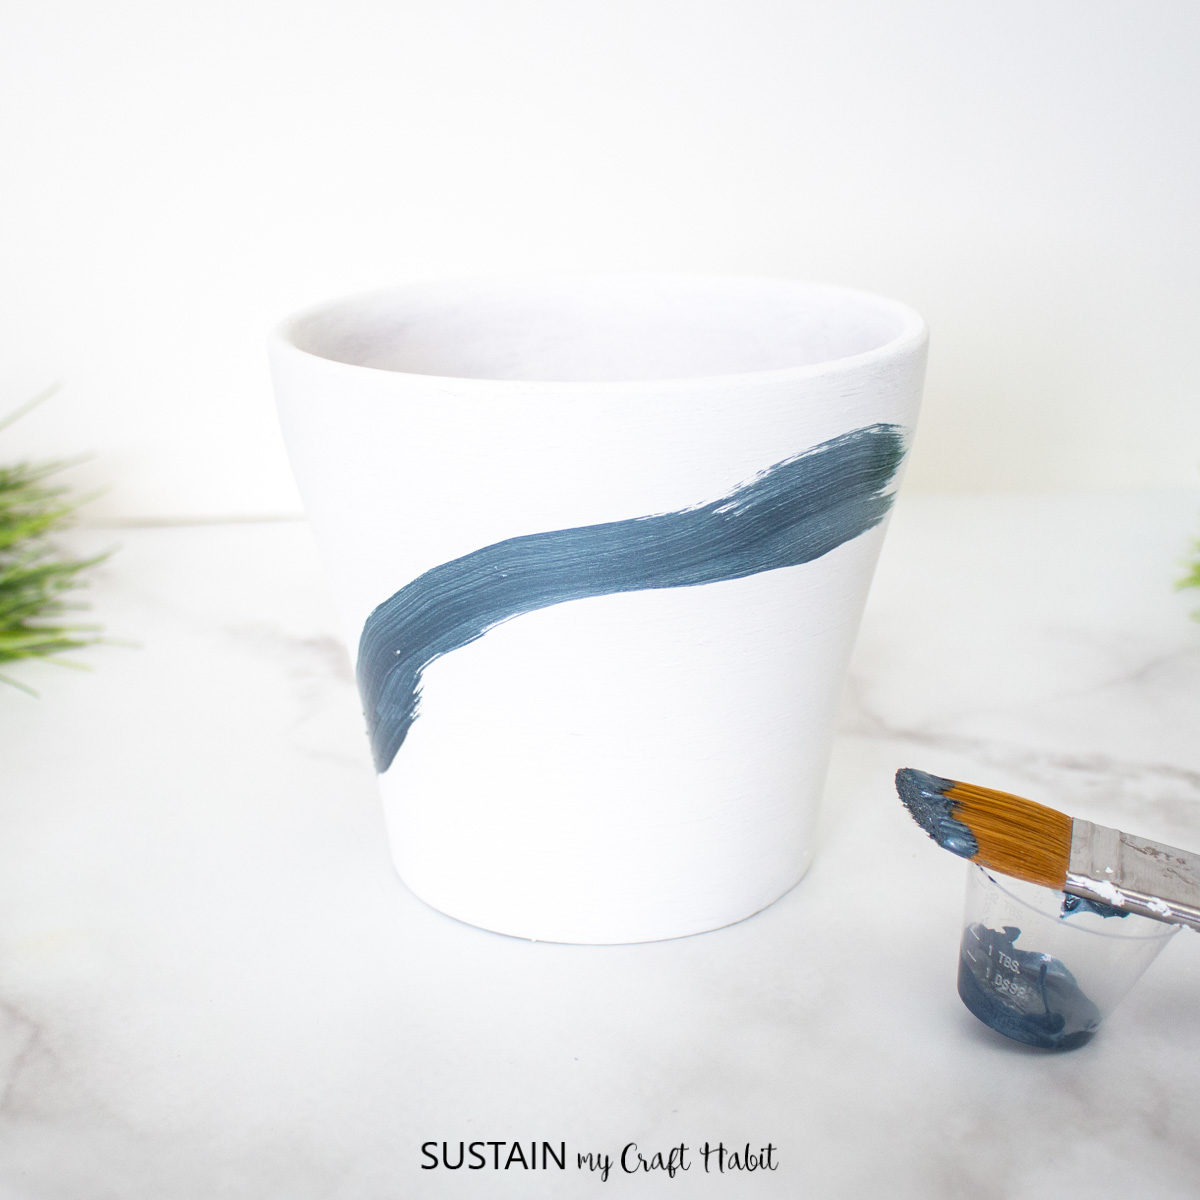
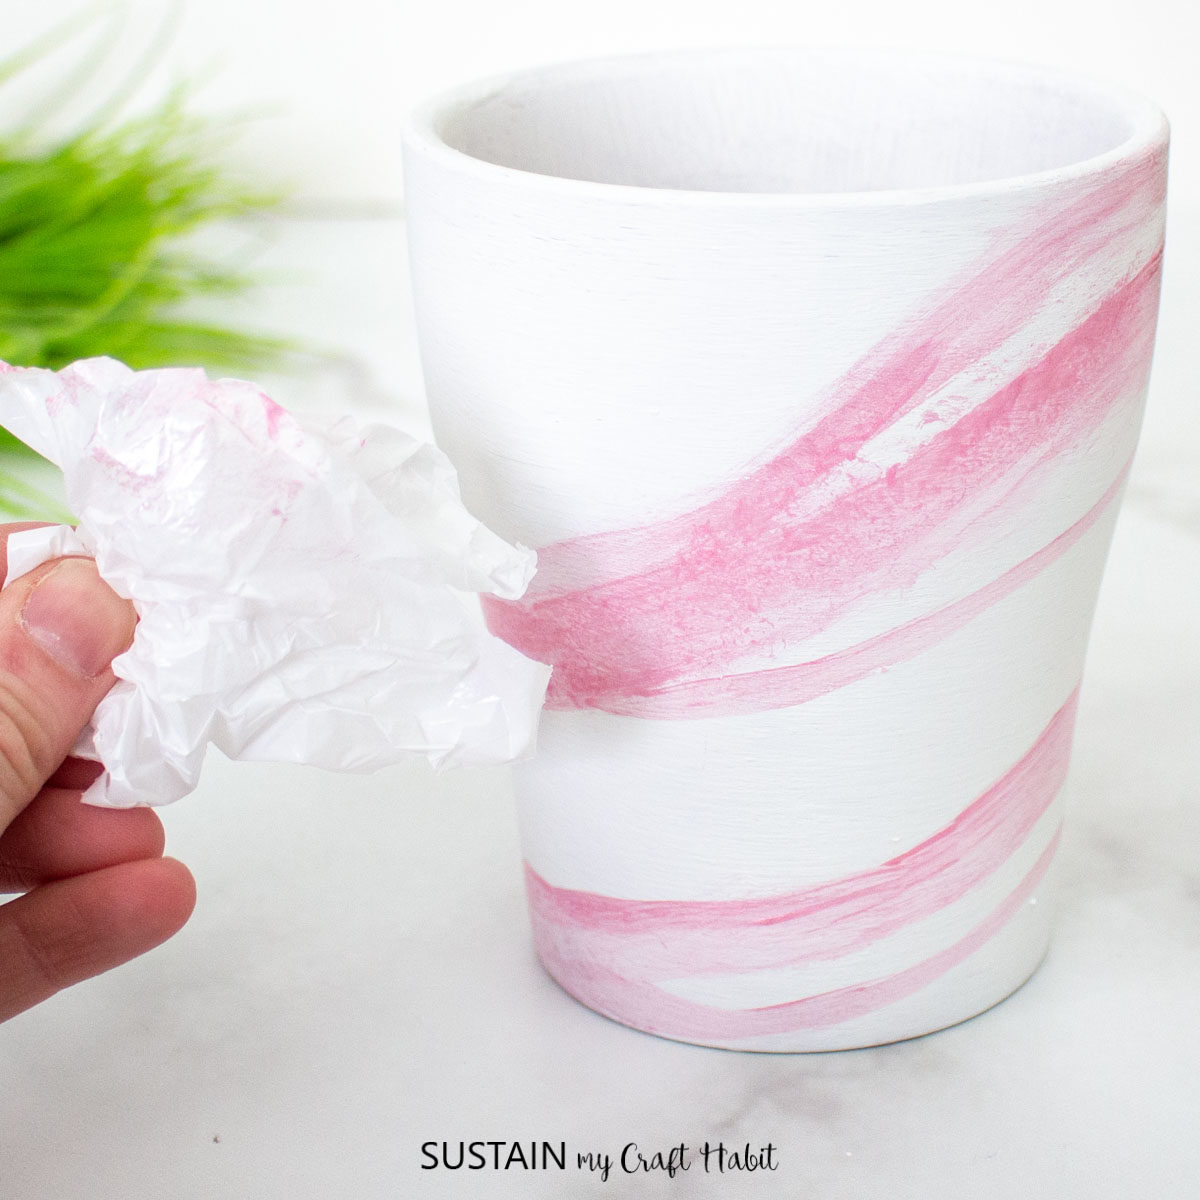
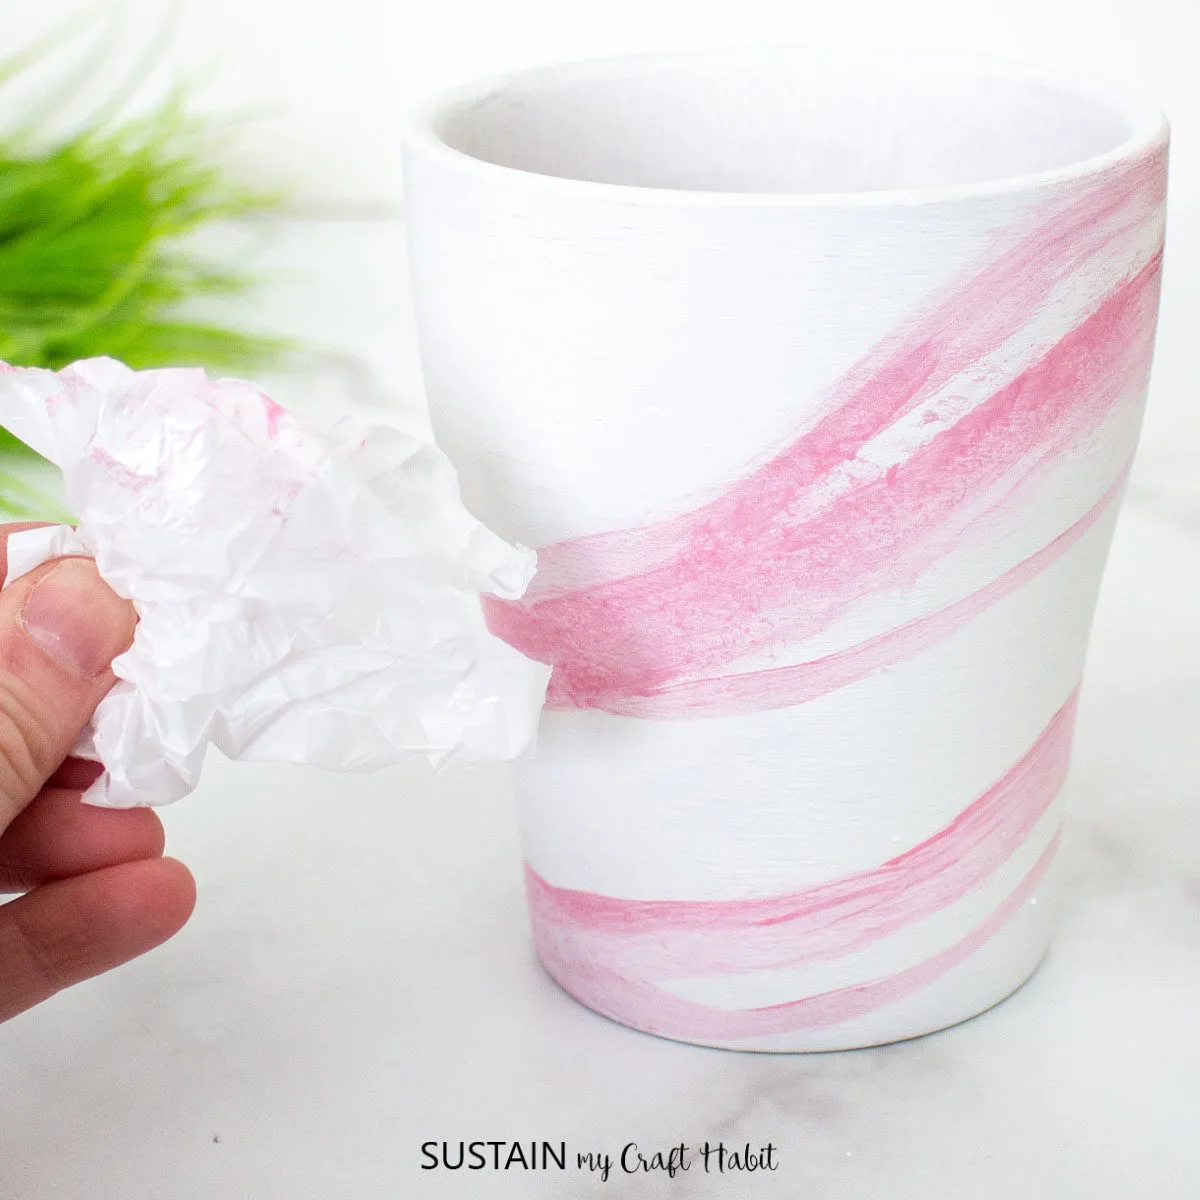
Using a slightly damp sponge, spread out the Extreme Sheen base color creating a somewhat water color effect.
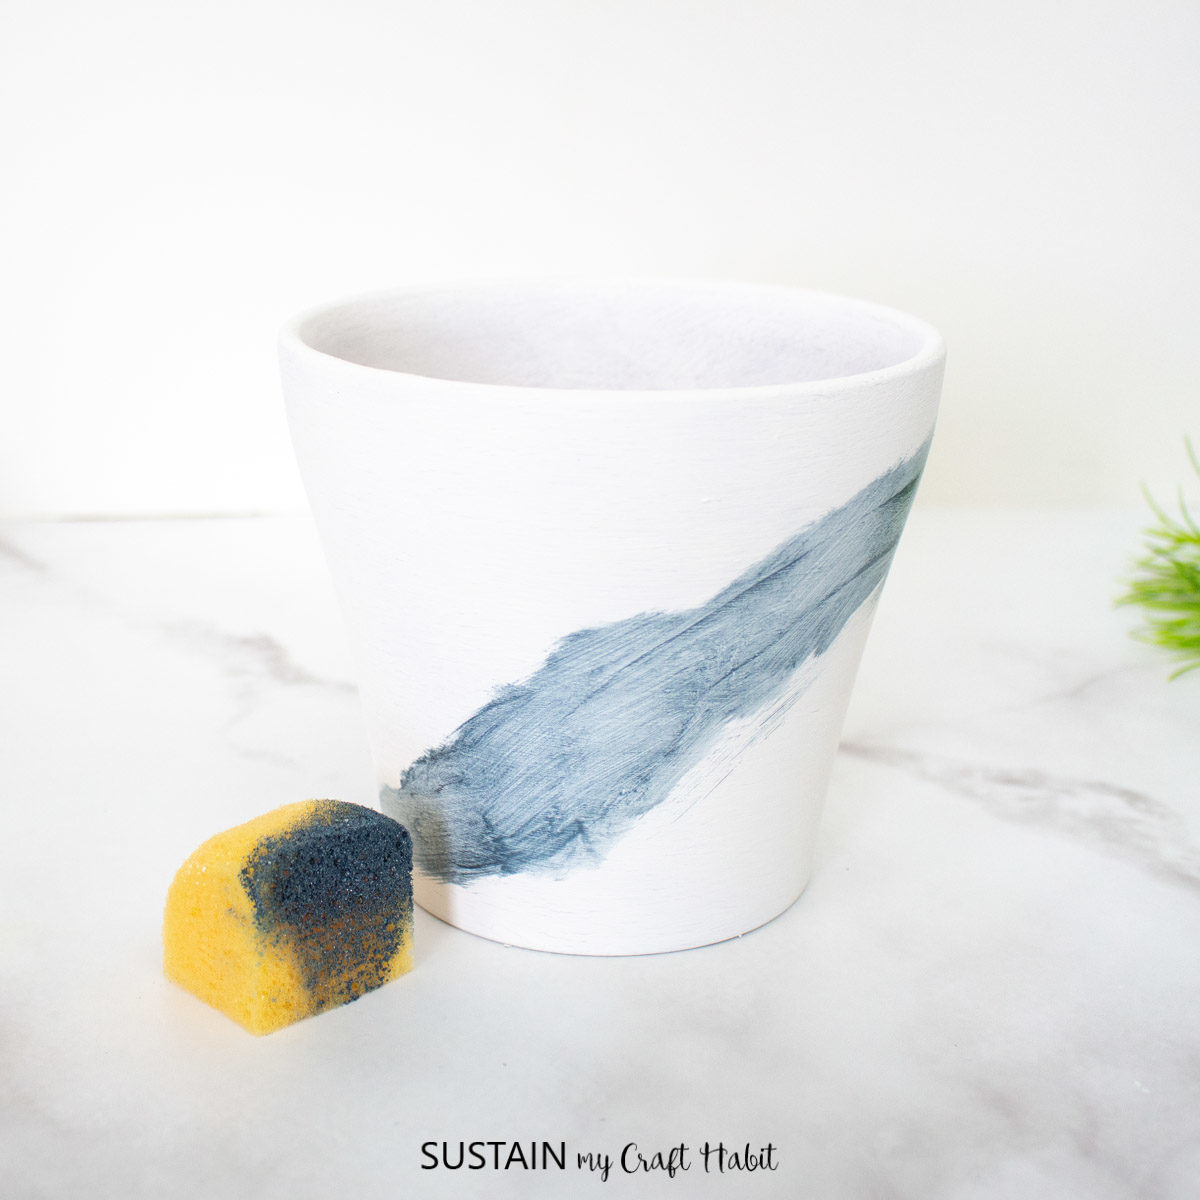

Scrunch up a plastic baggie and dab the painted areas creating a spotted texture throughout.
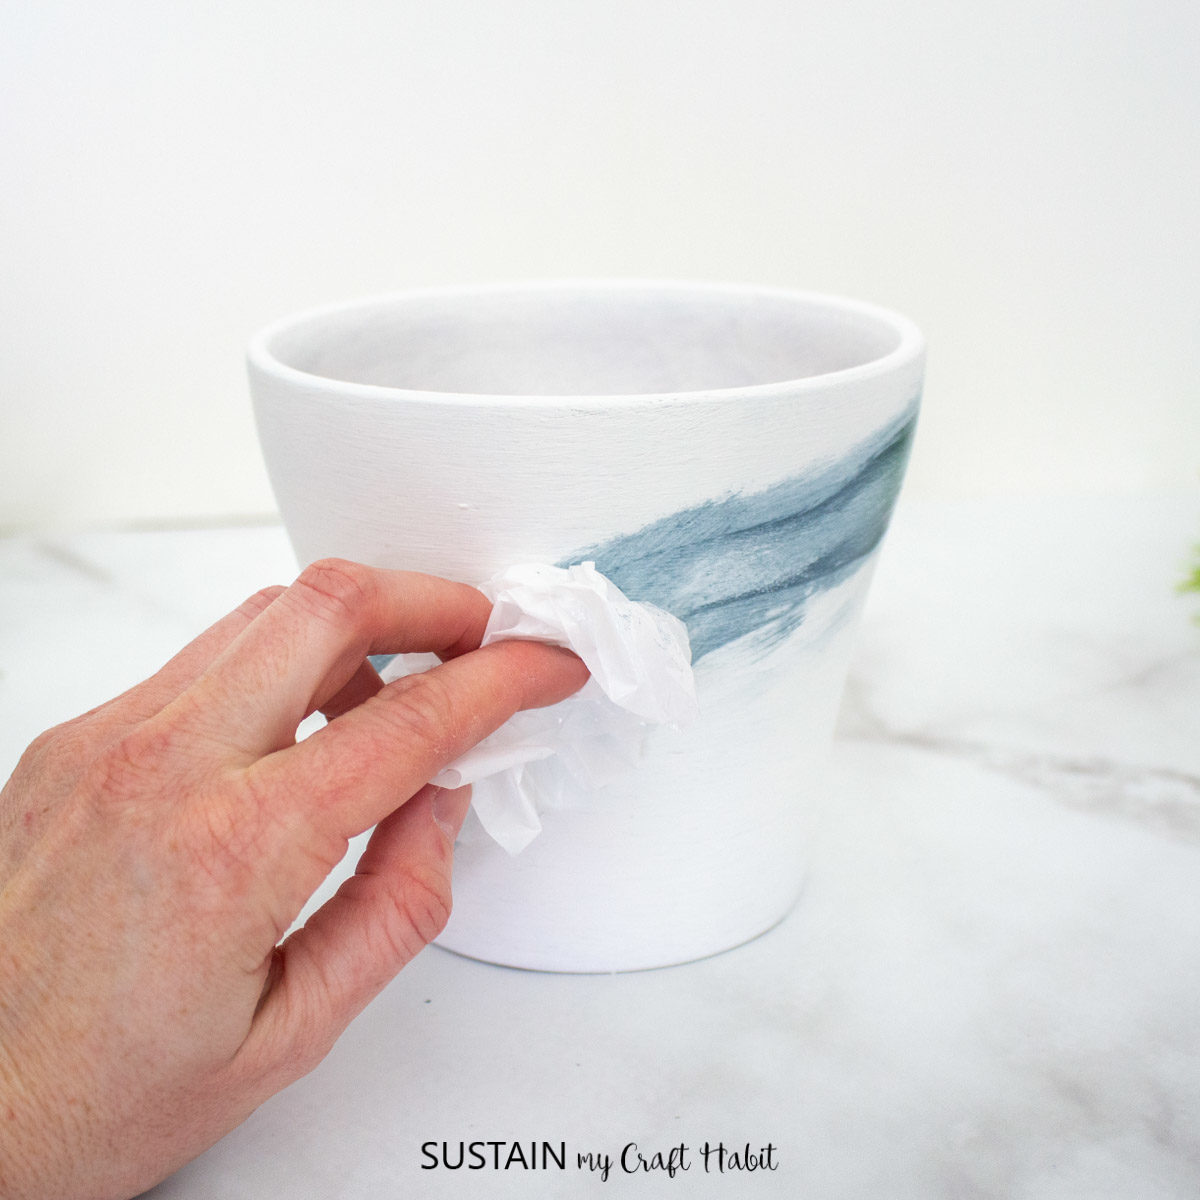

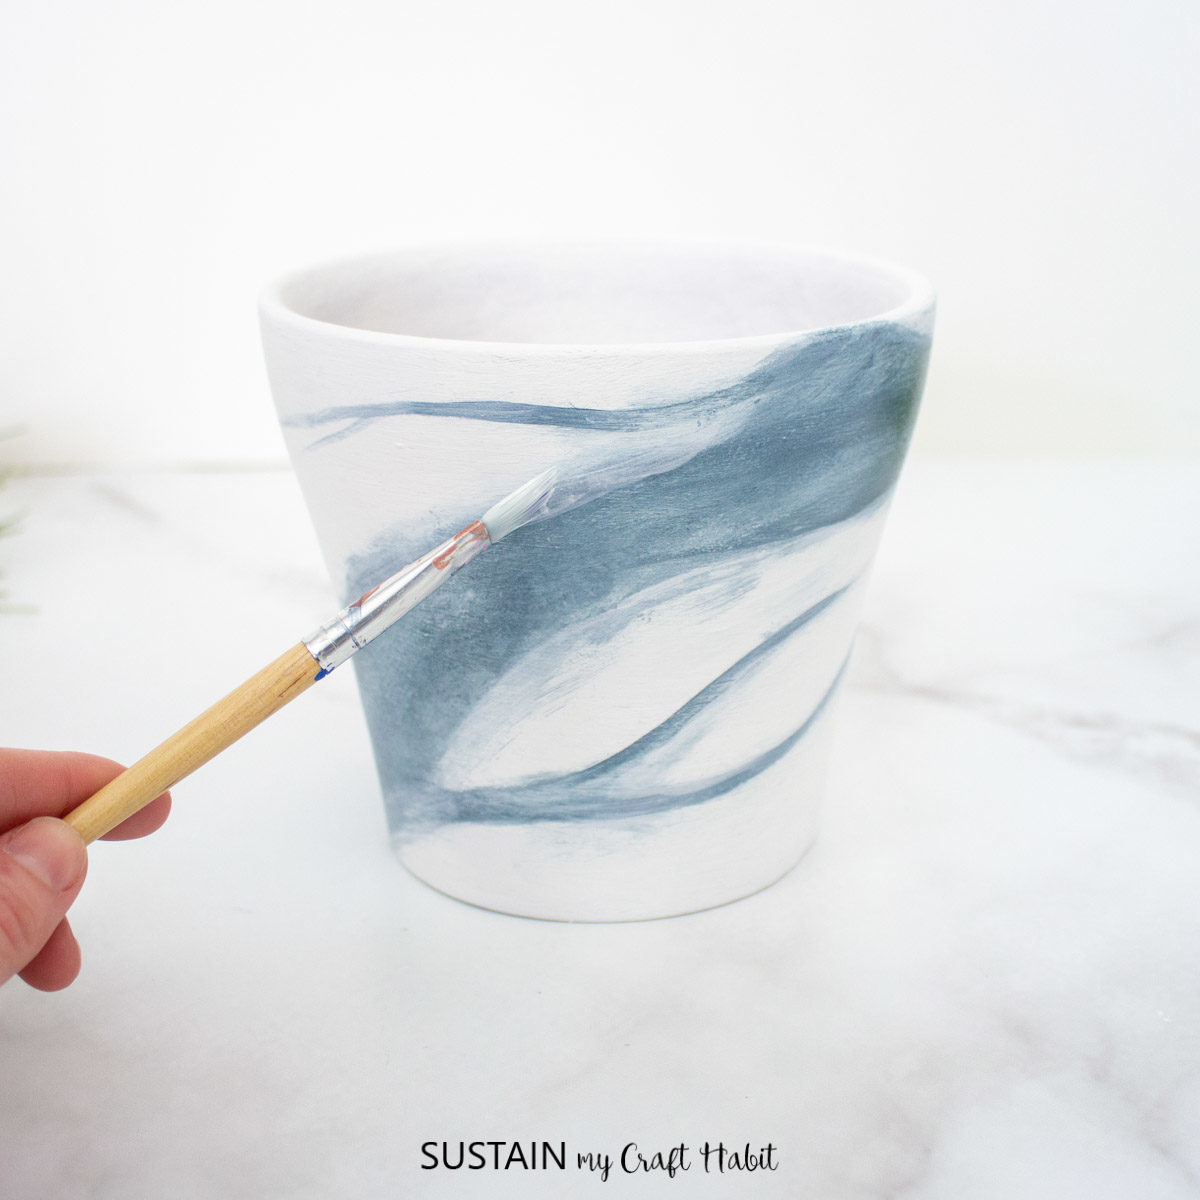
Add veining throughout using a fine tip angled paint brush. Dip the brush in the Extreme Sheen Pewter color and paint long flowing veins that taper at the ends throughout. Repeat the sponge and plastic bag process. Next, smooth the hard edges with watered down Everlasting paint.

Repeat with the other two pots using different Extreme Sheen colors. You can adjust the thickness of the flowing lines and even add more throughout.

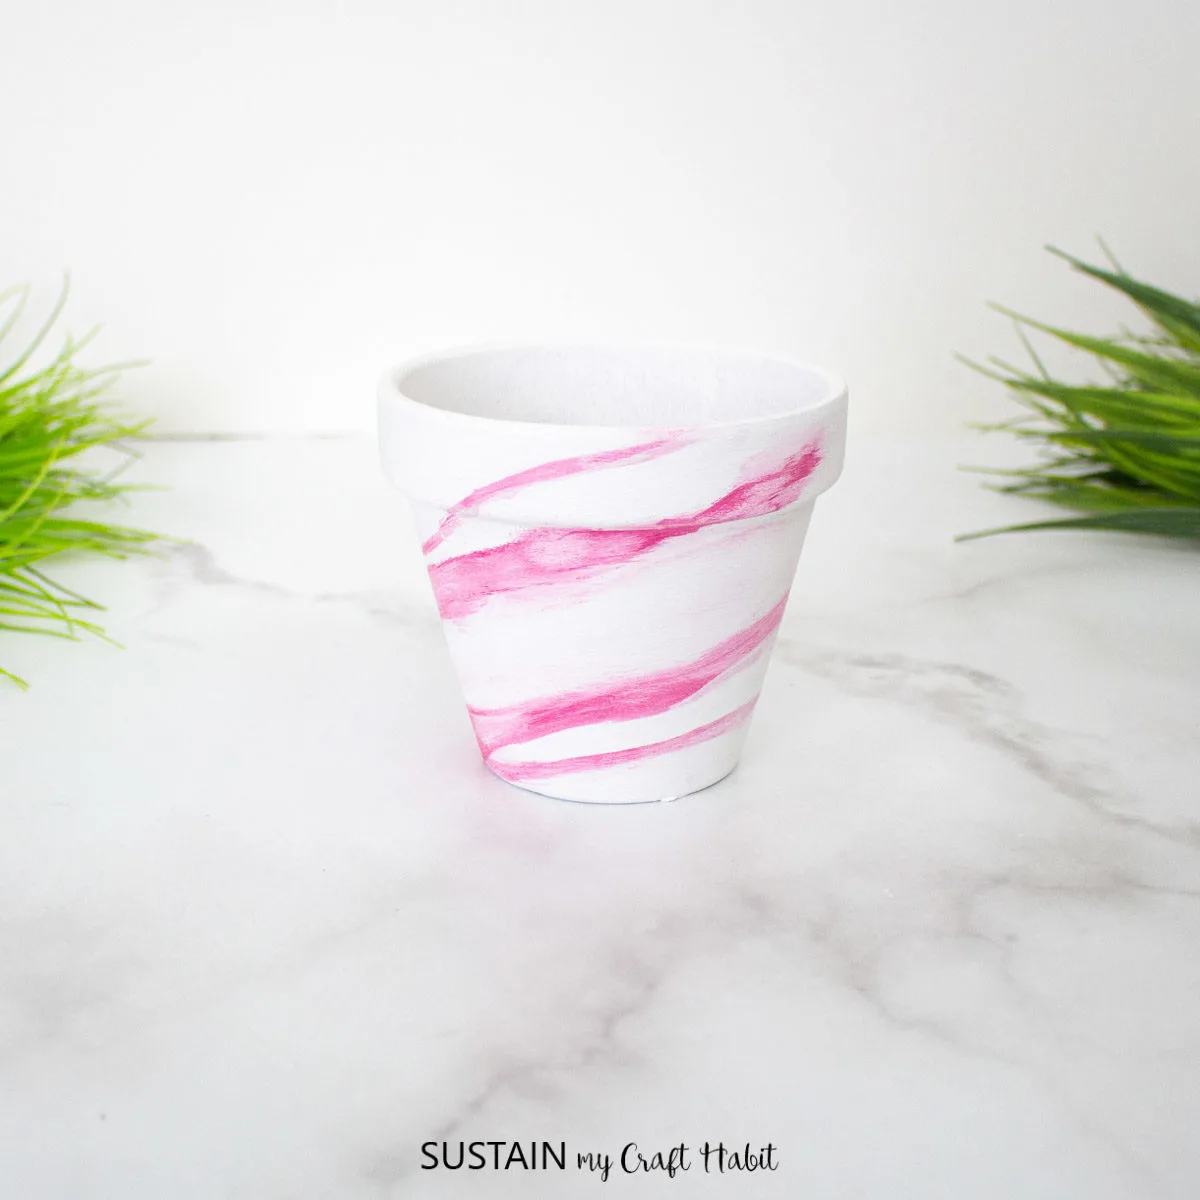
Leave the paint to dry and apply a coat of Multi Purpose sealer over the pots.
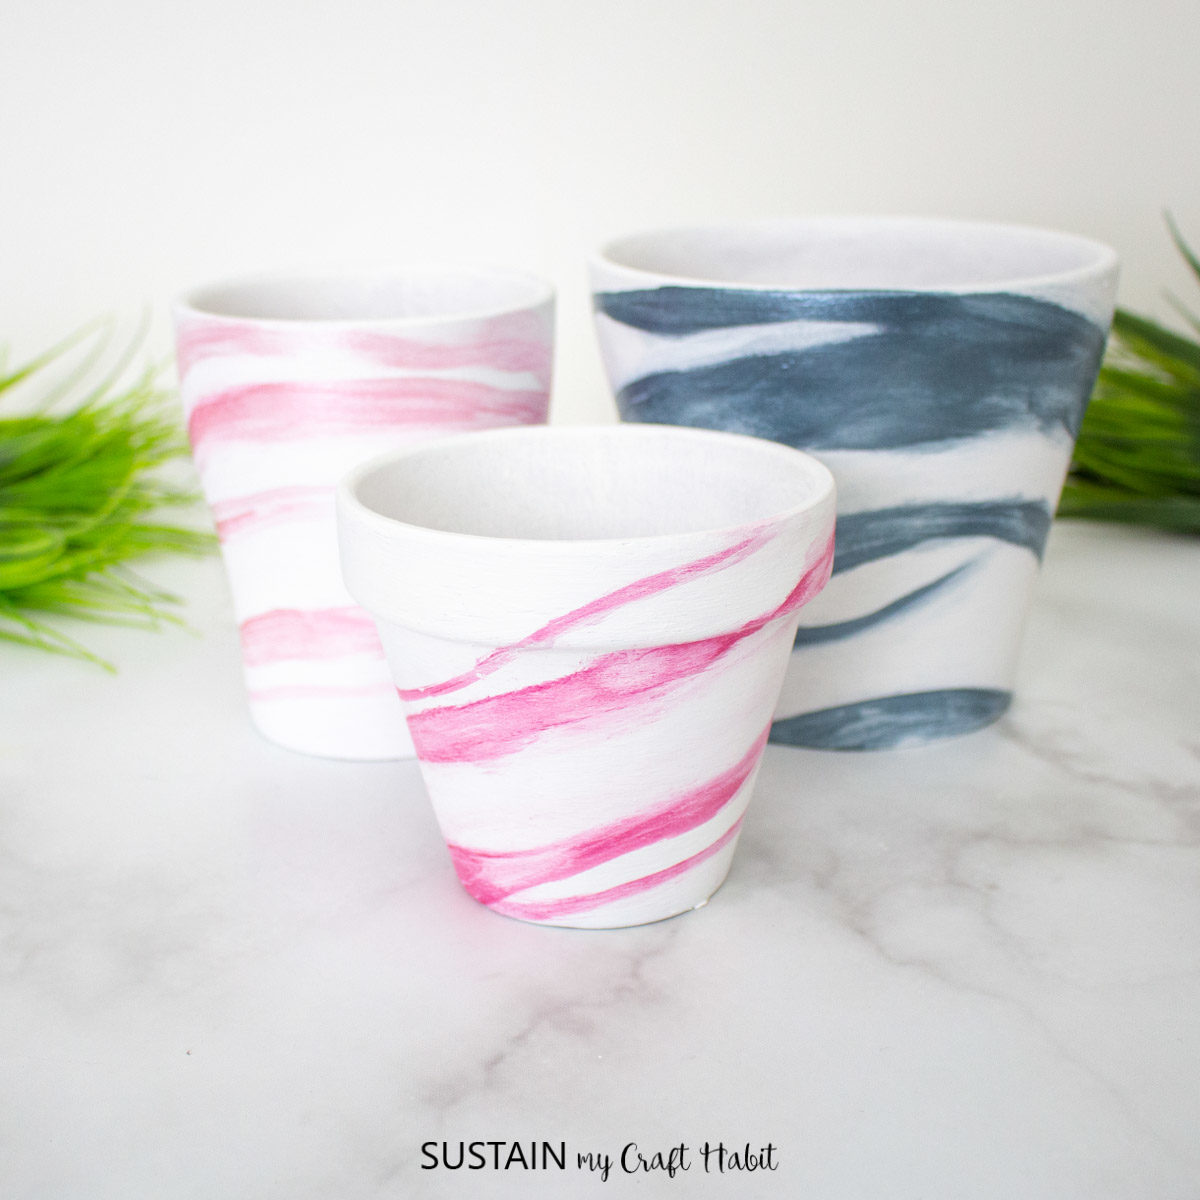

When finished, add some faux green (or fresh if you prefer) for a light, modern look. This project originally appeared in DecoArt’s project gallery.
Would you consider painting a marble effect on a large focal wall? I wonder how it would look as a budget-friendly DIY kitchen backsplash or even a counter top??
More Crafting Ideas using Clay Pots
We do love using terracotta pots for crafting! Although normally, we use smaller sized pots as you can see from these few fun crafts.


Valentine’s Painted Clay Pots 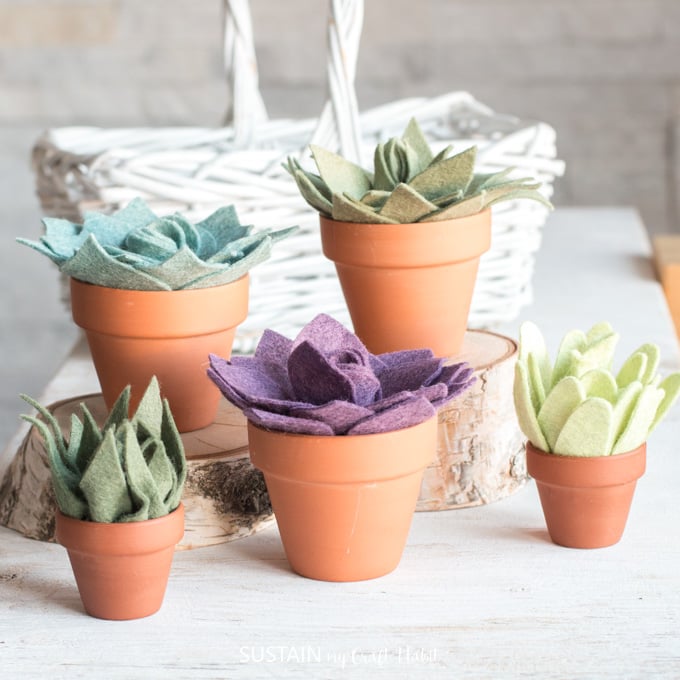
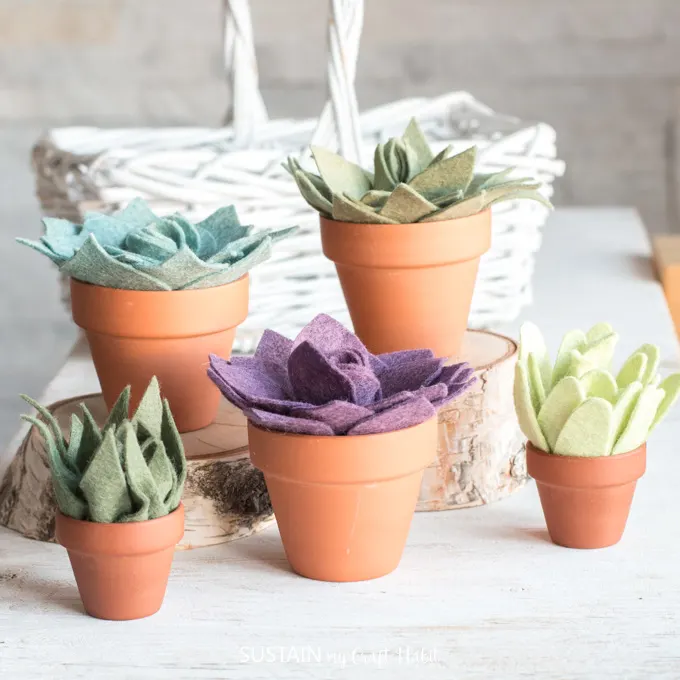
Potted Felt Succulents 

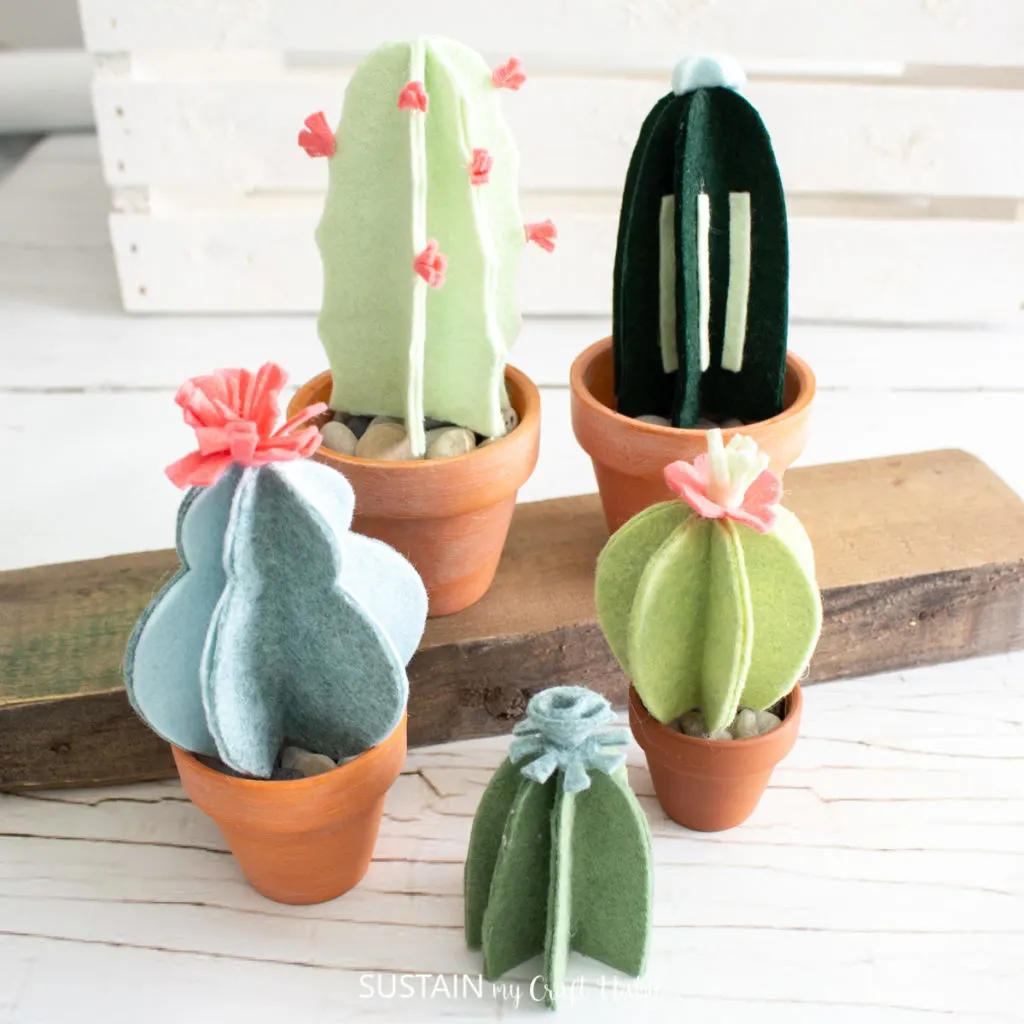
Felt Cactus Plants 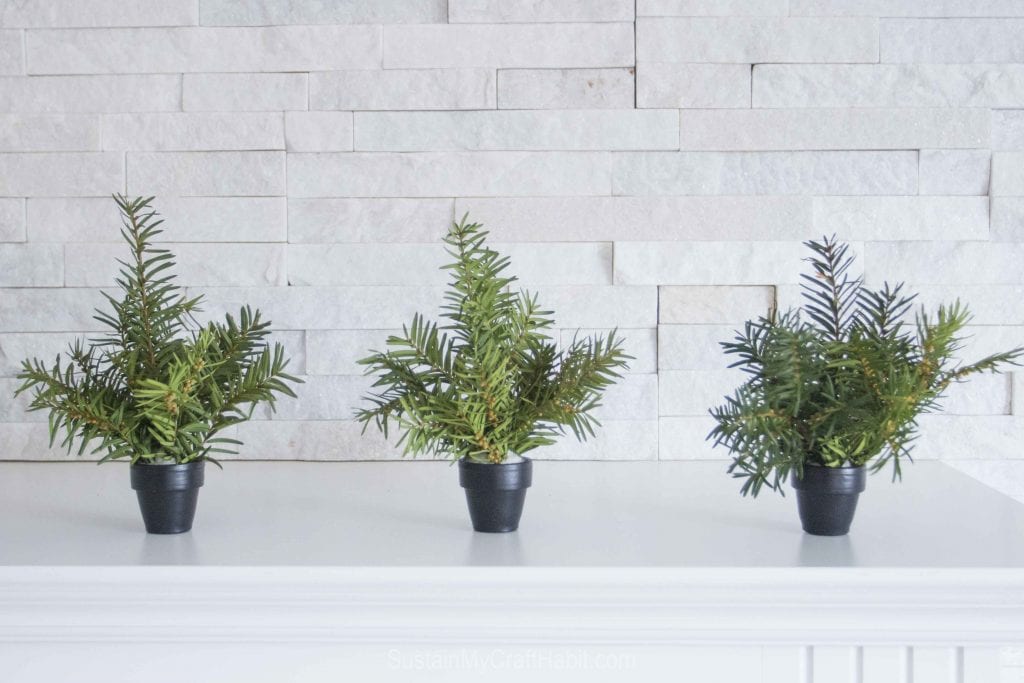

Mini Clay Pot Centerpieces

Like it? Pin it for later!


How to Create a Marble Effect with Paint
Materials
- Set of 3 terracotta pots in different sizes and shapes
- Extreme Sheen in Pewter, Rose Quartz, Pink Tourmaline
- Americana Decor Chalky Finish in Everlasting
- Americana Multi Purpose Sealer
- 1” angled Paint brush
- Fine tip angled brush
- Small sponge
- Small Plastic bag
Instructions
- Apply a coat of sealer to the inside and outside of the terra cotta pots. Leave them to dry fully.
- Paint the terra cotta pots in Chalky Finish Everlasting. Let the paint dry fully and then apply a second coat of paint for better coverage. Leave the pots to dry fully. Add additional coats if desired.
- Work on one pot at a time and work the marbling steps quickly while the paint is still wet.
- Using a 1” angled brush apply a coat of Extreme Sheen in Pewter in a single flowing stroke around the entire pot.
- Using a slightly damp sponge, spread out the Extreme Sheen base color creating a somewhat water color effect.
- Scrunch up a plastic baggie and dab the painted areas creating a spotted texture throughout.
- Add veining throughout using a fine tip angled paint brush. Dip the brush in the Extreme Sheen Pewter color and paint long flowing veins that taper at the ends throughout.
- Repeat with the other two pots using different Extreme Sheen colors.
- Leave the paint to dry and apply a coat of Multi Purpose sealer over the pot.