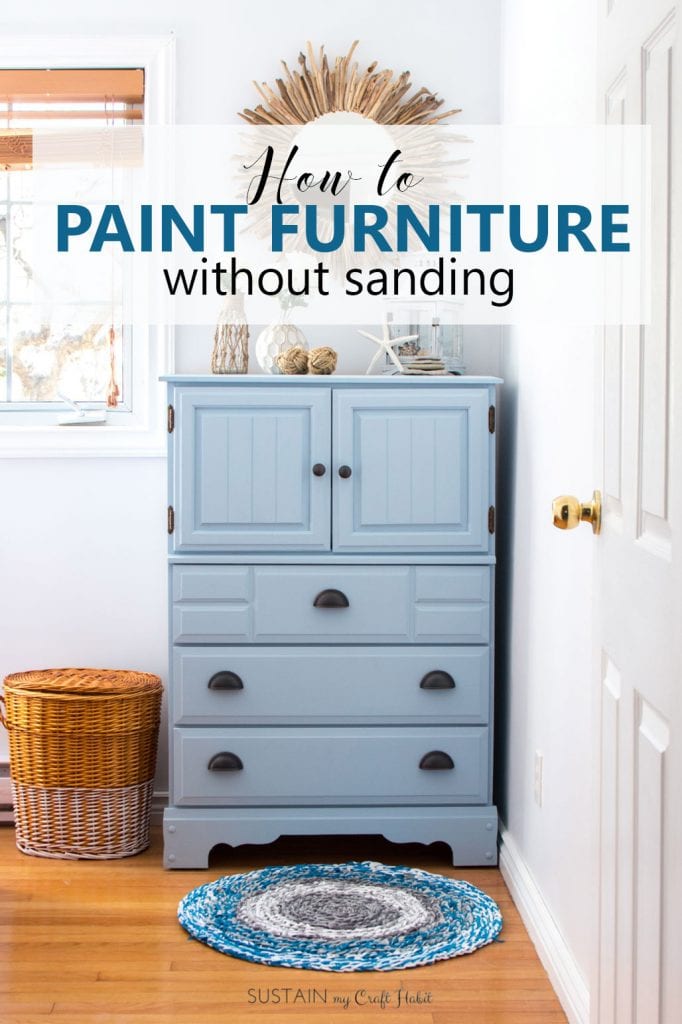
How to Paint a Dresser Without Sanding in 4 Easy Steps!
Have you ever wanted to try refinishing an old piece of wood furniture but were put off by the idea of stripping off the varnish and needing to sand down the entire piece? We were for the longest time until we figured out how to paint a dresser without sanding!

Disclosure: We have not received any compensation for this post. However, we have (and continue to) receive products from DecoArt. This post also contains affiliate links for your shopping convenience. You find our full disclosure here.
Painting Furniture the Easy Way
Painting old pieces of furniture from your home or the thrift store is a great way to save money and give the furniture piece new life. However, with so many different products and supplies out there, it’s easy to get put off of repainting an old piece of furniture. The good news is that new paint products out there (such as chalk paint and milk paint) were designed to make furniture painting quick and easy.
When we first read that we could paint wood furniture without sanding or using stripping chemicals, we were a little skeptical. But we’ve had such great results that we’re quite addicted now!
When sanding IS necessary: if the piece has a lot of large imperfections, such as deep scratches or uneven surfaces you may want to sand them down and/or fill the holes with a wood filler and then sand it prior to painting. Also, if there is preexisting paint that is peeling off, you’ll want to scrape it down prior to painting it again.
What is the Best Furniture Paint?
Over the years we’ve had the opportunity to try a number of different paints for our furniture including Decoart Chalky Finish and Satin Enamels, Fusion Mineral Paint, Country Chic Paint and even latex paint. We’ve had great results with all of these paints following the four simple steps below.

While oil-based paints were previously recommended for outdoor furniture, high-traffic areas or those with more moisture, water-based paint options have come a long way! There are now great options such as outdoor latex, enamels and multi-surface paints.
When deciding on the best paint to use for your project you’ll want to consider where the piece will be used:
- for areas that’ll have more moisture such as the bathroom or kitchen, we’d recomment a satin enamel or latex paint;
- consider oil-based paints for outdoor areas with heavy exposure to the elements;
- for most other wooden furniture pieces we’d use a chalk-style paint with Decoart Chalky Finish being our go-to.
Given that most furniture paints perform great, the other considerations when choosing the kind of paint you’ll use include:
- the finish your looking for (chalk paints will give a matte finish whereas enamel paints will give a satin or glossy finish);
- the cost (look for discounts and sales);
- availability (some paints are special order whereas others are easy to find in craft and home improvement stores);
- and paint color selection (there are less options for some furniture paints).
How to Paint a Dresser Without Sanding
So, here we go: four easy DIY steps to painting a tall wood dresser with chalk-style paint.
Note, although we’ve outlined below the general steps you can use for most wood furniture pieces, you can find the detailed step-by-step tutorial for our coastal dresser project over on the DecoArt blog.
Step 1: Prepare the Surface
For the prep work, place down a drop cloth to protect your floor or other work surface. Wipe the dresser and drawers down thoroughly with warm, soapy water and lint-free cloth to remove the grime and oils. Make sure that the piece is completely dry before moving on to the next steps. Also, the temperature should ideally be between 10°C (50°F) and 30°C (86°F) or the paint may dry too quickly (if it’s really hot) or too slowly (if it’s cold).
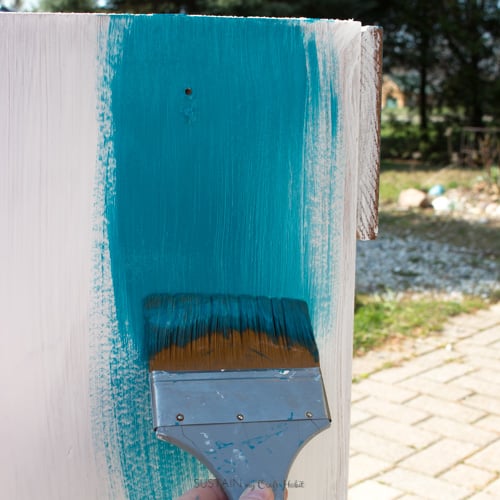
Step 2: Apply a Stain Blocker
Although not always necessary, this step is important if you are going from a really dark colour of wood to a lighter color, a wood with lots of knots, or a piece that is stained.
The natural tannins in the wood will bleed through your piece over time and a good stain blocker will stop this chemical reaction. We used the Decoart Americana Decor Stain Blocker/Sealer* which dries clear, provides a durable finish and cleans up really easily.
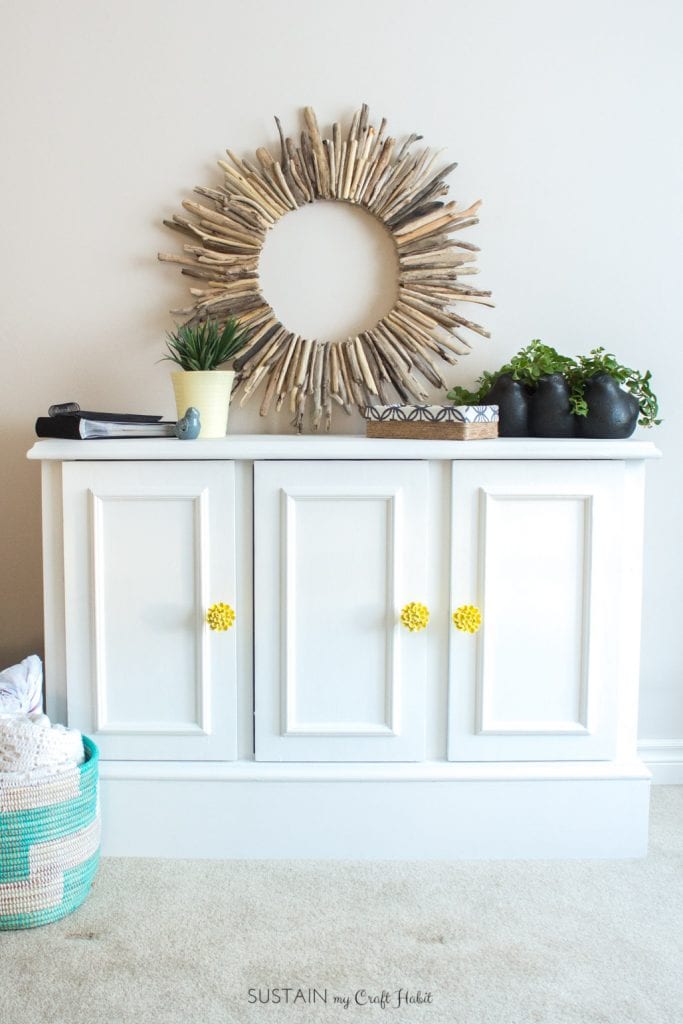
Other options include a high-quality primer (such as we used for this vanity makeover).
Step 3: Paint the Dresser
The next step is to paint your dresser! A chalk type of paint such as the Decoart Chalky Finish Paint (we used Serene for our dresser) is great for most pieces. The thickness and self-leveling properties are great for covering small imperfections to leave a smooth finish.
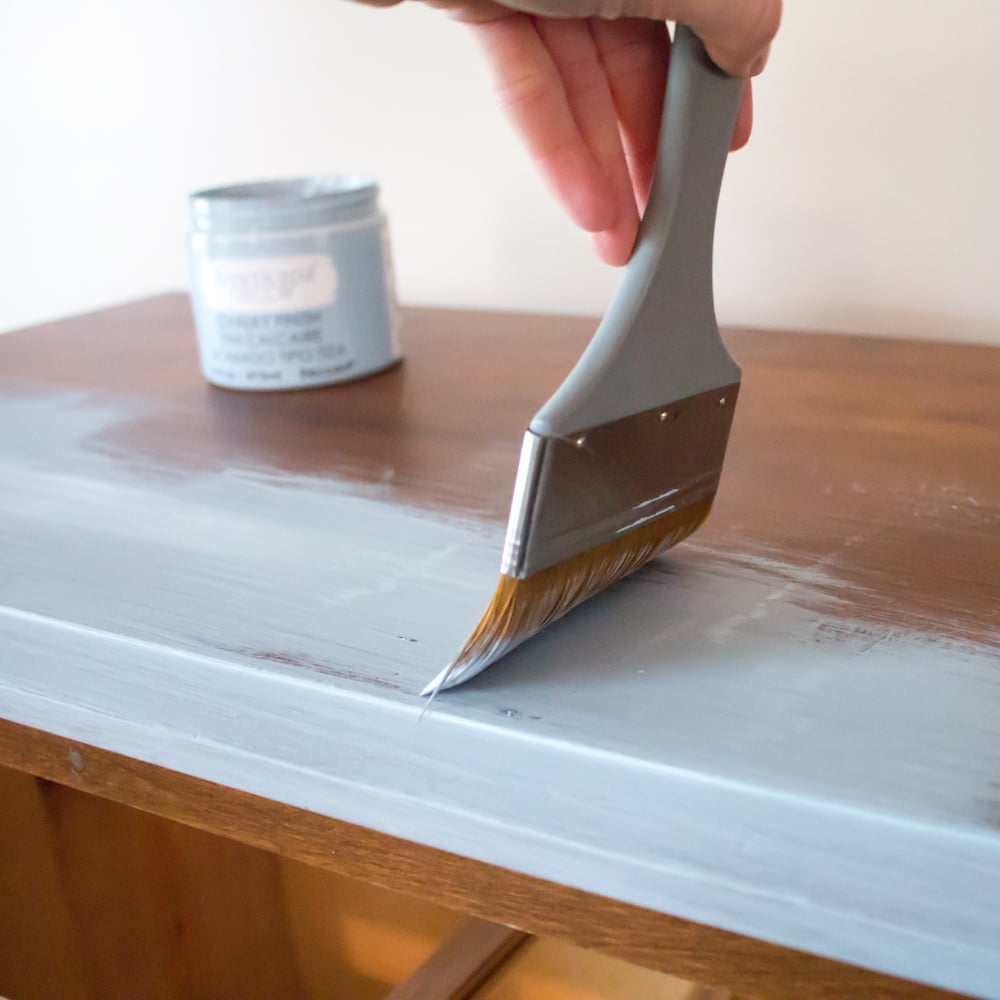
Apply the first coat of paint with a really soft brush or foam roller to avoid streaking. A paint sprayer will make your project go much quicker, but is not necessary if you’re just painting the occasional piece of furniture.
Ensure that the first coat is completely dry before applying a second coat of paint if needed. For a smoother second coat that’s free of brush marks, dilute the paint with a bit of water.
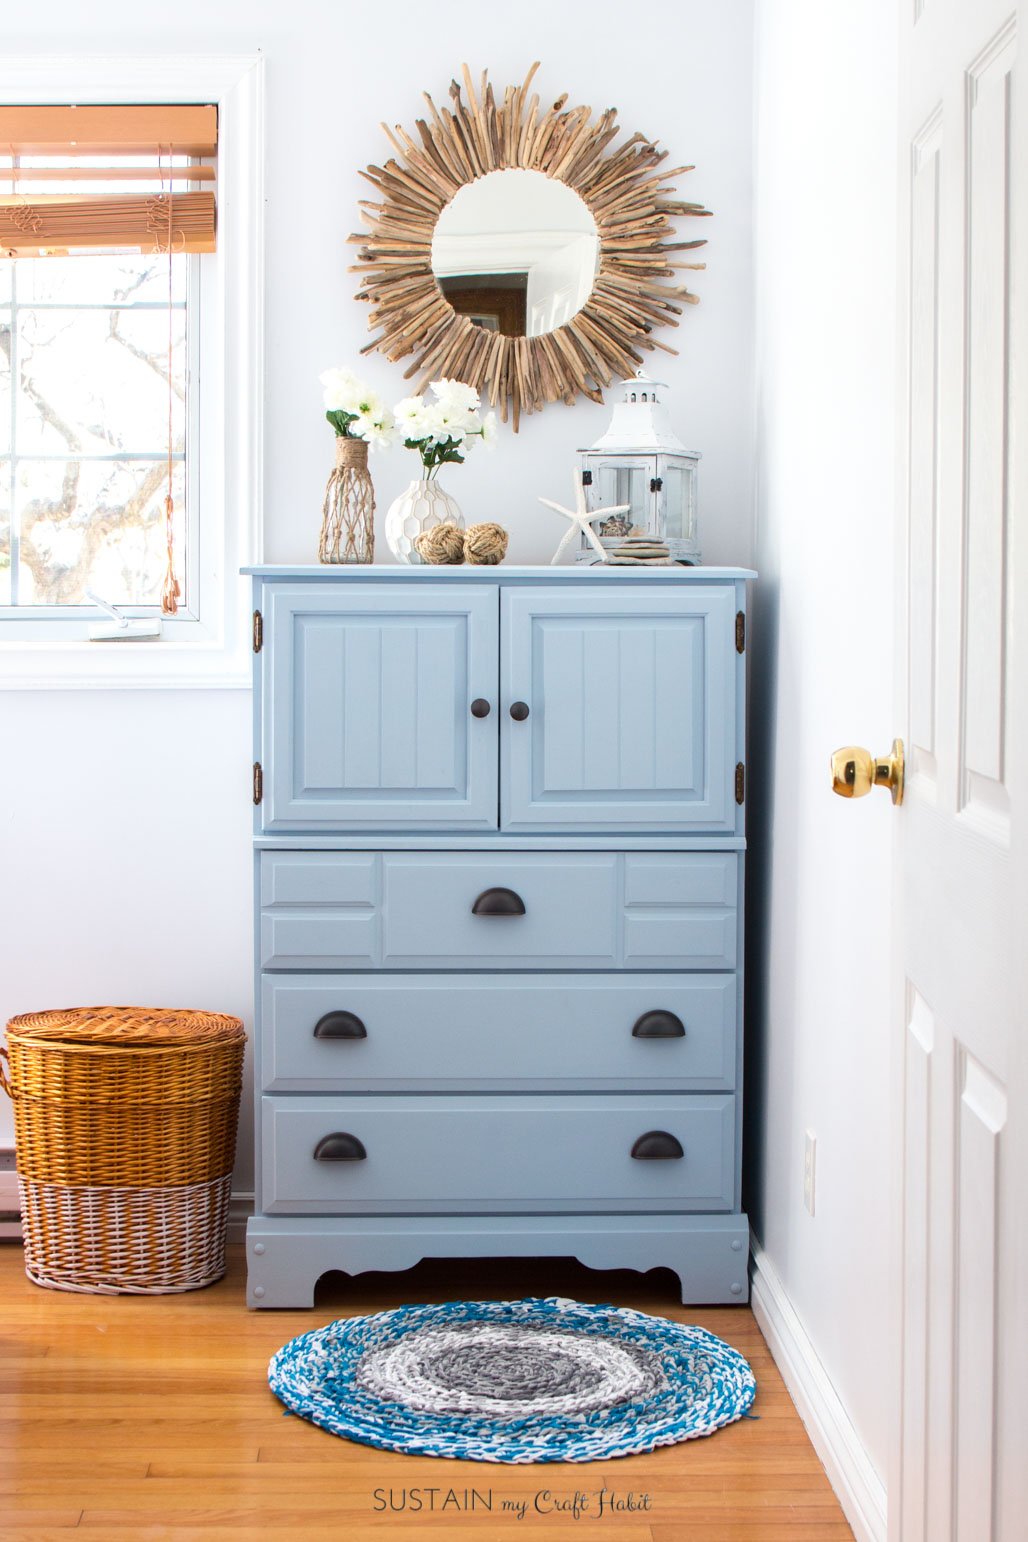
Step 4: Seal and Protect
A highly recommended step is the application of a top coat to seal and protect the painted dresser. We used the Clear Crème Wax which is non-yellowing and provides a durable finish for long-term results. You can buff this wax to a high-gloss sheen or leave it matte as we did.
Some paints have a built in top coat (such as the Satin Enamel we used for this headboard) – read the manufacturer’s instructions on your paint for the best results.
That’s it!

When we first started using the Americana Decor Chalky Finish products for our furniture makeovers we admittedly found it hard to believe that sanding wasn’t required.
However, we’ve now refinished a number of pieces using the paint and they’ve turned out beautifully. Since the paints come in plastic jars with twist off lids, they’re really convenient to use. And since they’re water-based, cleaning up is really simple.
We hope you’ve found this tutorial on how to paint a dresser without sanding helpful. In this blog post we have instructions on how to paint laminate furniture and here we have 70+ easy DIY projects for your home.
Do you have any furniture in your home that you’ve thought about painting?
How to Paint a Dresser Without Sanding
Materials
- 1 dresser or other piece of wooden furniture
- paint
- flat brush
- drop cloth
Instructions
- Step 1: Prepare the Surface: For the prep work, place down a drop cloth to protect your floor or other work surface. Wipe the dresser and drawers down thoroughly with warm, soapy water and lint-free cloth to remove the grime and oils.
- Step 2: Apply a Stain Blocker: Although not always necessary, this step is important if you are going from a really dark colour of wood to a lighter color, a wood with lots of knots, or a piece that is stained.
- Step 3: Paint the Dresser: Apply the first coat of paint with a really soft brush or foam roller to avoid streaking. Ensure that the first coat is completely dry before applying a second coat of paint if needed. For a smoother second coat that’s free of brush marks, dilute the paint with a bit of water.
- Step 4: Seal and Protect: A highly recommended step is the application of a top coat to seal and protect the painted dresser. Some paints have a built in top coat – read the manufacturer’s instructions on your paint for the best results.


How many containers of paint did you use to paint this dresser?
Hi Leigh. The paint comes in several sizes including 8oz and 16oz. We needed two of the 8oz bottles to finish the dresser but did have paint left over. So one 16oz jar would be plenty for a dresser of this size. Let us know if you have any further questions. -Jane
@Jane and Sonja, what is the color name of the blue dresser shown on in this article?
Hi Fadira. It’s called Serene (Decoart Chalky Finish). Hope that helps! Jane
Fabulous paint job. Fabulous paint color. Thanks for all the tips.
Thank you, Ivory! We hope you can put them to great use.
Hi! did the paint scratch after a little while?
Hello! No we haven’t had any problems with scratching or peeling. The dresser still looks great!
Thank you for stopping by.
Jane
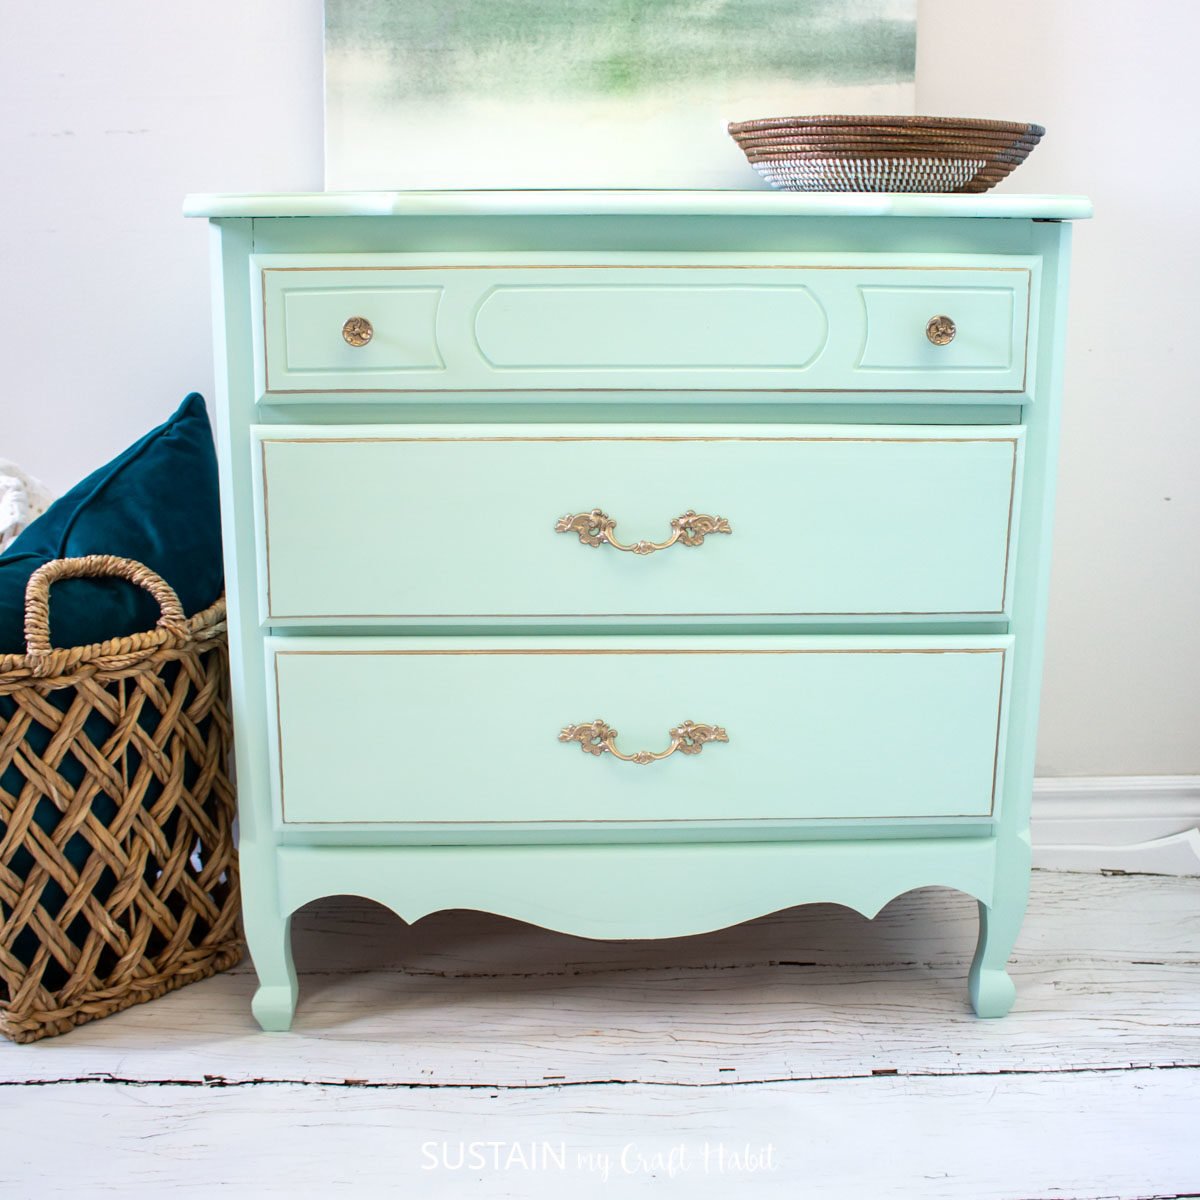
Do you think I could use this technique on a bathroom vanity? I love the look of the slightly distressed greenish cabinet in the original photo and have been scouring the internet for something similar. I have located a couple white ones which I thought might work if I painted it and removed small areas of paint. But it will be in the bathroom so my concern is the paint won’t stand up to higher moisture.
Hi, I do not know what kind of finish is on my wood. I assume it is either lacquer or varnish. Is it possible to use this process to paint over my wood without removing the finish? Thank you!
Hi Maya,
Yes, absolutely! Our dresser also had a varnish or lacquer on it and we just painted over it. You actually don’t want to sand it because it’s more likely for the underlying tannins to bleed through the paint if you do.
Hope this helps!
Jane
The bedroom furniture I want to paint is very shiny, likely from furniture wax or polish (my mother). Will the washing be enough or must I sand? Love your site!
Hi Sandy. If there’s a wax or greese type material on the furniture you’ll want to degrease with something like TSP. That should do the trick without needing to sand it.
Thank you for your kindness.
Warm regards,
Jane
Gorgeous painted dresser! I love the ease of painting without sanding.
Happy fall,
Kippi
This dresser makeover is so beautiful! I love the color you chose. I’ve been wanting to paint some old furniture, and I’m glad to know I don’t have to sand it first. Pinned! Love the new look of the site, by the way!