
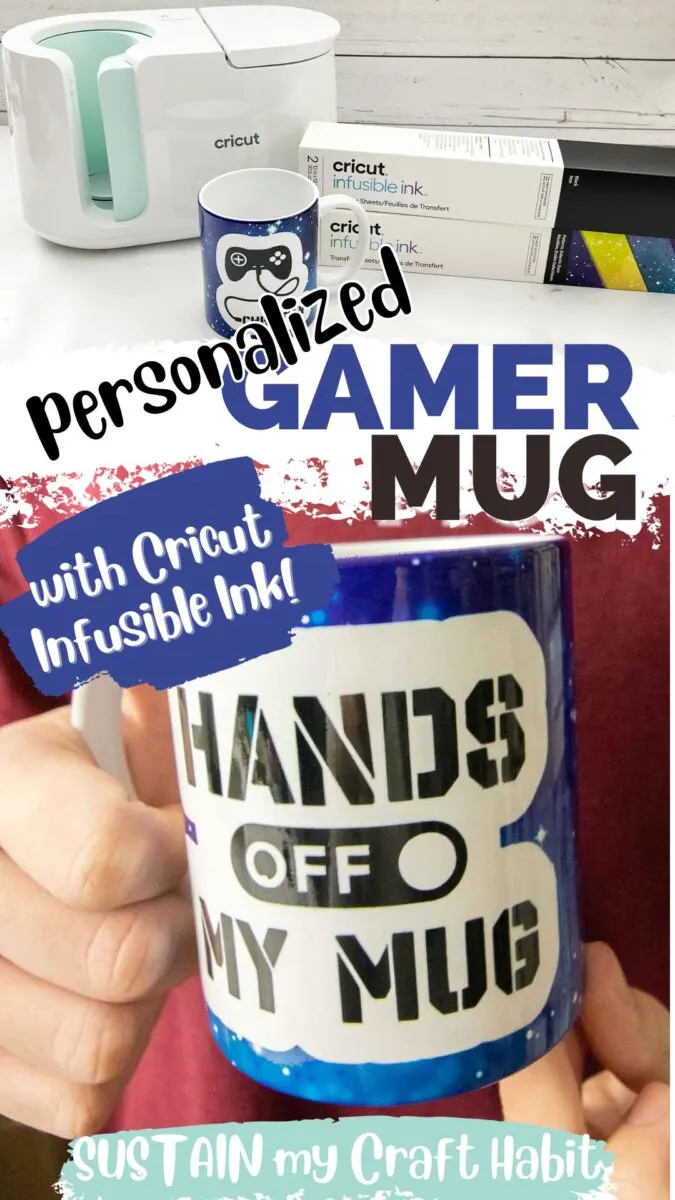
If you’re a mom of a teen you might also regularly find a sea of used mugs on the countertop. My son is the worst culprit in our home so for his birthday I made him a personalized mug using Cricut Infusible Ink and my Cricut Mug Press! This customizable gamer themed mug is a fun gift idea to make with your Cricut machine for any special occasion.
This post was sponsored by Cricut. All opinions are our own.


Crafting a Personalized Gift with Cricut
Finding the right gift for my teenage son for his birthday and other special occasions can be a challenge. Cricut makes creating something unique and personal for him easy: a few years ago I made a motivational race-track themed sign for his room. Now, for his birthday, I crafted him his very own personalized mug!
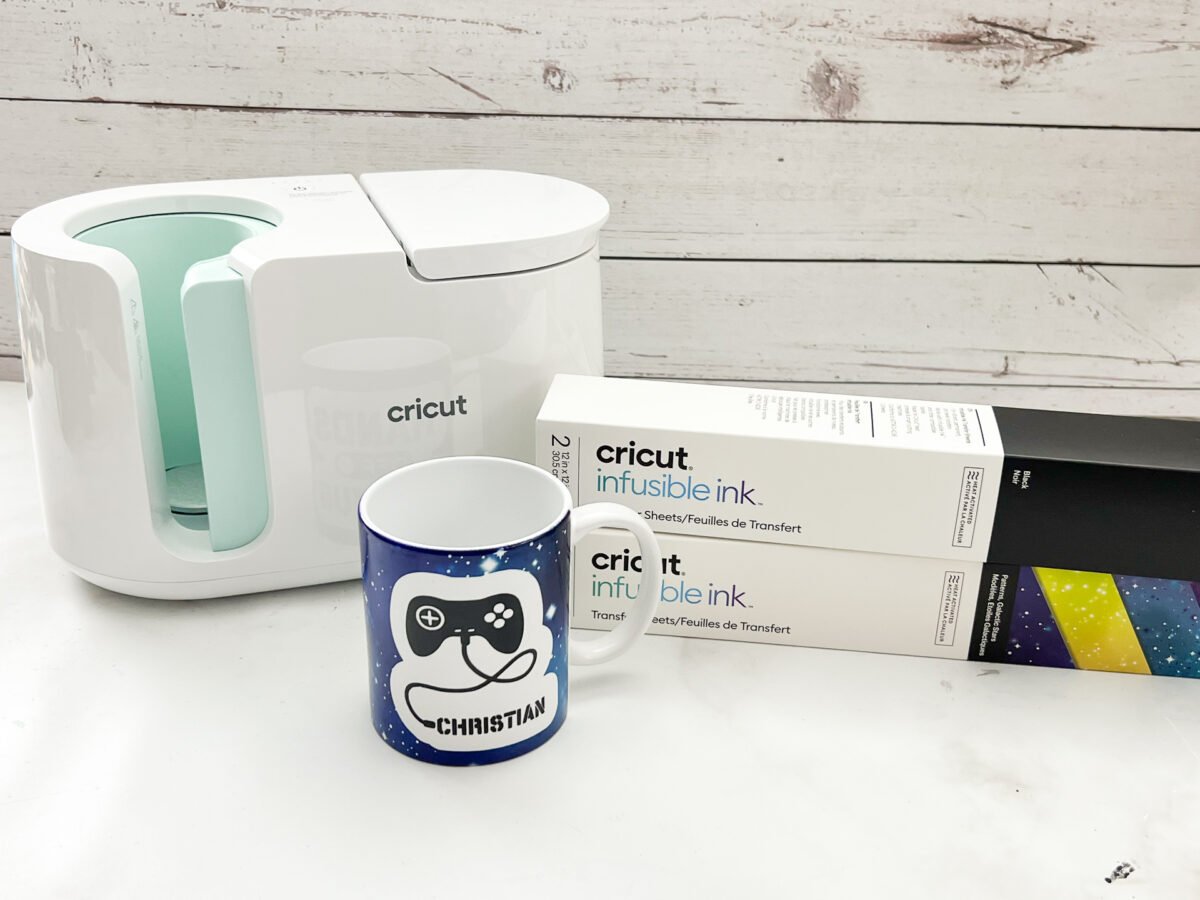
I created this cute “Hands Off” gamer-inspired design in Cricut Design Space and cut it out on two colors of Infusible Ink (Black and Galactic Stars) using my Cricut Maker 3. I then sublimated the design on to the mug using the Cricut Mug Press. You can find our whole beginner guide to sublimation here.
Materials Needed:
- Cricut Mug Press
- Cricut Maker 3 (you can also make this craft with the Cricut Joy or Cricut Explore)
- Infusible Ink Transfer Sheets in Black and Galactic Stars
- 12 oz white Cricut ceramic mug
- lint roller
- butcher paper (included in Infusible Ink Transfer Sheet package)
- heat resistant tape
- heat resistant surface such as the EasyPress mat

Using the Cricut Mug Press
We have a detailed video tutorial for this Cricut Mug Press project over on our YouTube channel. The video walks through all the steps of creating the mug design, cutting the Infusible Ink with the Cricut Maker 3 and applying it to the mug with the Mug Press. If you prefer a photo tutorial, keep scrolling!

Preparing the Design In Cricut Design Space
If you’d like to use our project design, simply head to our Design Space profile, insert the design onto the canvas, double click on the name and customize it, then click on “Make It”. Follow the prompts on the screen to cut out the design from the Infusible Ink Transfer Sheets. Remember to select MIRROR ON so the image is reflected.
To design your own mug, start by searching “MUG DESIGN SETUP” in the project tab. Choose the mug size along with the type of edge (STRAIGHT, SCALLOPED, RIPPED, etc) and then insert it onto the blank canvas.
Now you can start designing!
We began with inserting the Game Controller (#M4857D8D7) image and the Teacher Mode Off (#M2A381EC3) image onto the canvas.


We changed the name in the editable portion of the Gamer Controller image using the font BFC Home Team. Next, we highlighted the entire image and clicked “Attach” to unite all the pieces together.
To remove the “TEACHER MODE” portion of the other image we inserted a cut line between the two sections of the image. Then, we selected the image and click “Slice” which separated the image into two pieces. After deleting the top part of the image we added the custom text “HANDS OFF MY” in the same BFC Home Team font.


Next, we created offsets around each of the designs. The goal was to create a “window” in the mugs background pattern into which the images would be placed. To do so we simply clicked on the image, clicked “Offset” and then increased the size until a nice outline was created around the image. We repeated that with the second image. This now creates a second layer behind your images.


To ensure that the offset lines cut out of the background, we move it to the same colored layer in the color sync tab. Highlight the entire mug template along with the images together and select “attach” to join all the pieces for cutting.


After formatting all the images so that they fit on the mug sleeve, we’re ready to cut them out of the Infusible Ink Sheets. With the machine set to Maker 3 (or whichever machine you are using), click on “Make It”.
Cutting the Infusible Ink Transfer Sheets
We previously shared tutorials for using Infusible Ink transfer sheets, so for more info you can also check out our DIY cosmetic bag, our personalized halloween tote bag project and our Awesome Sisters mugs project.
Ensure the toggle is set to “MIRROR ON”. This is necessary for all infusible ink (and Iron On Vinyl) cuts.
Place the Infusible Ink Transfer Sheet on the cutting mat and choose Infusible Ink Transfer Sheet from the drop down menu to proceed with the cutting.
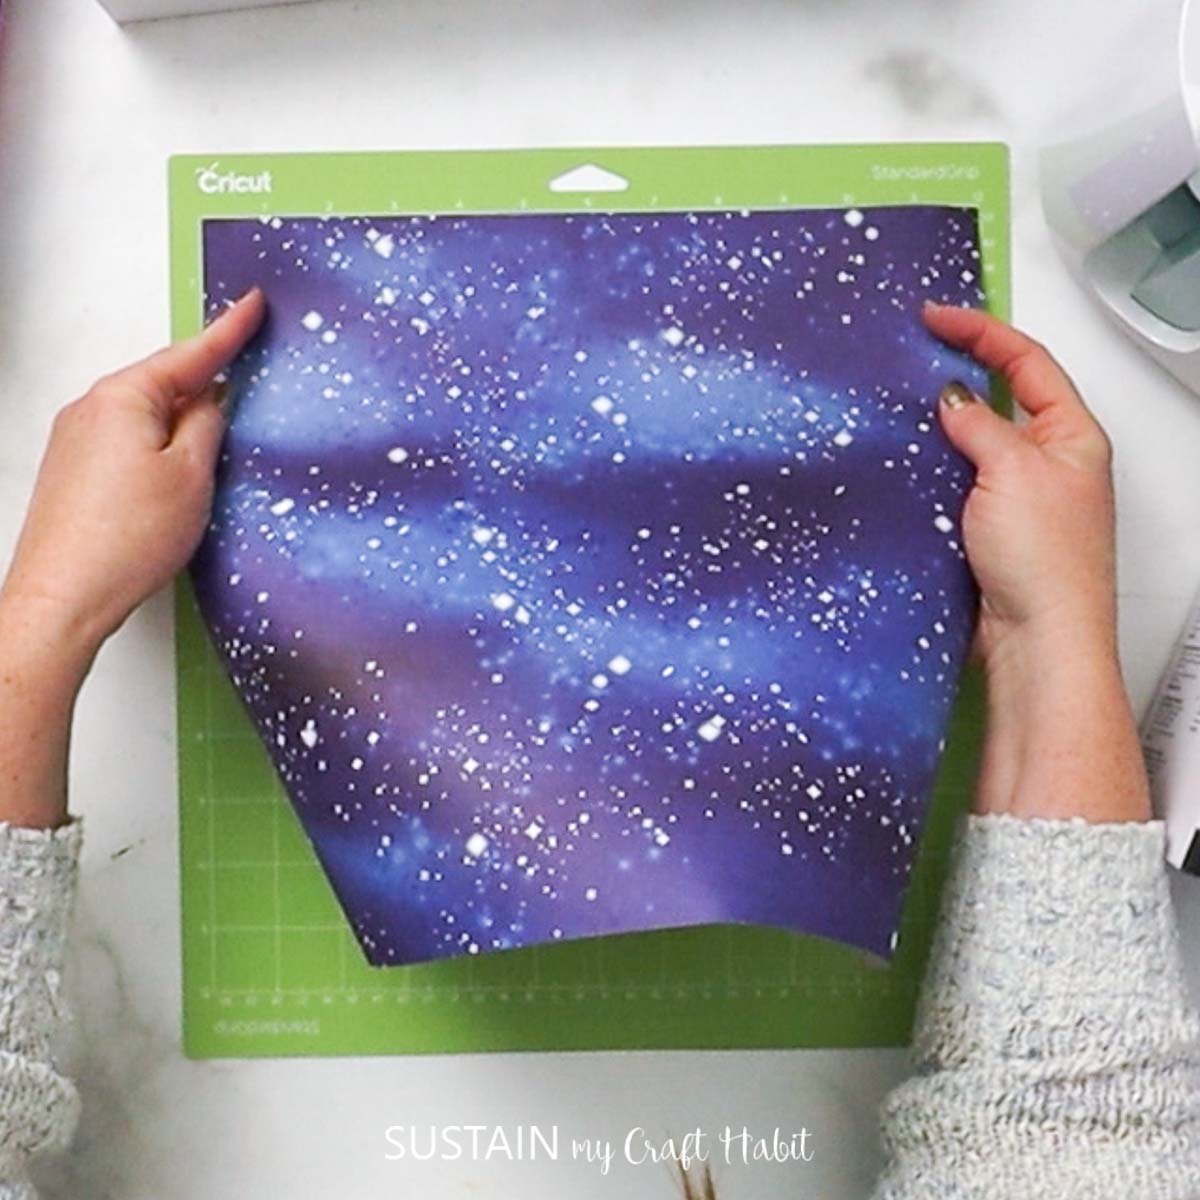

Make sure that the fine point blade is loaded into your machine and follow the prompts to load and cut the transfer sheets.


When the cut is complete, unload the mats from the machine and peel away the unwanted portions.


For this design, place the pieces cut out of the Black Infusible Ink into the window you had cut out of the Galactic Stars one. You can trim the clear backer around the Black Design with a pair of scissors to get it to fit right inside the window.


Applying the Infusible Ink onto the Mug
Preheat the Mug Press by plugging it in and pressing the power on button.
Always remember to use a lint roller on your mug before wrapping it with the Infusible Ink transfer sheet. This will get rid of any loose particles that may show up after pressing.
Wrap the Infusible Ink transfer sheet around the mug, face side against the mug. Align the top and bottom edges with the top and bottom edges of the mug. Have the liner meet under the mug handle and gently press the transfer sheet so it’s snug against the mug.


Wrap the mug with two layers of butcher paper and secure in place with heat-resistant tape.


The Mug Press will beep when it reaches the required temperature.
Lift the Mug Press lever and insert the mug inside.


Push the lever down to lock the mug securely inside and it will begin to apply the image on to the mug. This process takes about 6 minutes. Once it’s done, the Mug Press will beep again.


Lift the lever and remove the mug by lifting it by its handle. Place the mug on a heat resistant surface such as the Easy Press mat and allow it to cool completely (about 30 minutes) before peeling off the transfer sheet.
If you forget to turn the Mug Press off with the one-touch button, don’t worry, it has a safety feature built in to automatically turn itself off after sitting idle.
The exciting part is removing the transfer sheet and revealing the design underneath! It’s so vibrant and seamless.


Troubleshooting
Although trying a new product is exciting, it can also be a little nerve wracking so here are a few Q&A’s to help ease the learning process.
Why doesn’t the Maker cut all the way through the liner?
Adjust the pressure when cutting to “more” instead of the default setting.
How do I avoid unwanted transfers on my mug like blue dots, stray ink and grid lines?
Most importantly, always use a lint roller on your mug before wrapping the transfer sheet around the mug. This will get rid of any loose particles (not visible to the eye) from getting trapped inside leaving unwanted markings. Additionally, ensure the design is flat against the Cricut blank mug.
What if I want to use my Cricut Infusible Ink Pens for the Design?
Refer to the Cricut Heat Guide for the instructions as there are some important differences in the steps required. We have a tutorial of making a cute fall themed mug using the pens here.
My son was so happy with his new mug – I even got a big smile out of him! I’m hoping it’ll encourage him to reuse the mug rather than taking a clean one out each time he wants a drink of water.


We hope you found this personalized mug tutorial using the Cricut Mug Press helpful. Let us know if you have any questions in the comments below. Happy crafting!
Like it? Pin it for later!

