If you would like to learn how to use Infusible ink pens on mugs, learn the step-by-step process with this fun fall craft idea!


How to use Infusible Pens on Mugs
This is the magical part about having a Cricut: beyond the Cricut materials, the only other thing we need is a white mug! (We include the printable here.) This is such a great and not-so-challenging project if you are looking for DIY designs with Infusible pens. We know that some people learn best from photos, while others learn best from video, so we included both options below.


The major thing to know is that once you get the concept, you’ll want to use your Infusible pens for EVERYTHING! Decorating mugs is only where it begins. I hope you share with us what you use your Infusible pens for the most after joining us in this craft.
Get updates on the latest posts and more from Sustain My Craft Habit straight to your inbox by joining our weekly newsletter. We promise to send you only the good stuff.
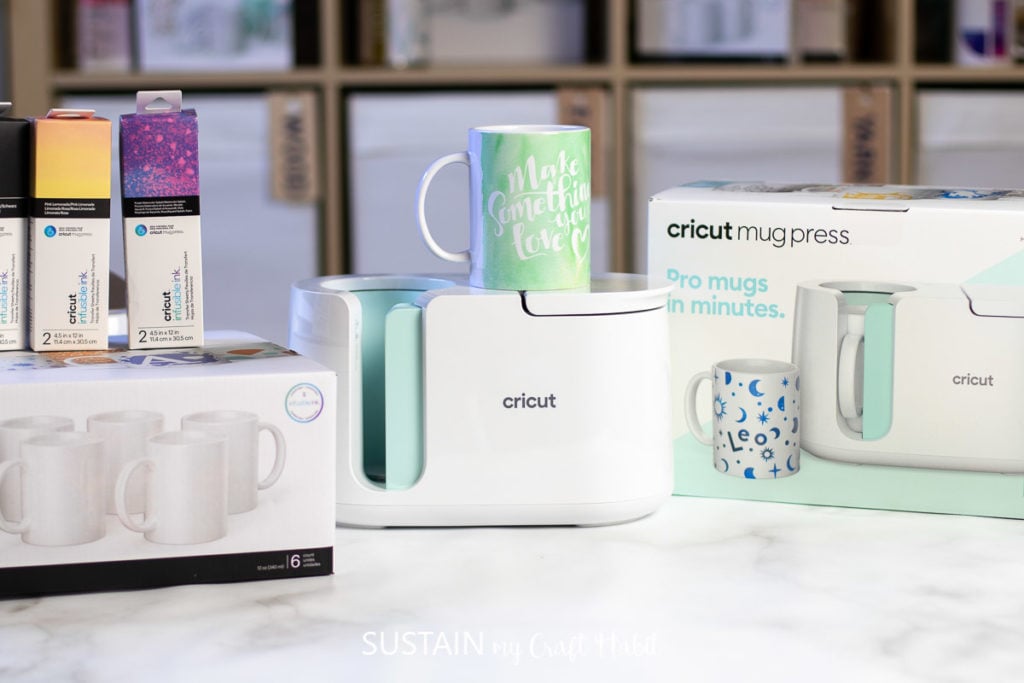
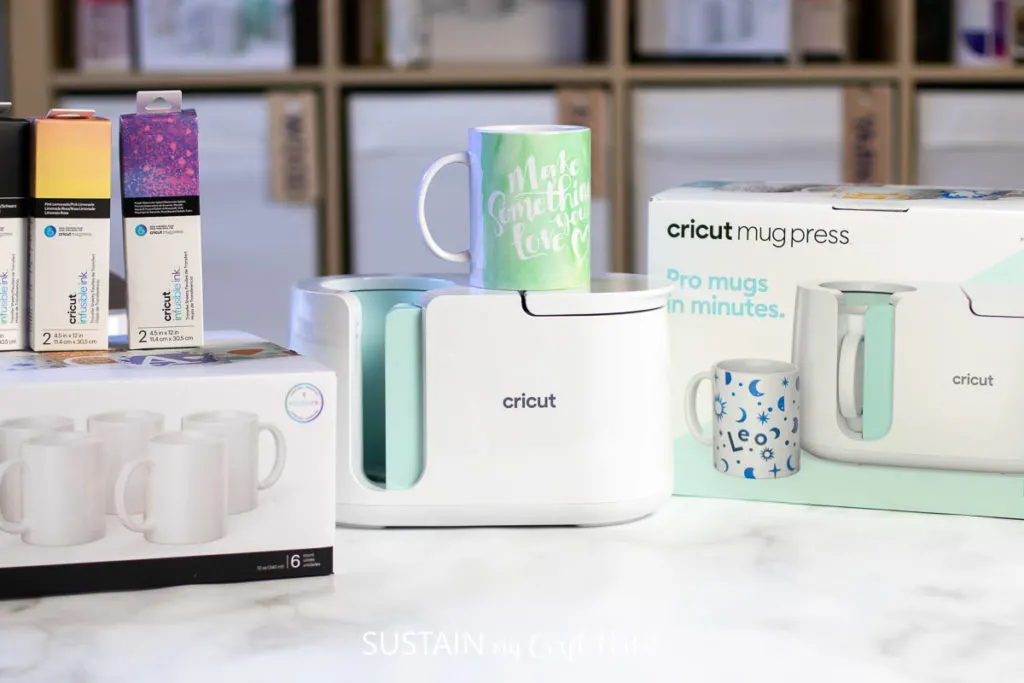
Materials Needed
Disclosure: This post contains affiliate links for your shopping convenience. Should you choose to purchase through them, we will make a small commission at no extra cost to you. You can read our full disclosure policy here.
- White mug (compatible with the Mug Press)
- Cricut Mug Press
- Cricut infusible ink markers or pens
- Cricut transfer sheets
- Heat resistant tape
- Free fall printable
How to Use Infusible Ink Pens on Mugs
Here is a step-by-step video of the mugs we made on our Facebook page! Or if you prefer the photo tutorial, continue reading below.
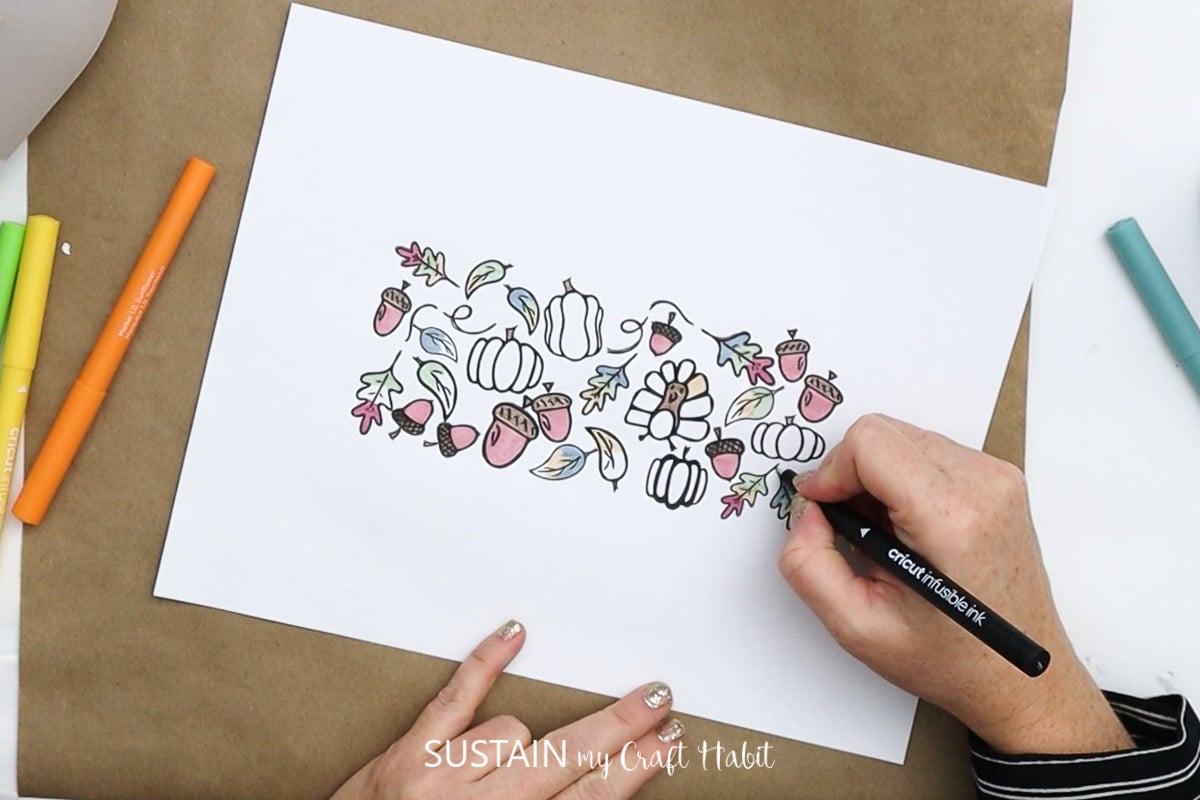
Choose your design or grab our free fall printable.
Start by coloring your printable using Cricut infusible ink markers and cutting out the image to the height and circumference (minus the space for the handle) of the mug.


Use a lint roller on your mug before wrapping it with the colored printable. This will get rid of any loose particles that may show up after pressing.


Wrap the design (face down) around the mug aligning the top and bottom edges with the top and bottom edges of the mug. Use heat resistant tape to hold the image in place.
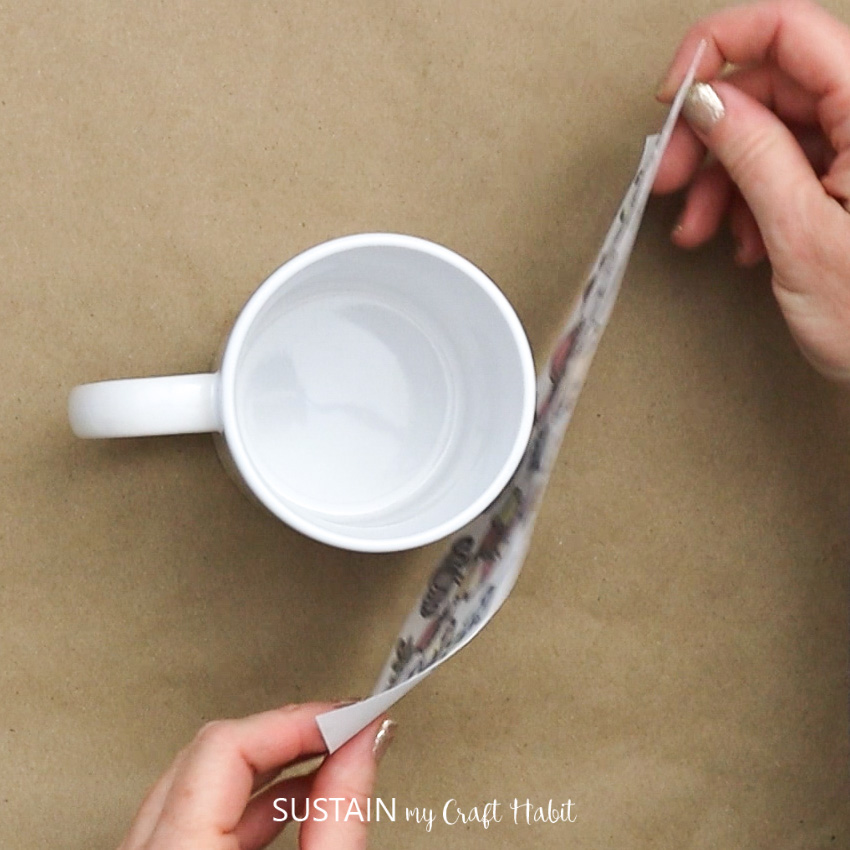


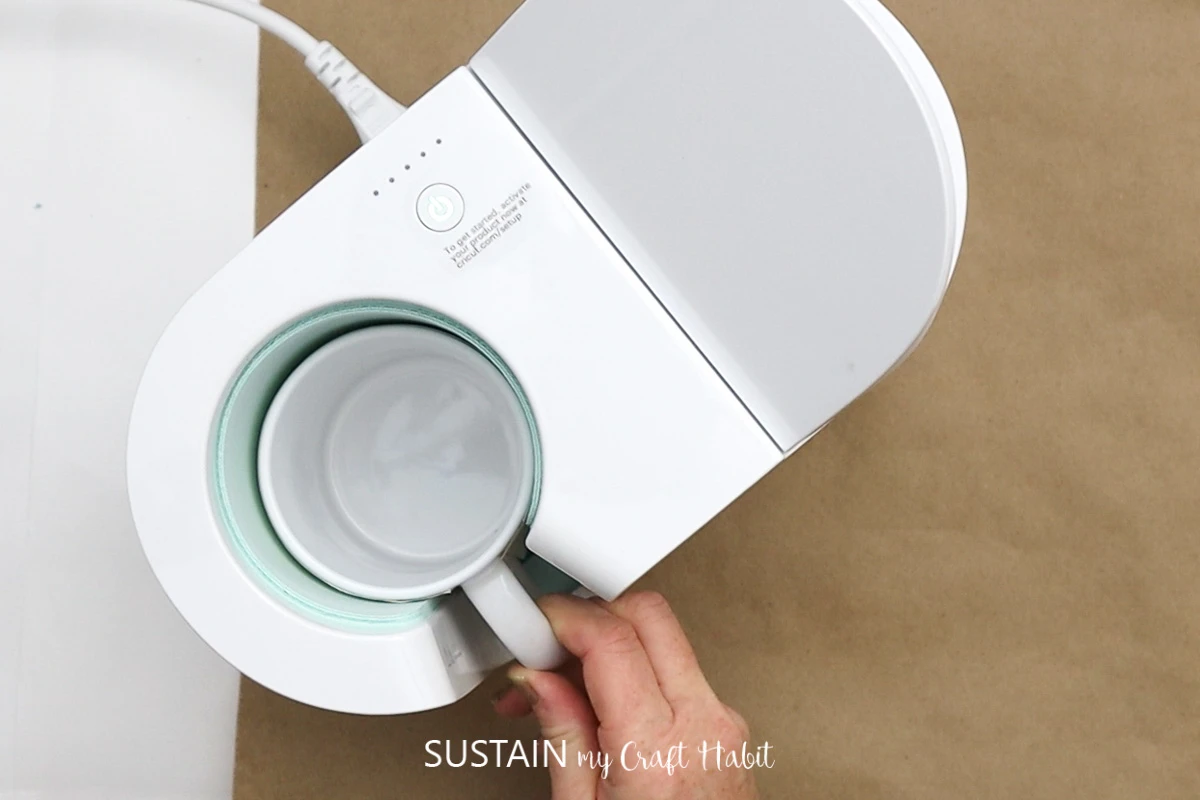
Have the liner meet under the mug handle and gently press the transfer sheet so it’s snug against the mug.

Preheat the Mug Press. It will beep when it reaches the required temperature.
Secure the mug inside the Cricut Mug Press and push the button. Lift the Mug Press lever and insert the mug inside. Push the lever down to lock the mug securely inside. Then just push the button and wait to the magic to happen! This process takes about 6 minutes. Once it’s done, the Mug press will beep again.

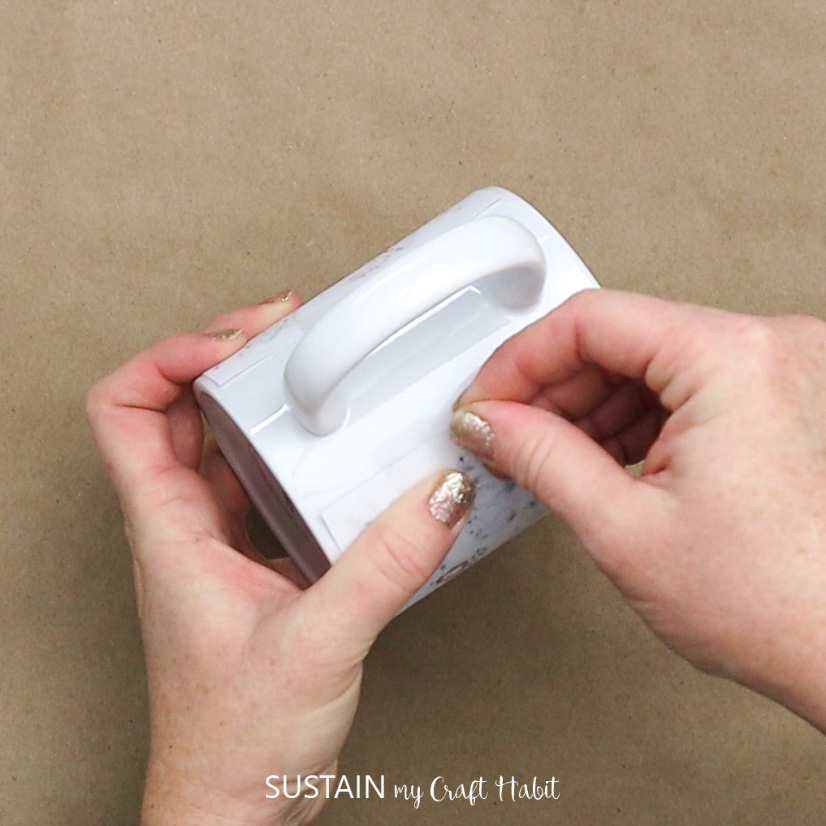
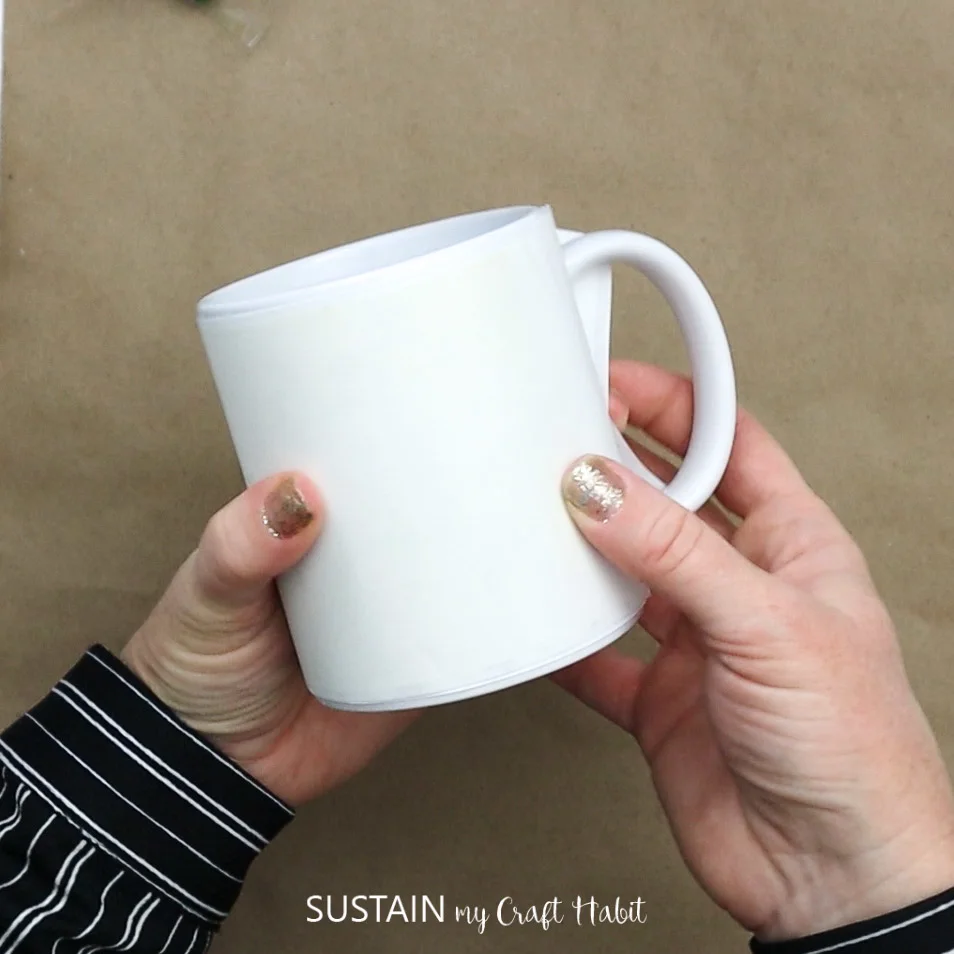
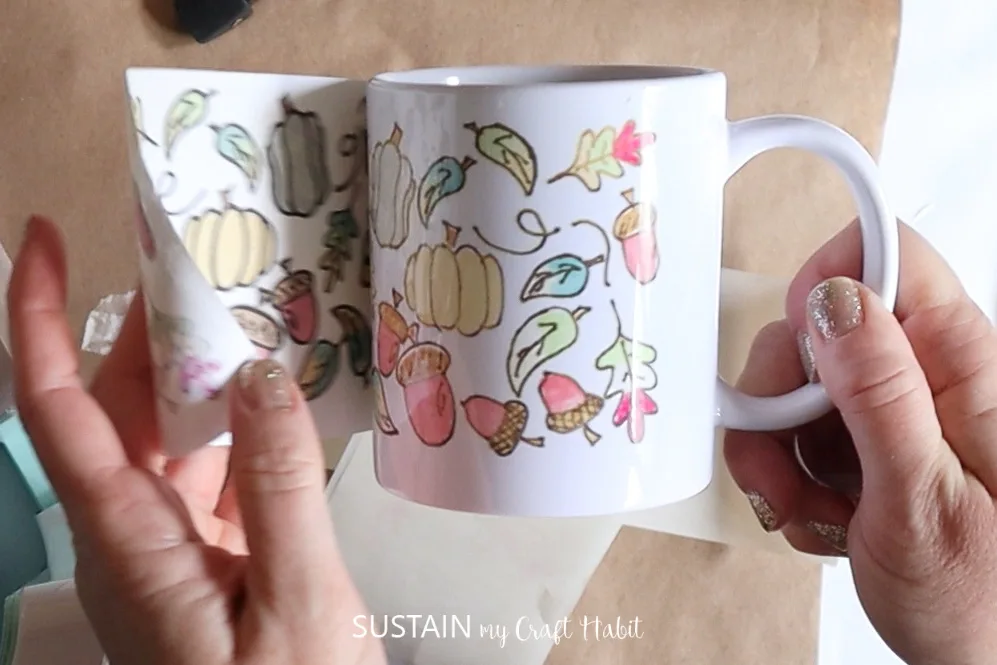
Lift the lever and remove the mug by lifting it by its handle. Place the mug on a heat resistant surface such as the EasyPress mat and allow it to cool completely (about 30 minutes) before peeling off the transfer sheet.
The exciting part is removing the transfer sheet and revealing the design underneath!

More Cricut Mug Press Tips
For a more of in depth guide check out our ultimate guide the the Cricut Mug Press. Plus check out these awesome sister mugs we made!


Not only do you now know how to use Infusible pens on mugs, but hopefully this created other infusible ink mug ideas! We have you covered for fall, but I’m sure you can now envision ideas for every season!


Want to receive a ton of inspiration and money saving ideas for decorating, gift-giving and crafting? Join HERE!
Like it? Pin it for later!


How to Use Infusible Ink Pens on Mugs
Materials
- White Mug
- Cricut mug press
- Cricut infusible ink markers
- Cricut transfer sheets
- Heat resistant tape
- Free fall printable
Instructions
- Start by coloring your printable using Cricut infusible ink markers and cutting out the image.
- use a lint roller on your mug before wrapping it with the Infusible Ink transfer sheet.
- Wrap the design (face down) around the mug aligning the top and bottom edges with the top and bottom edges of the mug.
- Have the liner meet under the mug handle and gently press the transfer sheet so it’s snug against the mug.
- Preheat the Mug Press. It will beep when it reaches the required temperature.
- Secure the mug inside the Cricut Mug Press and push the button. Once it’s done, the Mug press will beep again.
- Lift the lever and remove the mug by lifting it by its handle. Place the mug on a heat resistant surface such as the EasyPress mat and allow it to cool completely (about 30 minutes) before peeling off the transfer sheet.
- The exciting part is removing the transfer sheet and revealing the design underneath!