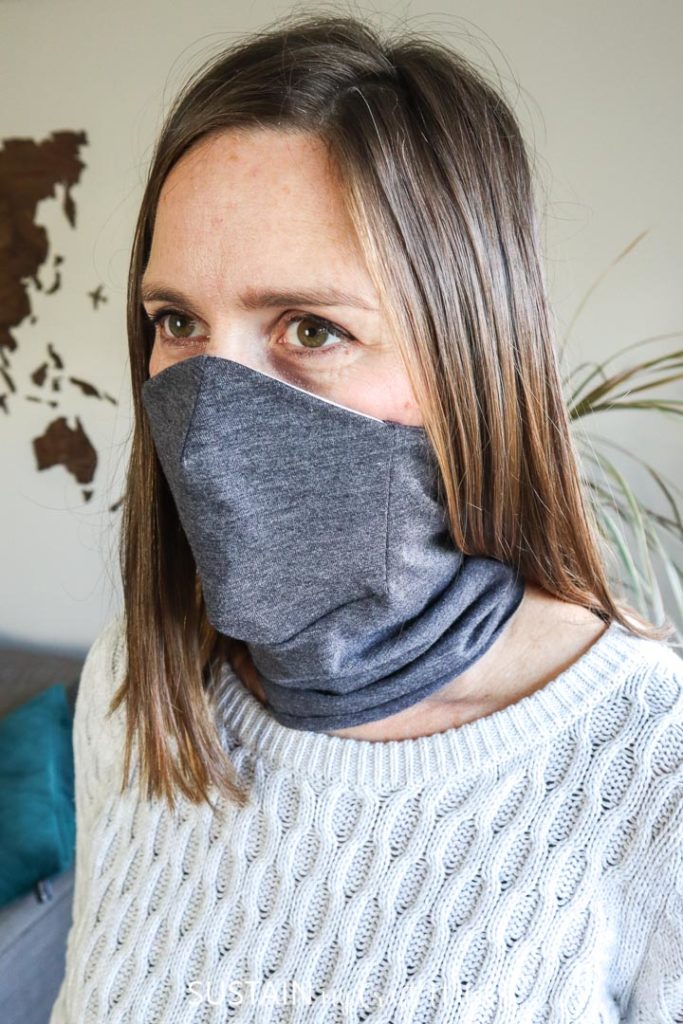
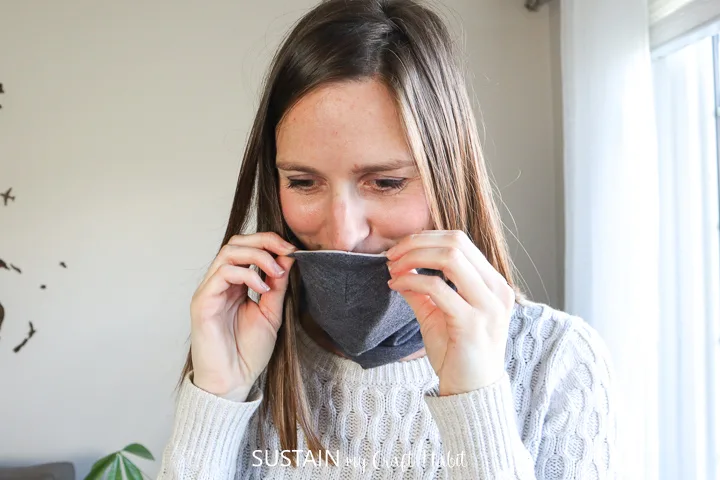
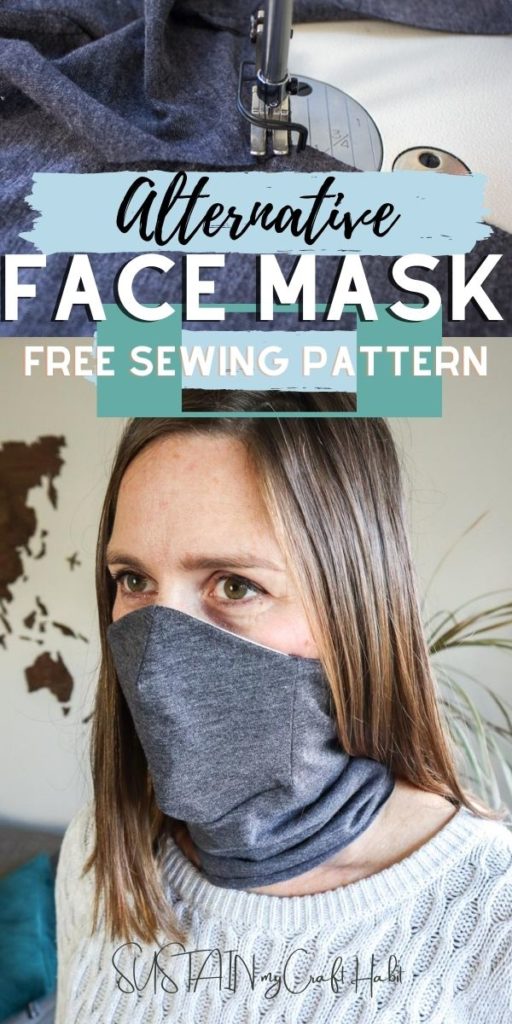
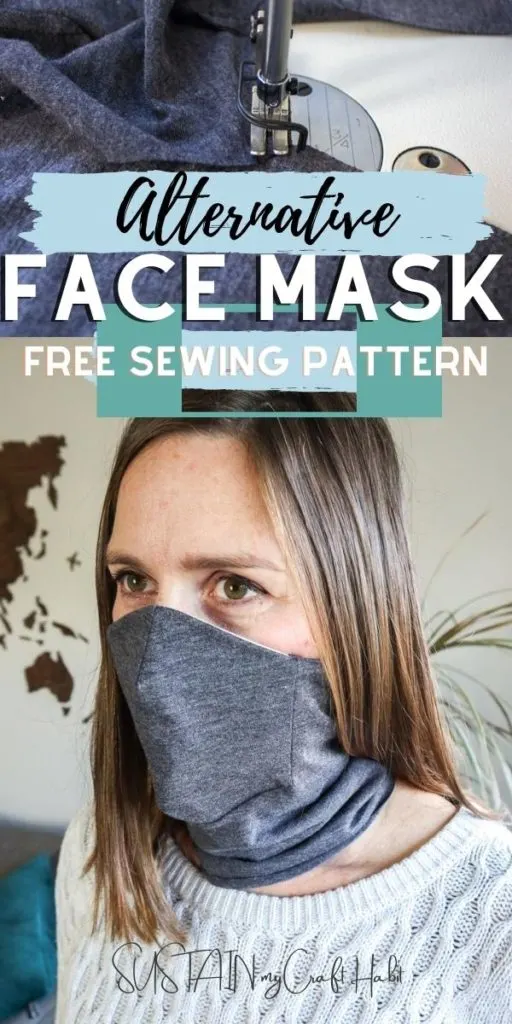
If you’re looking for an alternative face mask option, we’re sharing the sewing pattern and tutorial for making an over the nose and mouth mask scarf with a built in front panel for added protection.

DIY Alternative Face Mask
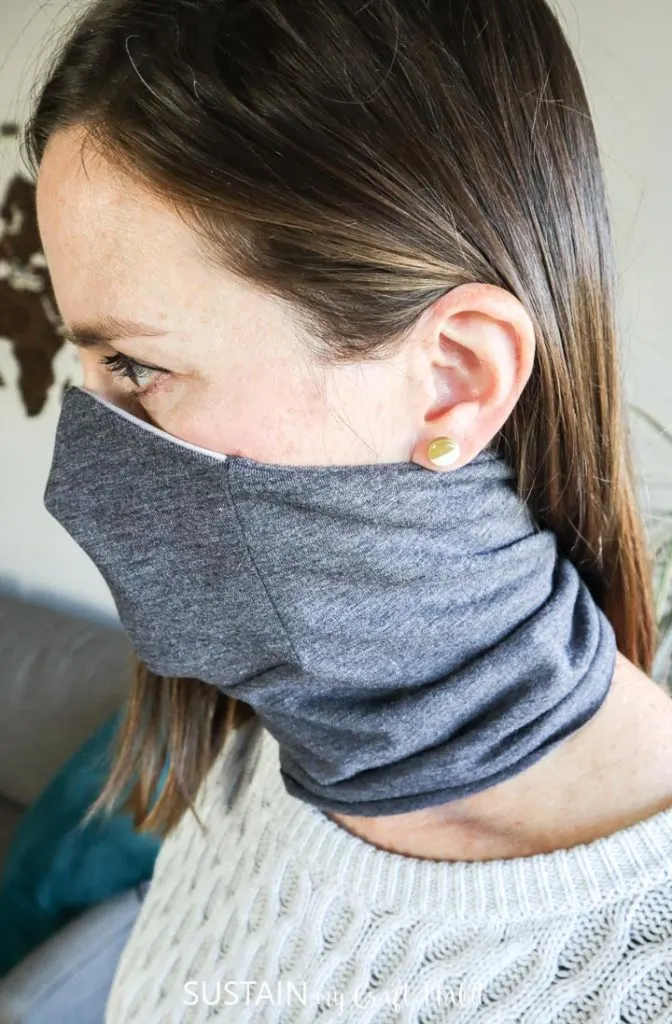
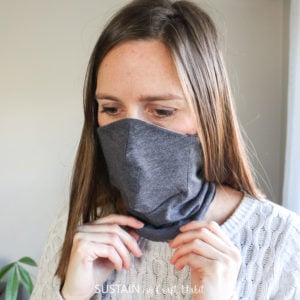
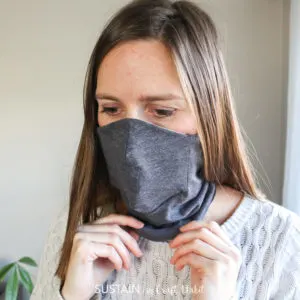
Initially, I made this mask scarf specifically for my husband who works outside the home throughout the COVID-19 pandemic. As a property manager he struggled with his day to day tasks while wearing a traditional pleated face mask. This alternative face mask style stays in place covering the nose and mouth without the need for elastics around the ears. And additionally when it’s not being worn over the nose, it can be worn loosely around your neck avoiding the need to over-handle the mask or accidently misplace it.
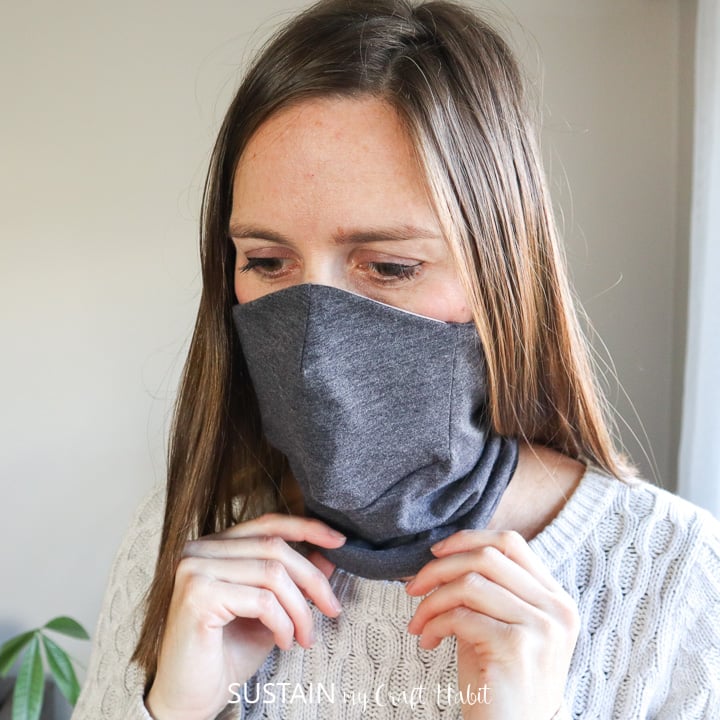

I’ve seen similar styles being called a neck gaiter, a snood and even a buff. While the others look good I didn’t like that they were solely made out of a stretchy knit material; which does not provide the same level of protection as a tightly woven fabric. Since the intent of wearing a mask is to minimize expelled droplets from escaping into the air, a tightly woven material with its reduced permeability is the better option. I wanted to ensure my hubby was safe and keeping others safe while he worked.

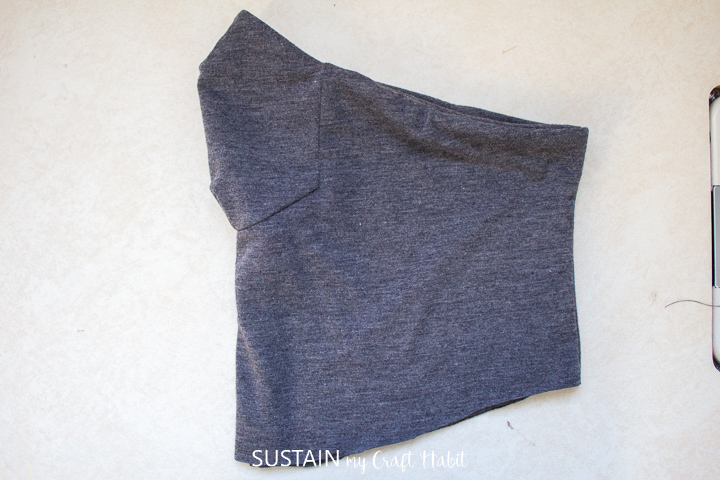
Outer Full Knit Layer 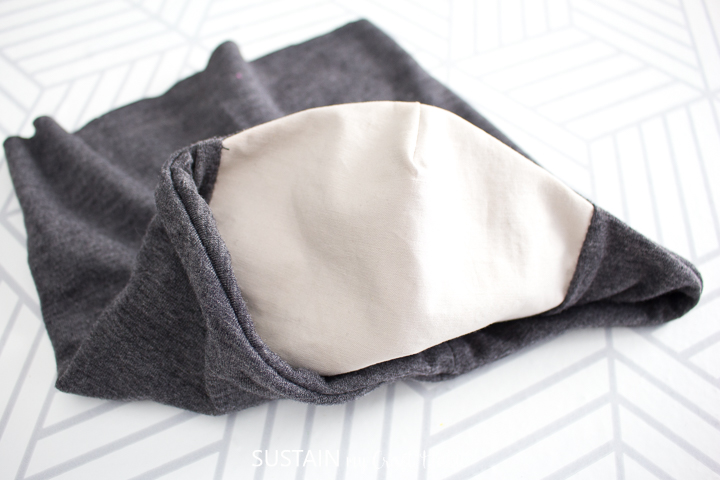
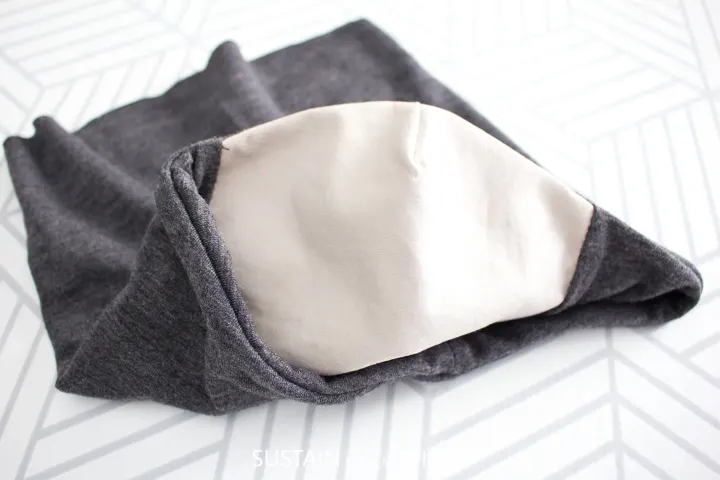
Inner Mixed Woven Nose and Mouth Panel with Knit Neck Panel
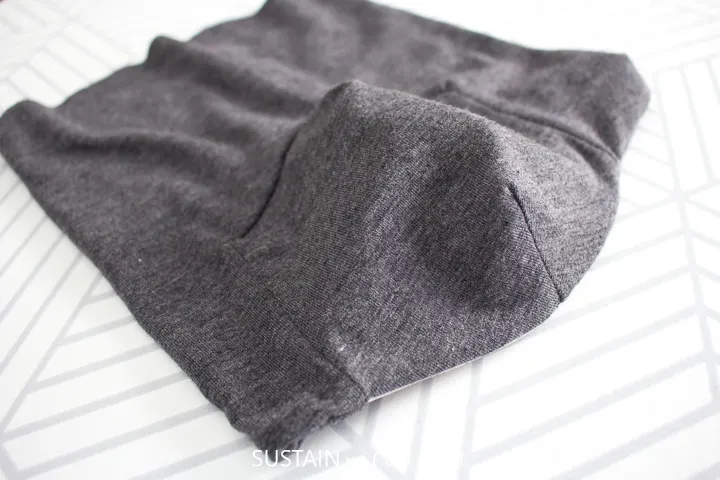
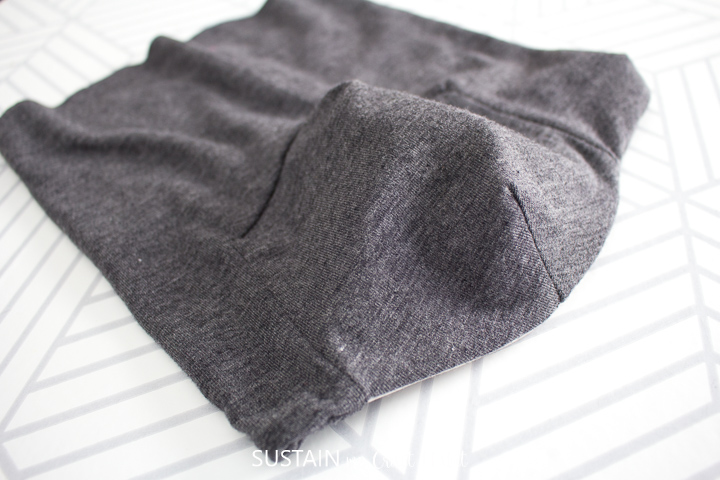
The buff is designed with a separate panel for the nose and mouth area to be cut out in a tightly woven fabric while the rest of the buff is made out of a stretchy fabric to fit comfortably over the head.
WHICH FABRICS TO USE FOR GENERAL USE FACE MASKS?
Although this particular home-sewn face mask is intended for general use (not approved for medical use), choosing the right fabric is very important. As mentioned above, it is best to use a tightly woven fabric with a plain weave, one that DOESN’T have any stretch. This is different from a knitted material, such as t-shirts; which are stretchy by nature. A tightly woven fabric (in a medium weight) is less permeable and also will ensure the mask won’t loose it’s shape after wear.
UPDATE: The WHO (World Health Organization) recommends using 3 layers of fabric for non-medical fabric face masks: outer layer to be water resistant; inner layer to be water absorbent and the middle layer to be a non-woven filter. Refer to the WHO’s video for how to wear a mask for more details.
I’ve been using a mix of leftover tightly woven fabrics from my past sewing projects, such as this upcycled cardboard storage box and these hair scrunchies, but even fabric from fitted bed sheets work well for these face masks…BUT keep in mind if the fabric feels thin, then it is best to add additional layers of fabric for added protection.

Sizes for the Mask Scarf
We have two adult sized patterns for this mask scarf: medium and large. Choose the size you need, keeping in mind that I use the medium size (shown above), while my husband uses the large size.
Materials Needed:
Disclosure: This post contains affiliate links for your shopping convenience. Should you choose to purchase through them, we will make a small commission at no extra cost to you. You can read our full disclosure policy here.
- Knit Fabric (such as 100% polyester or cotton jersey knit in a medium weight)
- Flat, tightly woven fabric, 100% cotton (see above)
- Flat braided elastic, ¼”
- Sewing Machine and matching thread
- Fabric Scissors
- Pins
- Printable mask scarf pattern
How to Make a Mask Scarf (an alternative face mask):
Cutting
Print off the mask scarf sewing pattern on 8.5×11 paper without adjusting the scale (see below for actual pattern measurements for reference). Align the paper edges and tape the pieces together.
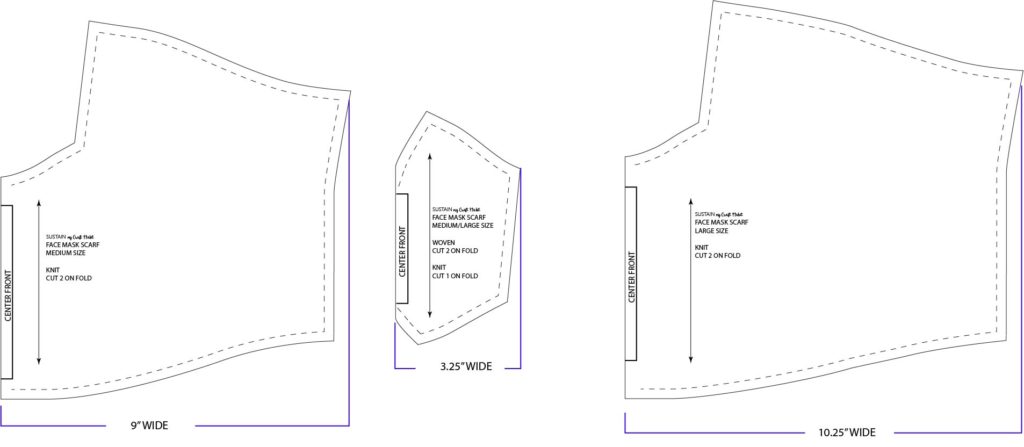
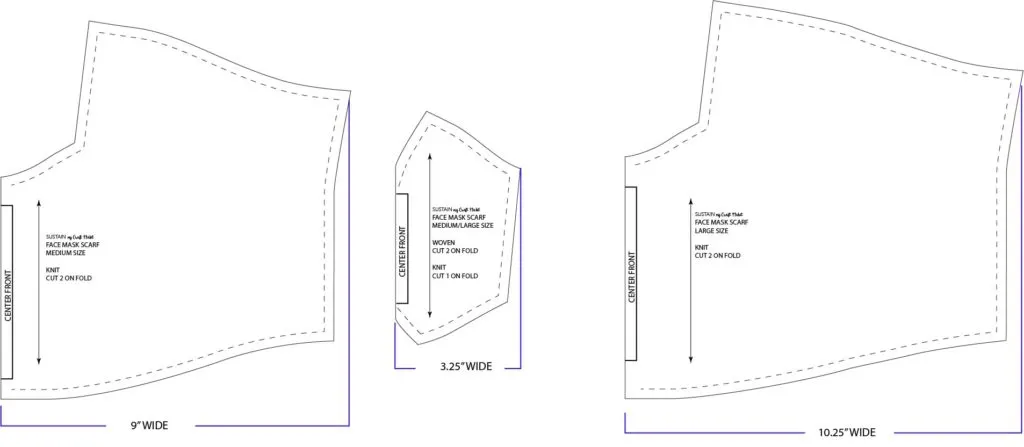
Position pattern pieces over top of the fabric and pin in place aligning the grain lines. Make sure the center front fold line is aligned with the fold of the fabric.
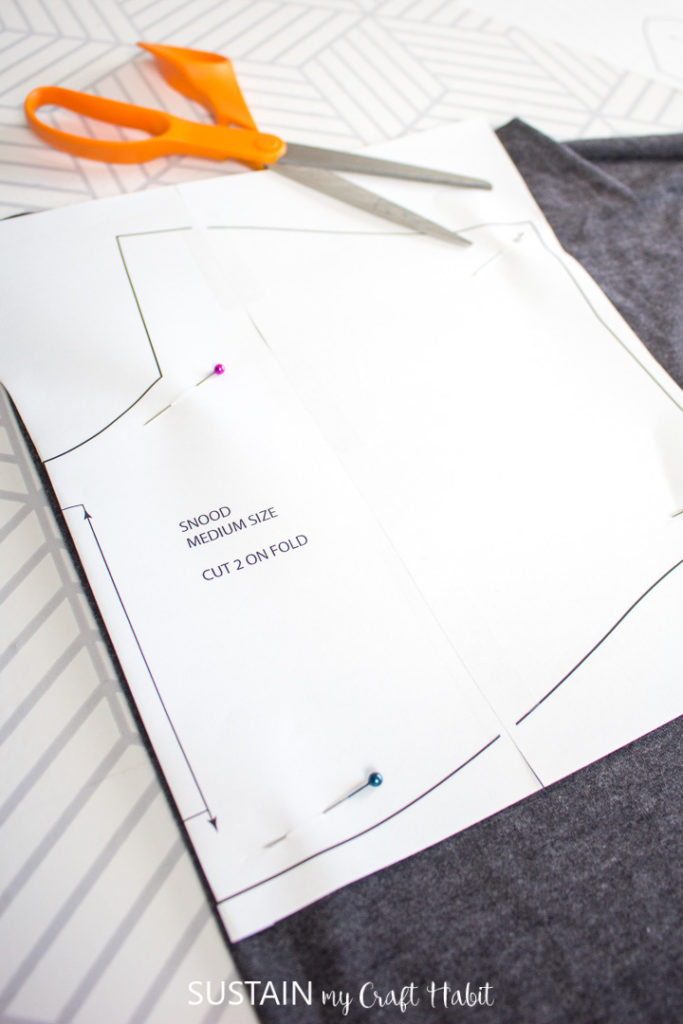
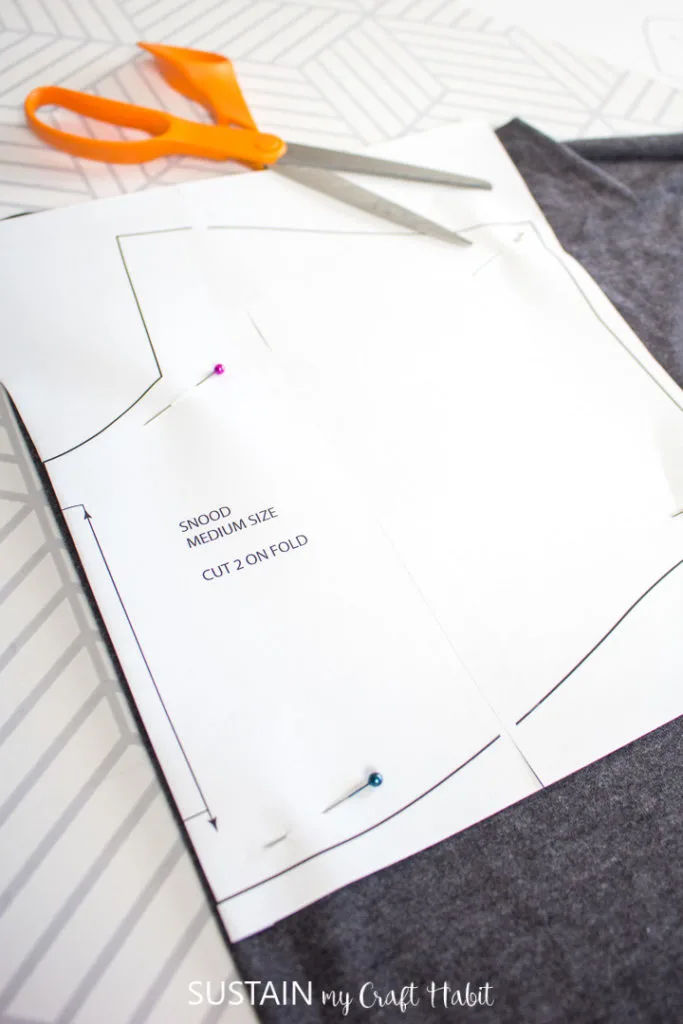
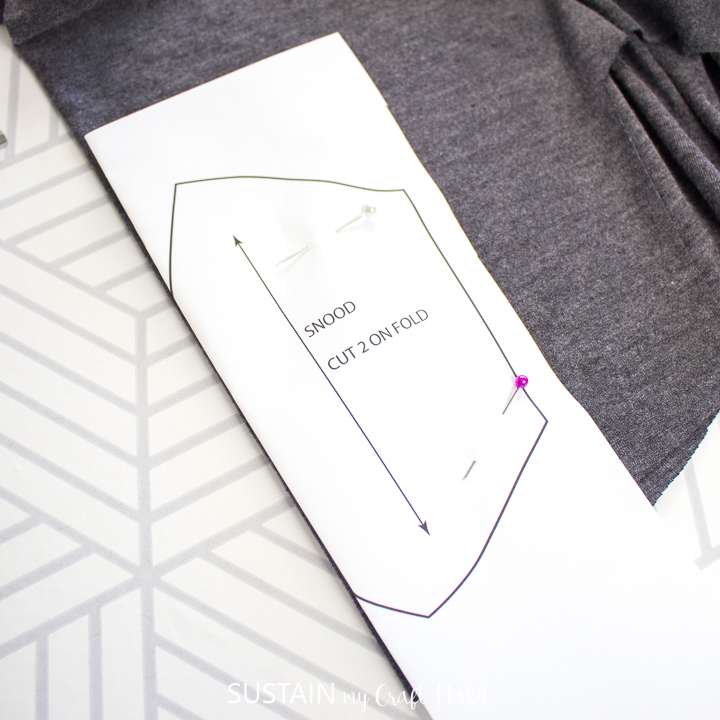
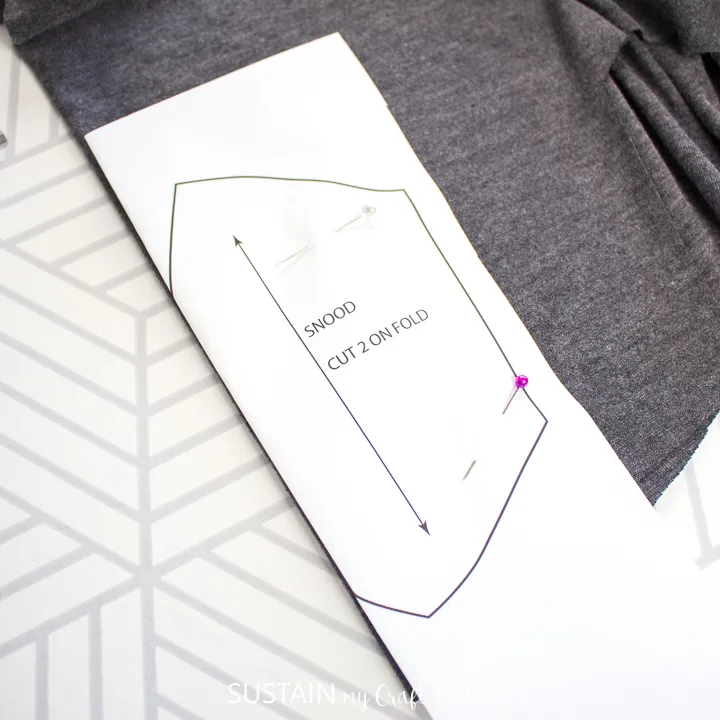
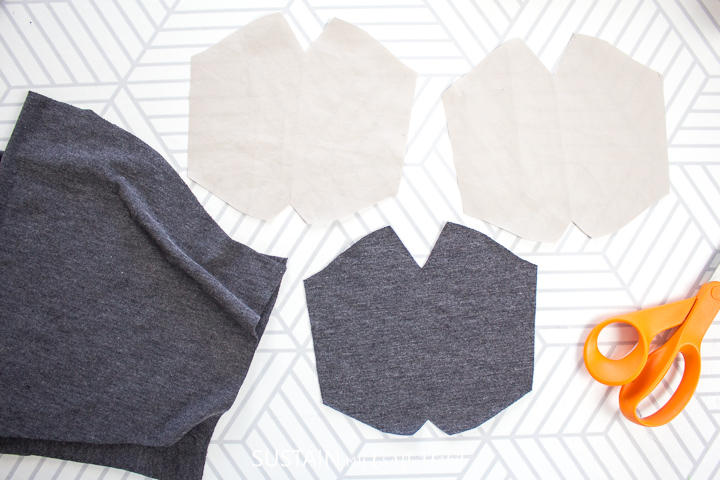
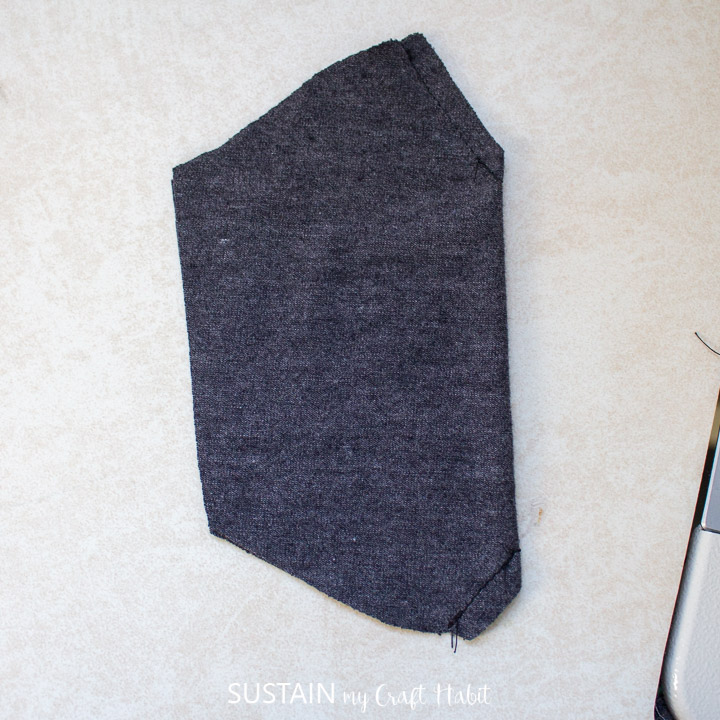
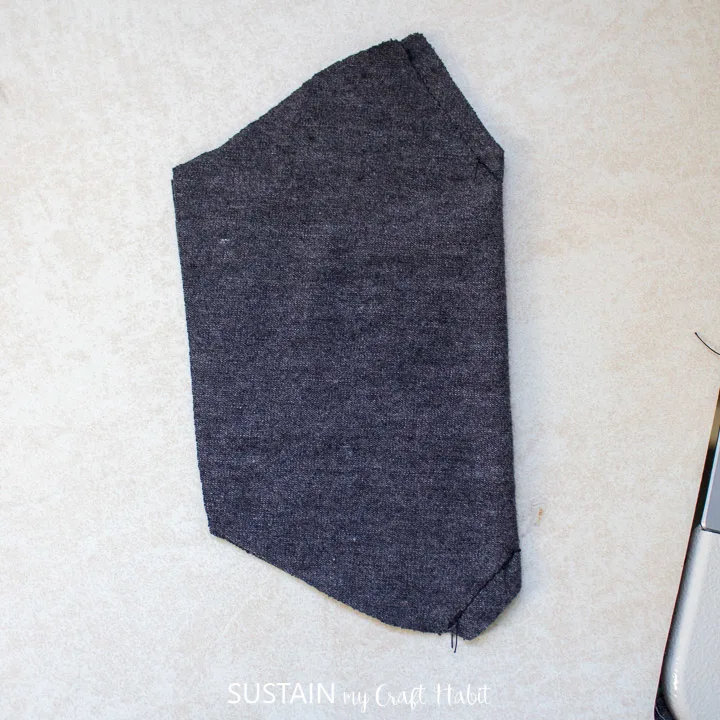
Cut along the solid line (the dashed lines represent the sew lines). Once all pieces are cut, you will have the following pieces to sew together:
- Two pieces of the center nose and mouth panel in a woven fabric.
- One piece of the center nose and mouth panel in a knit fabric.
- Two of the neck pieces in a knit fabric.

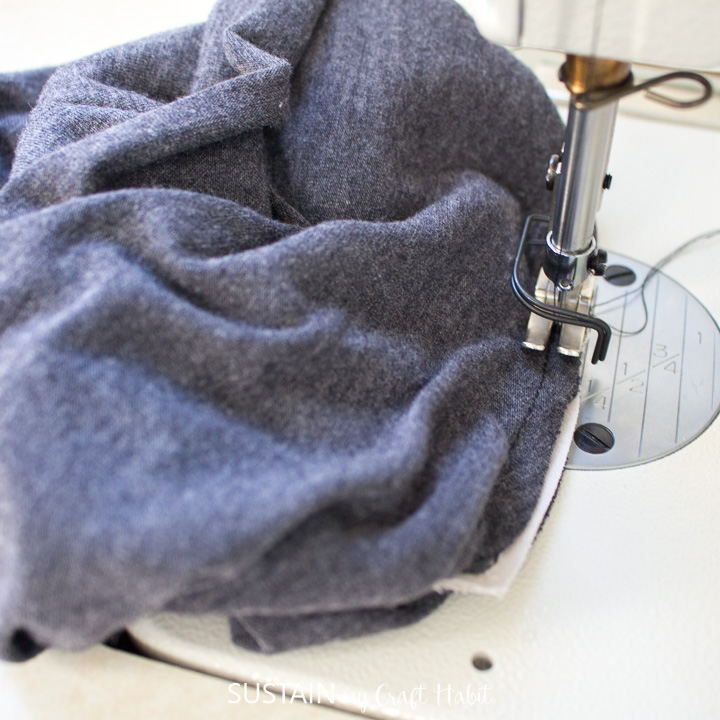
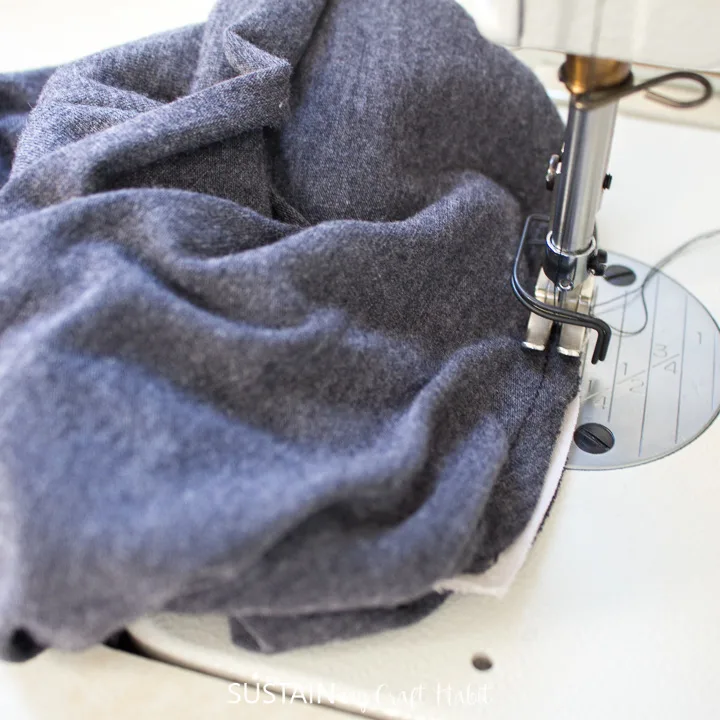
Sewing
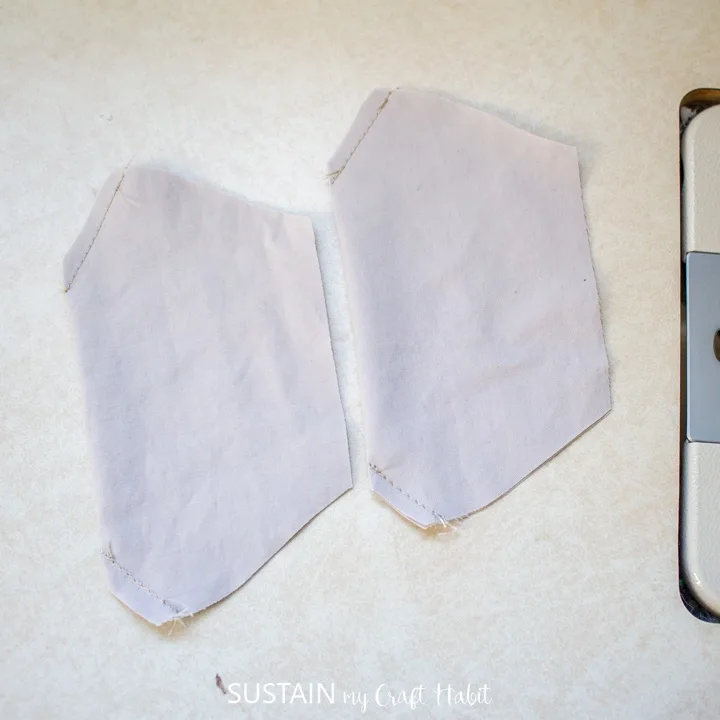
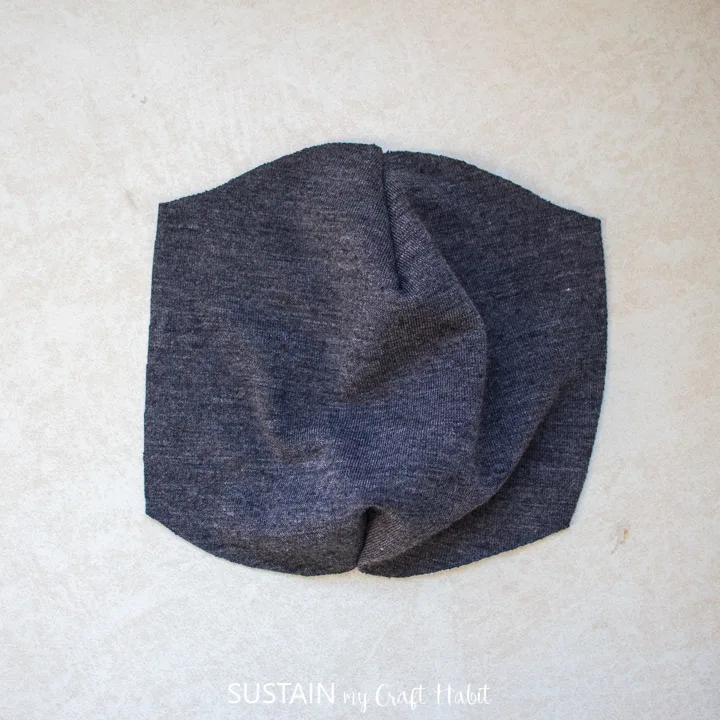
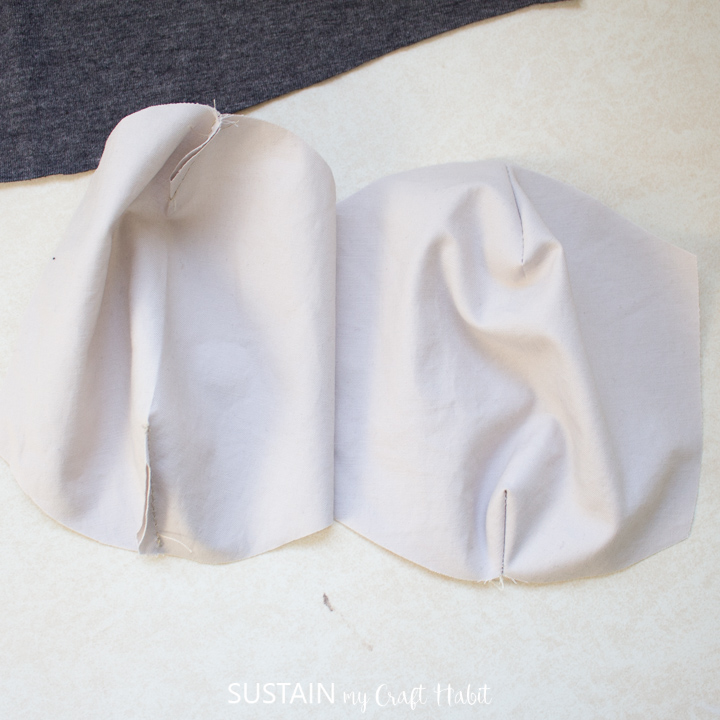
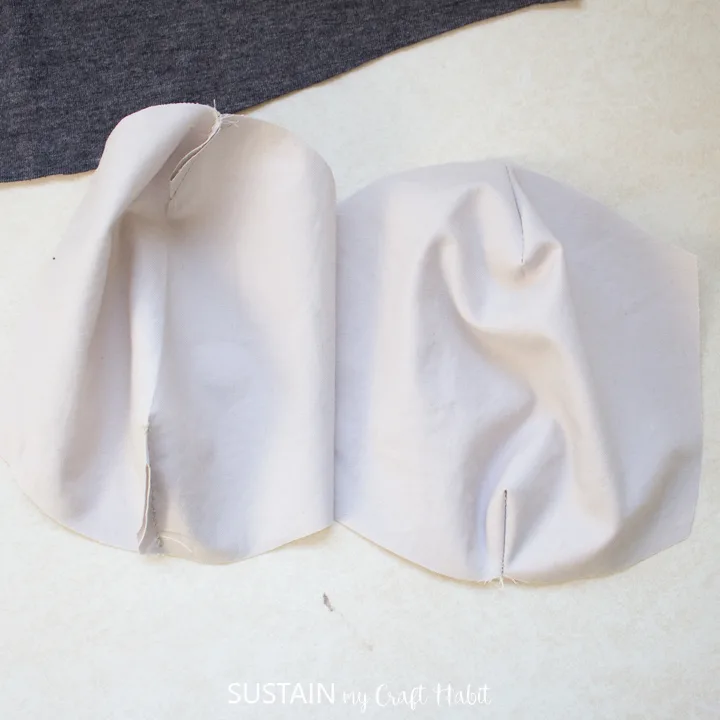
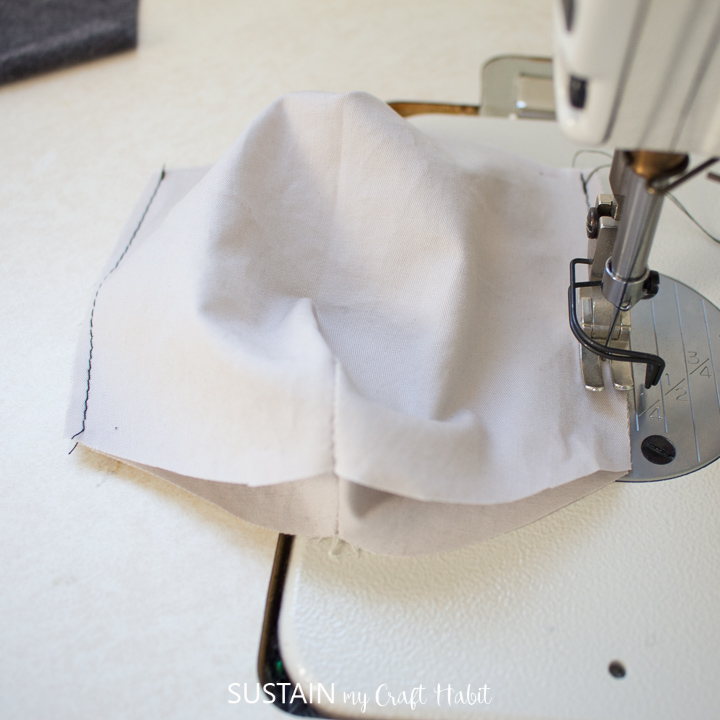
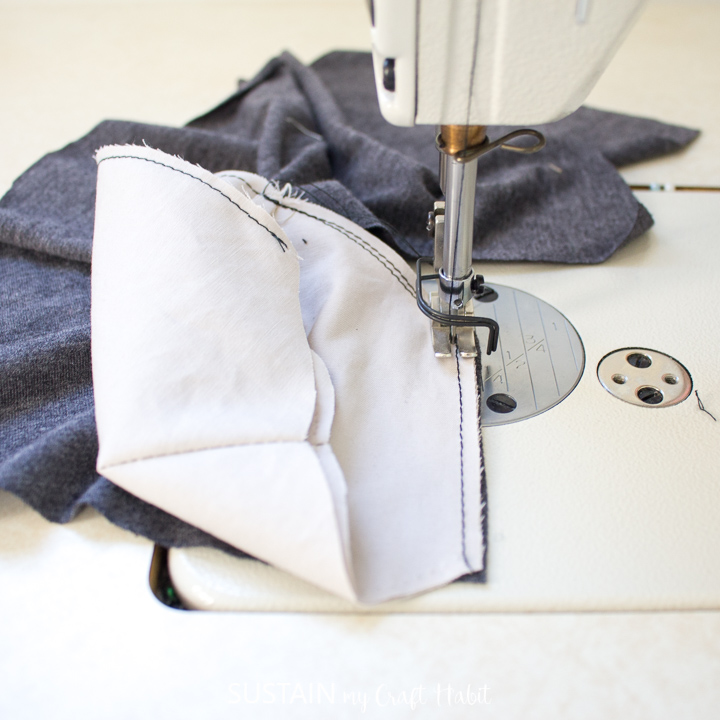
With the nose and mouth pieces folded in half along the center, RIGHT sides together, stitch the top and bottom darts as shown.
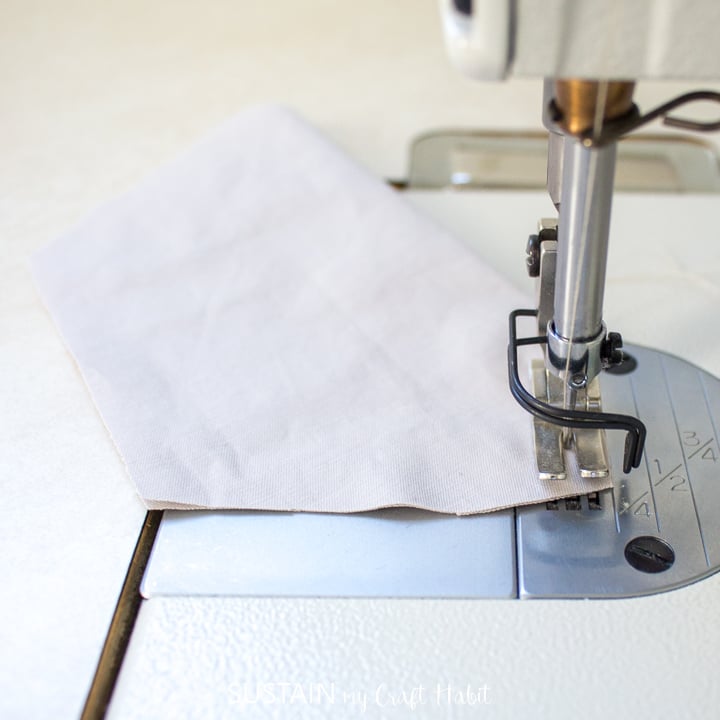
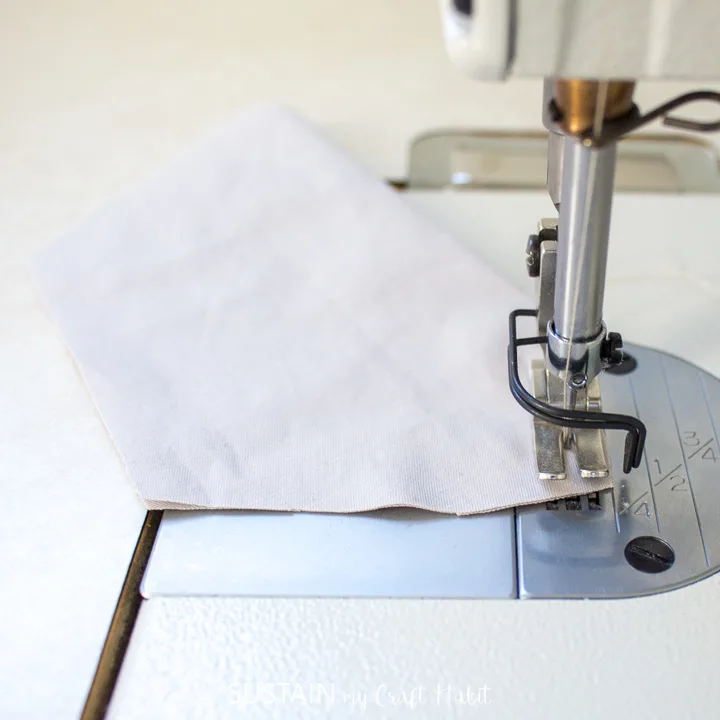
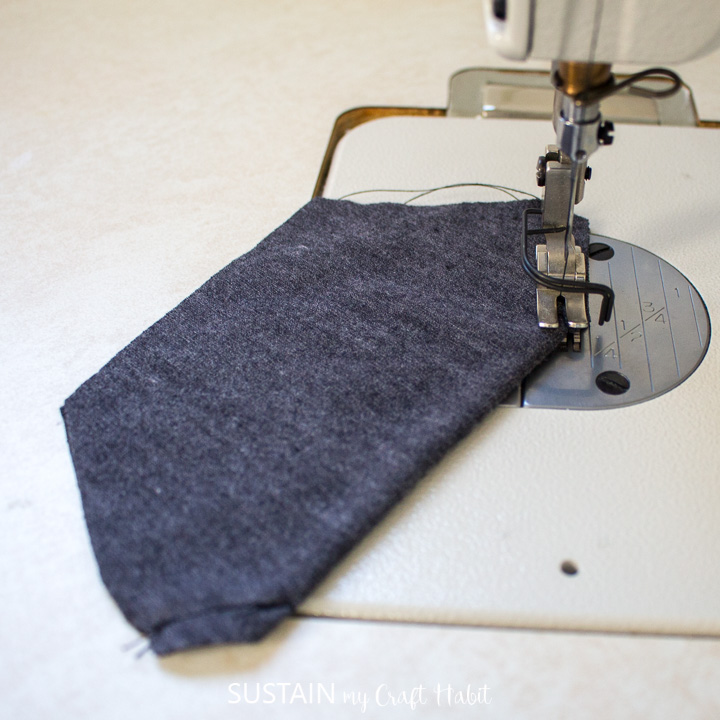
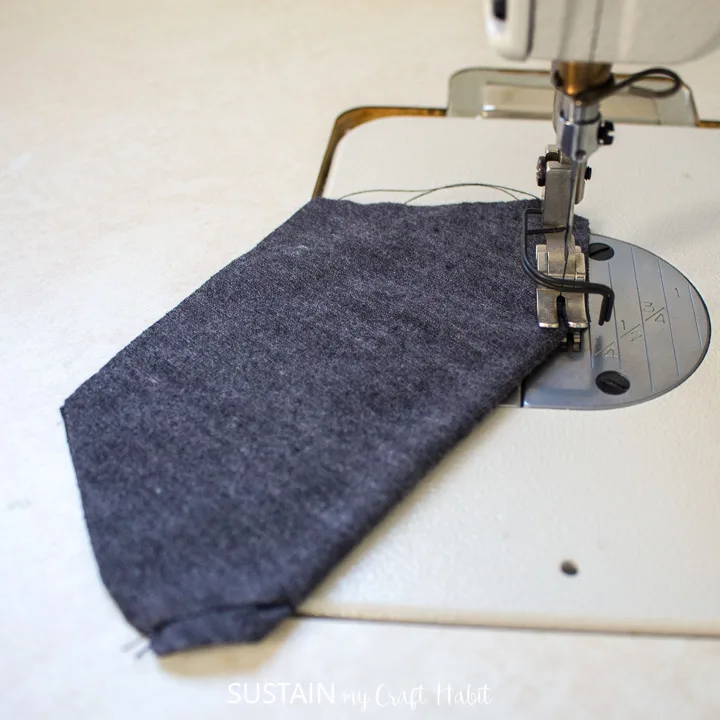
Repeat for the other nose and mouth pieces.


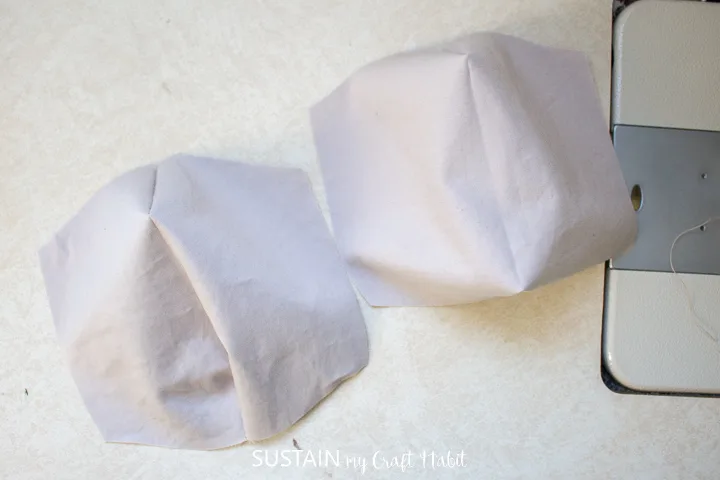

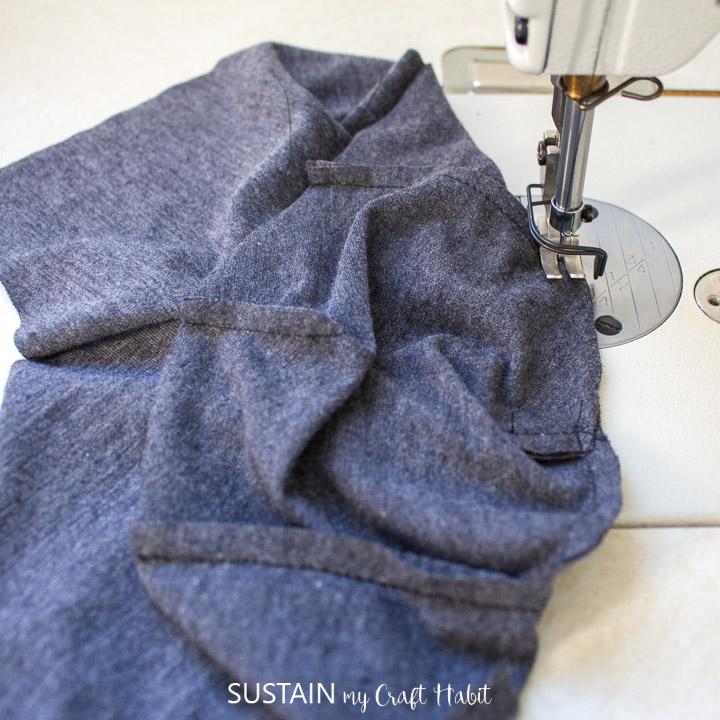
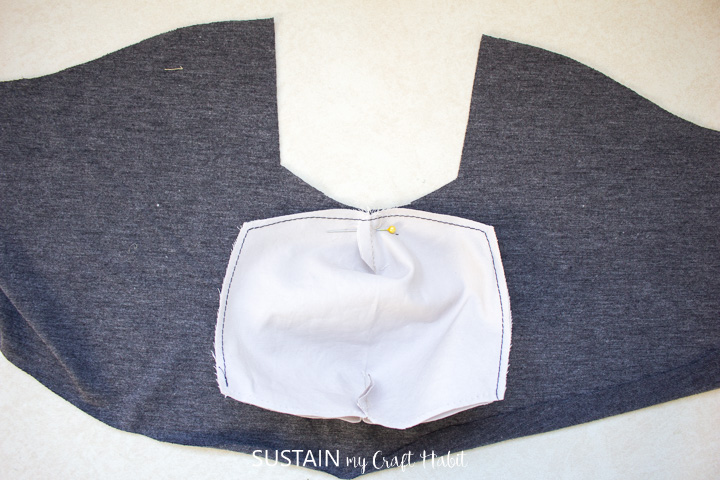
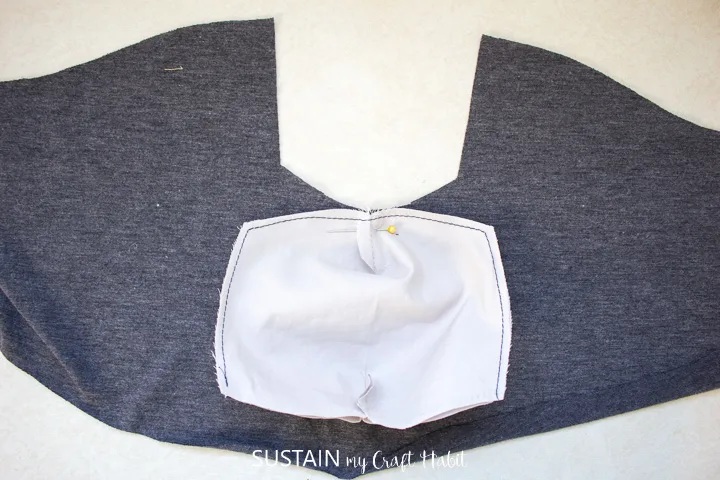
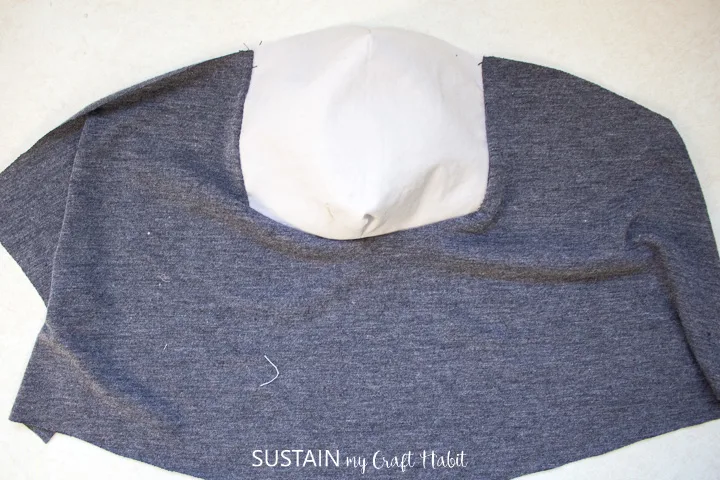
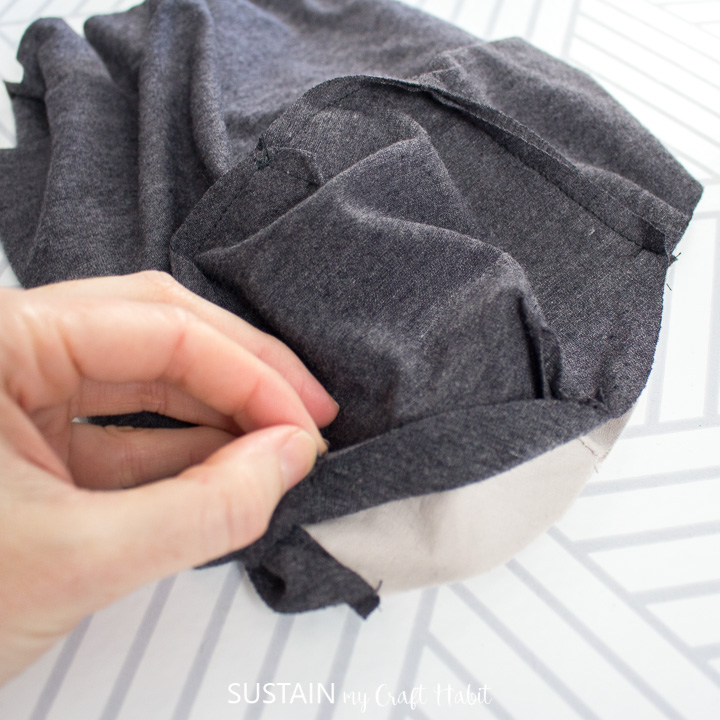
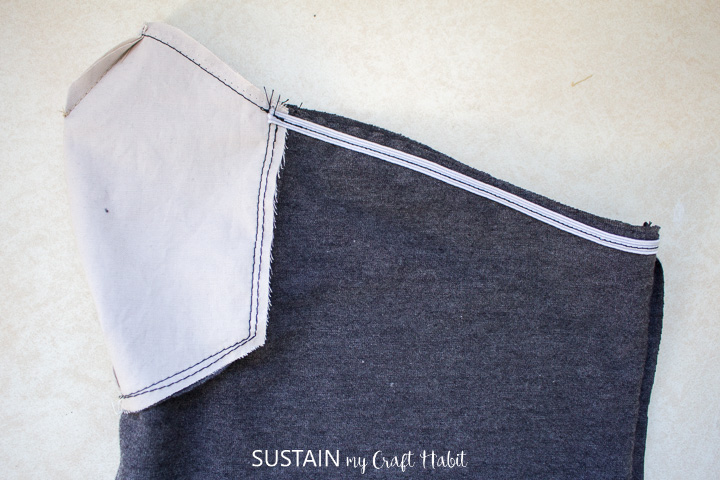
Align the bottom edge of the nose and mouth piece with the top edge of the neck piece along the center front. Pin in place and sew the pieces together, pivoting at the corner. Remove the pin.
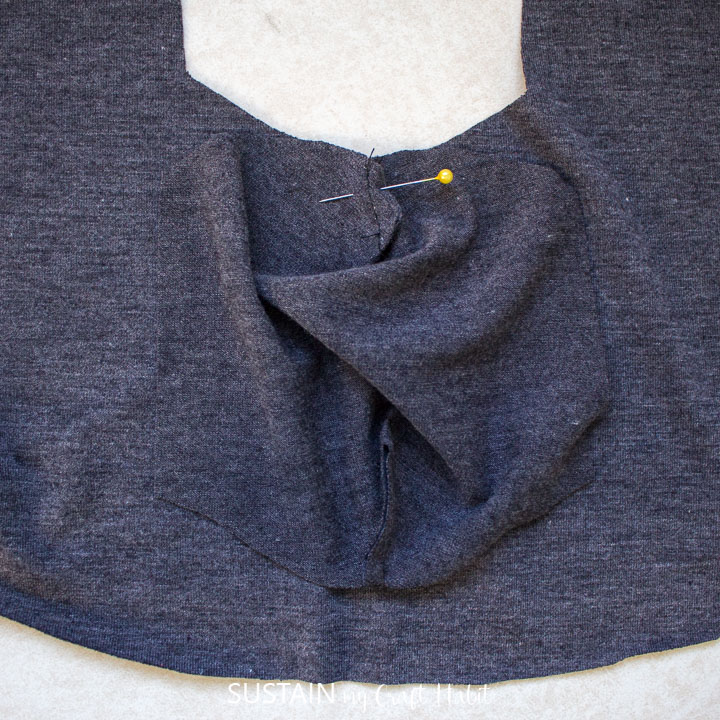
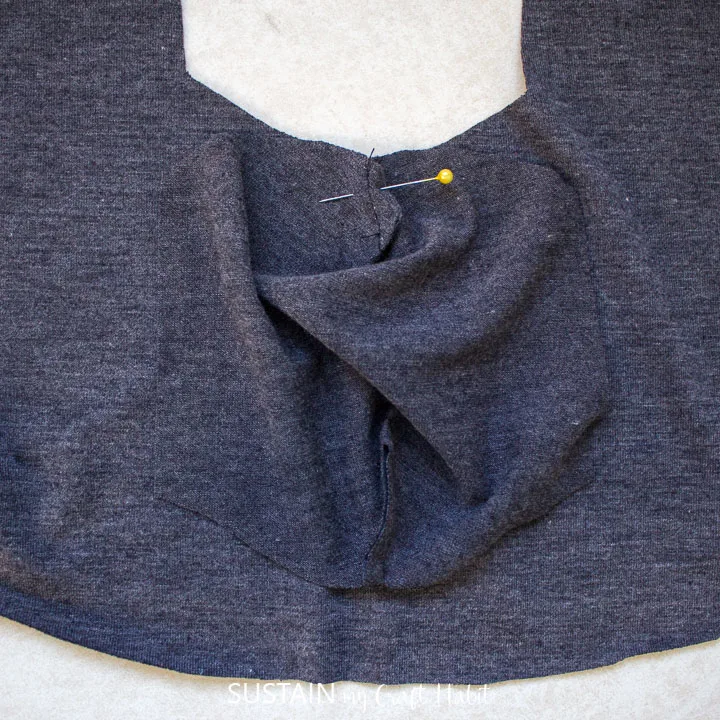
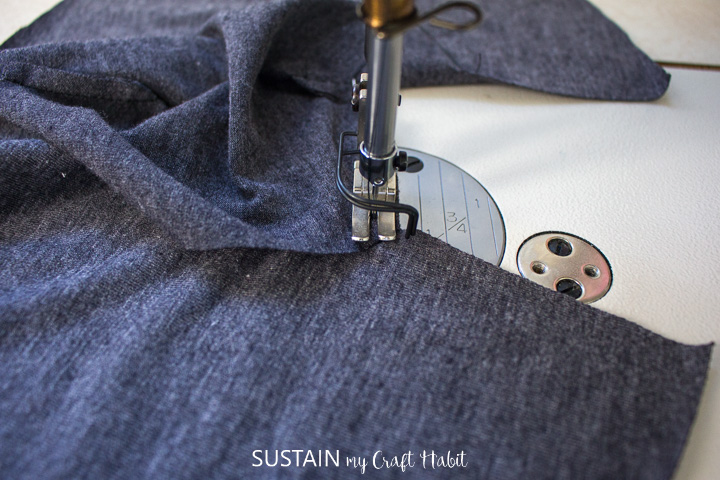


Stitch the opposite side of the center panel in the same way until it is fully stitched.


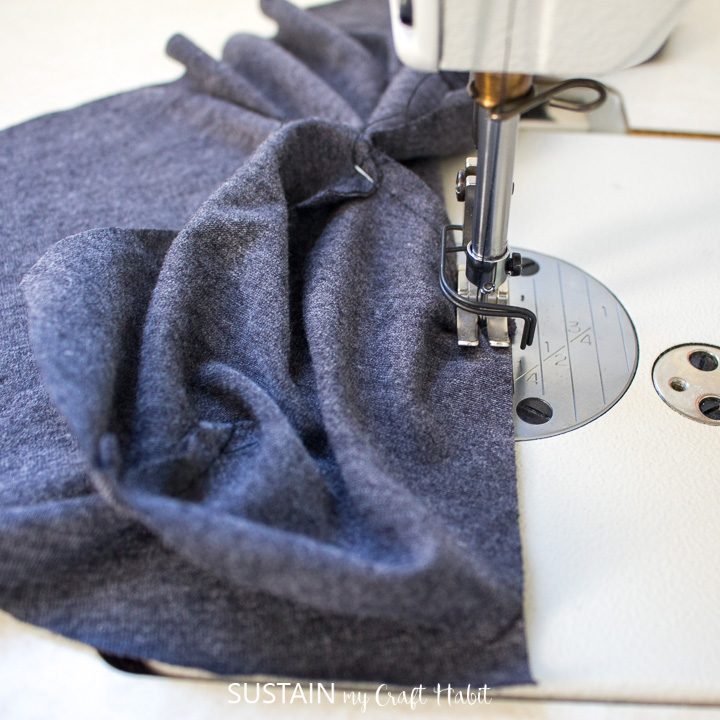
Next, stack the two nose and mouth pieces together with the RIGHT sides facing up. Ensure the top edges are aligned (the longer dart is for the nose; while the shorter dart is for the chin). Baste stitch them together with a narrow stitch.

Sew the nose and mouth panel piece to the other neck piece in the same way as the knitted piece was sewn.


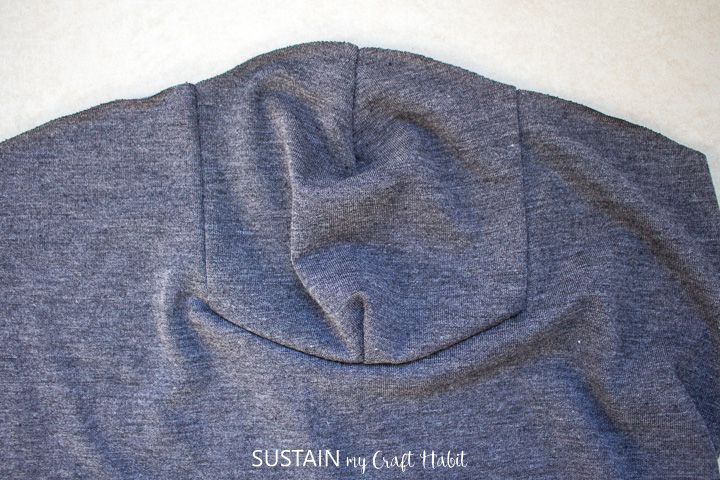
Sew the center back seams together for both of the neck pieces.
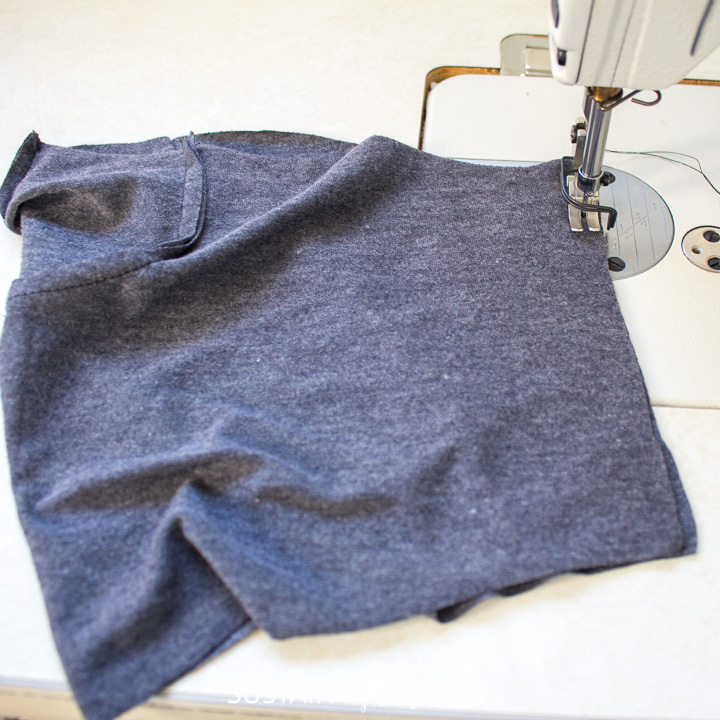
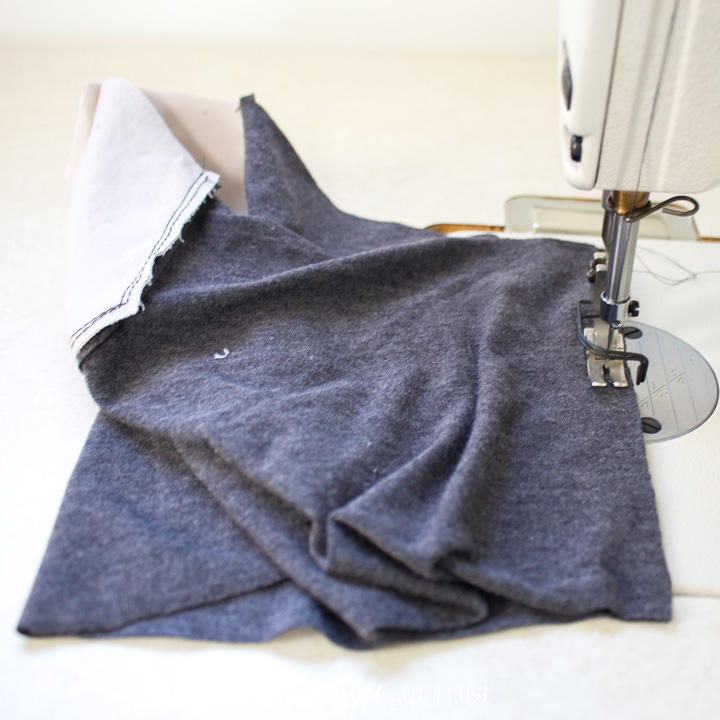
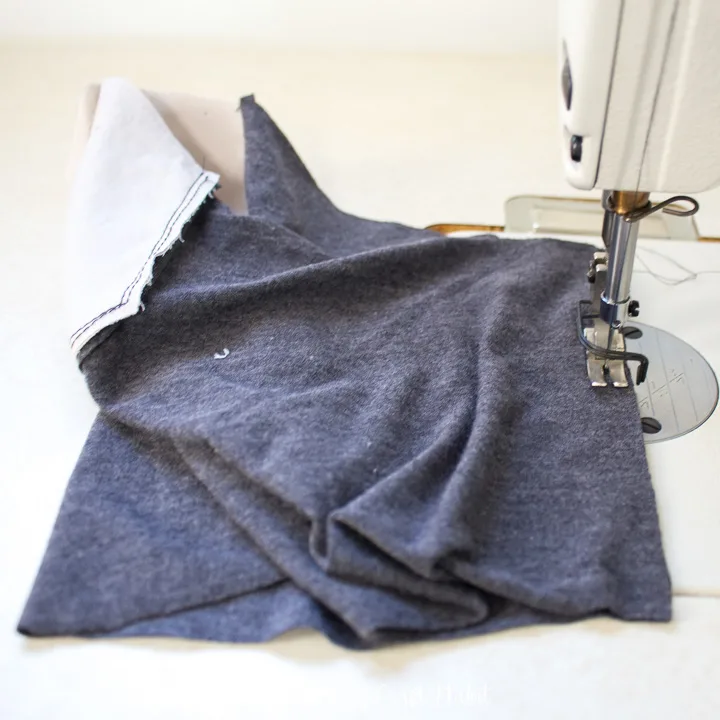
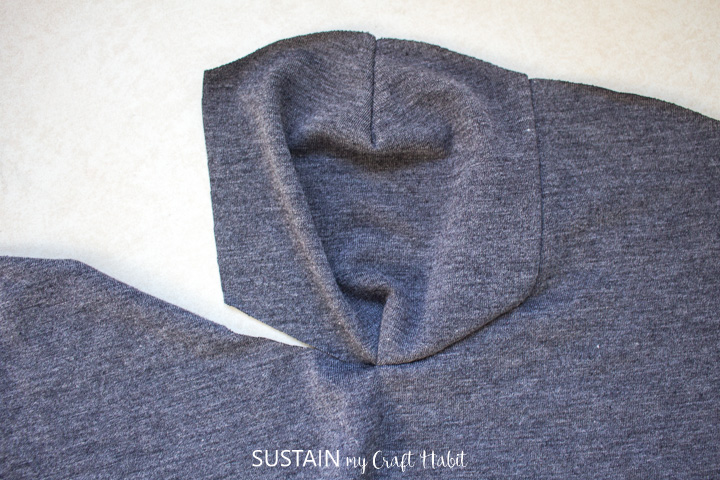
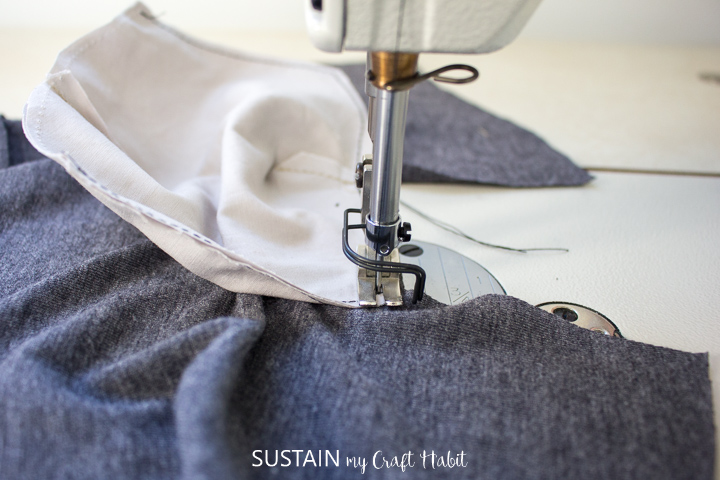
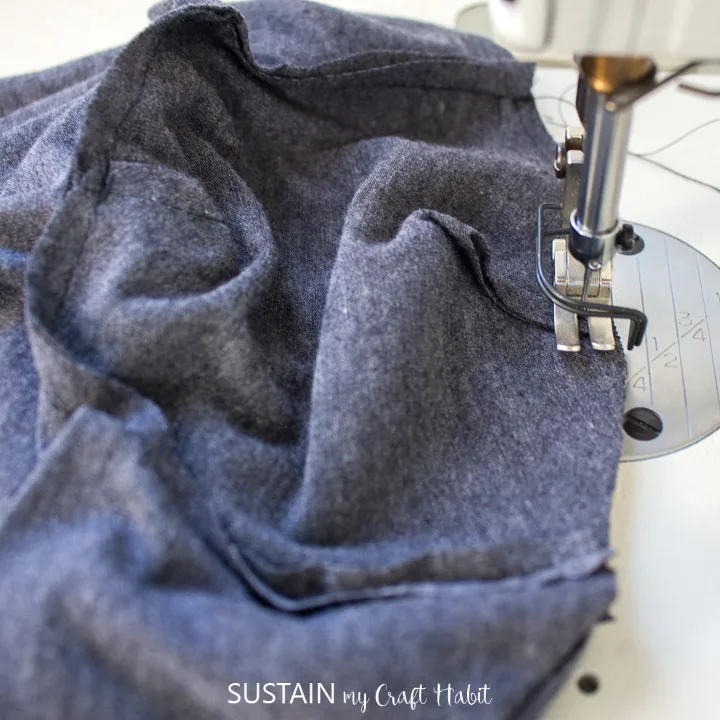
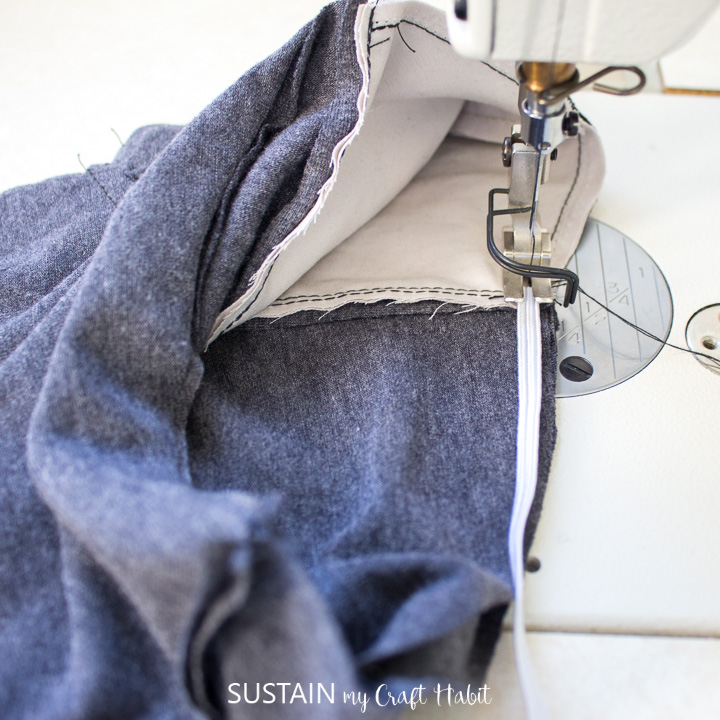
Join the lining with the shell. Place the two sides together with RIGHT sides together and stitch the top edge of the center nose panel.


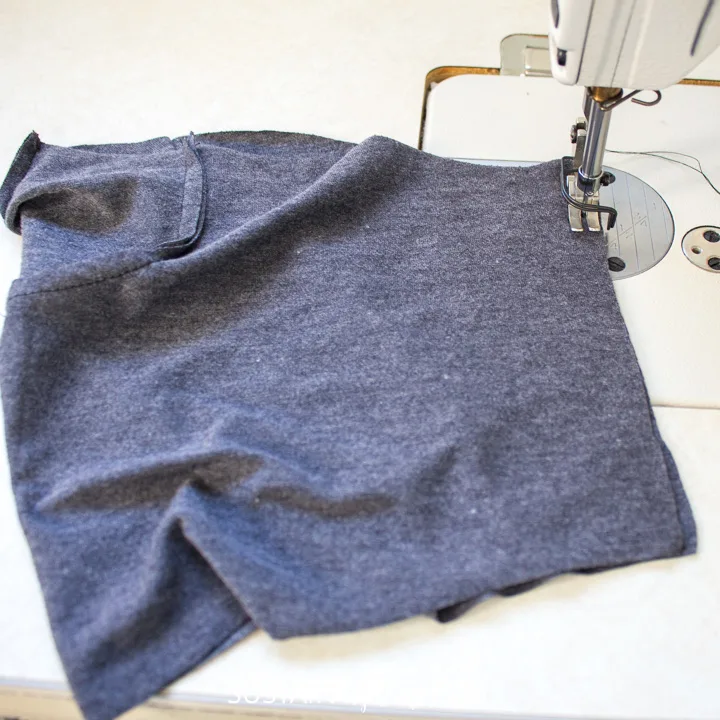
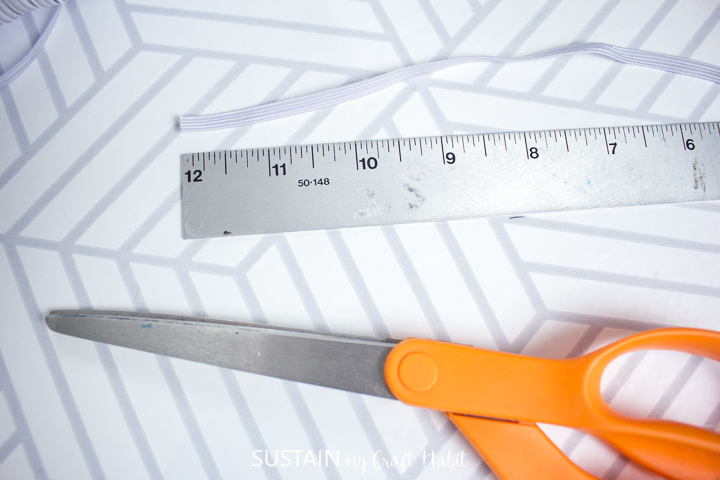
Cut a piece of elastic 12” long.

Sew the elastic along the top edge of the mask scarf as you sew the two layers together. Gently stretch the elastic as you sew to ensure it is sewn evenly around the neck piece.


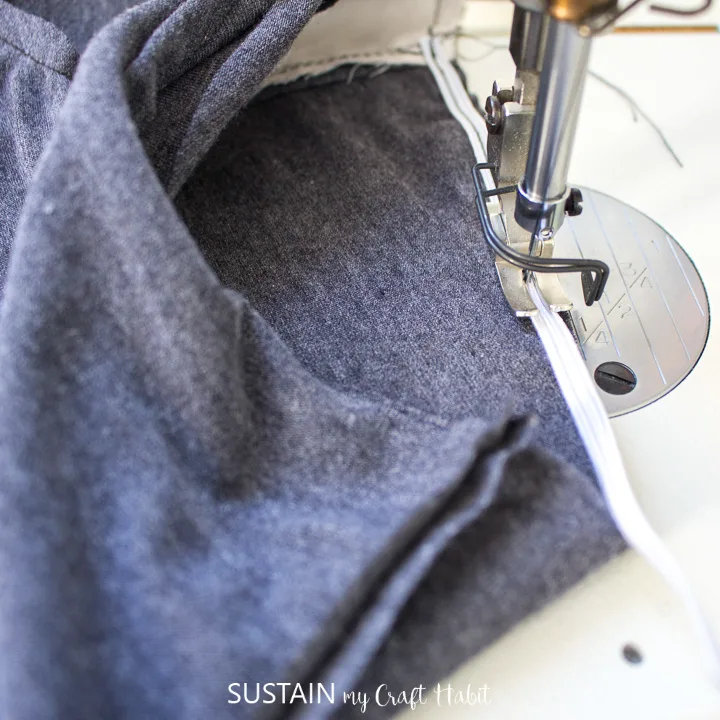
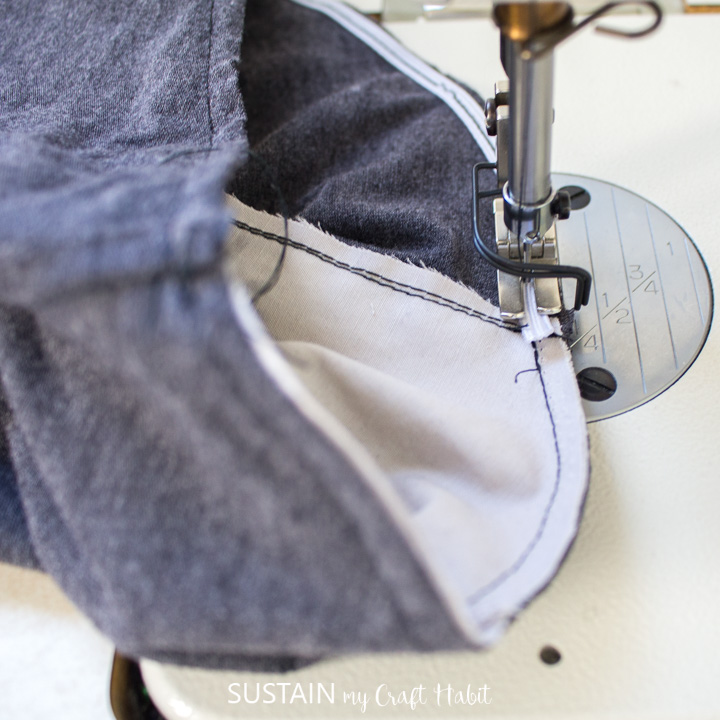

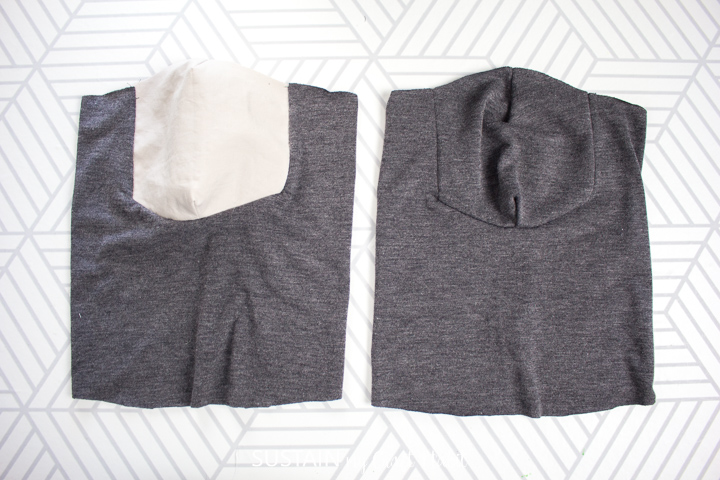
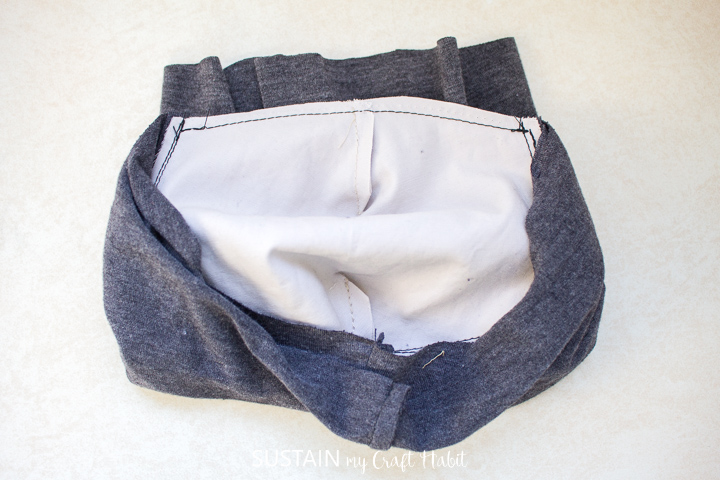
Turn the lining towards the inside.


Finishing
Finish by stitching the bottom of the two nose/mouth panels together. Additionally, you can stitch the two neck pieces together at the center back bottom just to hold in place.
Hoping you find this alternative face mask option helpful as we continue to fight against the spread of COVID-19.

Disclosure: This post contains affiliate links for your shopping convenience. Should you choose to purchase through them, we will make a small commission at no extra cost to you. You can read our full disclosure policy here.
Like it? Pin it for later!
Alternative Face Mask Option: DIY Mask Scarf with Free Sewing Pattern
Materials
- Knit Fabric – 100% cotton or polyester in a jersey or interlock knit
- Woven Fabric
- Fabric Scissors
- Flat braided elastic 1/4" wide
- Printable mask scarf pattern
- Sewing Machine and thread
Instructions
Cutting
- Print off the mask scarf sewing pattern on 8.5×11 paper and align the paper edges and tape the pieces together.
- Position pattern pieces over top of the fabric and pin in place aligning the grain lines. Make sure the center front fold line is aligned with the fold of the fabric.
- Cut along the solid line (the dashed lines represent the sew lines) and clip any notches.
- Cut out two pieces of the center nose and mouth panel in a woven fabric.
- Cut one piece of the center nose and mouth panel in a knit fabric.
- Cut two of the neck pieces in a knit fabric.
Sewing
- With the nose and mouth pieces folded in half along the center, RIGHT sides together, stitch the top and bottom darts as shown. Repeat for the other nose and mouth pieces.
- Align the bottom edge of the sewn knitted nose and mouth piece with the top edge of the neck piece at the center cut out. Pin in place and sew the pieces together, pivoting at the corner. Remove the pin.
- Stitch the opposite side of the center panel in the same way until it is fully stitched.
- Next, stack the two woven nose and mouth pieces together with the RIGHT sides facing up and ensuring the top edges are aligned.
- Baste stitch them together with a narrow stitch.
- Now sew the nose and mouth panel piece to the other neck piece in the same way as the knitted piece.
- Join the inner piece to the ouer piece along the top edge: place the two sides together with RIGHT sides together and stitch the top edge of the center nose panel.
- Cut a piece of elastic 12” long. Sew the elastic along the top edge of the mask scarf as you sew the two layers together. Gently stretch the elastic as you sew to ensure it is sewn evenly around the neck piece.
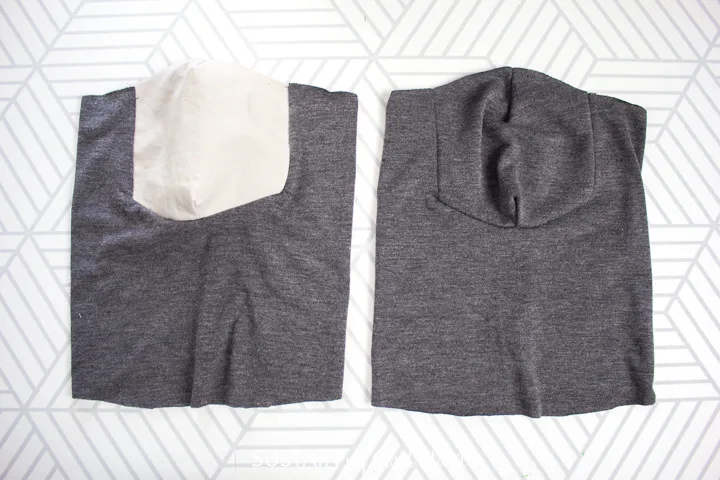
- Turn the lining towards the inside and finish by stitching the bottom of the two nose/mouth panels together.
- Additionally, you can stitch the two neck pieces together at the center back bottom just to hold in place.