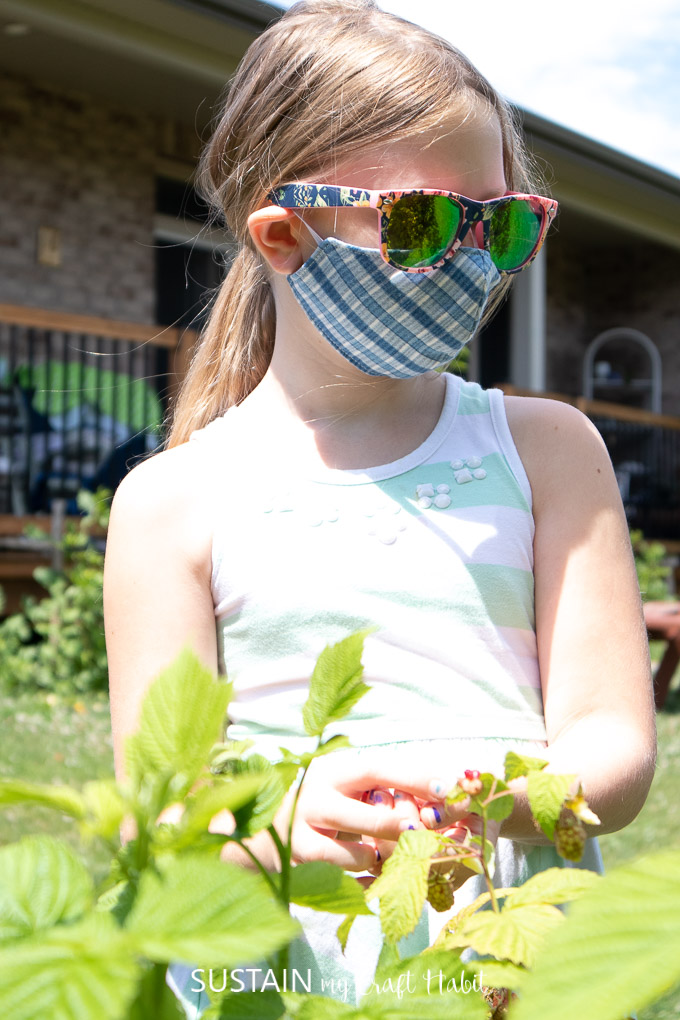
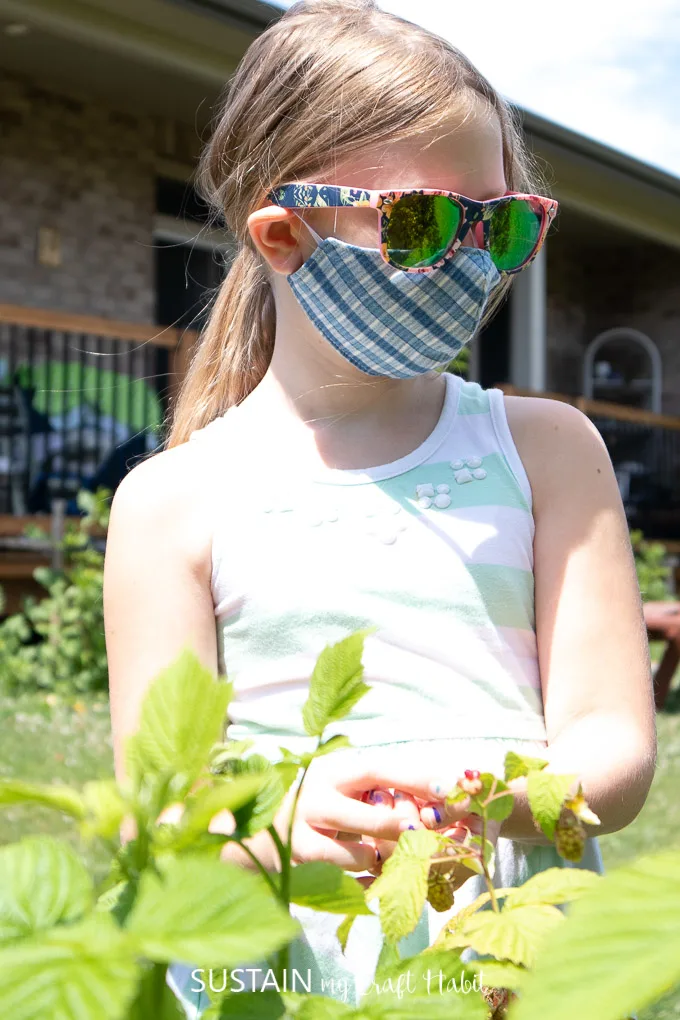
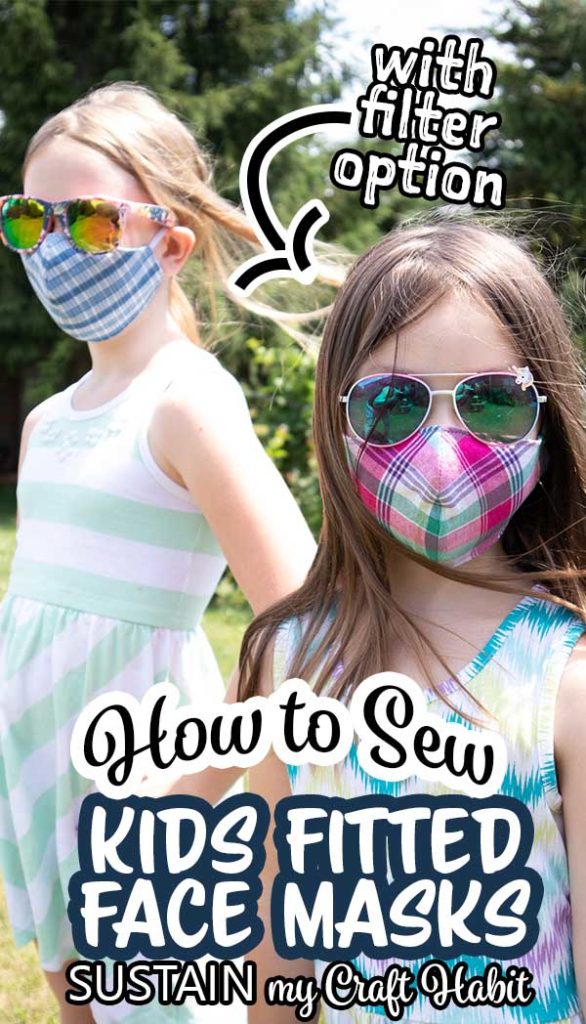

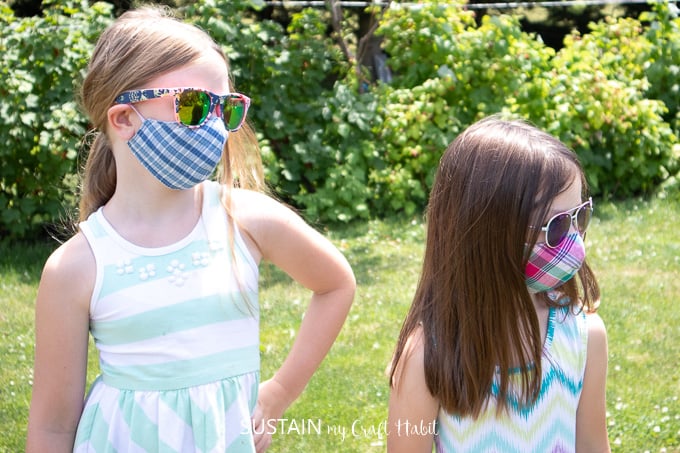
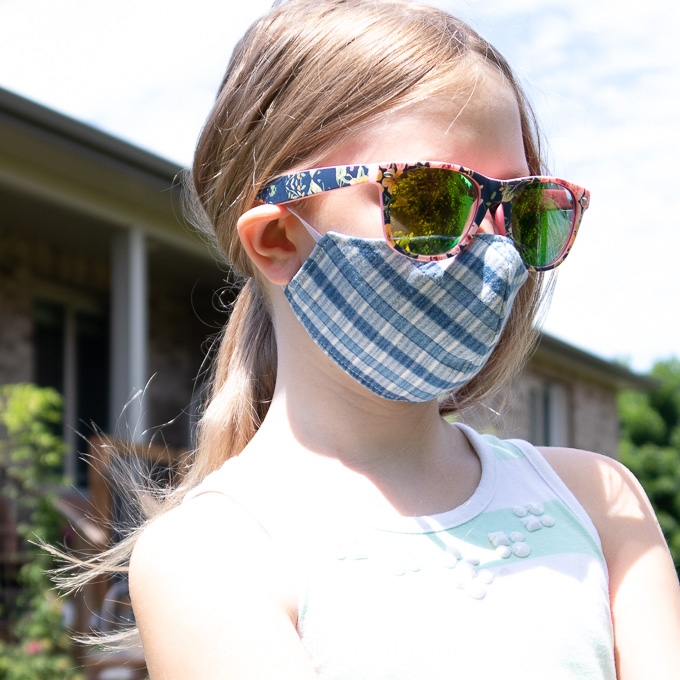
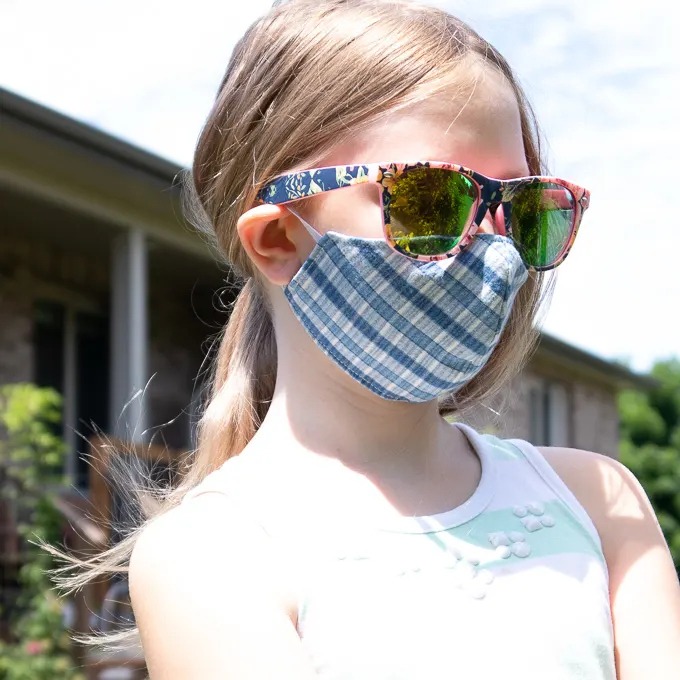
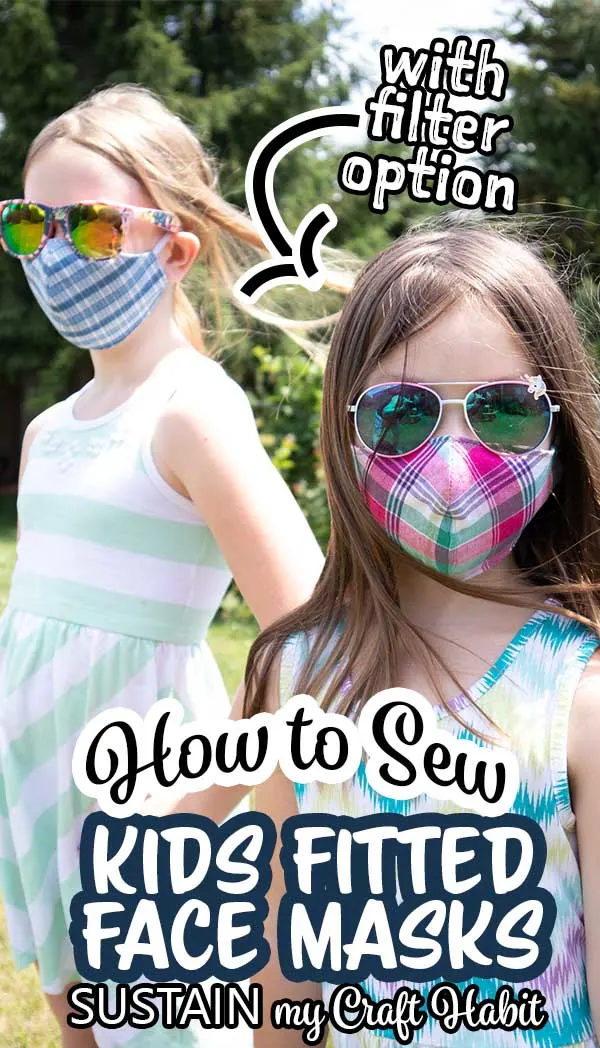
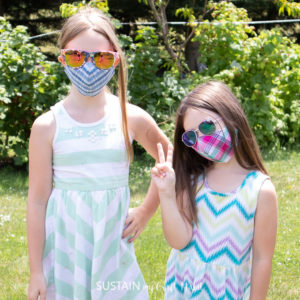
For those of you making masks at home (either for family members, friends or as a donation), this tutorial will show you how to sew a washable, reusable kid’s fitted face mask with filter option.
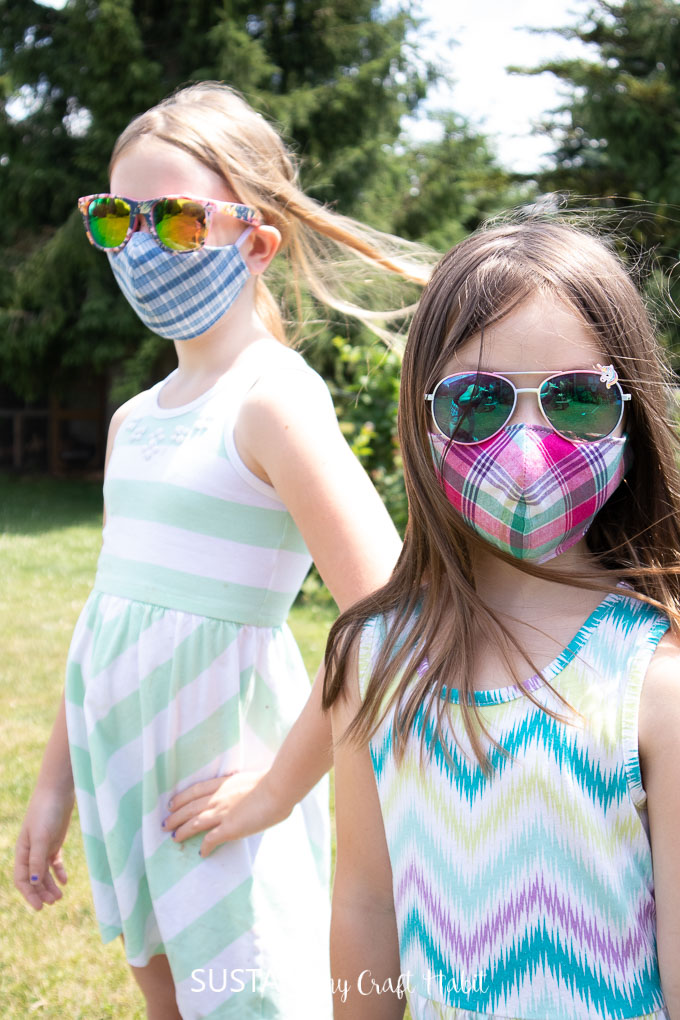

Since making and sharing this DIY kid’s pleated face mask pattern weeks ago, many have been downloading the free pattern to sew reusable face masks for kids at home. Wanting to give parents more options for children’s homemade masks, we created this fitted face mask with filter (and without filter) option. It is the youth version of the adult fitted mask pattern we shared months ago.
WHICH FABRICS TO USE FOR GENERAL USE FACE MASKS?
Although these particular home-sewn masks are intended for general use (not approved for medical use), choosing the right fabric is very important. It is best to use a tightly woven fabric with a plain weave, one that DOESN’T have any stretch. This is different from a knitted material, such as t-shirts; which are stretchy by nature. A tightly woven fabric is less permeable and also will ensure the mask won’t lose its shape after wear.
UPDATE: The WHO (World Health Organization) recommends using 3 layers of fabric for non-medical fabric face masks: outer layer to be water resistant; inner layer to be water absorbent and the middle layer to be a non-woven filter. Refer to the WHO’s video for how to wear a mask for more details.
Fabric Options for Masks
If you’re finding it hard to get your hands on suitable fabric, there are other options in your home to consider. Look to your closet and child’s closet for items that are no longer being worn or used. I revisited a pile of clothes intended for the second hand store and found some pieces to use for making face masks instead.
Be sure your fabric is machine washable. Using either 100% cotton or polyester woven shirts (and dresses) that are a medium weight and constructed of a tight weave, I’ve been able to make more masks without buying more fabric. BUT keep in mind if the fabric feels thin, then it is best to add additional layers of fabric (and/or a non woven filter) for added protection.
Elastic Options for Masks
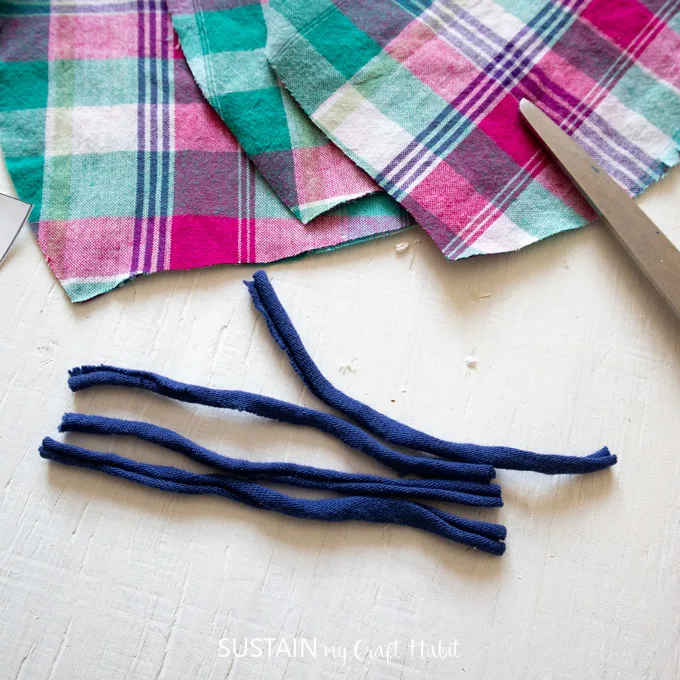
Additionally, elastics can also be a challenge to find so another option is to use t-shirt yarn instead. Made from 100% cotton t-shirts, t-shirt yarn is soft, stretchy and best of all, most people already have 100% cotton tees at home.
And our YouTube video on how to make your own t-shirt yarn here:

Fitted Face Mask with Filter Pattern: Kid’s Sizing
This child’s fitted face mask pattern is intended for ages 6-10 years.

We shared the adult version of this pattern a few months ago so if you are in need of a larger sized free mask pattern, refer to these two posts here:
- How to Make a Pleated Face Mask with Free pattern
- How to Make a Fitted Face Mask with Free pattern
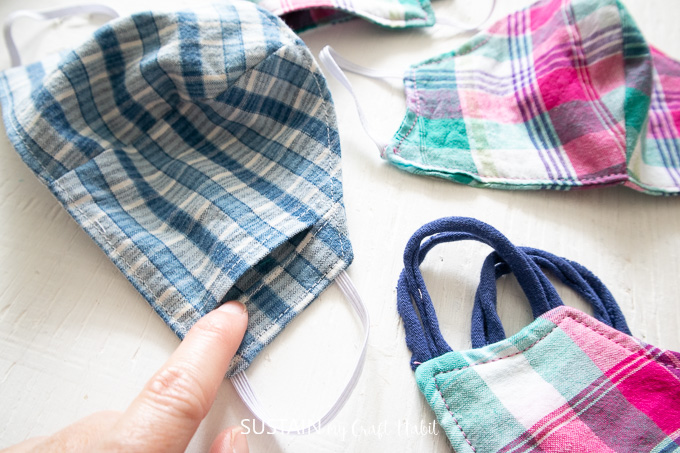
- These washable fitted face masks can be made with or without built in openings for adding and removing filters.
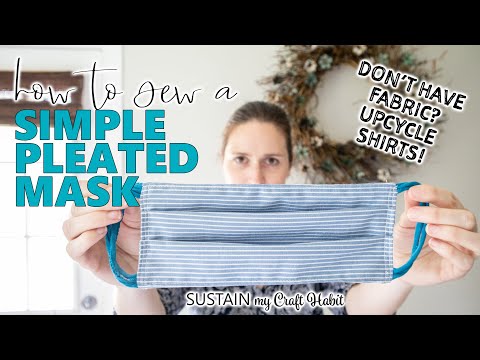
You can find our YouTube video for how to make a pleated face mask with upcycled shirts here:
Inserting a Filter
This fitted face mask pattern also has an option to add an opening for inserting a filter. Filters are made from non woven materials which are the least permeable material. But be sure to remove the filter before laundering your washable fabric mask.

Adding a Nose Wire
Nose wires are great as they help the mask to fit snugly around the nose giving them a more comfortable fit. To add a nose wire to your fitted face mask with filter pocket, head to this post here.
Materials Needed:
Disclosure: This post contains affiliate links for your shopping convenience. Should you choose to purchase through them, we will make a small commission at no extra cost to you. You can read our full disclosure policy here.
- Youth Fitted Face Mask Pattern WITH filter opening and Youth Fitted Face Mask Pattern WITHOUT filter opening
- Flat, tightly woven fabric in medium weight, 100% cotton
- Flat elastic, ¼” wide (or alternatively, make your own tshirt yarn)
- Sewing Machine
- Fabric Scissors
- Pins
How to Make a Face Mask: Fitted
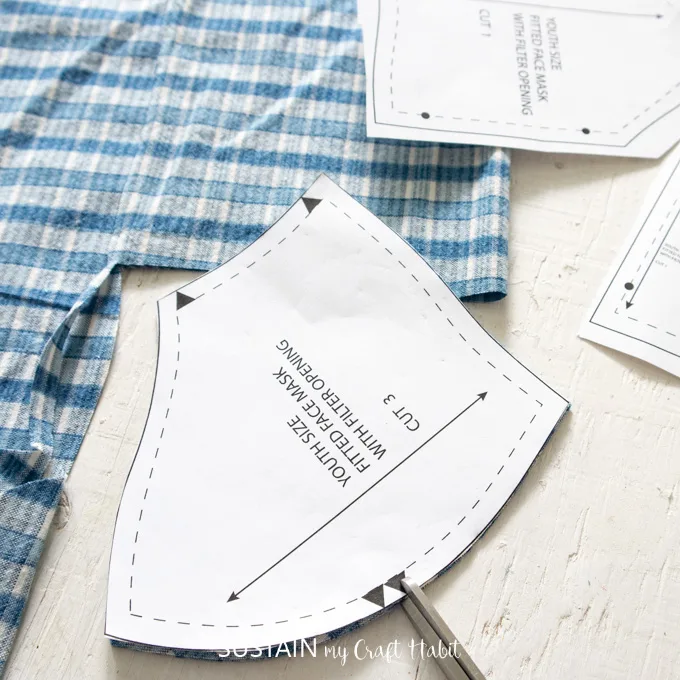
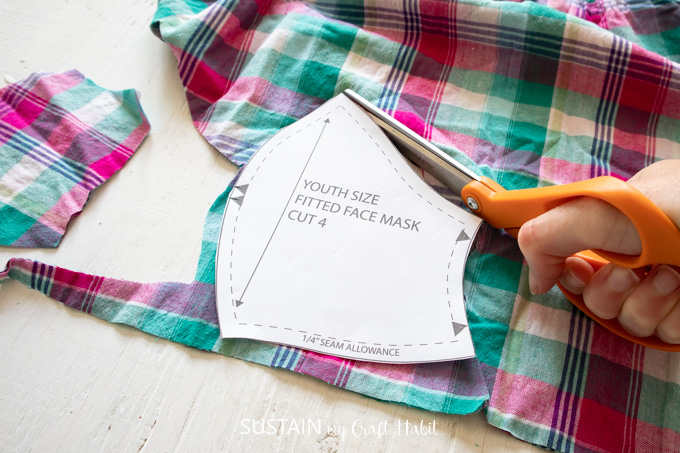
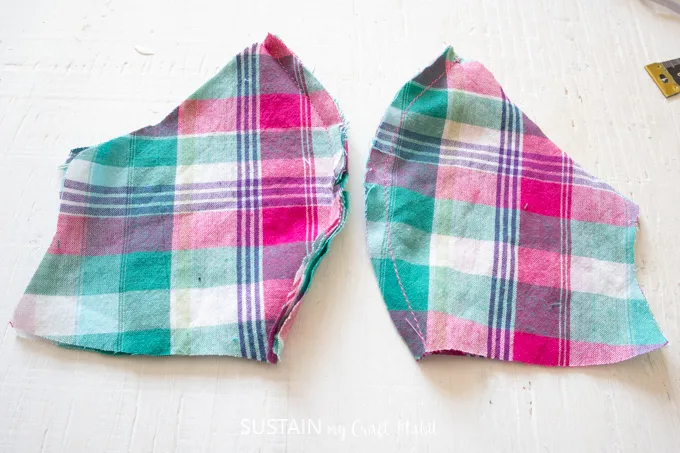
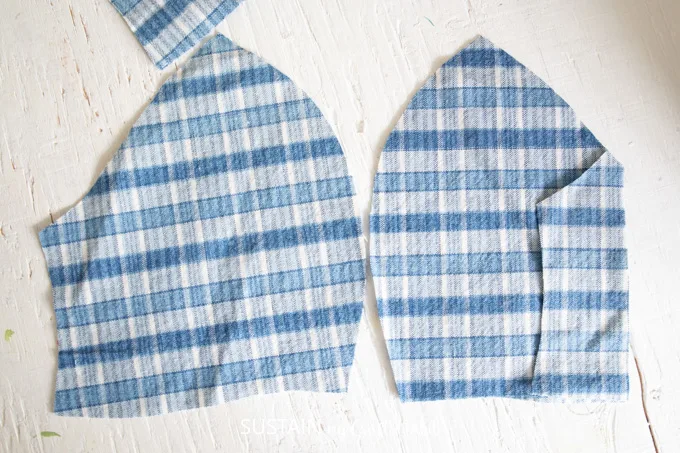
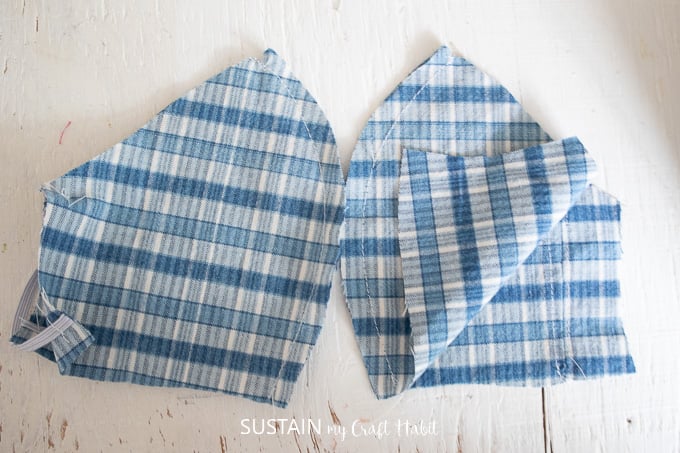
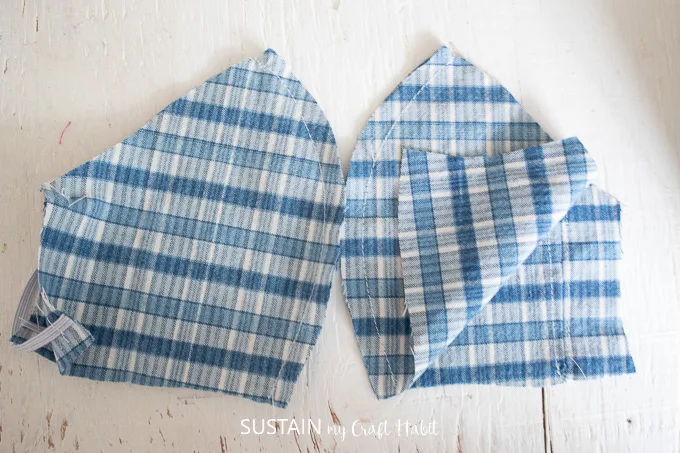
Print off one of the two mask patterns: Fitted Mask Pattern (with filter opening) or Fitted Mask Pattern (no filter opening). Cut around each pattern piece and place it on the fabric. Pin or hold in place remembering to align the grainline arrow on the pattern pieces with the grainline of the fabric. Cut around the solid lines.
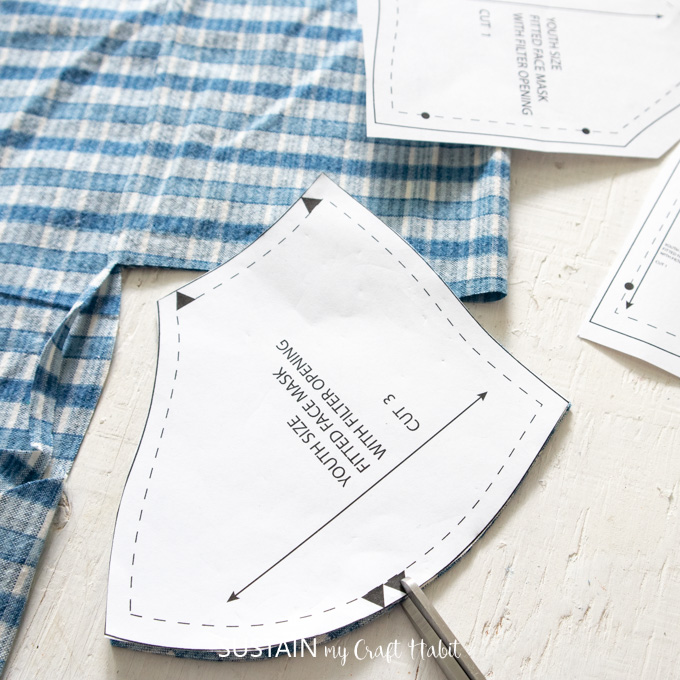

** To adjust the face mask WITHOUT filter opening pattern according to the WHO’s recommended 3 layer fabric mask, cut three pieces of each pattern instead of two and work the following sewing steps in the same way (but with an additional layer).
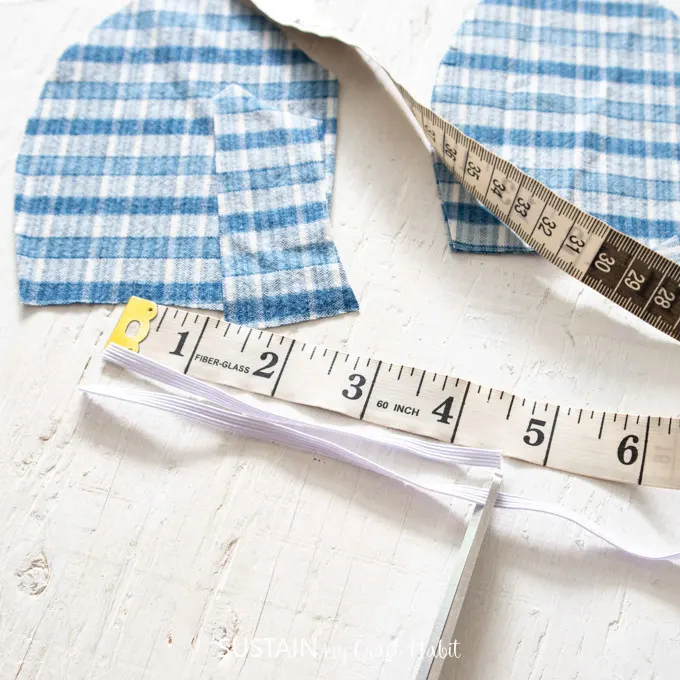
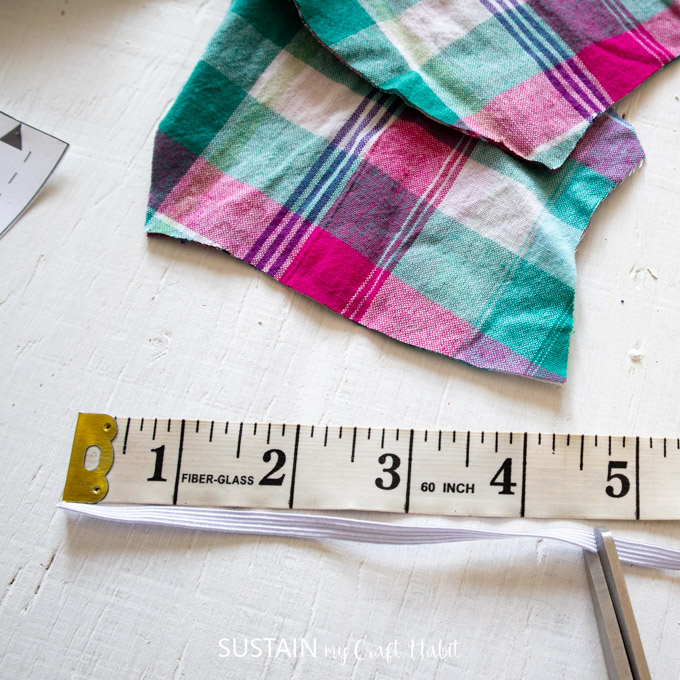
Cut two pieces of flat elastic 4.5” long or cut four pieces if using t-shirt yarn instead. You can also adjust the length of the elastic if needed: if mask is too loose on child, reduce elastic length, if mask is too tight on child, increase length of elastic.


How to Make a Kids Face Mask WITHOUT filter opening:
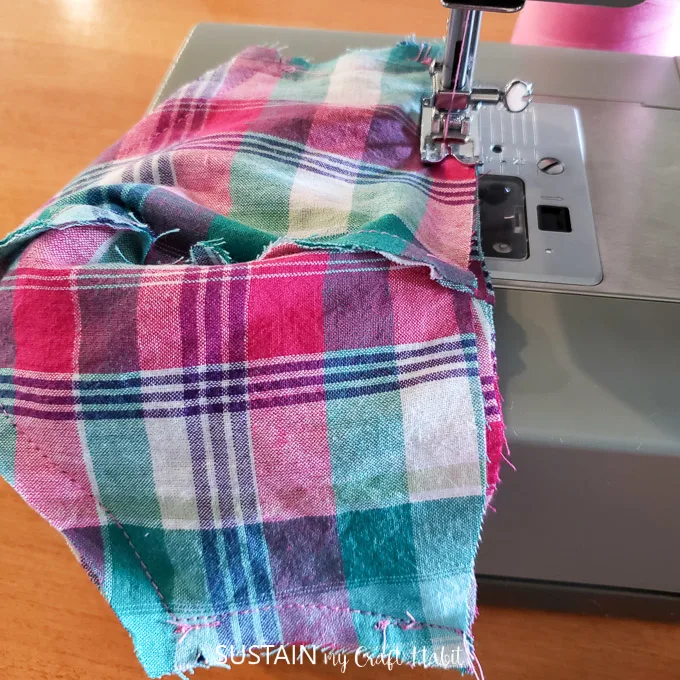
Align the inner facing pieces and outer mask pieces with RIGHT sides together and sew along the curve with a ¼” seam allowance. **If adding an additional third layer, sew all 4 layers together along the curved edge.

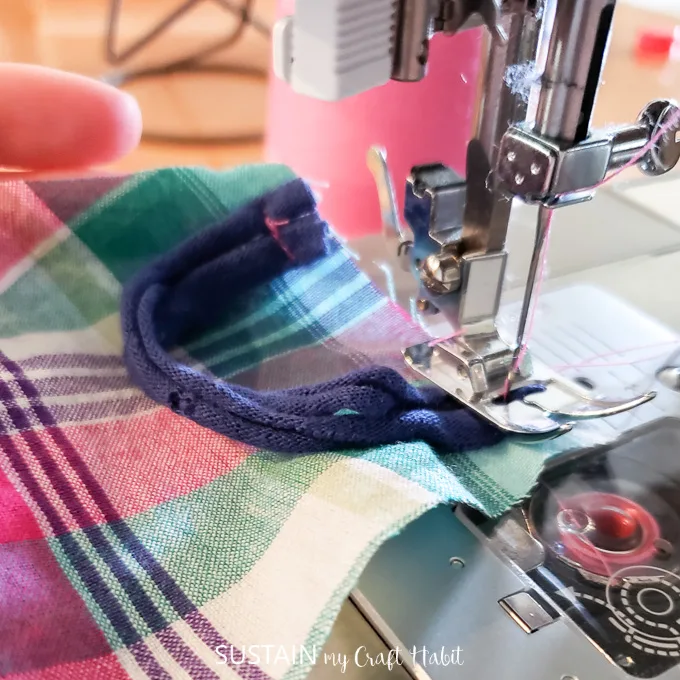
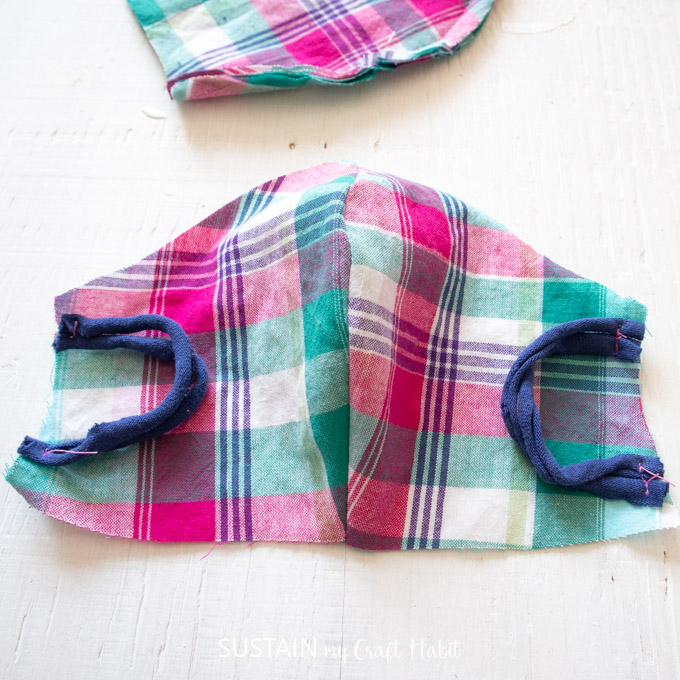
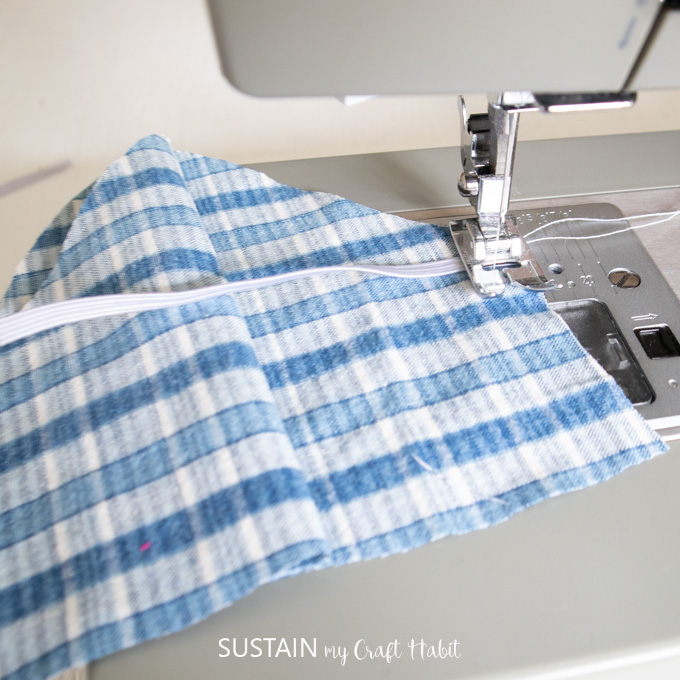
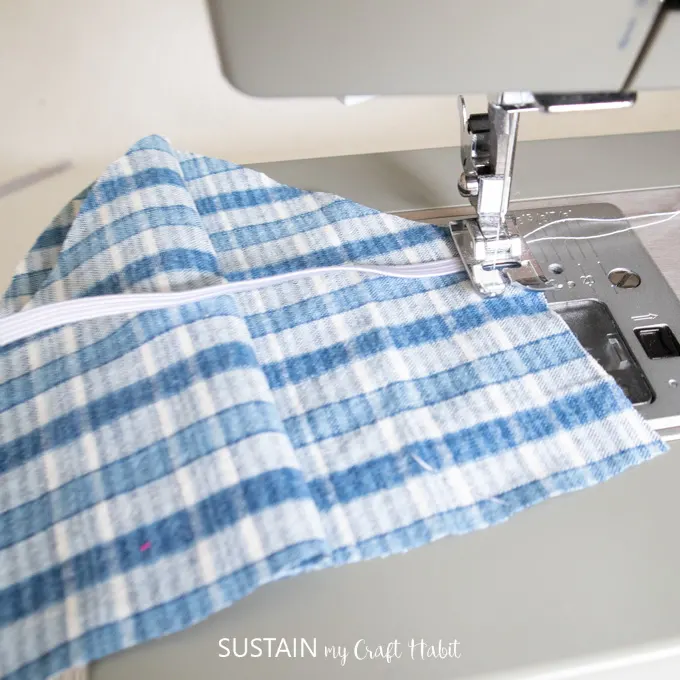
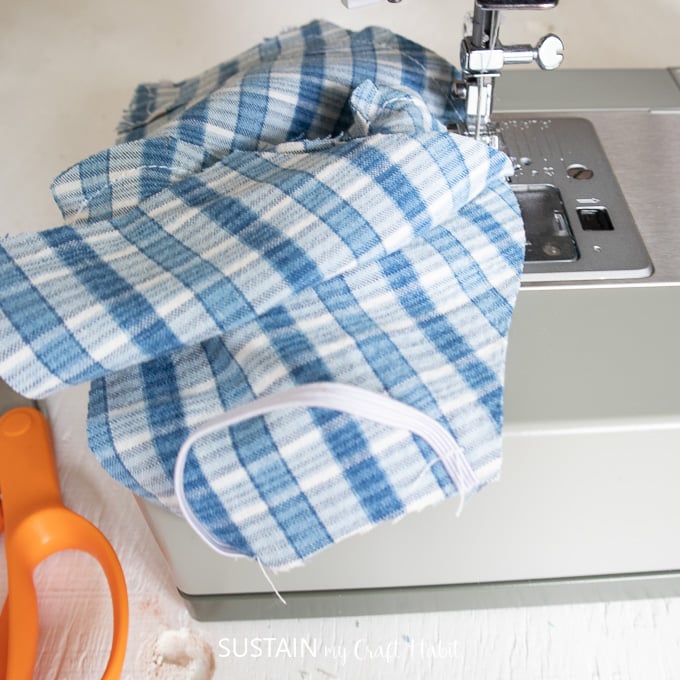
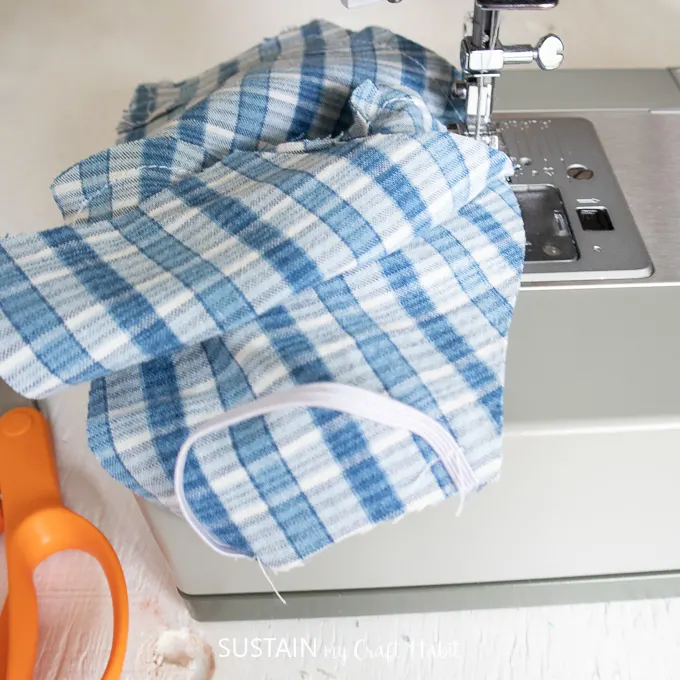
Sew the ends of the elastics to the sides (on the RIGHT side of the fabric) forming loops as shown.


Align the two layers (inner facing with filter opening and outer fask pieces) with RIGHT sides and stitch all around the perimeter with a ¼” seam allowance leaving a 3” gap.


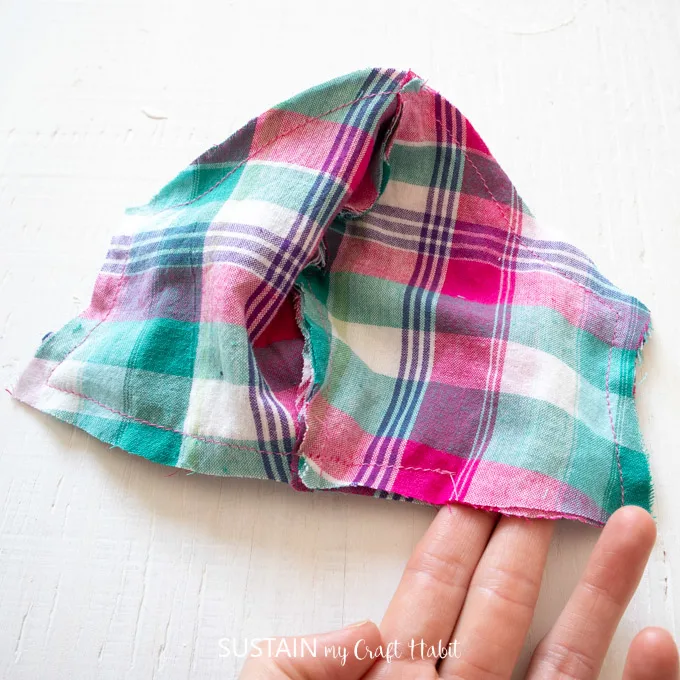
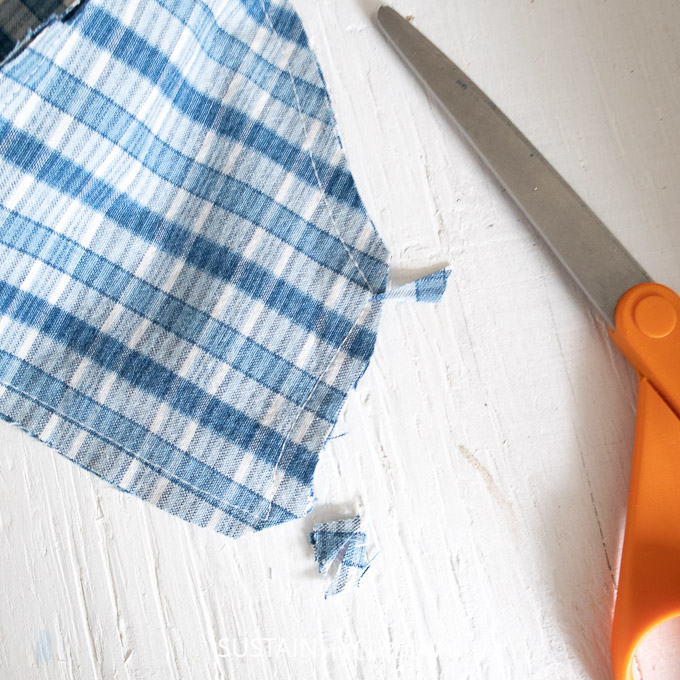
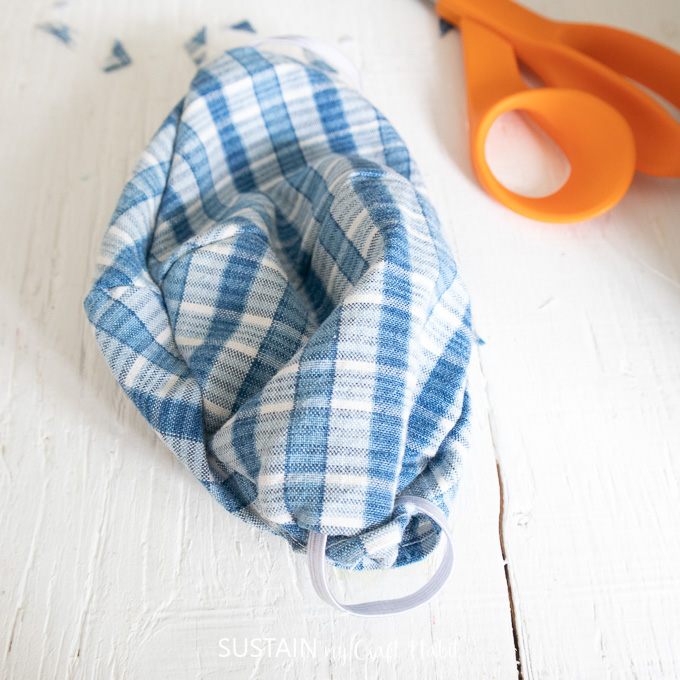
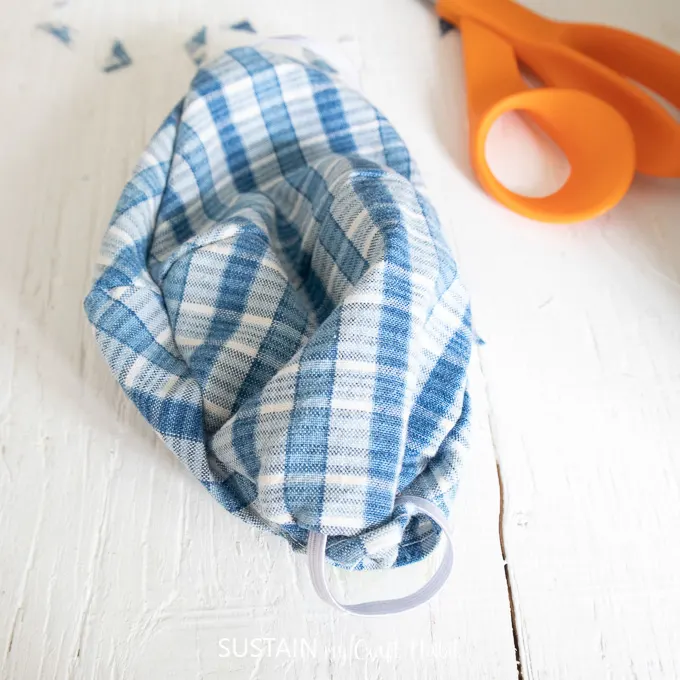
Clip the corners to reduce bulk and then turn the mask inside out through the 3” gap and press seams flat with an iron.


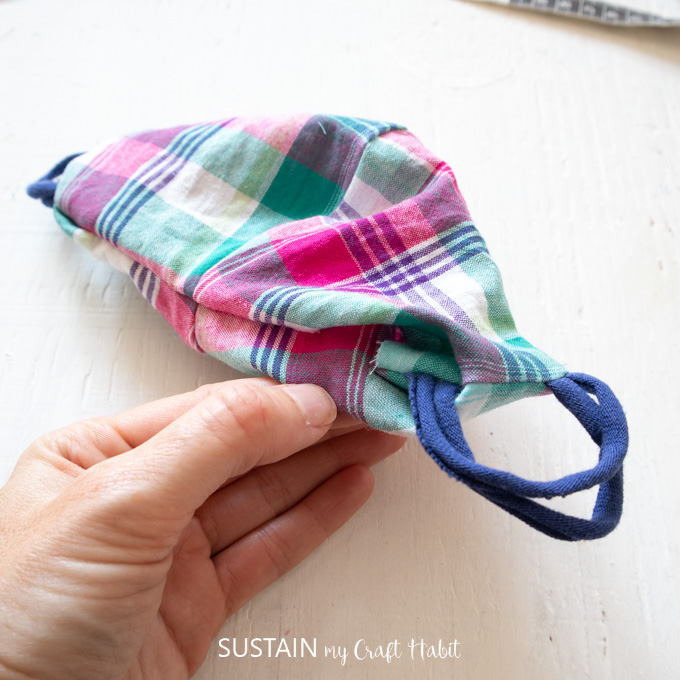

Iron the edges flat and edgestitch around the perimeter to stitch the opening closed to finish.
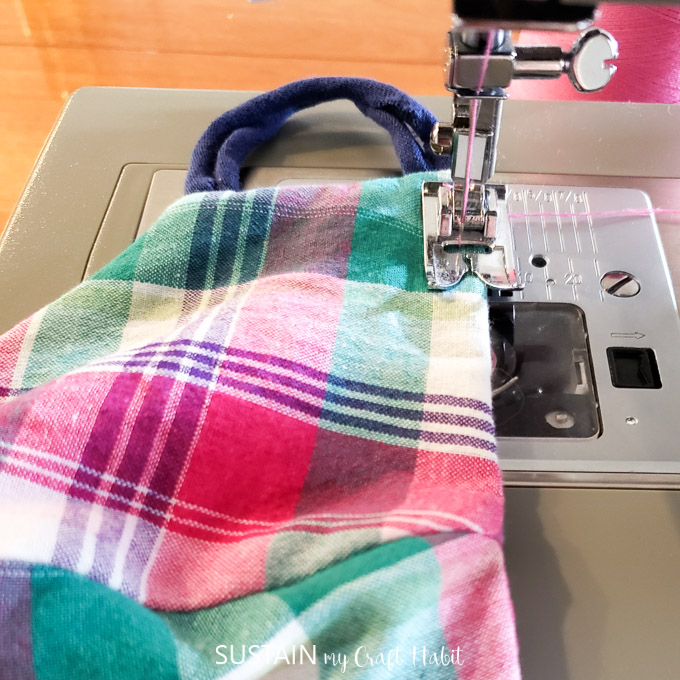

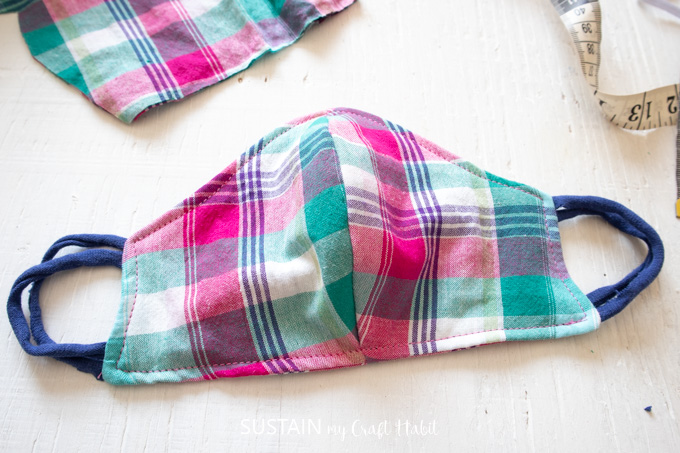

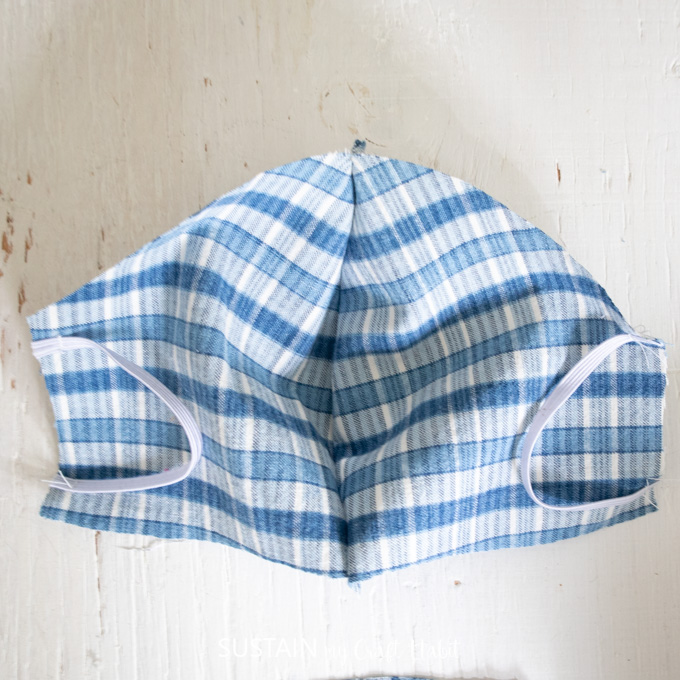
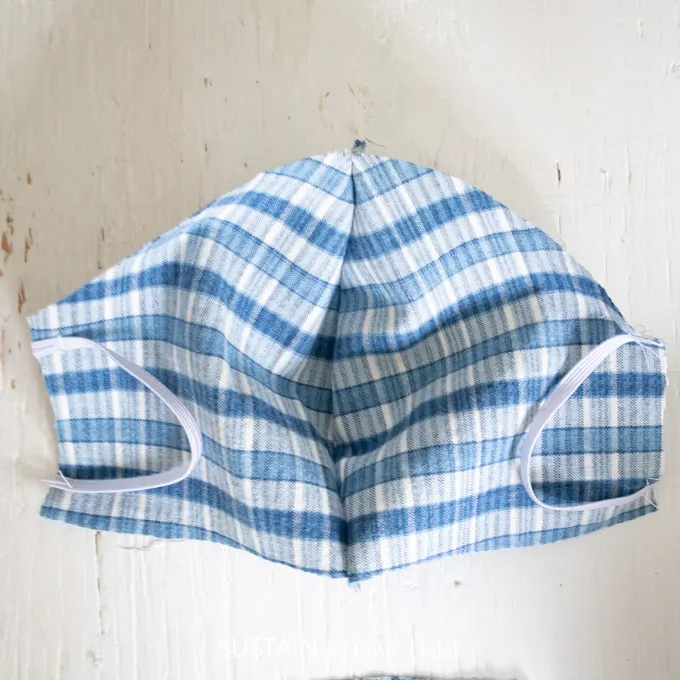
Once done, the mask is ready for wearing.

How to Make a Kids Face Mask with filter opening:
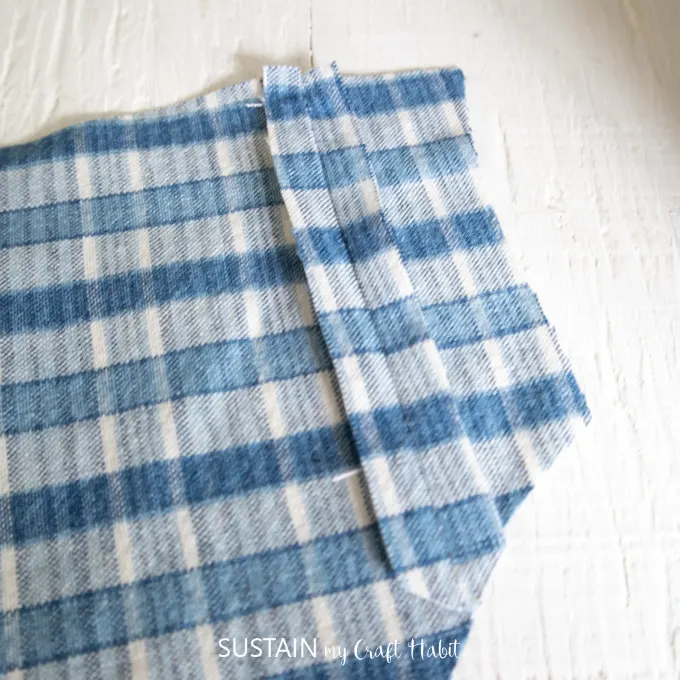
Sew the small side panel to the inner facing piece as shown, aligning the small dots.

Sew the panels together leaving a gap unstitched between the two dots and press seam allowance open.

Edge stitch the filter opening to hold seam allowance in place.


Next, align the inner facing pieces and outer mask pieces with RIGHT sides together and sew along the curve with a ¼” seam allowance.
Sew the ends of the elastics to the sides (on the RIGHT side of the fabric) forming loops as shown.
Align the two layers (inner facing with filter opening and outer mask pieces) with RIGHT sides together and stitch all around the perimeter with a ¼” seam allowance.
Clip the corners to reduce the bulk and turn the mask inside out through the filter opening.

Press the seams flat with an iron and edgestitch around the perimeter.


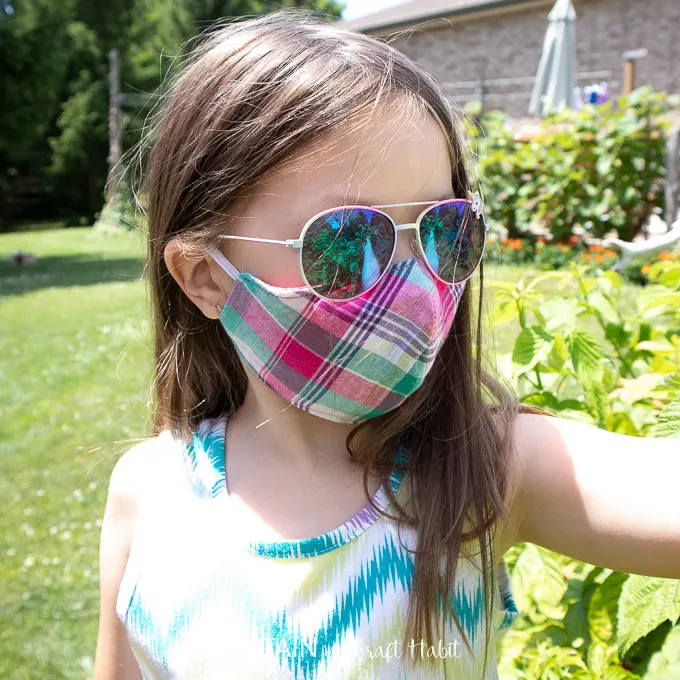
The kids fitted mask is complete and ready to wear. Insert your non woven filter material into the opening for added protection. If you would like to make your face mask more enjoyable for your little one check out this post on making kids face masks fun.
Washing Your Fabric Face Masks
Do not wear a mask that is damaged or dirty. To clean your fabric face mask, REMOVE the inner filter layer and place it in the washing machine as you do for regular laundering.
Additional Notes for Using a Fabric Mask
Disclosure: This post contains affiliate links for your shopping convenience. Should you choose to purchase through them, we will make a small commission at no extra cost to you. You can read our full disclosure policy here.
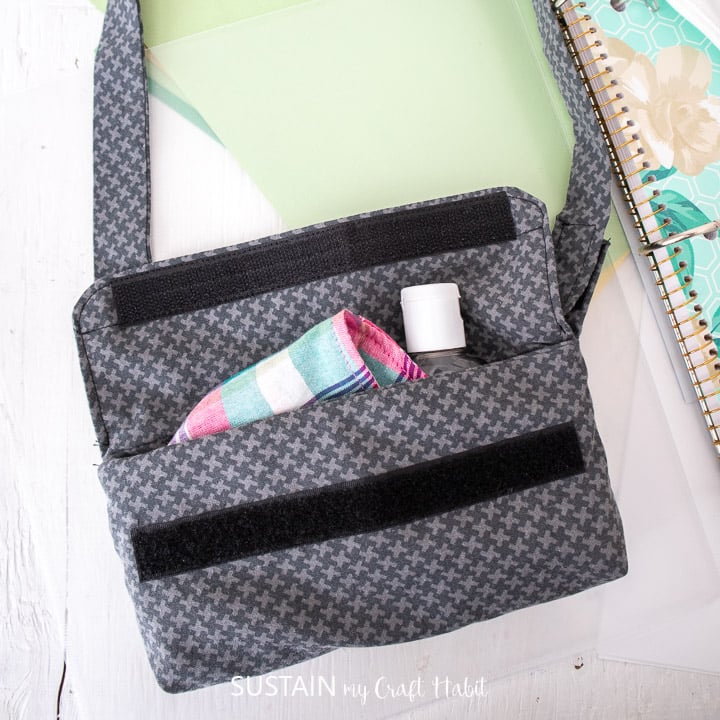
Making a Face Mask Pouch
To grab the free sewing pattern for making a face mask pouch for you child to store their face masks, sanitizer and other essentials, head here.

Like it? Pin it for later!


DIY Kids Face Mask with Filter Option (Free Sewing Pattern)
Materials
- Youth Fitted Face Mask Pattern WITH filter opening or
- Youth Fitted Face Mask Pattern WITHOUT filter opening
- Flat tightly woven fabric in medium weight, 100% cotton
- Flat elastic ¼” wide
- Sewing Machine
- Fabric Scissors
- Pins
Instructions
- Print off one of the two mask patterns. Cut around each pattern piece and place it on the fabric. Pin or hold in place remembering to align the grainline arrow on the pattern pieces with the grainline of the fabric. Cut around the solid lines.
- Cut two pieces of flat elastic 4.5” long or cut four pieces if using t-shirt yarn instead. You can also adjust the length of the elastic if needed: if mask is too loose on child, reduce elastic length, if mask is too tight on child, increase length of elastic.
How to Make a Kids Face Mask WITHOUT filter opening:
- Align the inner facing pieces and outer mask pieces with RIGHT sides together and sew along the curve with a ¼” seam allowance. **If adding an additional third layer, sew all 4 layers together along the curved edge.
- Sew the ends of the elastics to the sides (on the RIGHT side of the fabric) forming loops as shown.
- Align the two layers (inner facing with filter opening and outer fask pieces) with RIGHT sides and stitch all around the perimeter with a ¼” seam allowance leaving a 3” gap.
- Clip the corners to reduce bulk and then turn the mask inside out through the 3” gap and press seams flat with an iron.
- Iron the edges flat and edgestitch around the perimeter to stitch the opening closed to finish.
How to Make a Kids Face Mask WITH filter opening:
- Sew the small side panel to the inner facing piece as shown, aligning the small dots.
- Sew the panels together leaving a gap unstitched between the two dots and press seam allowance open.
- Edge stitch the filter opening to hold seam allowance in place.
- Next, align the inner facing pieces and outer mask pieces with RIGHT sides together and sew along the curve with a ¼” seam allowance.
- Sew the ends of the elastics to the sides (on the RIGHT side of the fabric) forming loops as shown.
- Align the two layers (inner facing with filter opening and outer mask pieces) with RIGHT sides together and stitch all around the perimeter with a ¼” seam allowance.
- Clip the corners to reduce the bulk and turn the mask inside out through the filter opening.
- Press the seams flat with an iron and edgestitch around the perimeter.
GAIL RASZEWSKI
Tuesday 22nd of September 2020
WHERE ARE THE CUTTING PATTERNS FOR YOUR MASK? i AM LOOKING FOR A SIZE FOR AN 8 - 12 YEAR OLD.
Jane and Sonja
Tuesday 22nd of September 2020
Hi Gail! The link to the pattern for the kid's mask (ideally up to 10 years) is in the materials supply list. For older kids, we recommend using the adult version of the mask pattern. You can find the link to the adult pattern under the "kid's sizing" section above. Let us know if you are still having trouble finding it. Kind regards, Jane
Caz / InvisiblyMe
Sunday 12th of July 2020
These look great for those wanting face coverings as opposed to more restrictive pre-made face masks. Great tutorial, very easy to follow and great step-by-step pictures that are super helpful!! Caz xx
Jane and Sonja
Tuesday 14th of July 2020
Thank-you, we're glad you found it helpful.