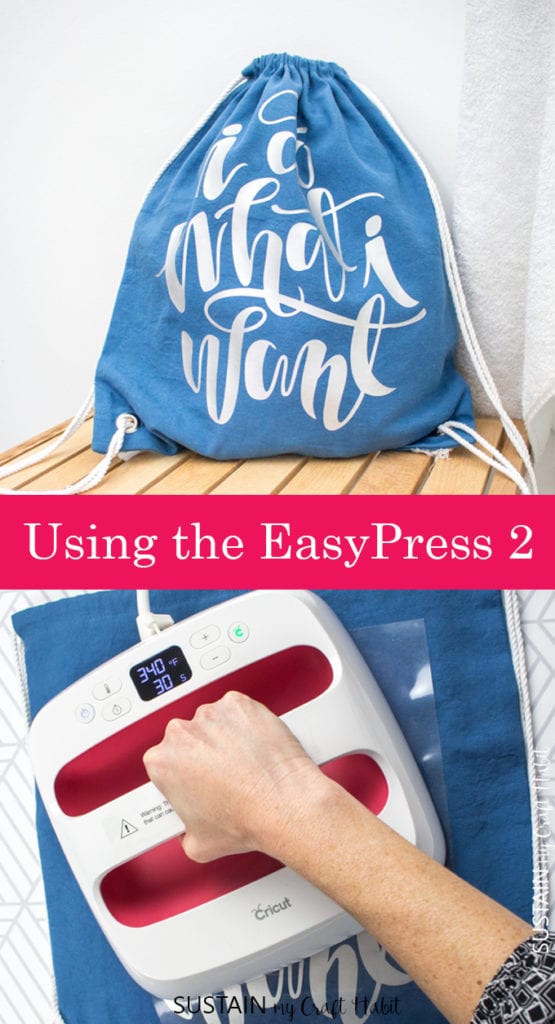
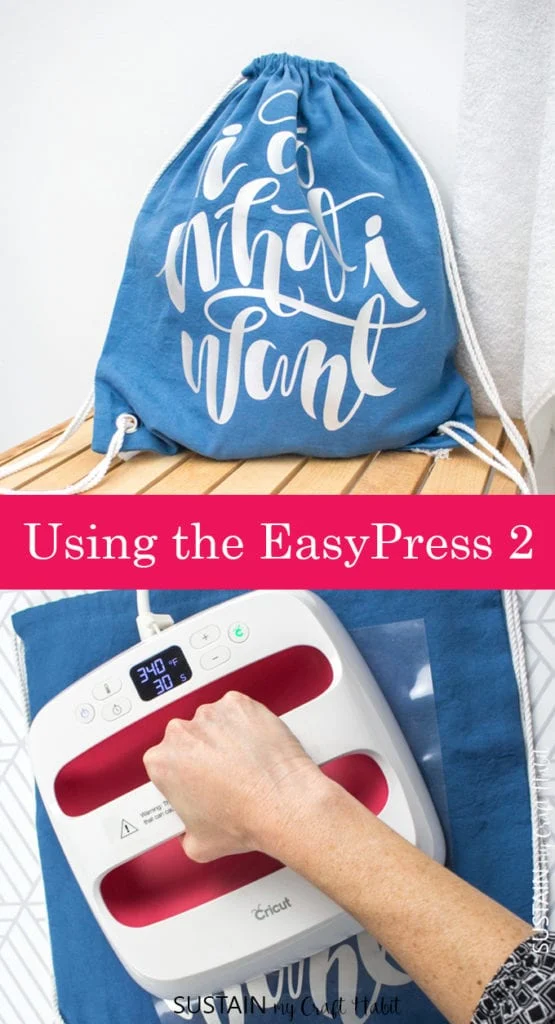
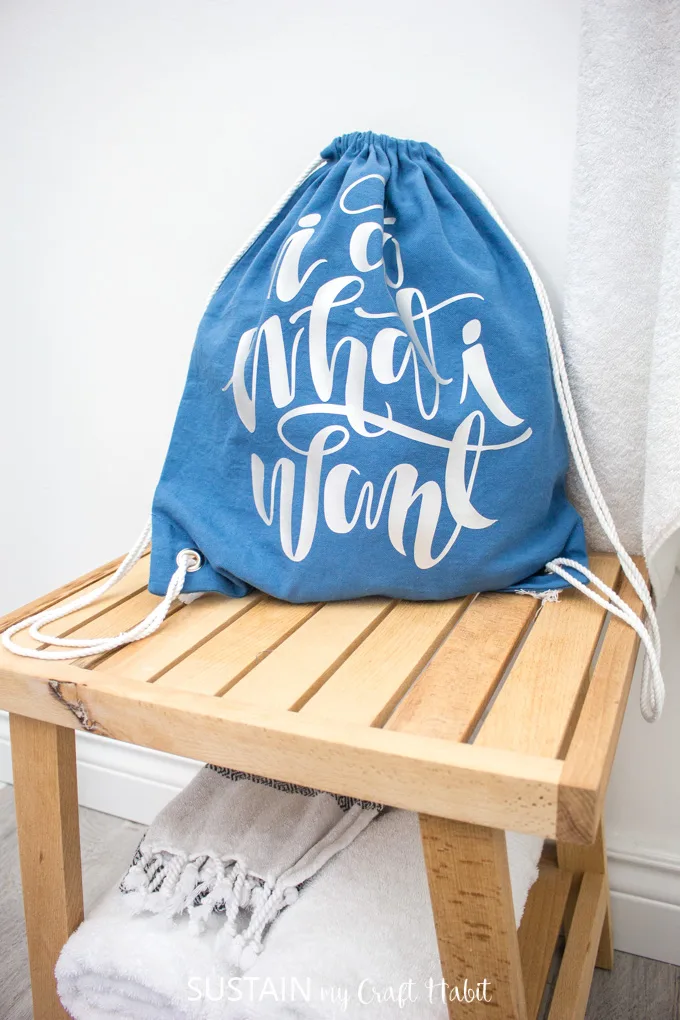
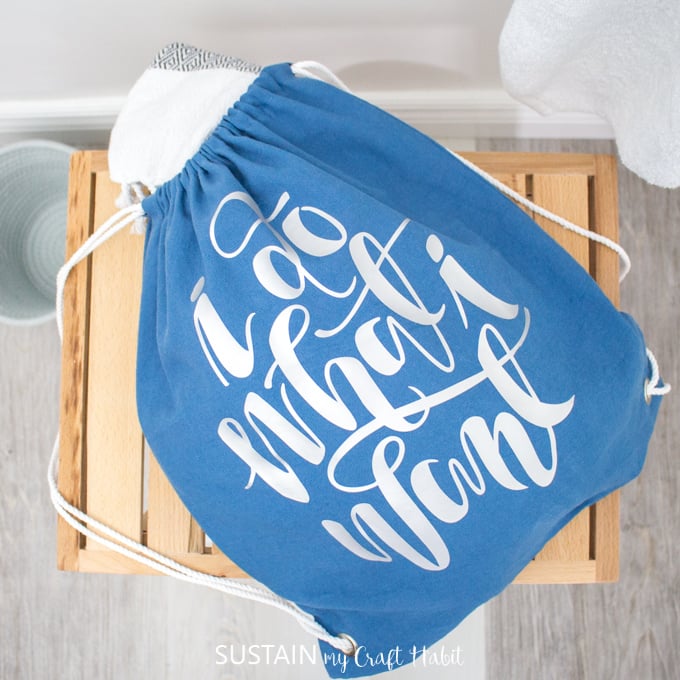
After sewing up this drawstring bag, we thought it would be fun to add a little something special to it using our iron-on vinyl and the Cricut Easypress 2.

Embellishing a Drawstring Bag with the EasyPress 2
When we first got our Cricut Easypress 2 we were very excited to get started. Even before figuring out how to use the Cricut, we made this Christmas gift bag using some patterned iron-on vinyl and a pair of scissors to cut out an abstract tree shape. The gift bag turned out perfectly so we knew it would be a great option for this drawstring bag.
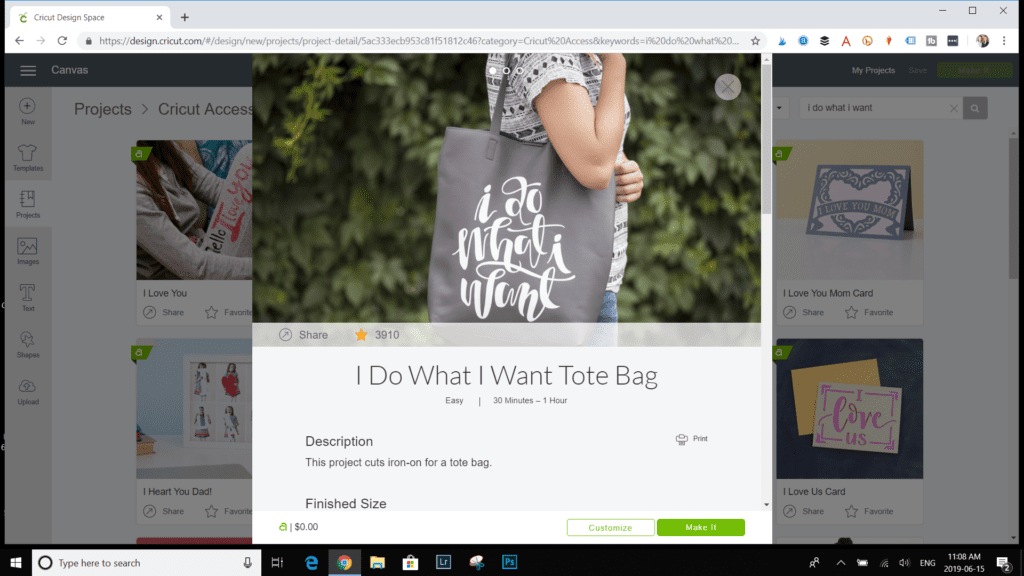
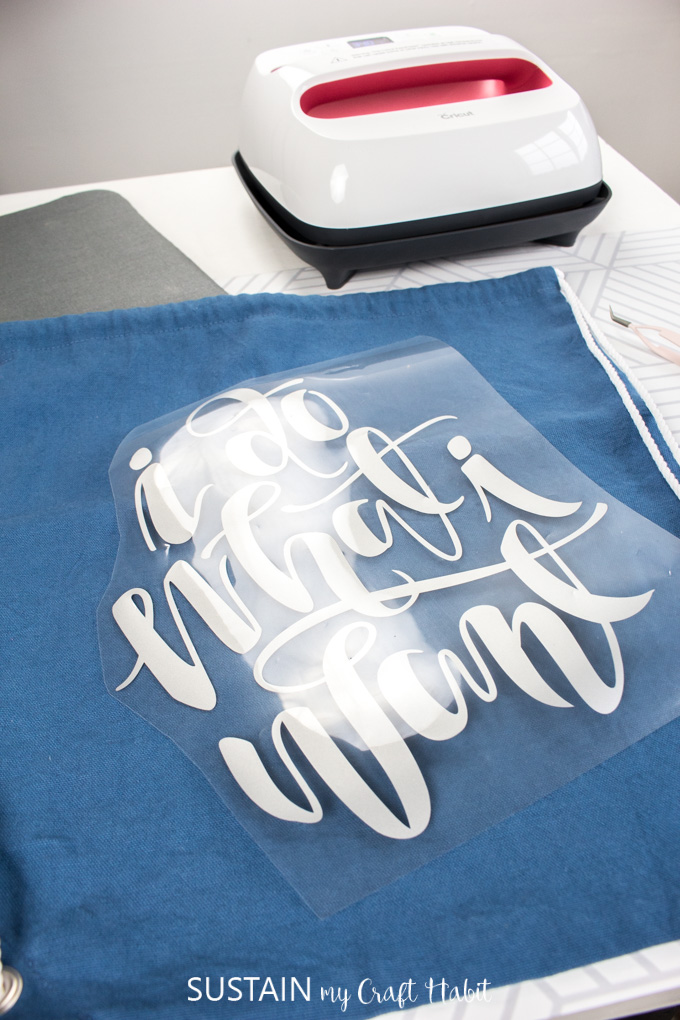
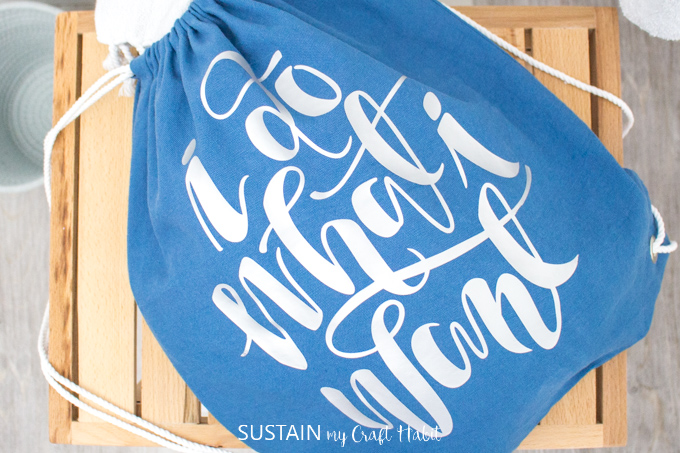
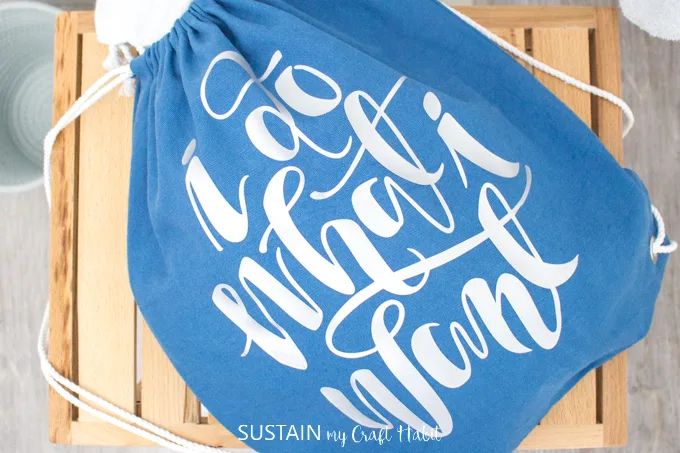
Now that we have experience using the Cricut, we selected this “I do what I want” project from Design Space to embellish our DIY drawstring bag. We used some left over canvas from our sewn utility aprons to sew this useful little bag. The drawstring bag pattern is available as a free printable and if you’re not a master sewer, don’t worry, it’s even great for beginners.

We know we’ll get a lot of use out of this bag and the fun saying is just icing on the cake. There are so many fun options to choose from off of Design Space. You can easily search by material type or project idea to find one that suits your style. We love this “All you Need Is Love and the Beach” pattern and this “The Craft Room is Calling” pattern for an everyday tote bag.
Materials Needed:
This post contains affiliate links – should you choose to purchase through these links we make a small commission at no cost to you. Read our full disclosure statement here.
- Cricut Design Space “I Do What I Want” Tote Bag Pattern
- Cricut Maker
- Cricut standard grip mat
- Everyday Iron On Vinyl in silver
- Weeding Tool
- EasyPress 2
- Easy Press mat
Instructions for using the EasyPress 2:
The Prepwork:
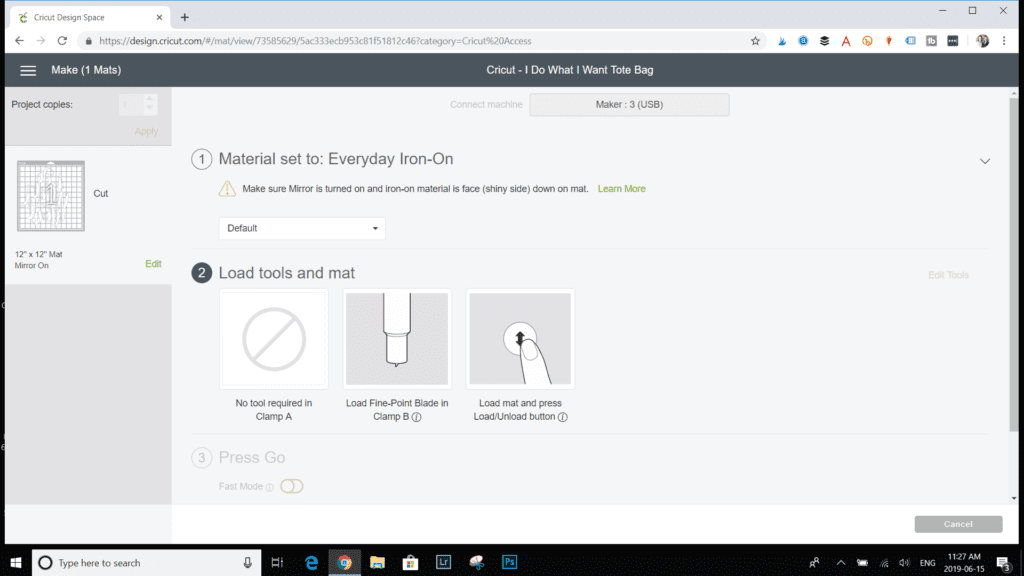
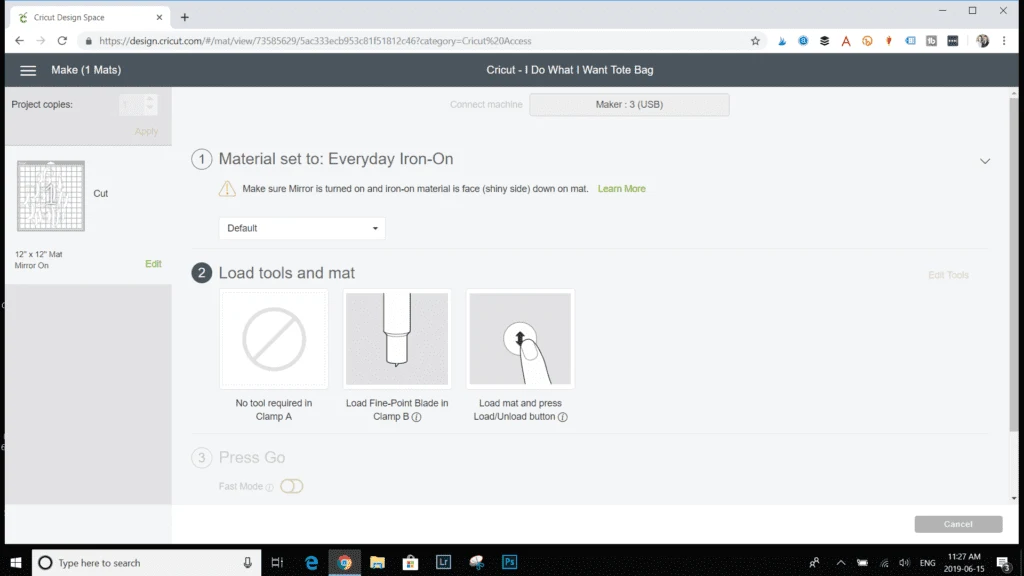
Upload the “I Do What I Want” tote bag pattern template from Design Space.

Follow the instructions prompted on the screen to cut out the iron-on vinyl. Select “Make It” to begin or go to “Customize” if you need to adjust the size.
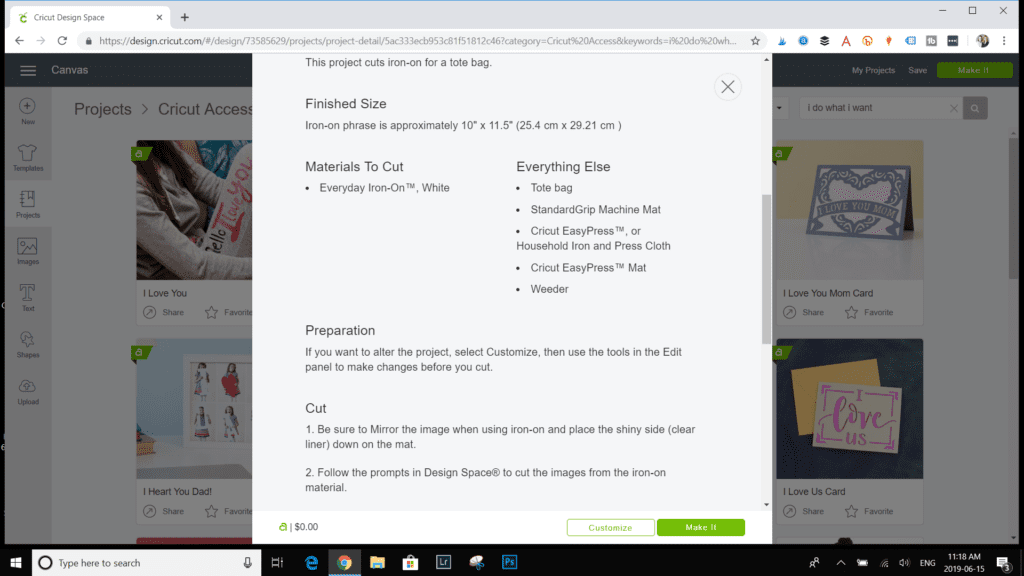
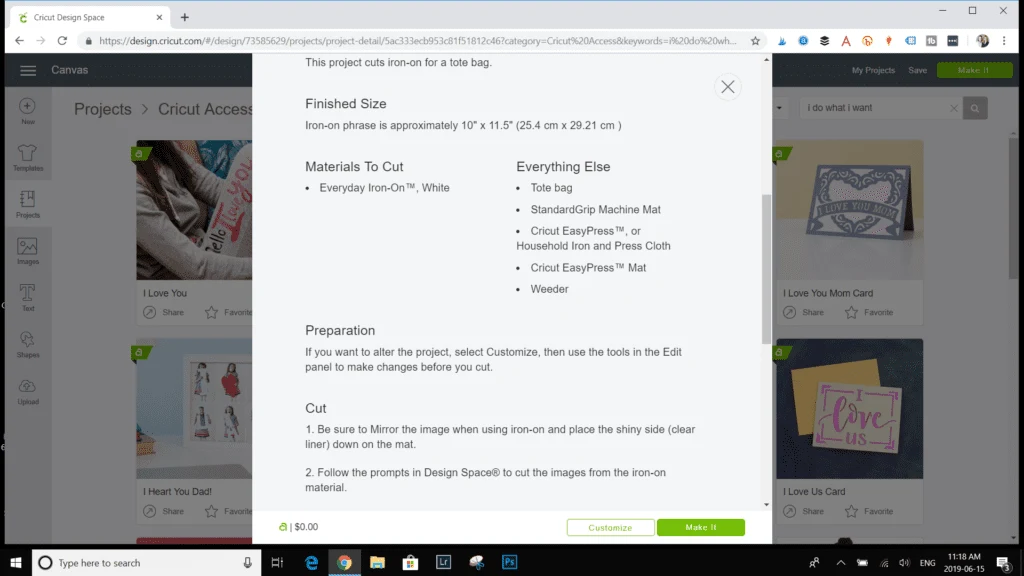
The actual size of the lettered phrase measures approx. 10″ wide x 12″ high so it fits on the drawstring bag without the need to adjust.
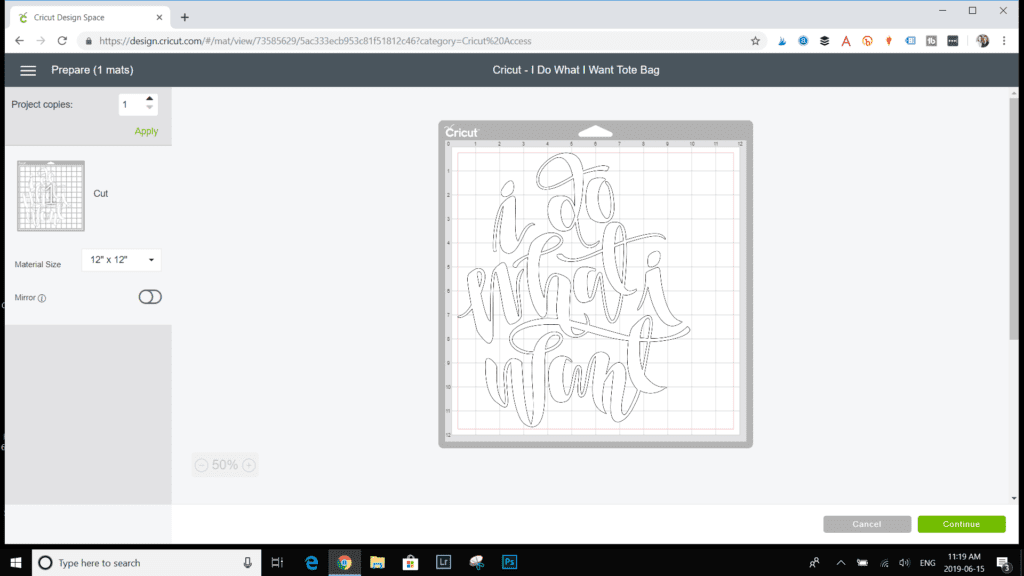
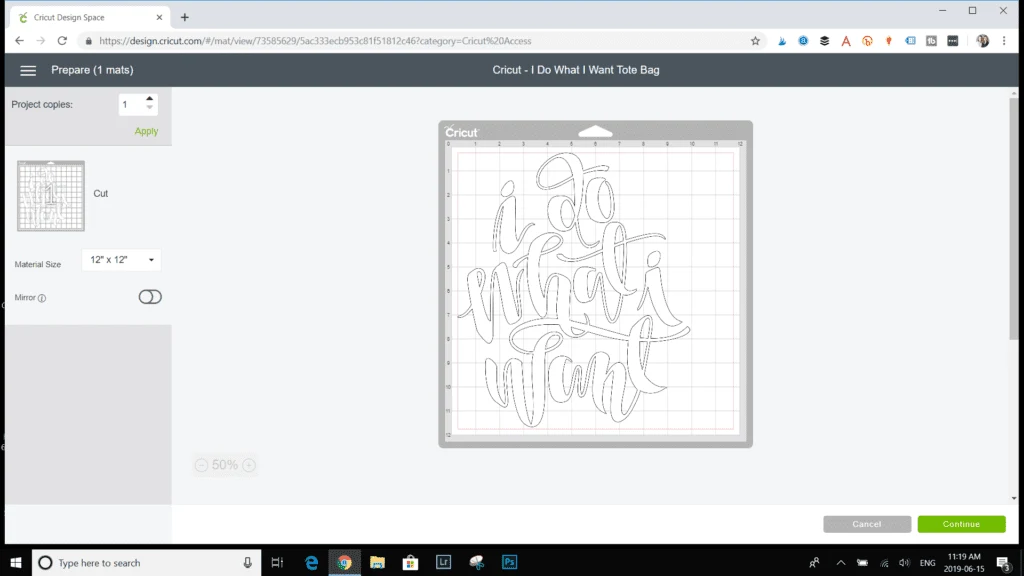
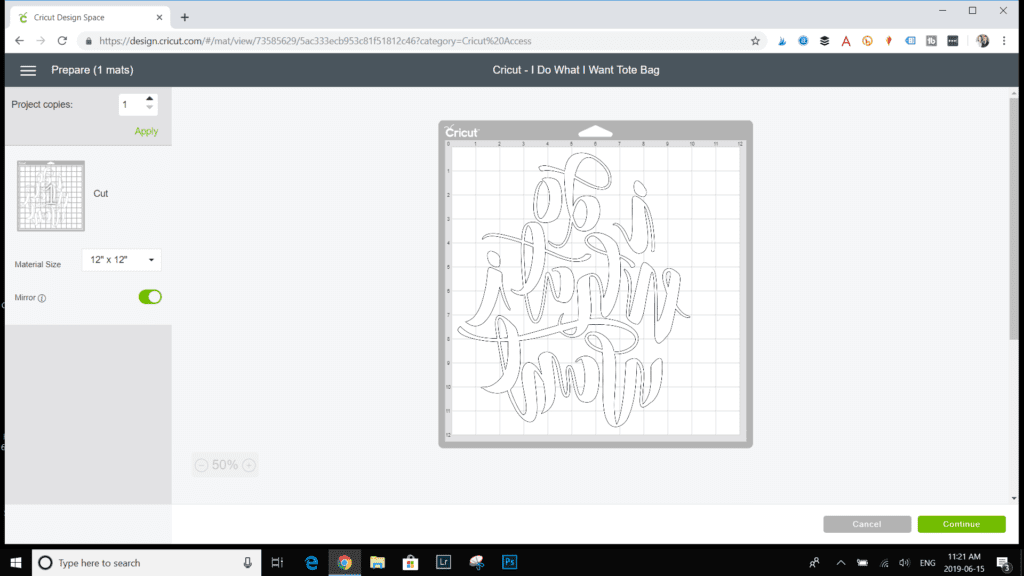
Click on the Mirror toggle button to flip the lettering. This is a necessary step for all iron-on lettering otherwise the image will appear backwards when pressed on. Select “Continue”.

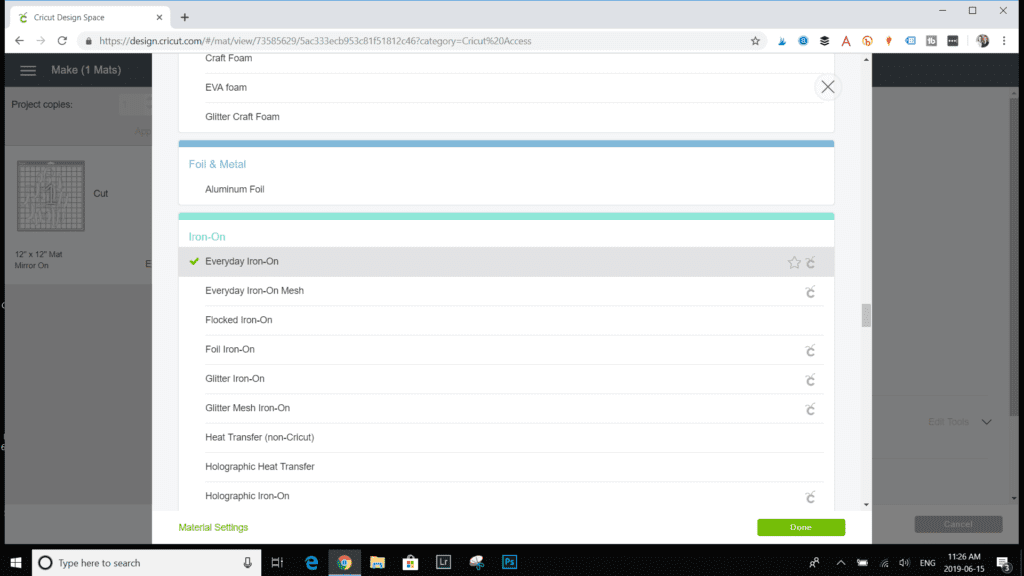
Select the materials from the list of options provided. Click on Iron-On (the 5th tab from the left).
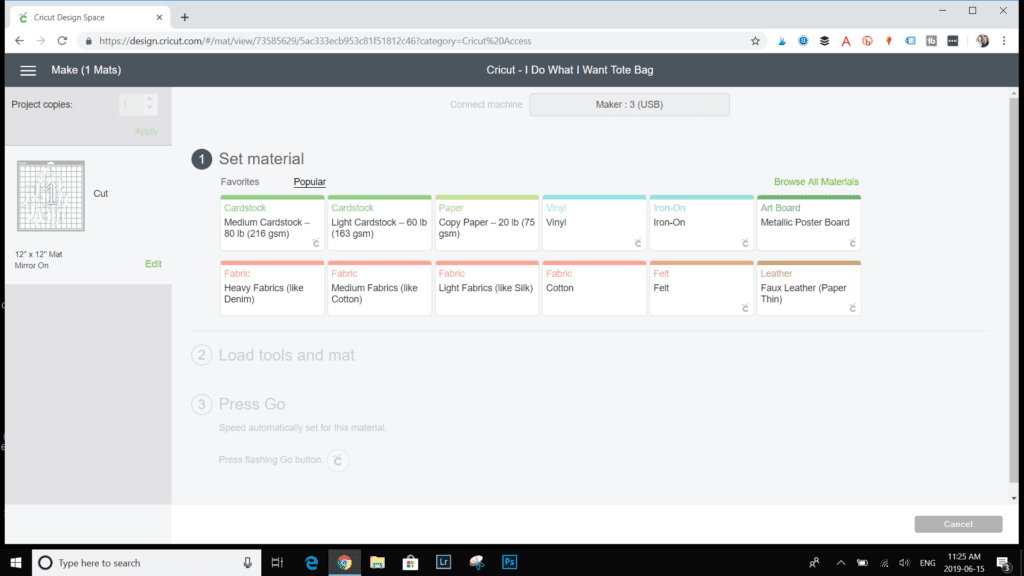
To choose a specific material, you can click on the browse materials and type the word in the search box, such as Everyday Iron-On.
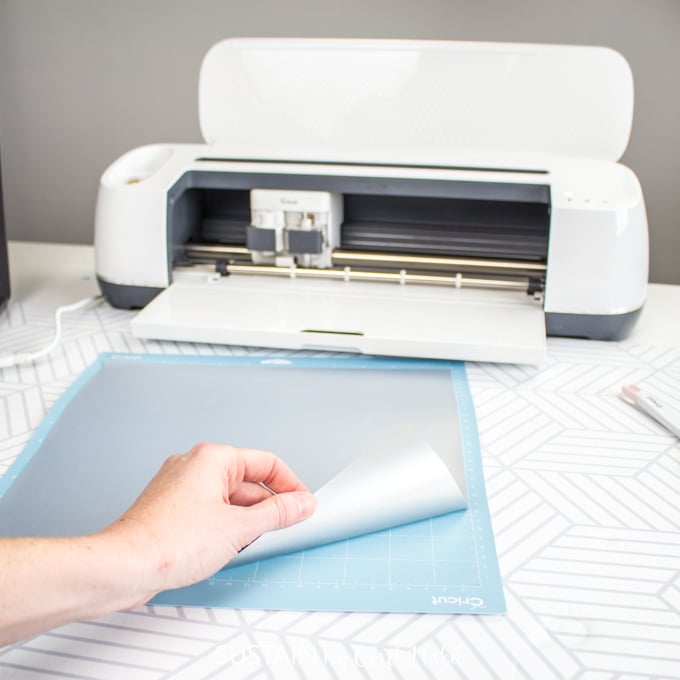
Ensure the correct blade is inserted into the Cricut Maker. Place the silver iron on vinyl directly on to the Cricut mat with the shiny side down and insert it into the Cricut Maker.
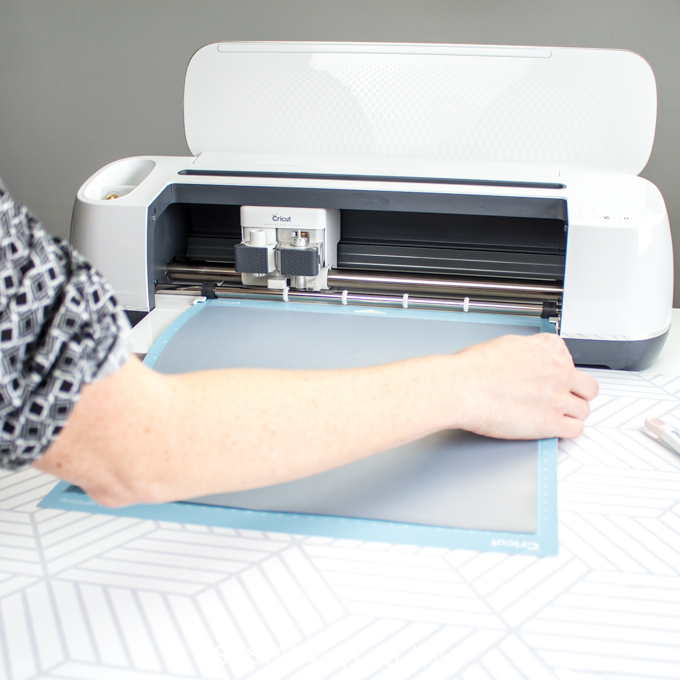
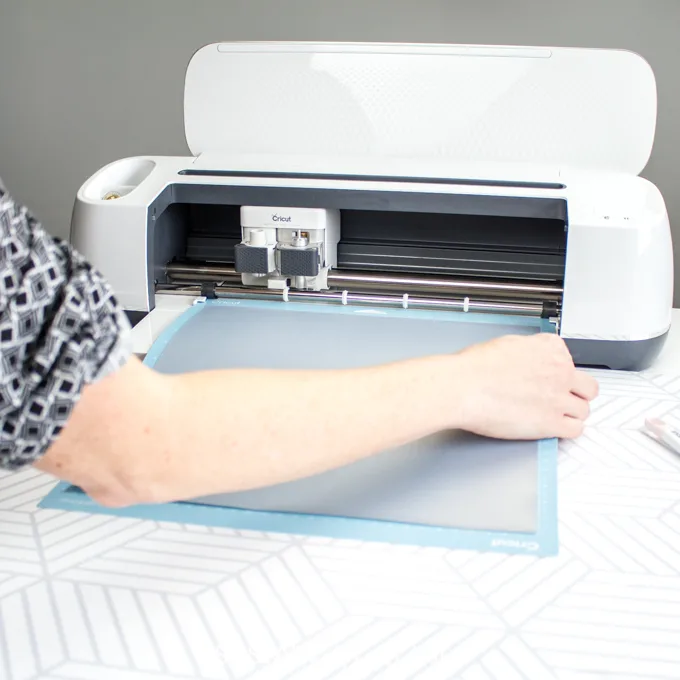
Press the flashing green button on the Maker to load the mat.
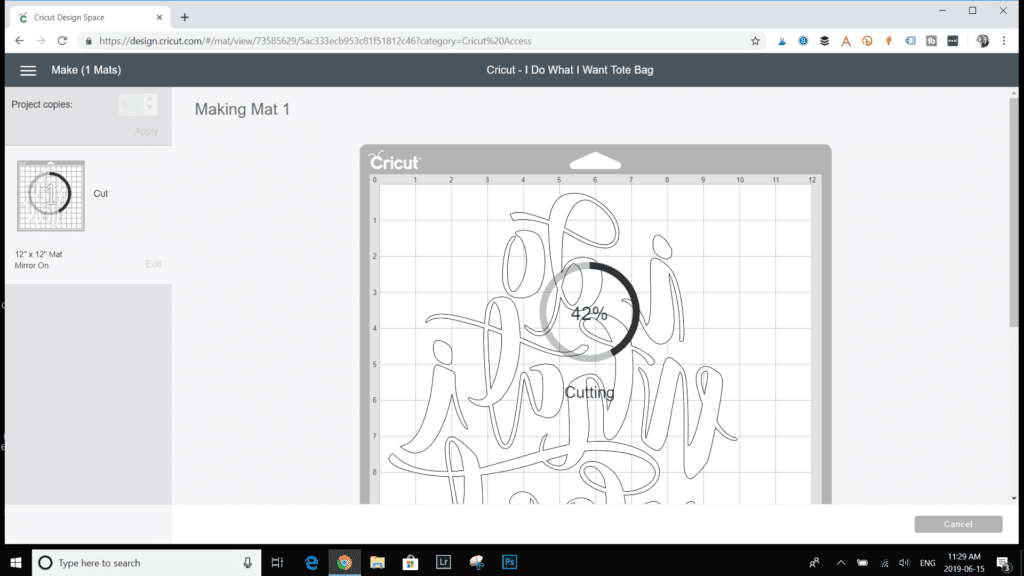
The Cricut Maker will begin preparing to cut the vinyl.

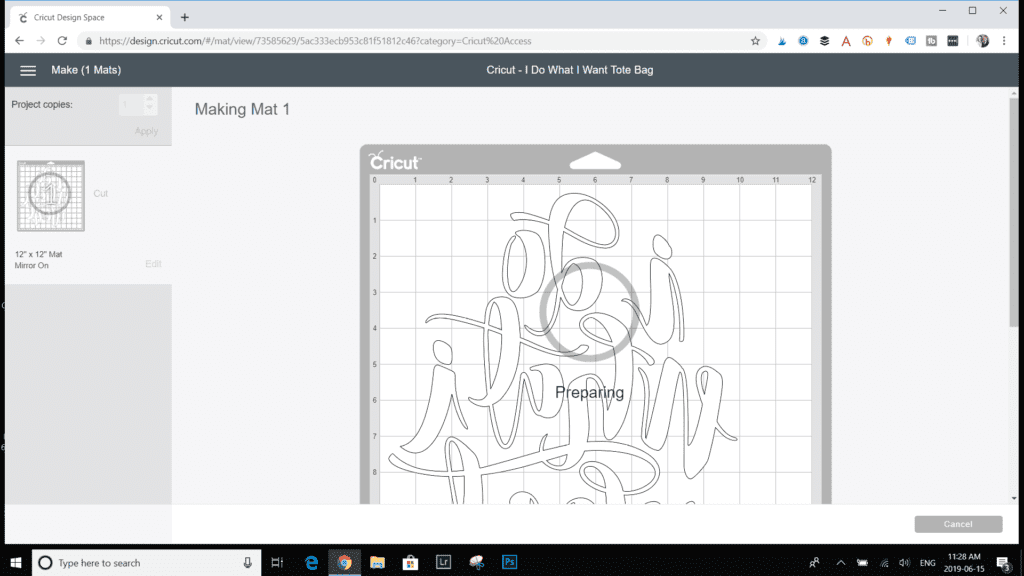
It’ll take a few minutes to cut out the iron-on vinyl showing you the status on your screen.

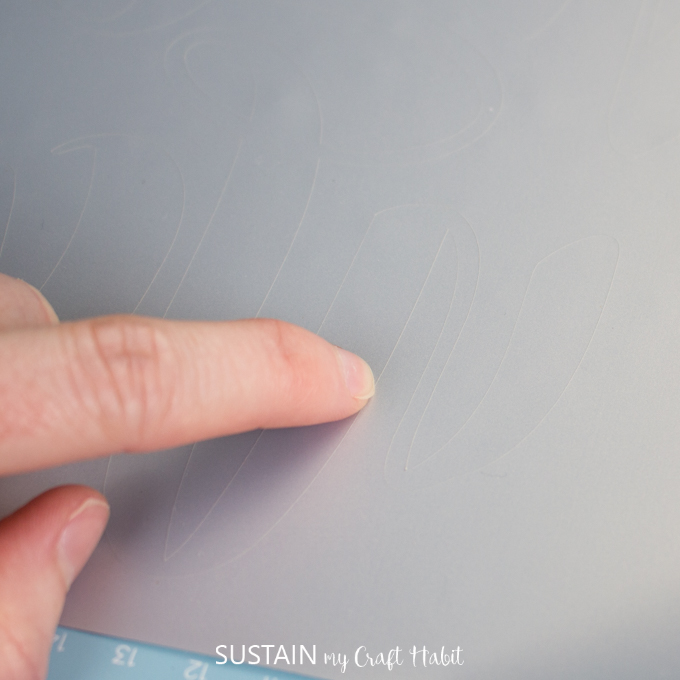
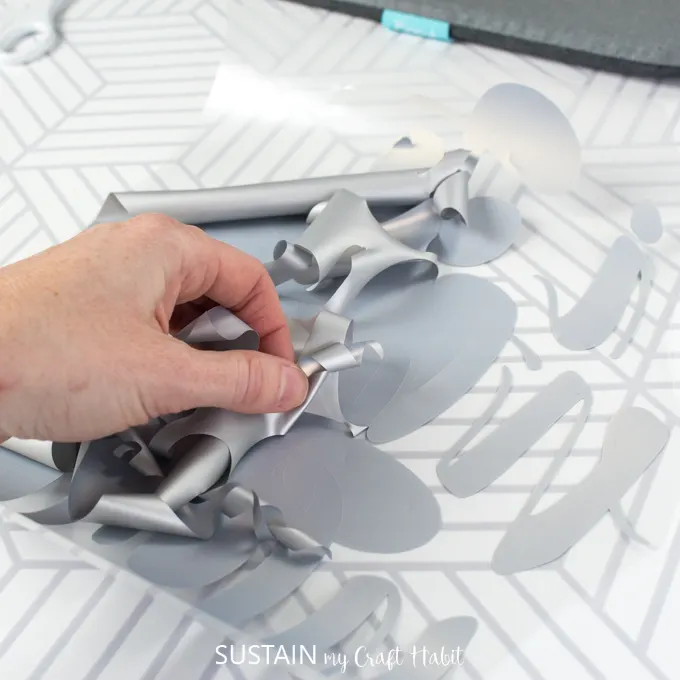
Once done, it’ll prompt you to unload the mat. Pull off the vinyl from the cutting mat to weed and discard the unwanted sections of the vinyl.


Using the EasyPress 2:
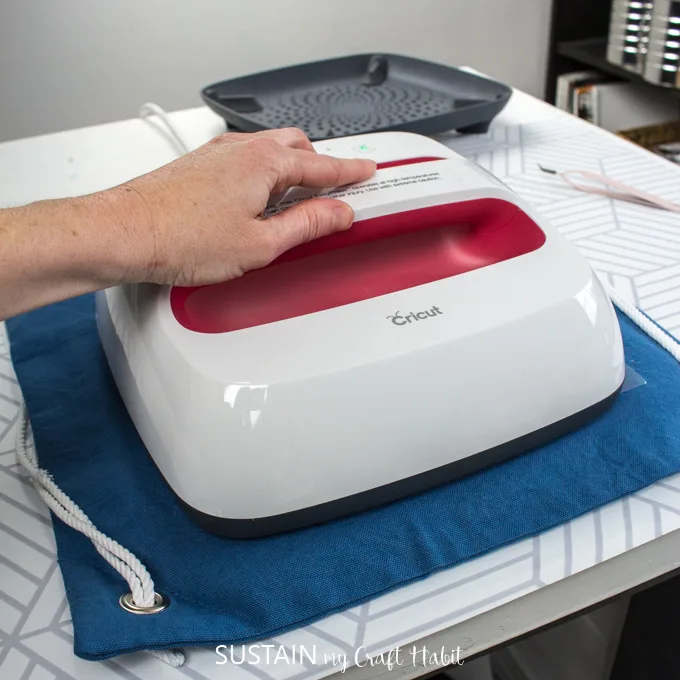
Position the mat on a flat surface. Turn on the EasyPress 2.

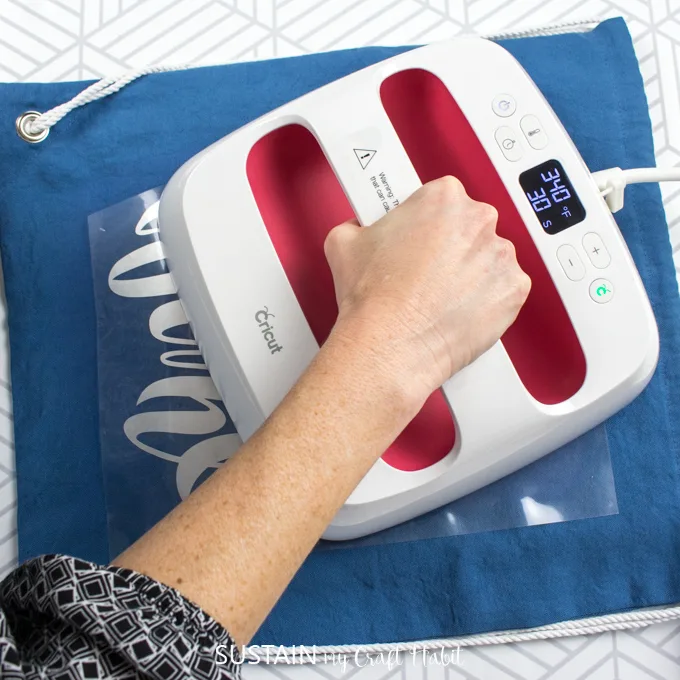
Set the temperature and time on the machine following the chart for the type of vinyl and material being used or use this EasyPress Interactive Quick Reference Guide.
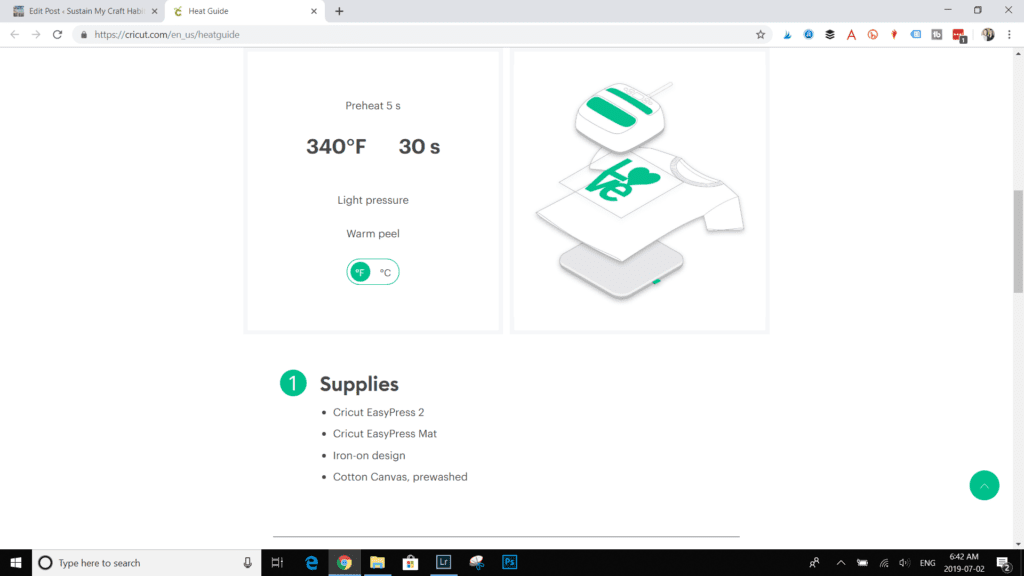
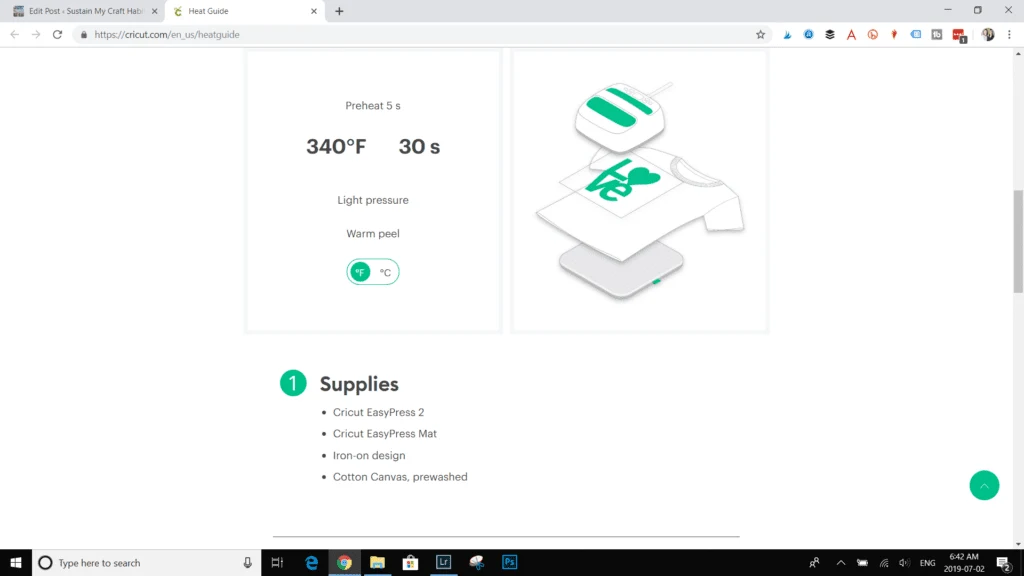
Always test a scrap piece of material and vinyl beforehand. We found that although the reference guide recommend 340F degrees for 30 seconds, we actually needed to apply it at a higher temperature and for longer in order for the vinyl to stick.
The risk with not setting the right temperature is:
- If temperature too low or time too short – the vinyl will peel off over time and washing
- If temperature is too high or time too long – the surface of the material could overheat and turn yellow.
Following the instructions on the screen, preheat the drawstring bag for 5 seconds. This will prep the fabric for the vinyl and the heat while also removing any creases and wrinkles from the fabric.
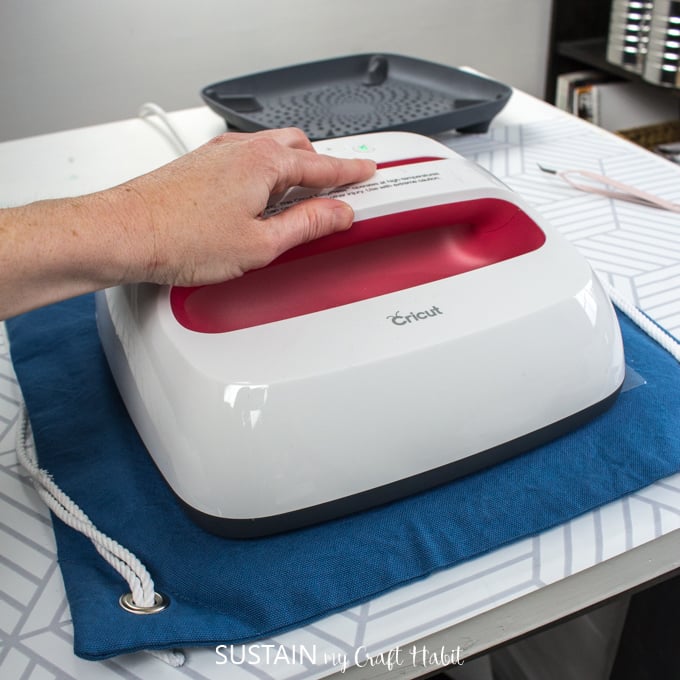
Place the vinyl on the bag with the liner side up and apply heat with a light pressure. Since the design was larger than our EasyPress 2 size, we applied heat in two separate sections.

Turn the bag inside out and apply more heat.

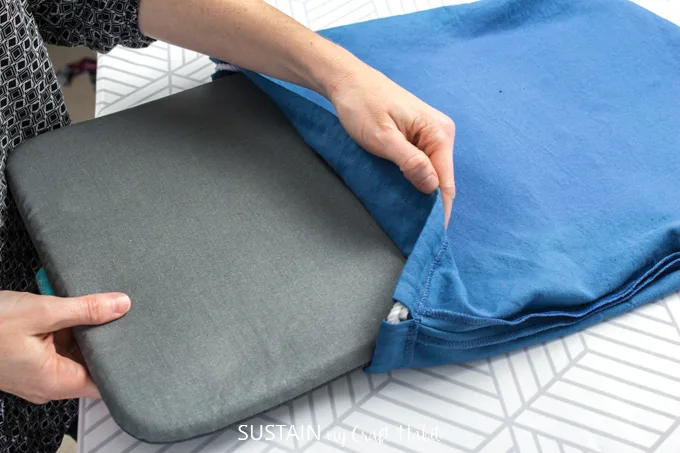
Allow the vinyl to cool for about 30 seconds before carefully peeling away the plastic liner.
Did you know you can also use the EasyPress 2 on wood? Check out our silly DIY bathroom sign post to see the effect as well as this of 10 projects you didn’t know you could make with the EasyPress 2.
Like it? Pin it for Later!