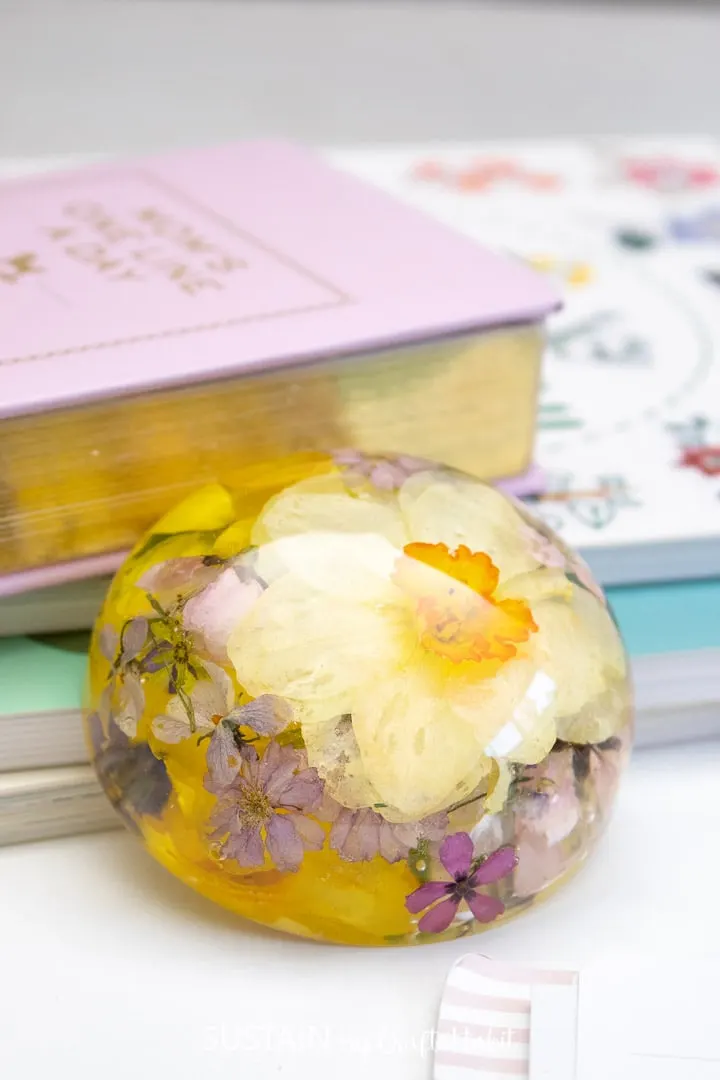
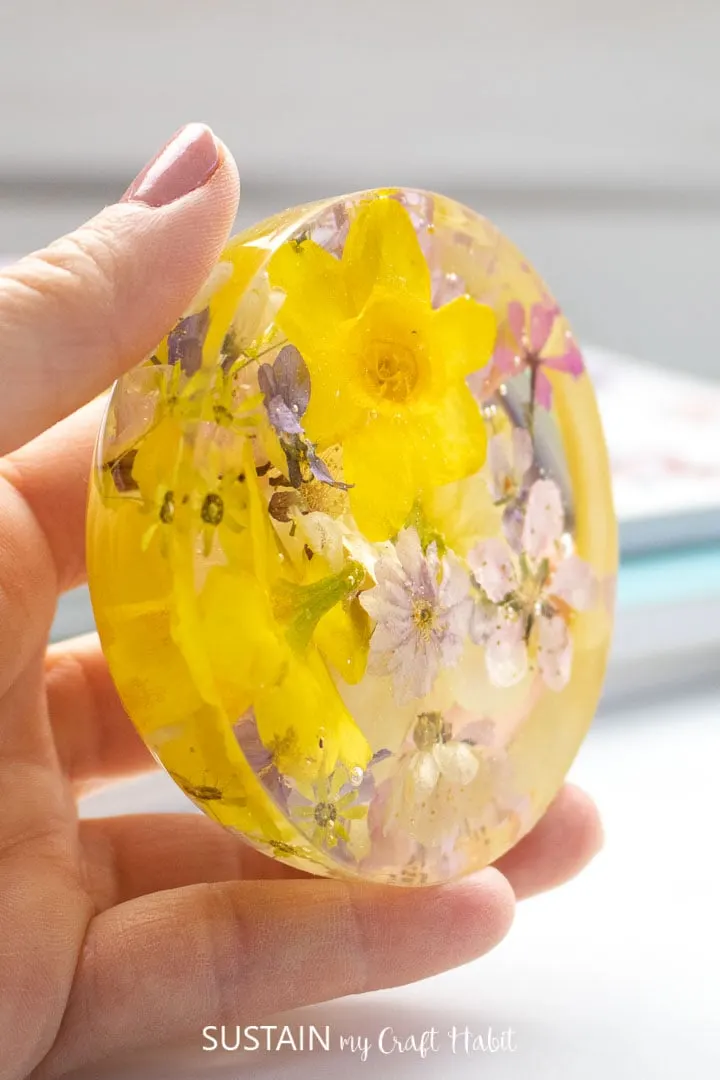
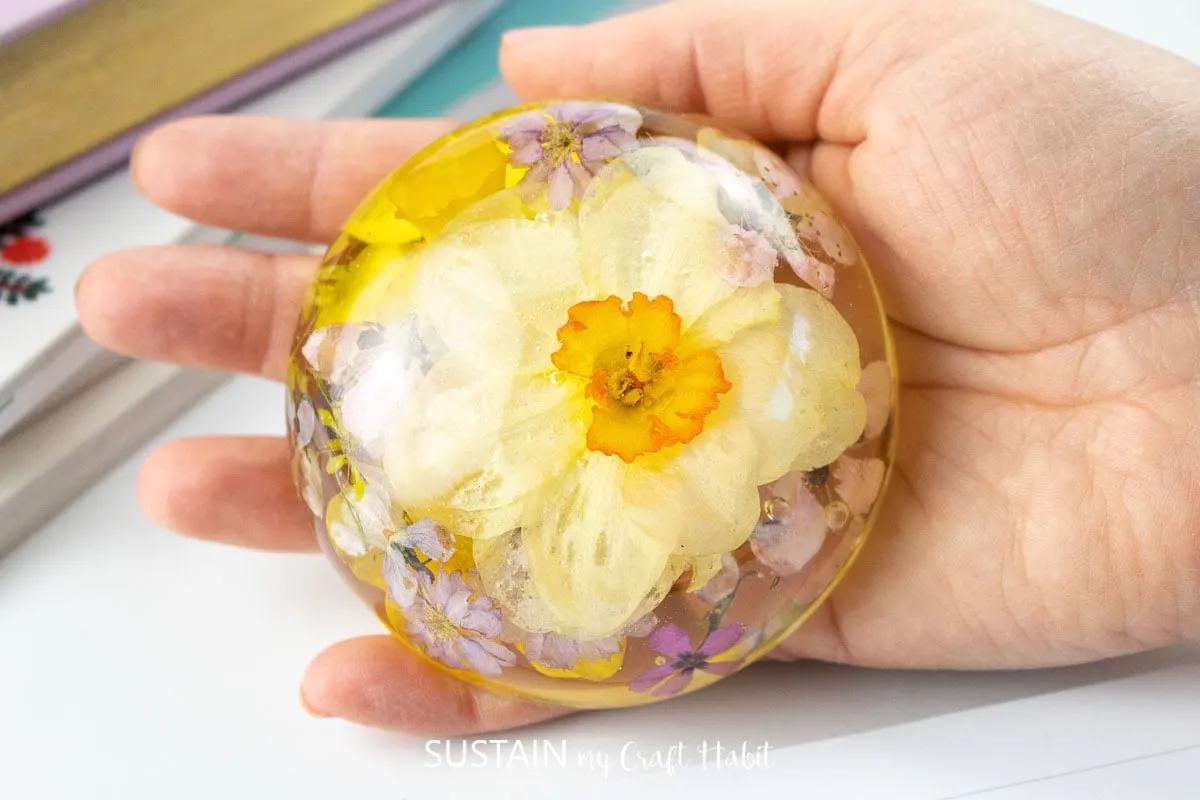
Are you looking for a new and exciting project to do at home? Do you love flowers and want to preserve their beauty in a unique way? If so, then you’re in luck because we have the perfect DIY project for you – daffodil resin paperweights!

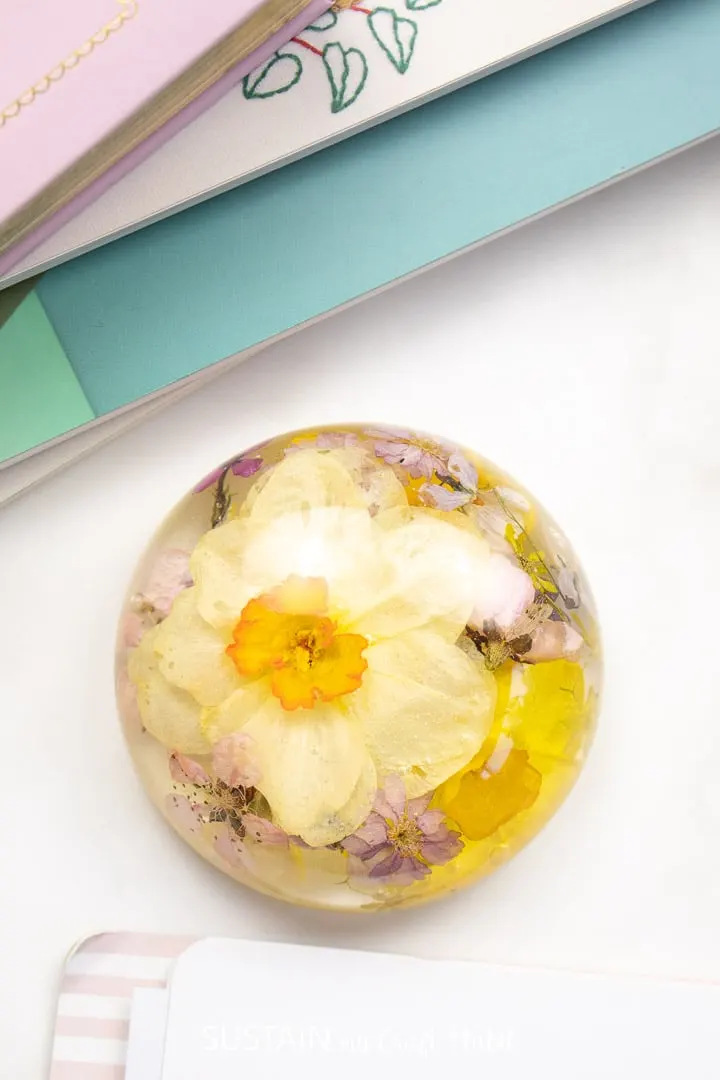
Resin paperweights are a popular trend in the crafting world, and for good reason. They allow you to encapsulate any object or design in a clear, glossy resin that creates a stunning and durable finished product. And what better way to showcase the beauty of nature than by incorporating real flowers into your resin creation?
What Is Resin?
Resin is a viscous liquid that hardens into a clear and durable plastic when cured. It has become increasingly popular in the crafting community because of its versatility and ability to preserve objects in a beautiful and unique way.
Resin comes in different types such as epoxy resin, UV resin, and polyester resin. Each type has its own curing time and application methods, so it’s important to choose the right one for your project. For our daffodil paperweights, we recommend using epoxy resin as it has a longer curing time and allows you to work with the flowers more easily.

Why you Will Love This DIY Daffodil Resin Paperweight
There are many reasons why you will love making your own daffodil resin paperweight. Here are just a few:
- It’s budget-friendly: Crafting can often be an expensive hobby, but this project is cost-effective as it only requires a few materials that can easily be found at your local craft store.
- It’s easy to make: You don’t need to be an experienced crafter to make these paperweights. With a little bit of patience and attention to detail, anyone can create a beautiful daffodil resin paperweight.
- It’s customizable: You can use any type or color of flower you want for this project. Plus, you can add in other elements like glitter or dried leaves to really personalize your paperweight.
- It makes a great gift: These paperweights are not only beautiful but also functional. They make a perfect gift for friends and family, especially for those who love flowers or unique home decor pieces.

Want to receive a ton of inspiration and money saving ideas for decorating, gift-giving and crafting? Join HERE!
Materials Needed
Disclosure: This post contains affiliate links for your shopping convenience. Should you choose to purchase through them, we will make a small commission at no extra cost to you. You can read our full disclosure policy here.
- Dried Daffodil flowers (and other small pressed flowers)
- Multipurpose sealer/white craft glue); small paintbrush
- Large domed poly mold (3″ Dia. x 1-3/8″ dome)
- Mold Release Conditioner
- EasyCast Clear Casting Epoxy
- Measuring Cups
- Stir Sticks
- Straw, paper towels, parchment paper (optional)
- Castin’ Craft Universal Opaque Pigments (Opalescent)

How to Make a Daffodil Resin Paperweight
Preparing the Daffodil Flowers
This project does need a bit of planning ahead. Ideally pick the daffodils and let them dry for at least one week. To dry your flowers so they retain their shape use silica crystals! Follow this step-by-step tutorial, we previously dried roses the same way.


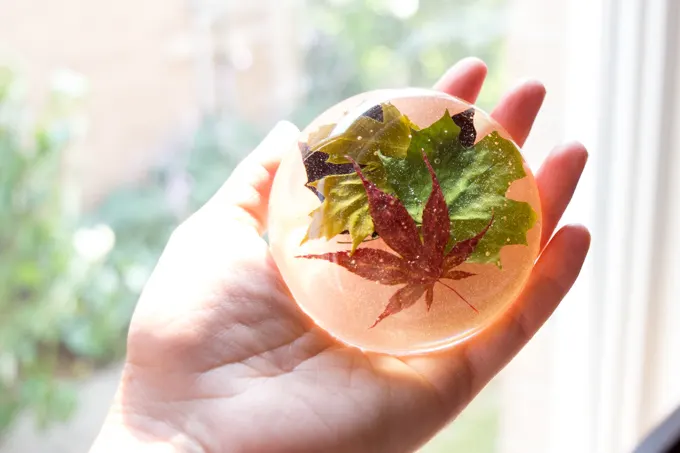
And then check out the previous paperweight we made using leaves to replicate this beautiful daffodil paperweight project.


Capture the Beauty of Nature
Creating your own daffodil resin paperweights is a fun and easy project that allows you to capture the beauty of nature in a unique way. With just a few materials and some creativity, you can make stunning paperweights that will not only add a touch of elegance to any room but also serve as a special keepsake. So why not give this DIY project a try and see the beauty of daffodils preserved in resin for yourself? We guarantee it will become your new favorite crafting activity.
More Resin Crafts
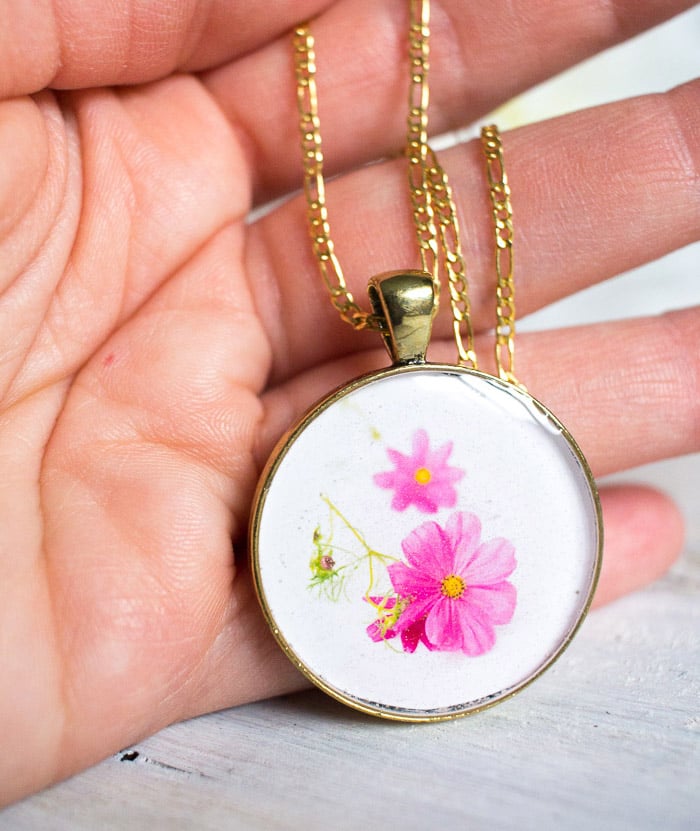
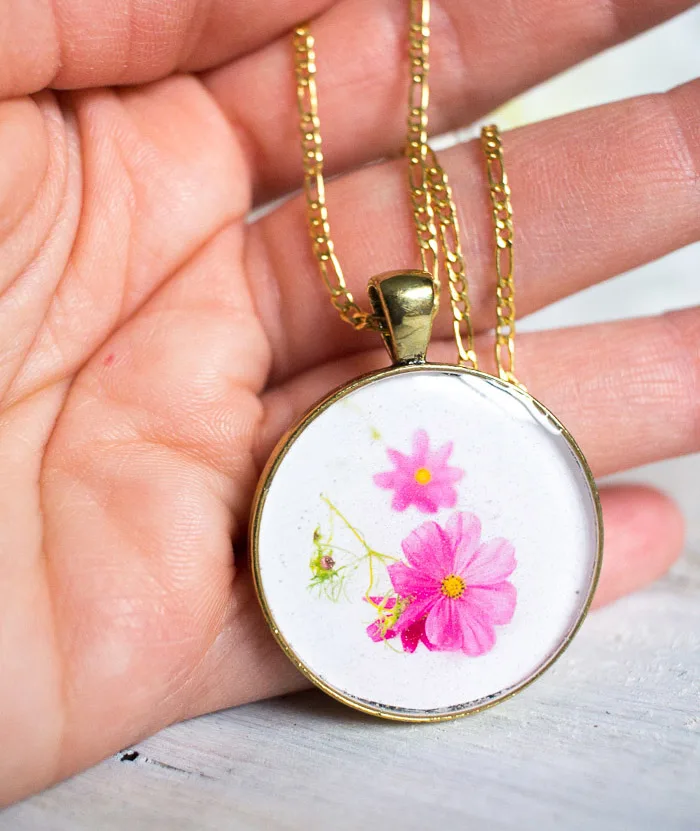
- Birth Month Flower Pendants
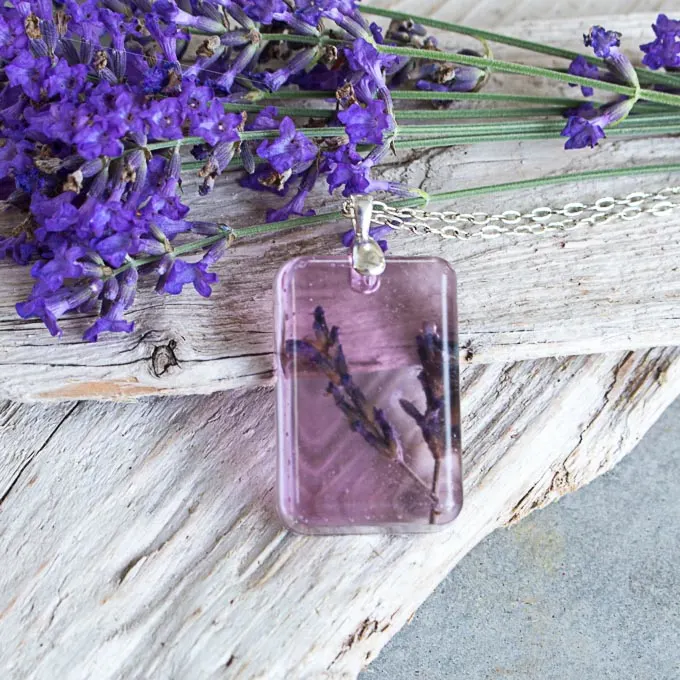
- Resin Pendants with Lavender
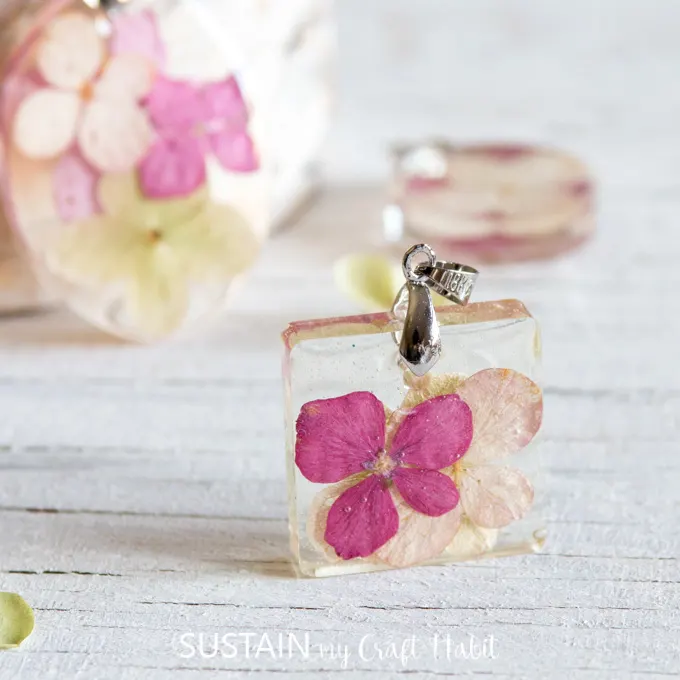
- Resin Jewelry with Flowers
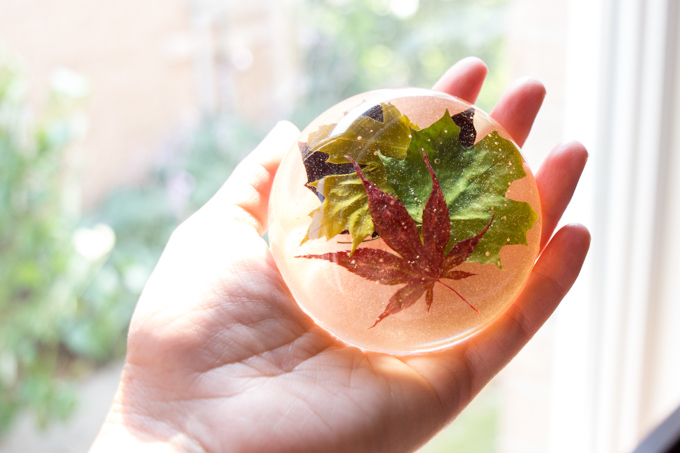
- Leafy Resin Paperweight
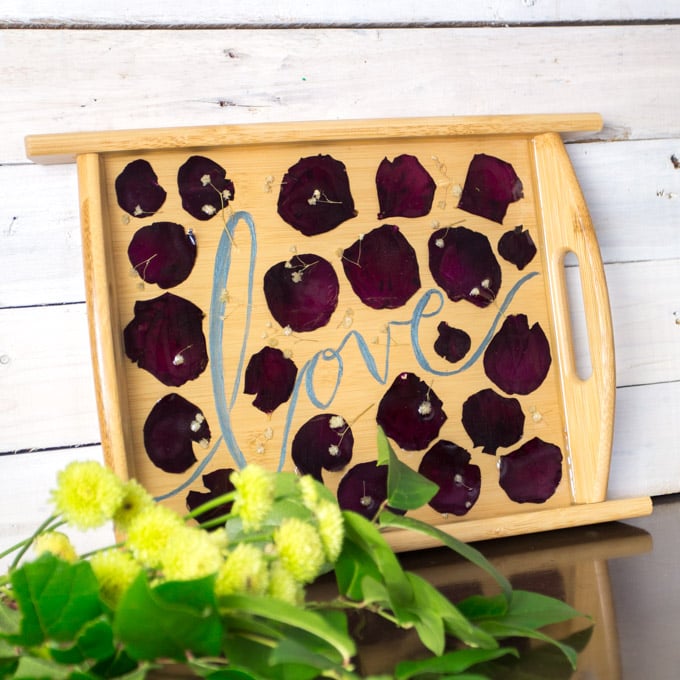
- Dried Rose Petal Serving Tray


Join our crafting community to find more nature-inspired DIYs and upcycled craft ideas. It feels good to repurpose, upcycle and create with nature!
Like it? Pin it for later!
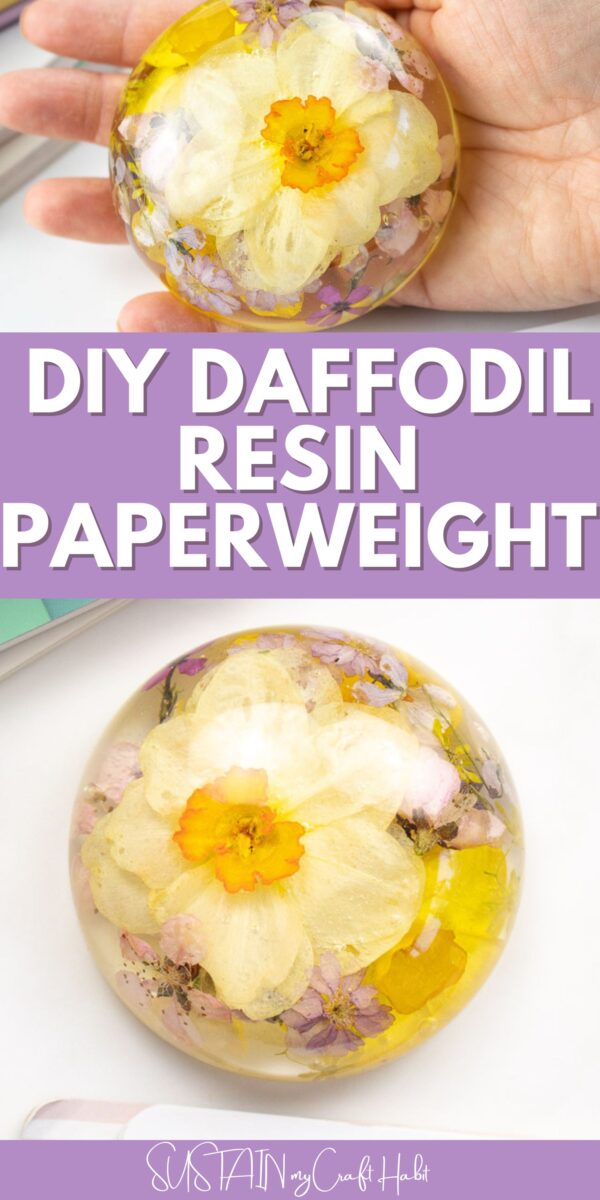


DIY Daffodil Resin Paperweight
Materials
- Dried Daffodil flowers
- Multipurpose sealer/white craft glue); small paintbrush
- Large domed poly mold 3″ Dia. x 1-3/8″ dome
- Mold Release Conditioner
- EasyCast Clear Casting Epoxy
- Measuring Cups
- Stir Sticks
- Straw paper towels, parchment paper (optional)
- Castin’ Craft Universal Opaque Pigments Opalescent
Instructions
Pouring the first Resin Layer
- Before starting the project be sure to follow all the directions in the EasyCast package. Work in a well-ventilated area using gloves.
- For best results the Resin and Hardener should feel warm to the touch before mixing. To warm it up, place it in warm (not hot) water just prior to using and swirl it around.
- Pour ½ oz of the Resin solution into a plastic measuring cup. Add ½ oz of Hardener to the cup. Blend the two components with a wooden craft stick for a full two minutes, scraping the sides and bottom of the cup along the way.
- Pour the mixture into a second measuring cup. With a clean craft stick, continue mixing for an additional minute.
- Spray the inside of the dome-shaped mold lightly with the Mold Release Conditioner. Pour the resin mixture into the bottom of the mold (should be about ¼ full).
- Cover and let set for 15-20 minutes. Blow off any bubbles which rise to the surface with a kitchen torch or your breath, using a straw. Repeat this if needed over the next 45 minutes.
- Let the resin cure for about 3 hours. At this point it will be firm yet tacky. Gently place the first daffodil flower (choose the smallest or the one you’d like to showcase the most) onto the resin, with the nicest side of the flower facing down. This will help to “stick” the first flower in place so that it doesn’t float to the surface with the next resin layer pour.
- Let cure for 6-8 hours.
Pouring the second Resin Layer
- Repeat the steps above to mix together the Resin and Hardener, this time using 1 oz of each.
- Slowly pour the mixed solution over the first resin layer and let the resin settle underneath the first flower you placed. Use a toothpick to carefully release any bubbles trapped under the first flower (or leave them there if you like the effect!).
- After 15 – 20 minutes, blow off any bubbles that rise to the surface as above. At this point, start layering the next daffodil flowers and other smaller flowers. Go slowly and try not to trap air bubbles under the flowers.
- I found it worked best to insert the flowers into the resin at an angle rather than simply laying them on top of each other. This gave the air a chance to escape up the surface of the flowers.
- The resin will still be quite fluid at this point so you can arrange the flowers as you’d like. I tried to spread mine out. A couple of times I carefully lifted up the mold to see how everything looked from the “top” side and rearranged as needed.
- After the resin cured for about 2 hours, I went back in with a toothpick and repositioned some of the flowers to separate them a bit. The resin was pretty thick by this point so I worked slowly and carefully not to damage the flowers (or introduce more air bubbles). I pushed the bottom flower down as far as it would go as it had floated to the top of the resin.
- I then placed the fourth and final flower on the semi-cured surface of resin, smoothing it out as much as possible.
- Let cure for 3 more hours before pouring the final resin layer.
Pouring the final Resin Layer
- Repeat the steps above to mix together the Resin and Hardener, this time using ¾ oz of each.
- When the second mixing process is complete, add in 2-3 drops of Pearl Opaque Pigment and blend in completely.
- Pour this final layer to fill the mold (do not overfill).
- Let the daffodil flower resin paperweight cure for at least 24 hours before attempting to remove from the mold. The piece should be fully cured after about 72 hours.
MAUDETTA
Friday 3rd of May 2024
Love the detailed instructions!