How to Sew a Pencil Case with a Zipper (Free Printable Pattern)

Hi creative friends! Have you ever wondered how to sew a pencil case with a zipper? If so, I’ll show you just how easy it is to sew a zipper into a large sized pencil case.
Sewing a Large Sized Pencil Case
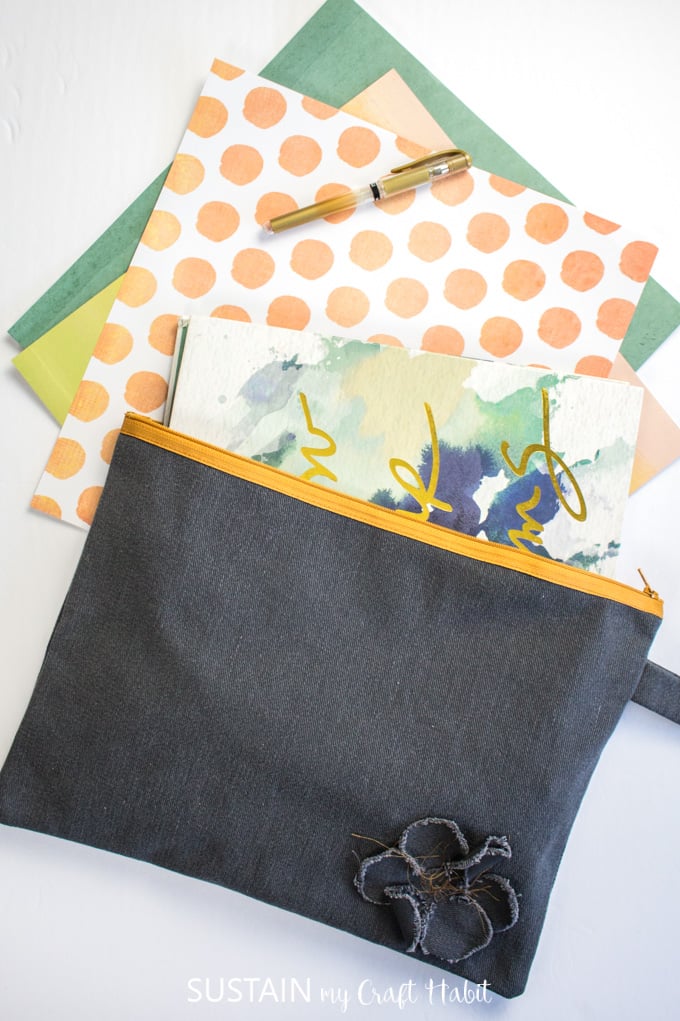
This over-sized pencil case will hold much more than just your standard set of pencils. At 14” wide and 10” high, this case will easily carry all your writing tools, notepads and other supplies.
I personally plan to use this case to hold my makeup bag along with all my hair products like my brush, hairspray, elastics and straightener when I’m packing for a weekend getaway.
I took inspiration from all of the deconstructed fashion that’s currently trending. You know all those ripped jeans with holes in the knees? And those shirts with raw edges at the neck? All those clothes that look unfinished? Well, they are all meant to look that way! So why not design a pencil case the same way? I’m staying on-trend by incorporating loose hanging threads, fraying raw edges and exposed zippers.
This graphite coloured 100% cotton twill with a soft brushed surface from Canvas Etc. is just the right medium weight fabric for this pencil case. And since I wasn’t able to find a matching zipper color I chose one in complimentary contrasting color instead (and it actually suits the deconstructed look perfectly).
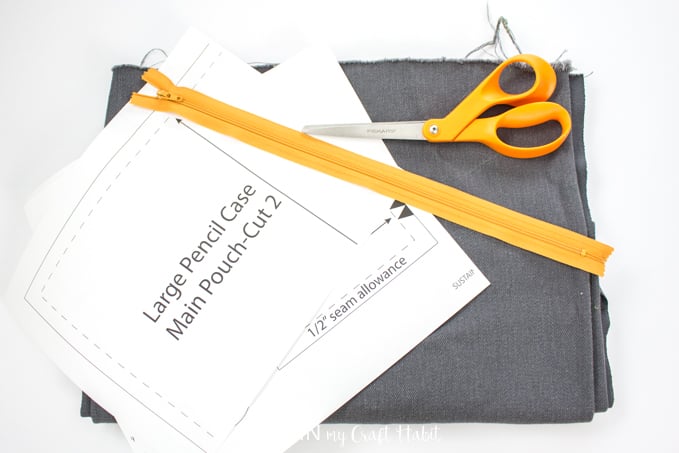
Materials Needed to Make this Large Pencil Case:
- 100% Canvas, 1/4 meter Bull Denim in Graphite (but you can use any color of your choosing)
- Free Printable Large Pencil Case Pattern (print on 4 sheets of 8.5×11 paper)
- Closed End Coil Zipper, size 3, 35cm long in a Golden Yellow color
- Fabric scissors (these Fiskars are our go-to scissors for fabric)
- Chalk, ruler, measuring tape
- Iron and ironing board
- Sewing machine and 2 thread colors (thread that matches the zipper color and fabric color)
How to Sew a Pencil Case with a Zipper:
If you’re unclear on any of the sewing terms, you can refer back to our free apron sewing pattern for clarity.
Always pre-wash and dry the cotton canvas prior to cutting and sewing and remove it promptly from the dryer to minimize wrinkles and creases.
Cutting the Pattern Pieces
Print off the pencil case pattern on 4 sheets of 8.5×11 paper. Align the paper edges and tape the pieces together as shown. The dash line of the large pencil case rectangular pattern piece will measure 14” wide and 10” high when the pattern is taped together properly.
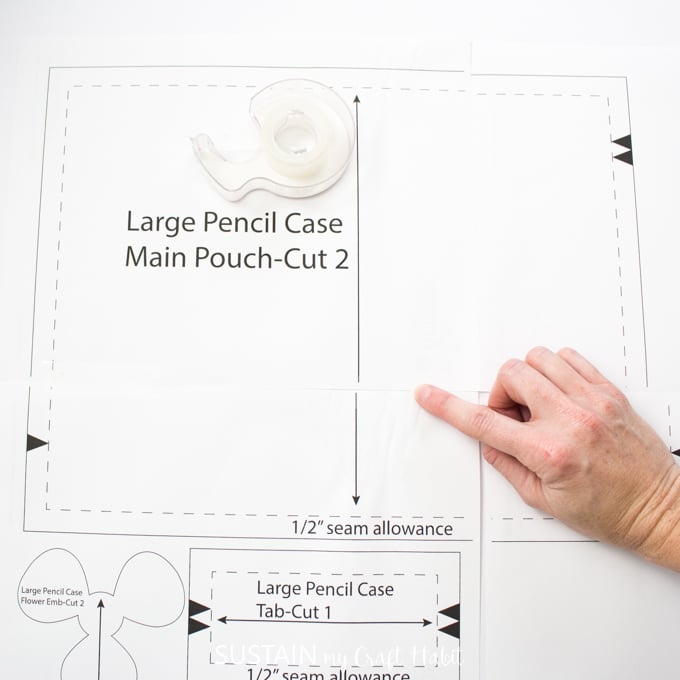
Place the pattern over the fabric aligning the grainline with the fabric grain. Cut along the solid line (the dashed lines represent the sew lines).
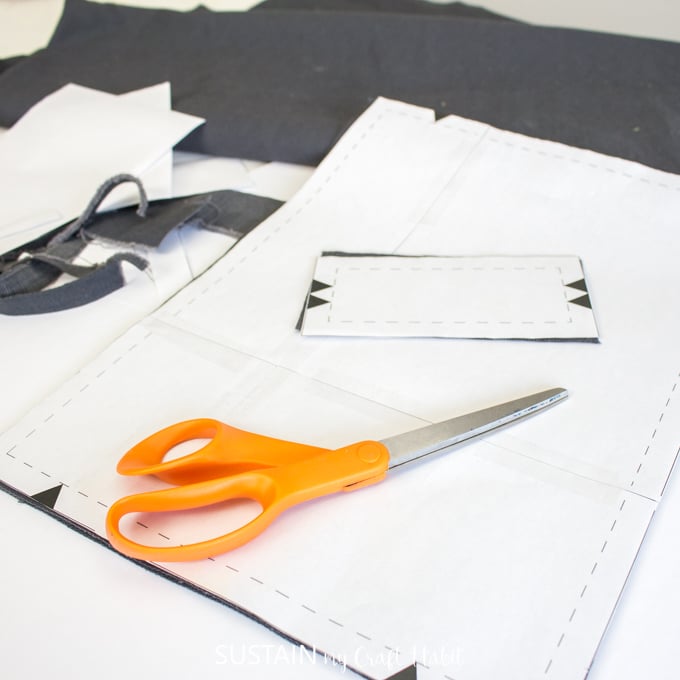
Clip the notches on the pattern as these notches will guide you with aligning pieces together.
As you’re cutting, keep your leftover fabric and scraps for other sewing projects. Those small pieces can be used to make these painted canvas ornaments or this scrap fabric heart garland.
Sewing the cut pieces
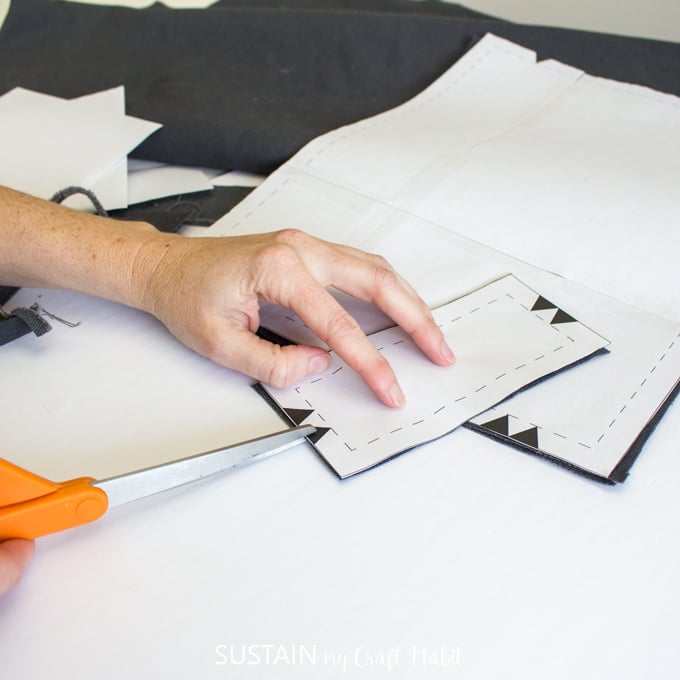
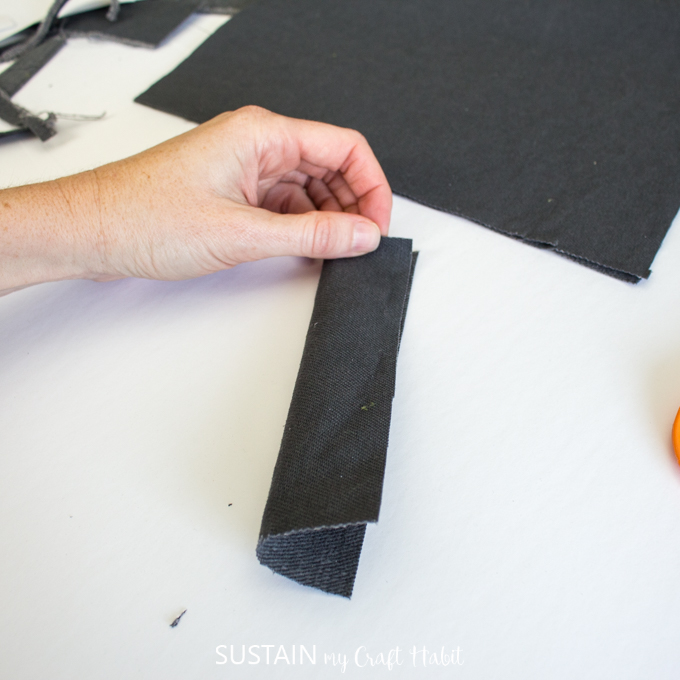
Fold the small tab in half lengthwise with right sides together. Stitch the tab closed with a ½” seam allowance along the long edge.
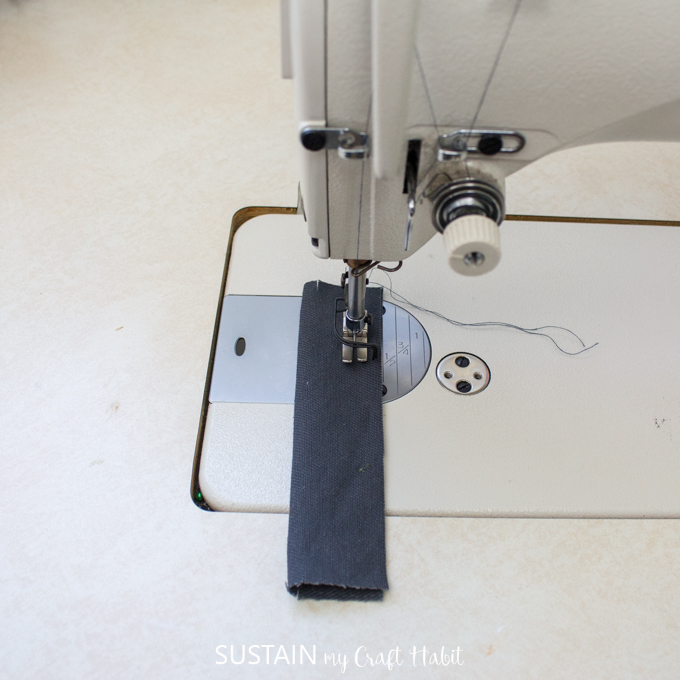
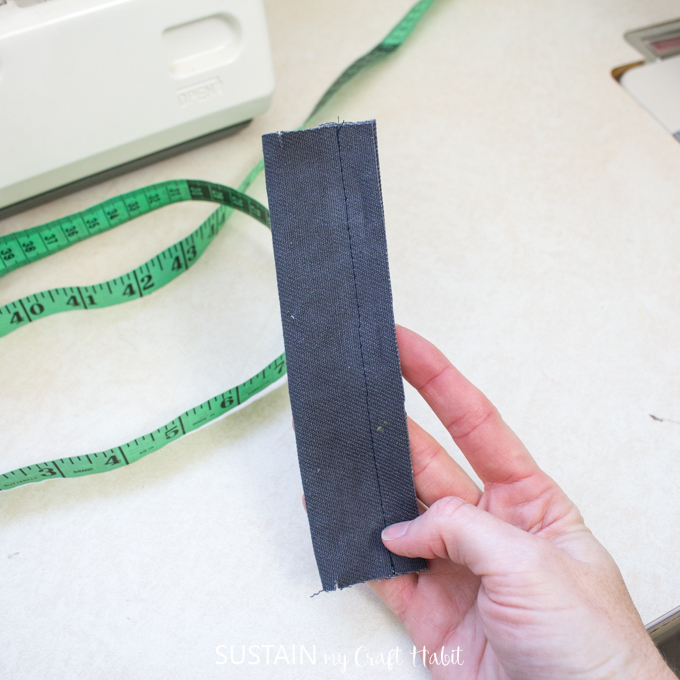
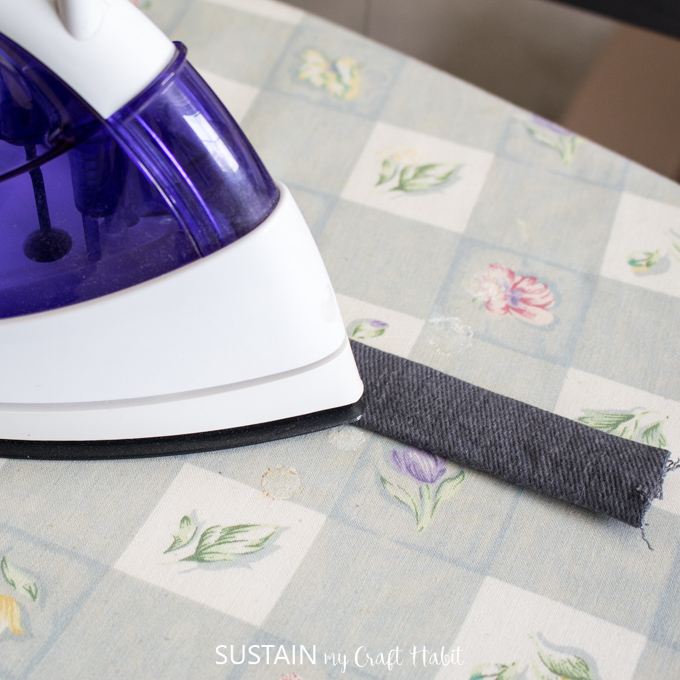
Turn the stitched piece inside out and press flat with an iron.
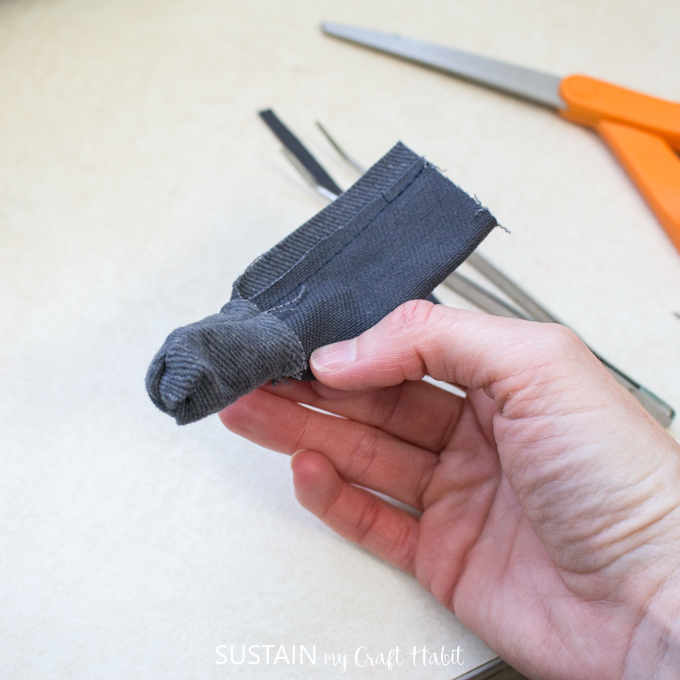
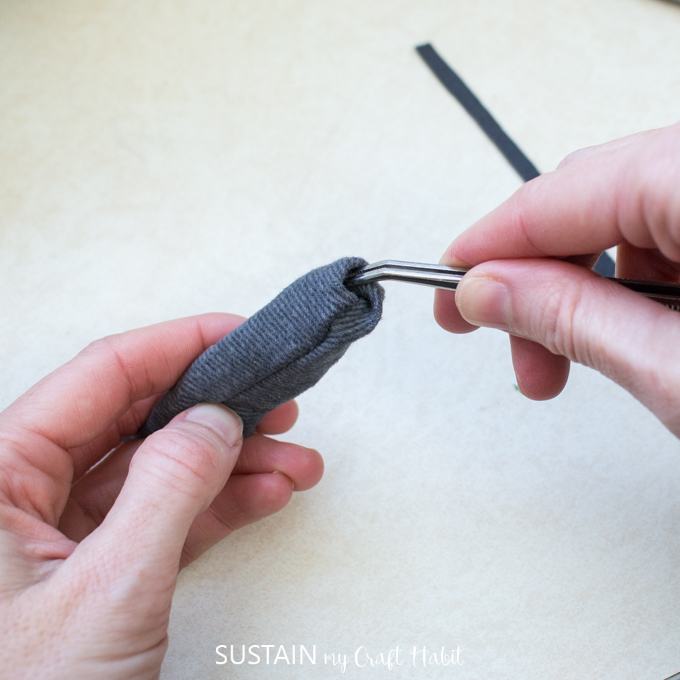
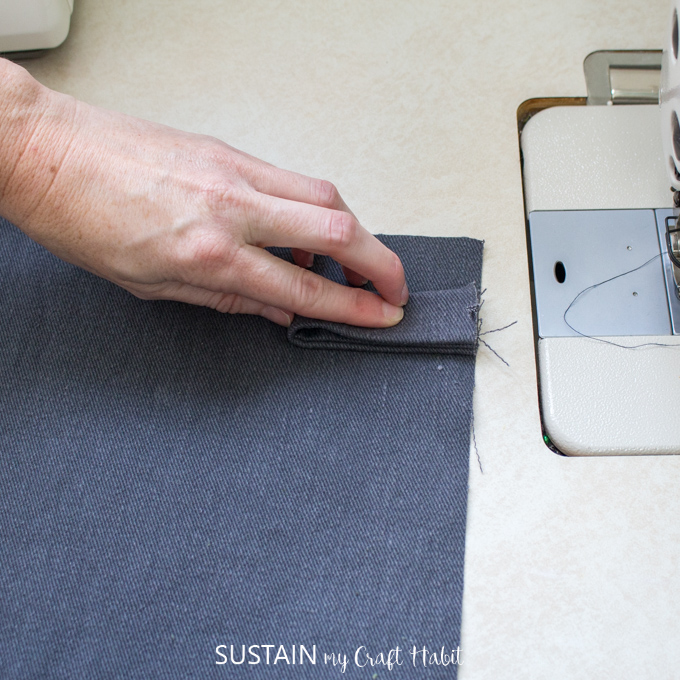
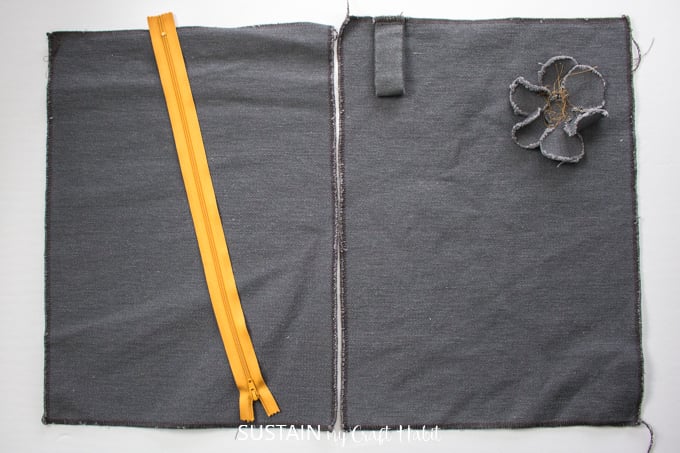
Fold the tab in half widthwise to form a large loop, aligning the double notches at the ends together and align those notches with the notches on the large rectangular pattern piece. Stitch it to the large pattern piece to hold in place.

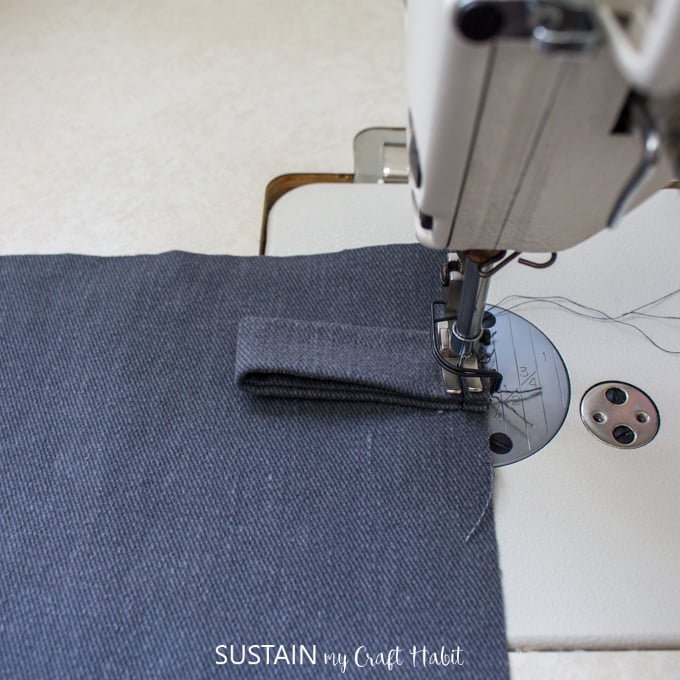
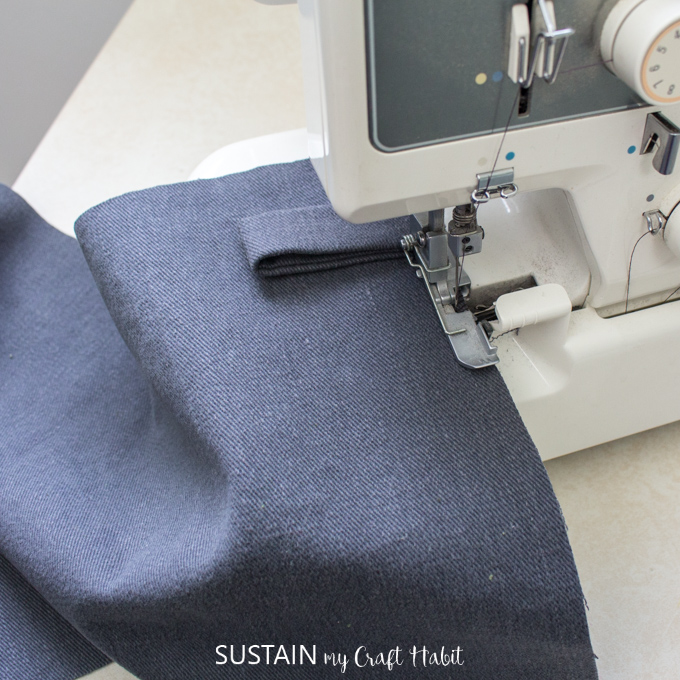
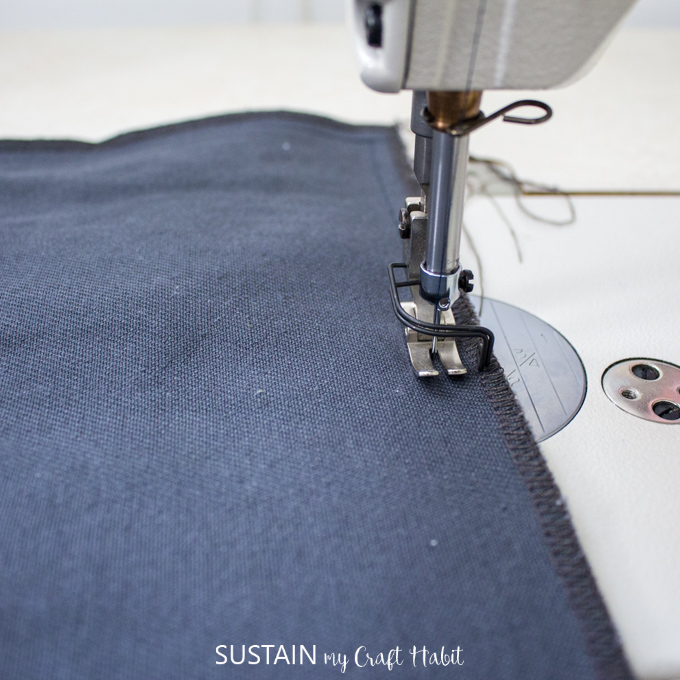
To prevent the cut edges from fraying, finish all edges of both pieces using a zig zag stitch or serging stitch as shown. Put aside.

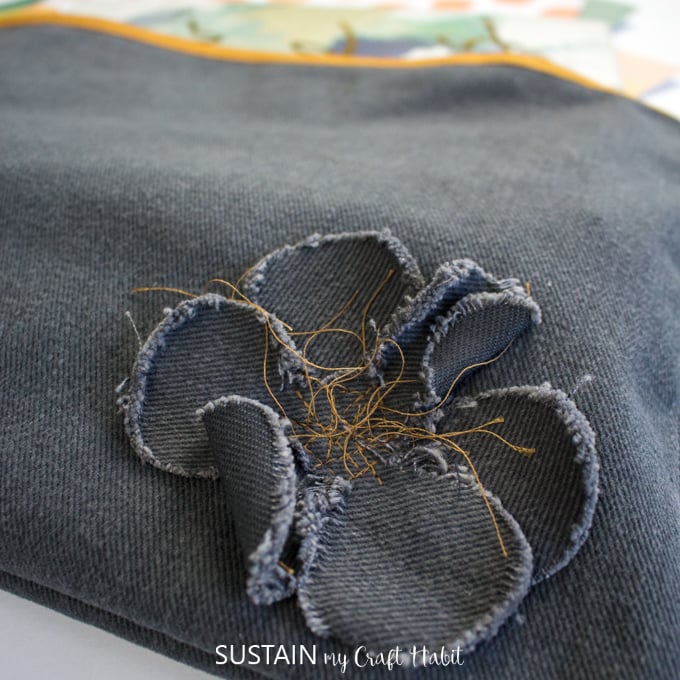
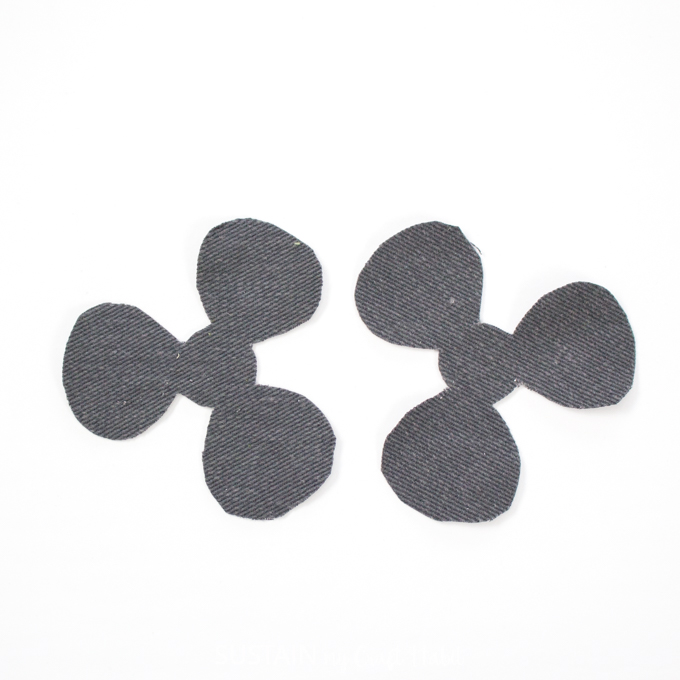
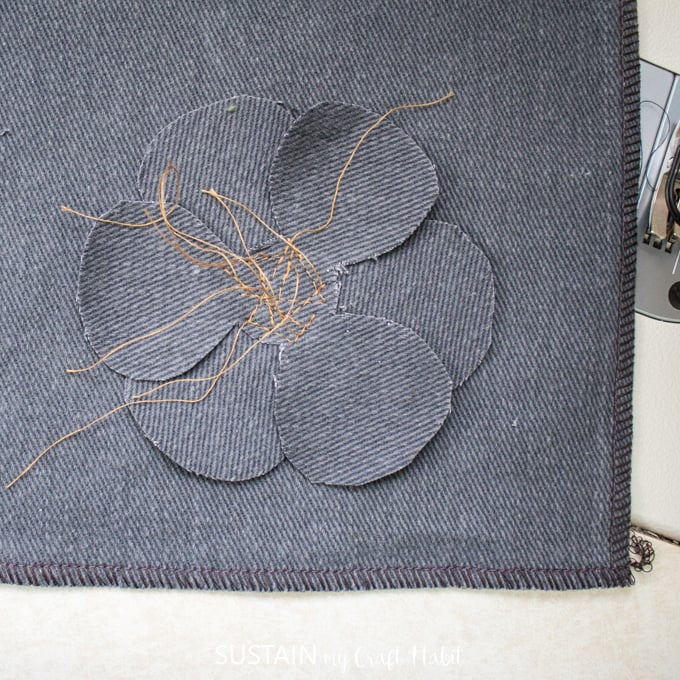
Rotate one of the flower petal pieces a full 180 degrees and place it over top of the other flower petal pattern piece.
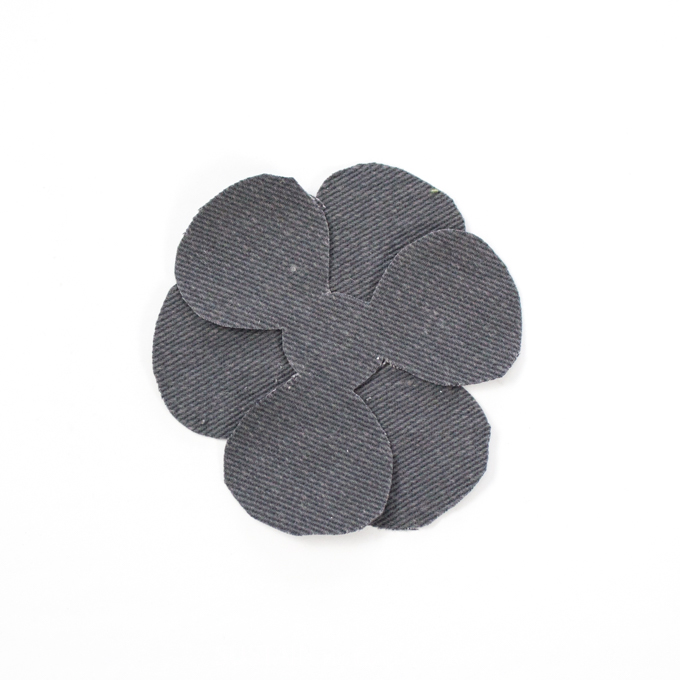
Place the flower in the lower right corner of the large rectangular pattern piece.
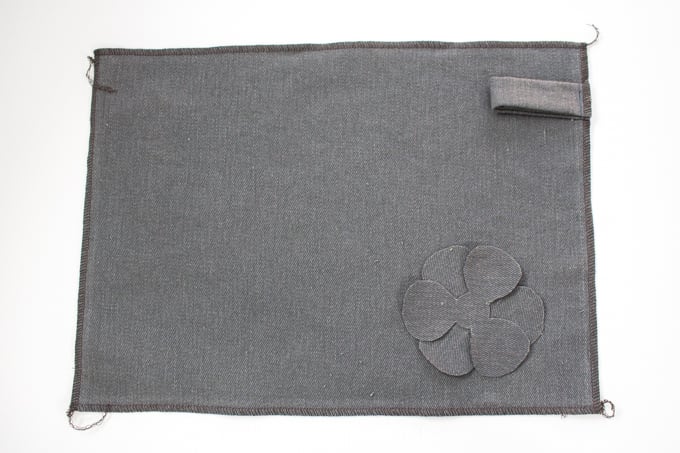
Using a contrasting thread color, stitch the flower in place. Since it’s a deconstructed style, sew short angled stitches while leaving the long hanging threads on the right side unclipped. Continue with this until you are happy with the amount of stitches and loose hanging threads.

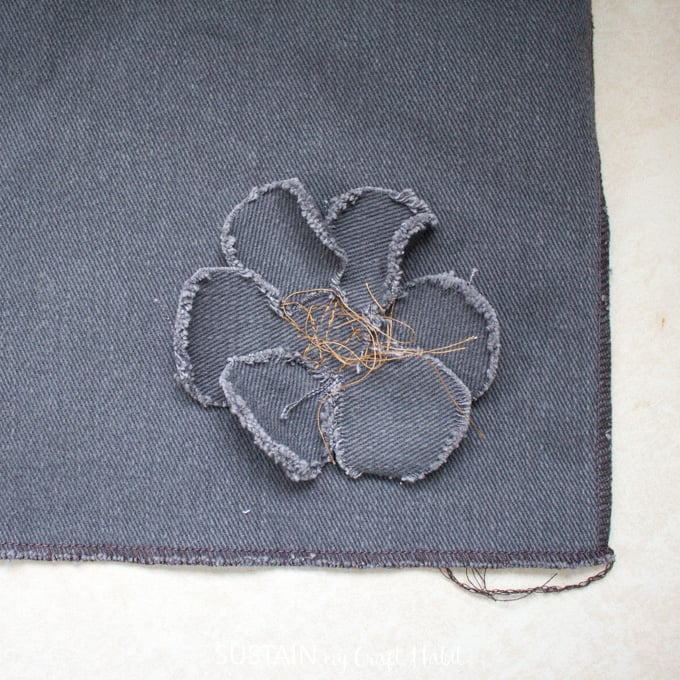
Put the prepared pieces into the washing machine and dryer for a quick cycle. When you remove the pieces, you’ll find the flower edges to have frayed giving you that deconstructed look.
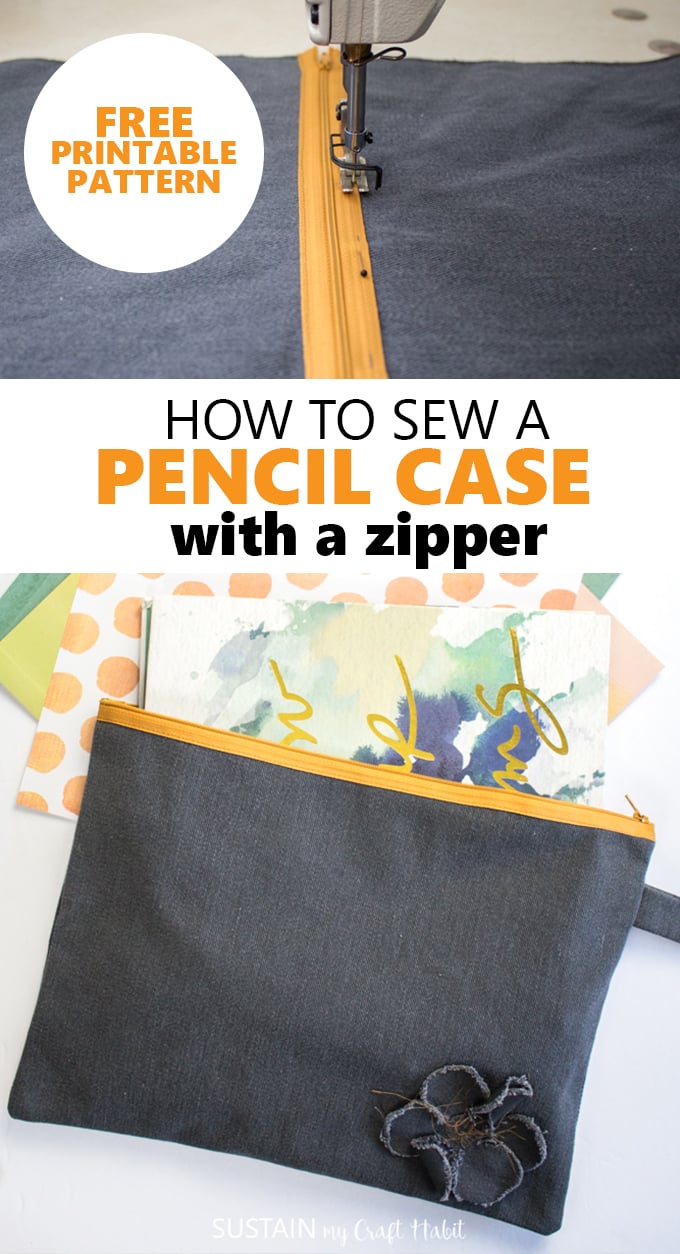
Sewing the Zipper
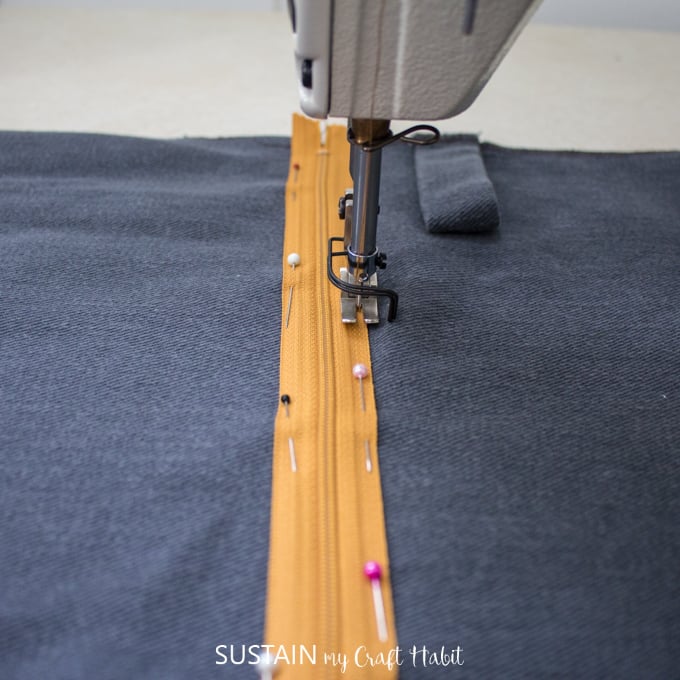
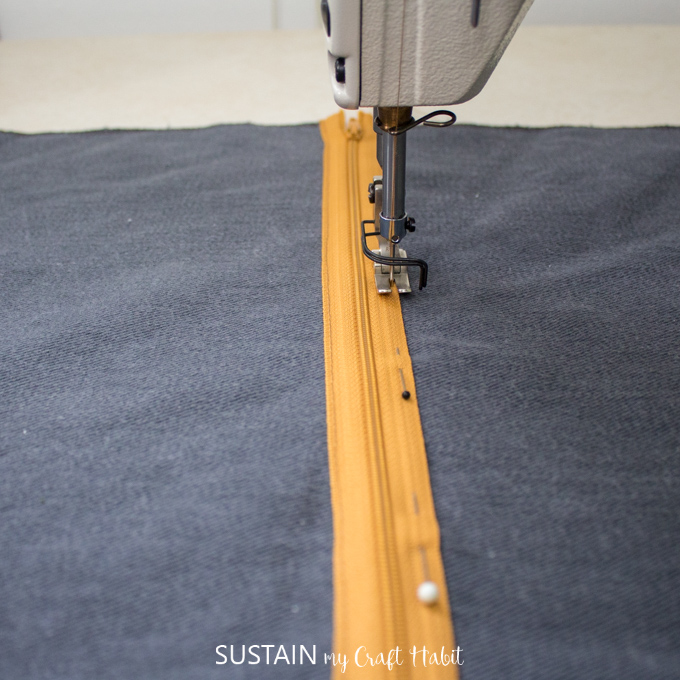
Place the rectangular pattern pieces with right sides up on a flat surface aligning the top edges as shown.
Position the zipper face up in the middle of both pattern pieces and pin in place.
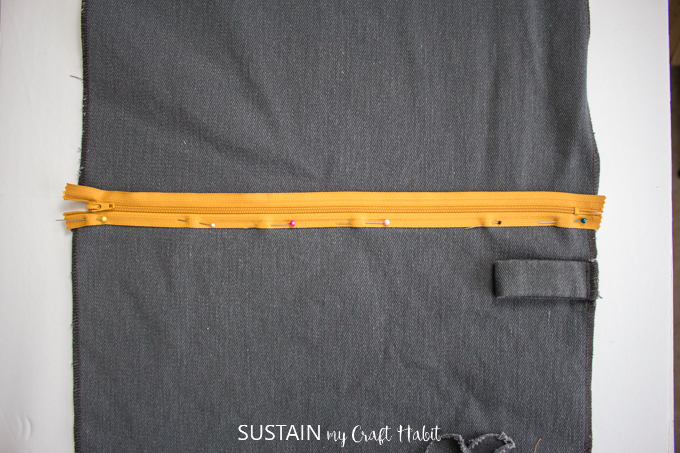
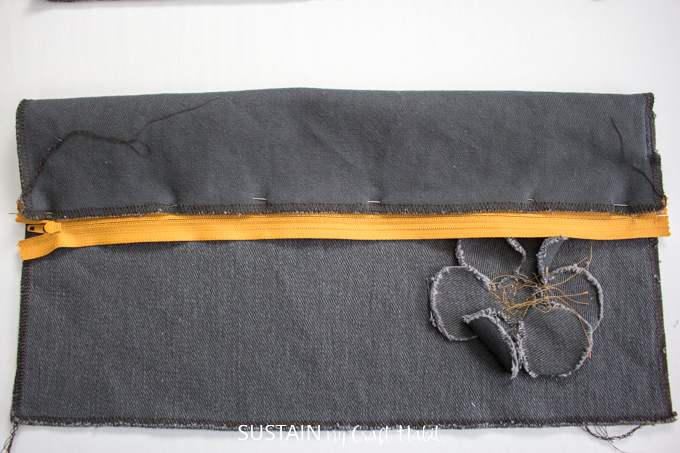
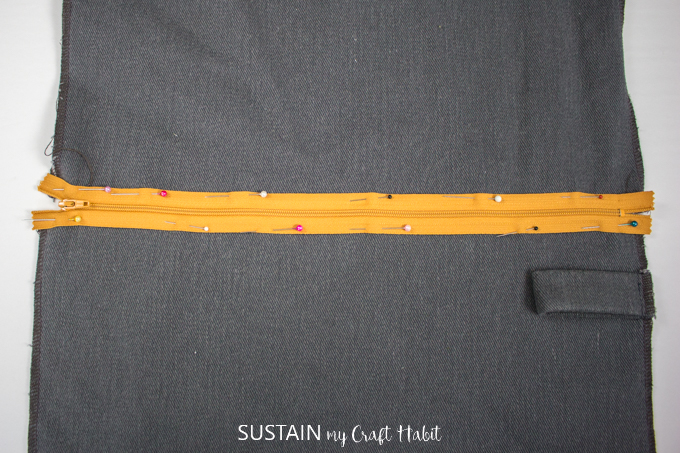
Sew along the zipper tape edges to secure the zipper to the pencil case.
Finishing
With right sides together and notches aligned, stitch the two large rectangular pattern pieces together. Sew a ½” seam allowance around the perimeter of the bag. Be sure to back tack at the start and at the end of the stitch line.

And there it is, the pencil case is complete! I forgot to mention, the other nice thing about the deconstructed style is that your sewing doesn’t have to be perfect, the more imperfect the better!

For more easy sewing projects check out our DIY storage ottoman, DIY drawstring bag, a fabric kids indoor tent, a handy utility apron or learn how to make a scrunchie.
Did you know that CanvasEtc. offers their fabric remnants for free! Just pay a nominal shipping fee for a 5lb box of remnants for your DIY and crafting projects!
If you have a Cricut cutting machine, such as a Maker, Explore or Silhouette and an EasyPress 2, you can also embellish the pencil case with an iron on vinyl like this silver “I do what I want” lettering.
What would you use your large pencil case for?
Like it? Pin it for later!