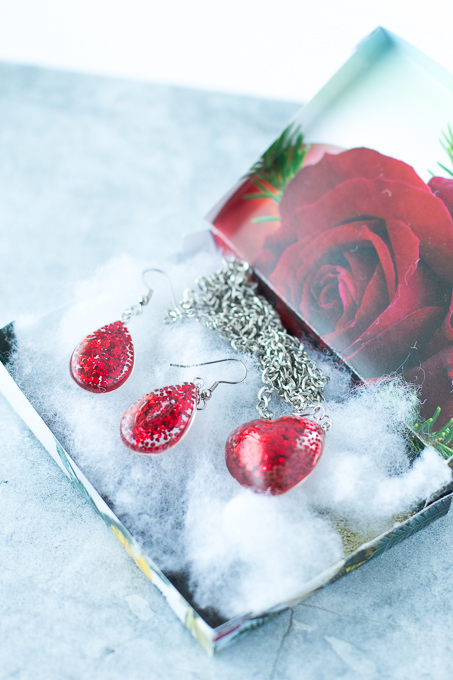
Don’t go out shopping to try to find jewelry to match your outfit when you can make resin earrings all on your own! Once you make these, you can always match them for simple day earrings or a special occasion.
Creating your own jewelry can be a rewarding and creative pursuit, and few materials offer as much versatility as resin. This earring post tutorial will walk you through the detailed steps to make stunning dangle earrings with resin. Whether you’re a seasoned crafter or a beginner looking to try something new, this guide will provide all the tips and techniques you need to achieve professional-looking results right at home. From preparing your materials to the final touches, get ready to immerse yourself in the art of resin jewelry making.
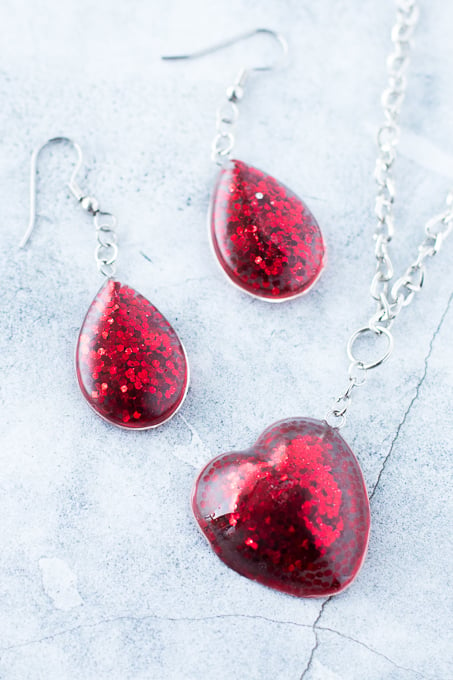
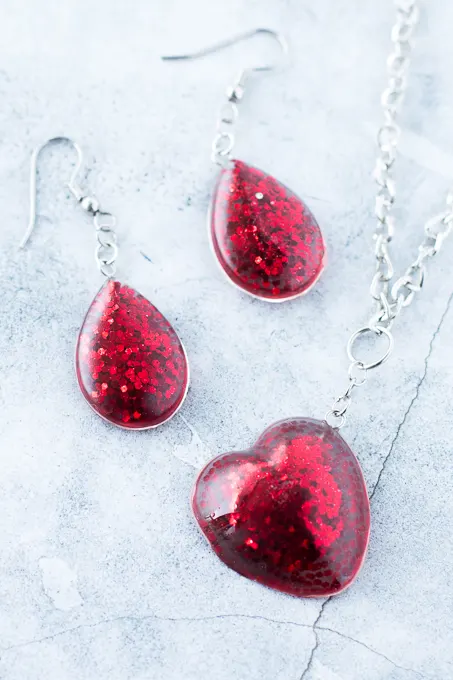
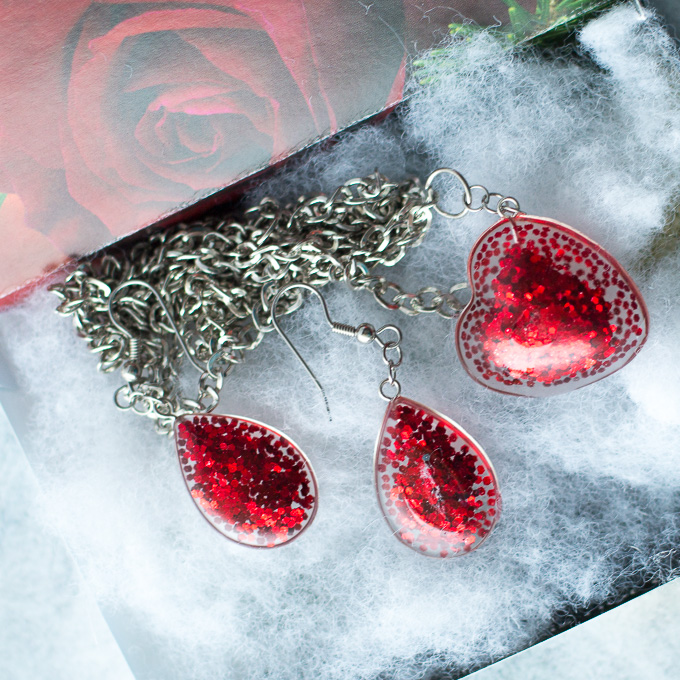
Resin earrings- fun for everyone!
Not only can you make resin earrings to perfectly match your outfit, but it is also a fun, easy craft to do with your kids. We chose red glitter, as these would be perfect for Christmas or Valentine’s Day, but you could choose whatever works best for the occasion. Or you could simply choose your favorite color in general!
I wish I had known about resin DIY earrings sooner. These make incredibly thoughtful gifts and are a lot easier to make than I thought they would be. They also make great one-on-one gifts for your daughter or any kid who wants to have craft time with you.

How Do I Know What Size To Make?
Choosing the right size for resin jewelry depends on your preference and intended design. To determine the ideal size, consider the context in which the jewelry will be worn. For example, consider personal preference for small, subtle studs or bold, statement dangles for earring size. Measuring some of your existing jewelry pieces that you like can give you a good reference point. Additionally, take into account the dimensions of the molds you have available and ensure they match your vision. Remember, you can always adjust the thickness of the resin poured within the molds to fine-tune the final look.
Another great idea is to have children make these for grandmothers or other special people in their life. This is a handmade gift that they will not forget.
Get updates on the latest posts and more from Sustain My Craft Habit straight to your inbox by joining our weekly newsletter. We promise to send you only the good stuff.
Materials Needed
Disclosure: This post contains affiliate links for your shopping convenience. Should you choose to purchase through them, we will make a small commission at no extra cost to you. You can read our full disclosure policy here.
- EnviroTex Jewelry Resin kit
- Earring stud backings and pins
- Red glitter
- Castin’ Craft Mold Release
- EasyCast Resin Jewelry Molds
- Gloves, wooden craft sticks, toothpicks, paper towels, small paint brush, straw
- Drill or Drill Press with 3/16” diamond drill bit (optional)
Work in a well-ventilated area, and be sure to read all the instructions on the products before beginning these easy projects.
How to Make Dangle Earrings with Resin
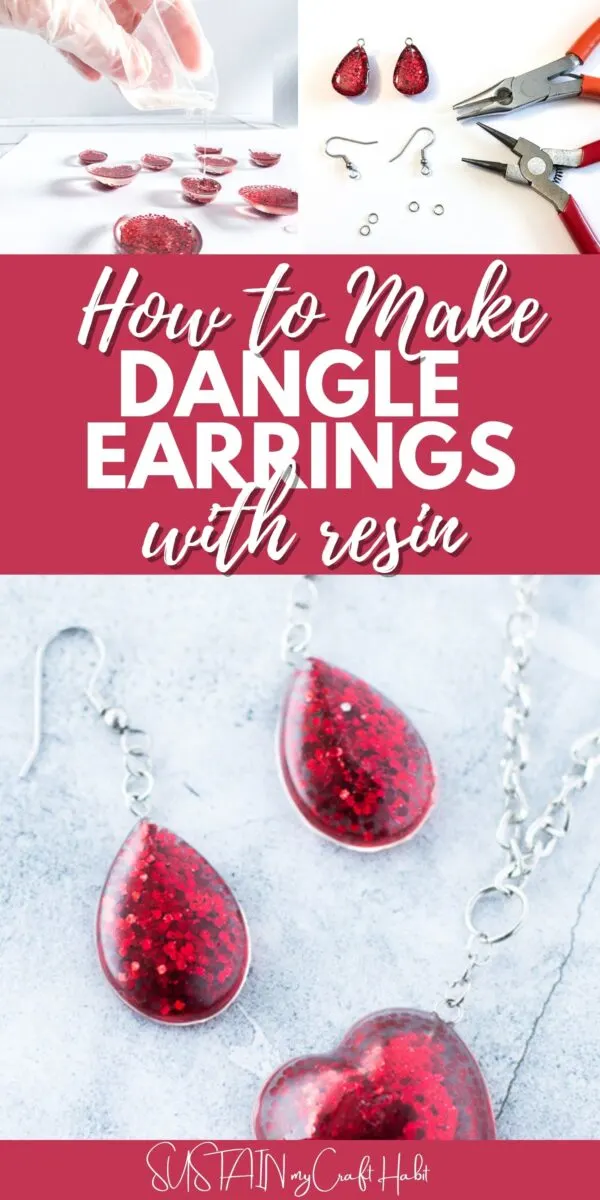
Apply a mold release / conditioner to the jewelry molds as per the instructions in the package.
Mix exactly equal amounts of Resin and Hardener into one measuring cup. I used very little of each, only about 10 mm, and it went a long way, as you’ll see.

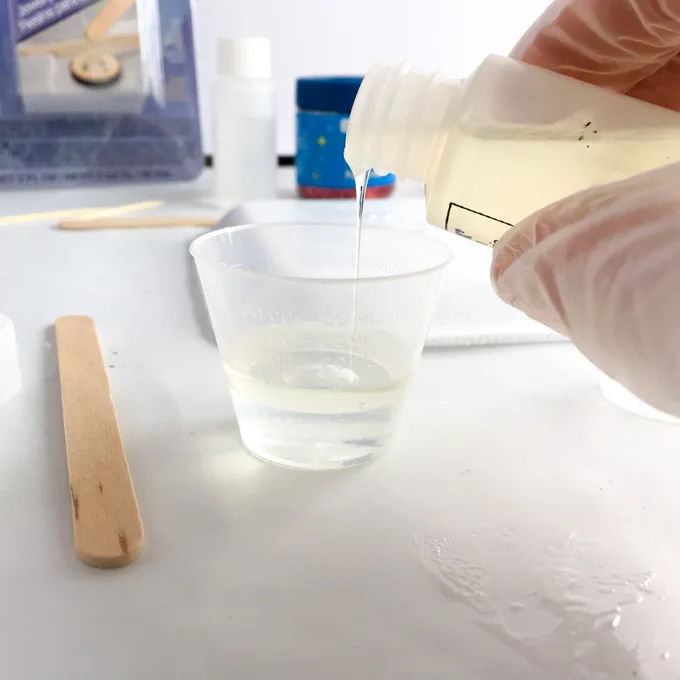
Stir continuously for 2 minutes, scraping the sides of the container.
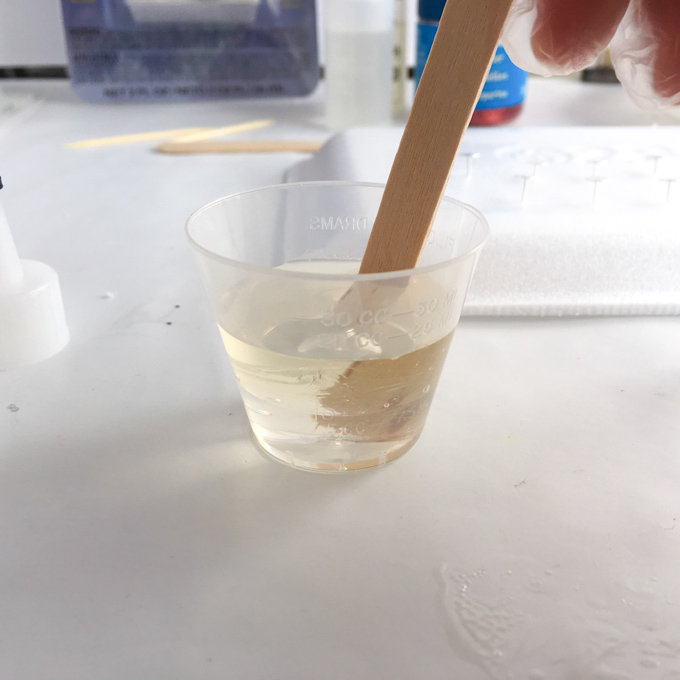

Pour the mixture into a second cup and stir for an additional minute, scraping the sides of the container and stir stick.


Once combined add a generous amount of glitter to the desired molds.


Pour the resin into your desired jewelry molds; we choose a little heart and oval pendants to the top of the mold.
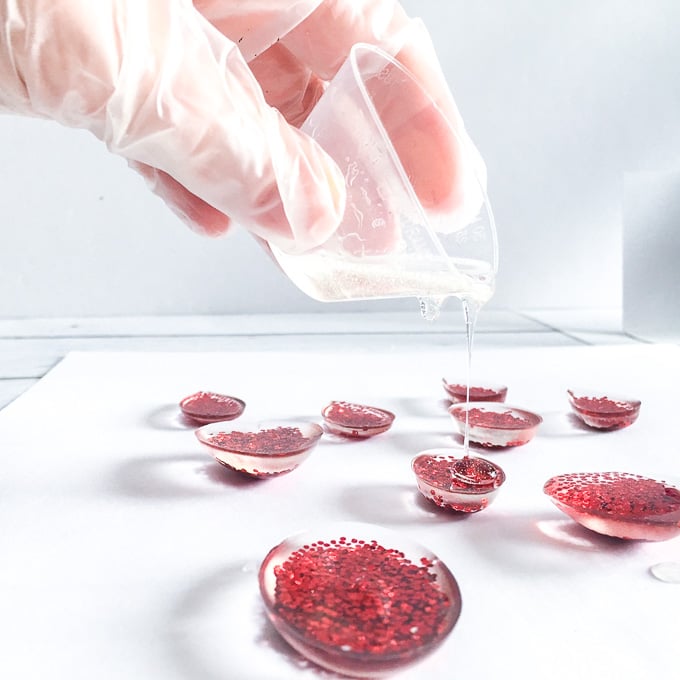

Gently blow off any air bubbles that have risen to the surface of the resin (you may need to repeat this a couple of times during the initial curing process). Cover the pieces to keep dust out and let cure overnight. 24 hours for a soft cure and up to 72 hours for fully cured jewelry.
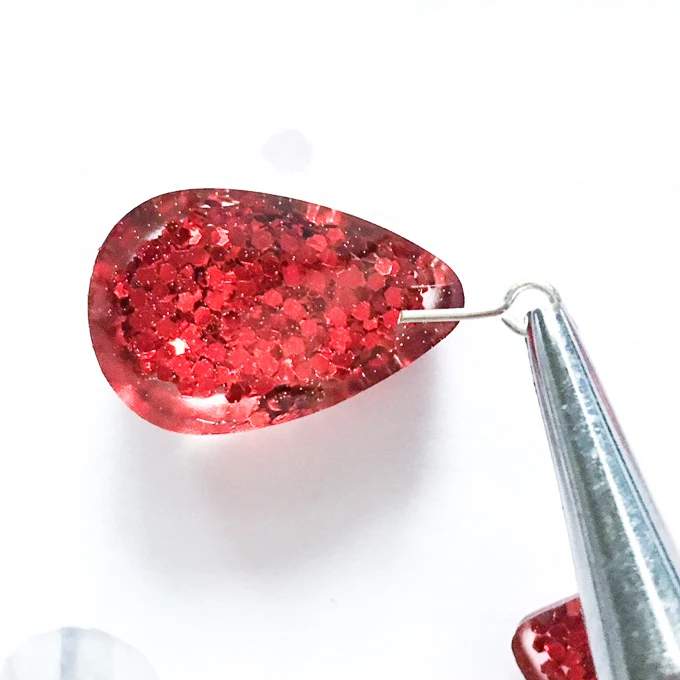
Remove the pieces from the mold. Using a cutting mat, trim around any sharp edges on the back of the pieces with a sharp utility knife (with a fine point blade) or a pair of sharp scissors. Gather all necessary earring components, and if needed, glue an earring headpin to the backside of the earring and repeat with the second earring.
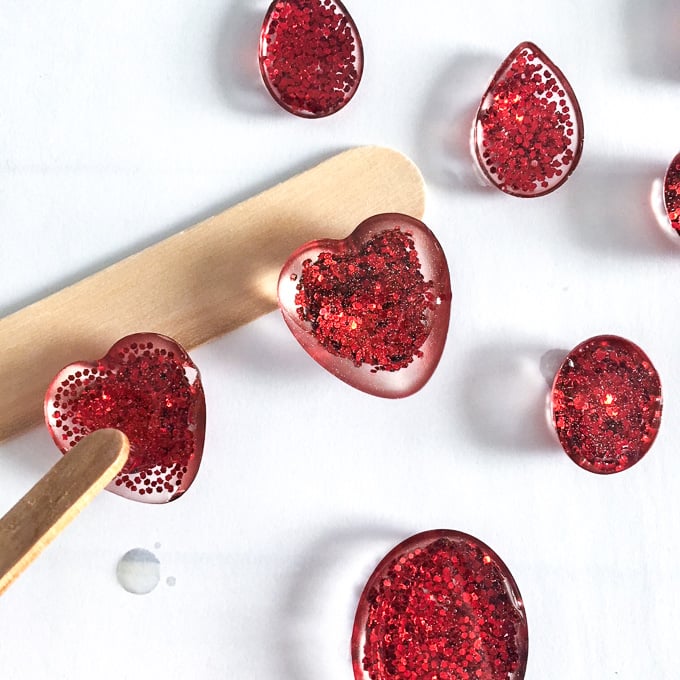


For the pendant or dangle earrings, drill a small hole into the top of the resin usually at the top of the heart shape or just below the top of the teardrop shape. Through it, insert the head pins (a pin with a loop at the end of the wire) into the earring hooks. Use a small jump ring to attach your choice of jewelry findings. Adjust the height of your earring with a small ring. You can also use earring posts if you want to have a stud style earring and a little less dangle.

This craft was originally shared on the Resin Crafts Blog project gallery.

Frequently Asked Questions (FAQs)
Can I make resin jewelry with a Cricut machine?
Yes, you can use a Cricut Maker or Cricut Joy machine to cut out intricate designs and shapes from various materials such as vinyl or cardstock. While the Cricut itself does not work with resin, you can create custom templates or embellishments when you open Cricut design space that you can embed into your resin jewelry pieces.
How do I get rid of bubbles in my resin?
Air bubbles in resin can be a common issue. To minimize bubbles, make sure you stir the resin mixture slowly and thoroughly. After pouring the resin into the molds, gently blow on the surface using a straw or a heat gun on a low setting to release any trapped air bubbles. Repeat this process as needed during the initial curing phase.
Is it safe to work with resin at home?
Yes, it is safe to work with resin at home, but it is essential to take appropriate safety precautions. Always work in a well-ventilated area, wear gloves and a mask to prevent inhalation of fumes or skin contact, and read all the instructions and safety data provided by the resin manufacturer.
How can I add color to my resin jewelry?
To add color to your resin jewelry, you can use resin-specific pigments, inks, or powders. These can be mixed into the resin after combining the resin and hardener. Just follow the manufacturer’s recommended amounts to achieve your desired shade while ensuring that the resin still cures properly.
More DIY Resin Jewelry
Using resin to make jewellry at home really gives it a professional look. Just check out these other DIYs you can make too!
- Resin Feather Pendants
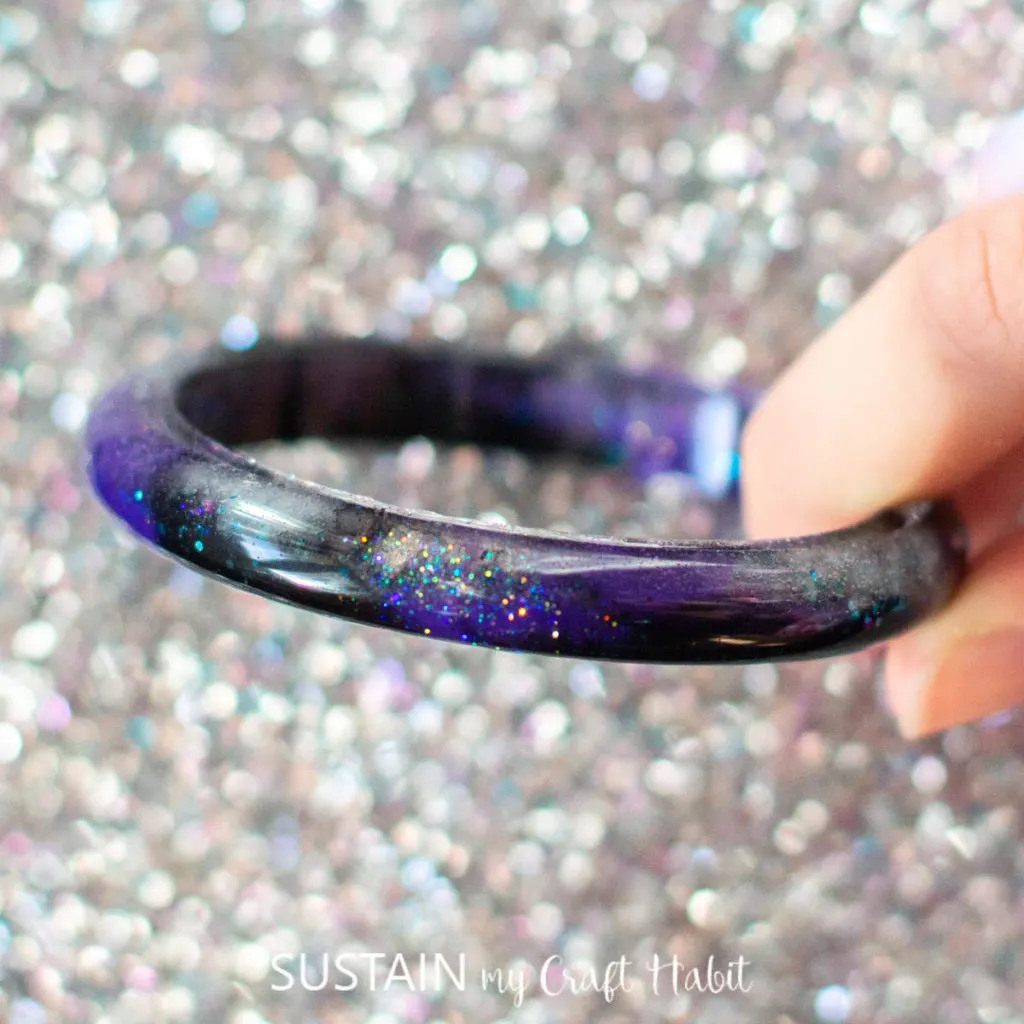
- Galaxy Resin Bracelet
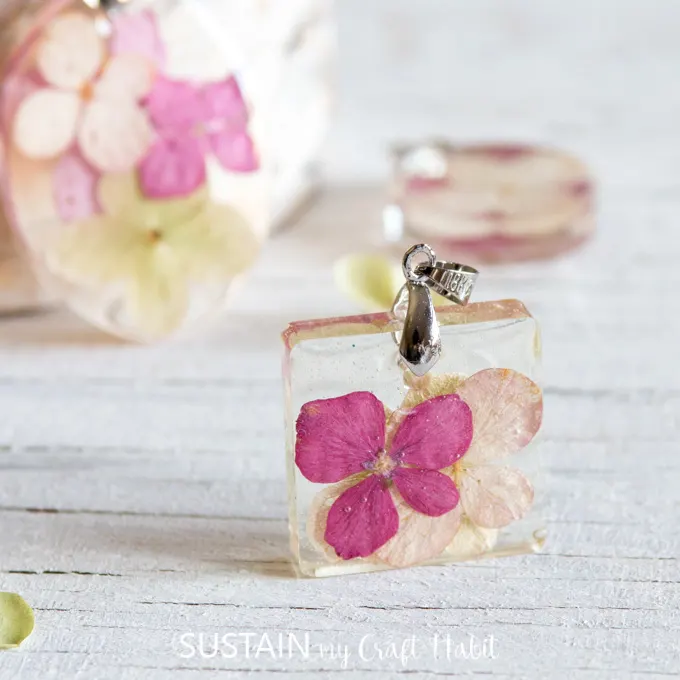
- Resin Jewelry with Flowers
- Resin Jewelry using Gift Wrap
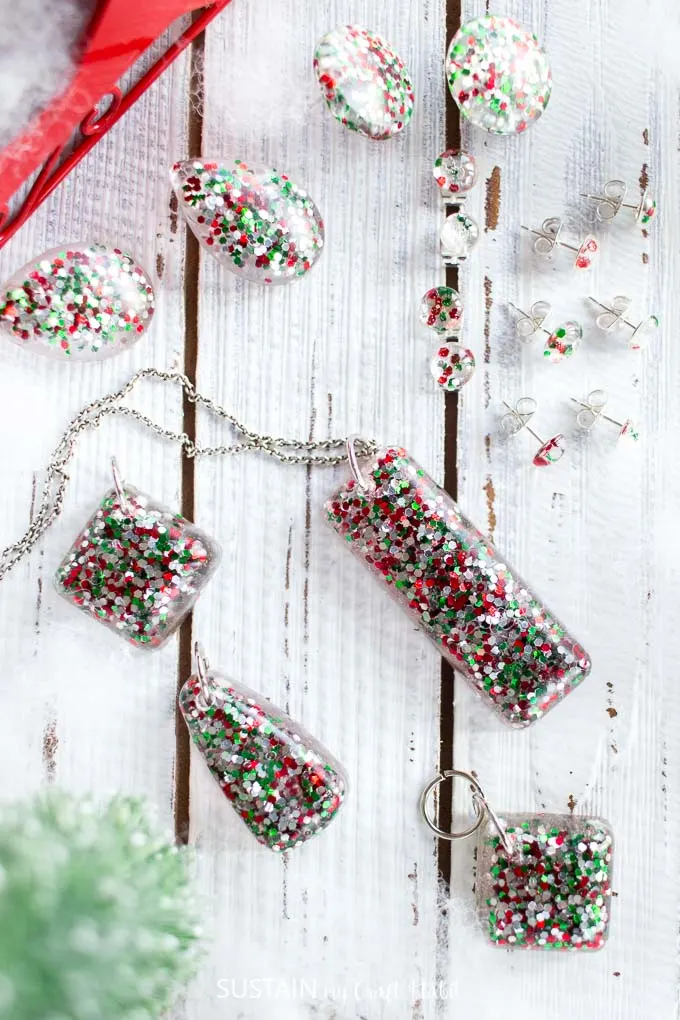
- Resin Christmas Earrings


There you have it, beautiful resin earrings that you can make yourself! It always feels great to finish a craft, doesn’t it? It is one thing to finish a craft and hang it up, but it’s a whole other thing to get to wear it after! We would love to see your pictures! Tag us on Facebook or Instagram– we can’t wait to see it!
Become a Sustain My Craft Habit insider to receive fun freebies! Thankyou so much for stopping by to visit us. Happy crafting!
Like it? Pin it for later!


How to Make Dangle Earrings with Resin
Materials
- EnviroTex Jewelry Resin kit
- Earring stud backings and pins
- Red glitter
- Castin’ Craft Mold Release
- EasyCast Resin Jewelry Molds
- Gloves wooden craft sticks, toothpicks, paper towels, small paint brush, straw
- Drill or Drill Press with 3/16” diamond drill bit optional
Instructions
- Apply a mold release / conditioner to the jewelry molds as per the instructions in the package.
- Mix exactly equal amounts of Resin and Hardener into one measuring cup.
- Stir continuously for 2 minutes, scraping the sides of the container.
- Pour the mixture into a second cup and stir for an additional minute, scraping the sides of the container and stir stick.
- Once combined add a generous amount of glitter to the desired molds.
- Pour the resin into your desired jewelry molds to the top of the mold.
- Gently blow off any air bubbles that have risen to the surface of the resin. Cover the pieces to keep dust out and let cure overnight. 24 hours for a soft cure and up to 72 hours for fully cured jewelry.
- Remove the pieces from the mold.
- For the pendant drill a small hole into the top of the resin through it you can insert a round jump ring.