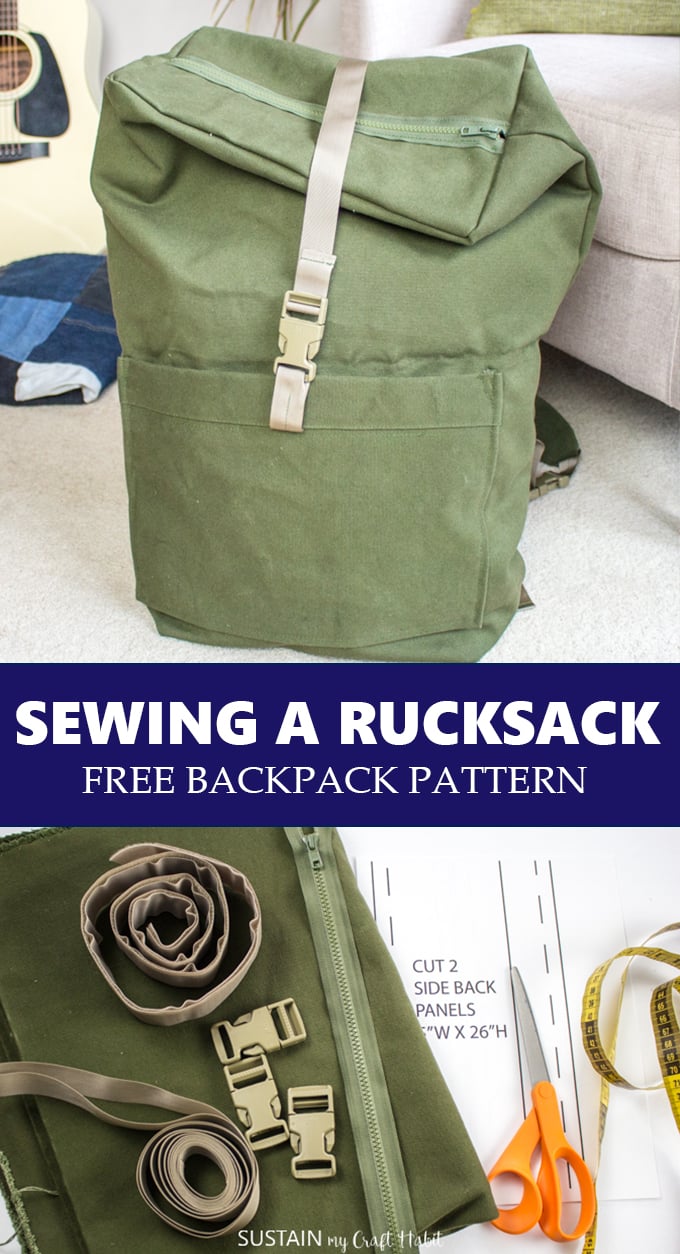
Sewing a Rucksack: Free Backpack Pattern
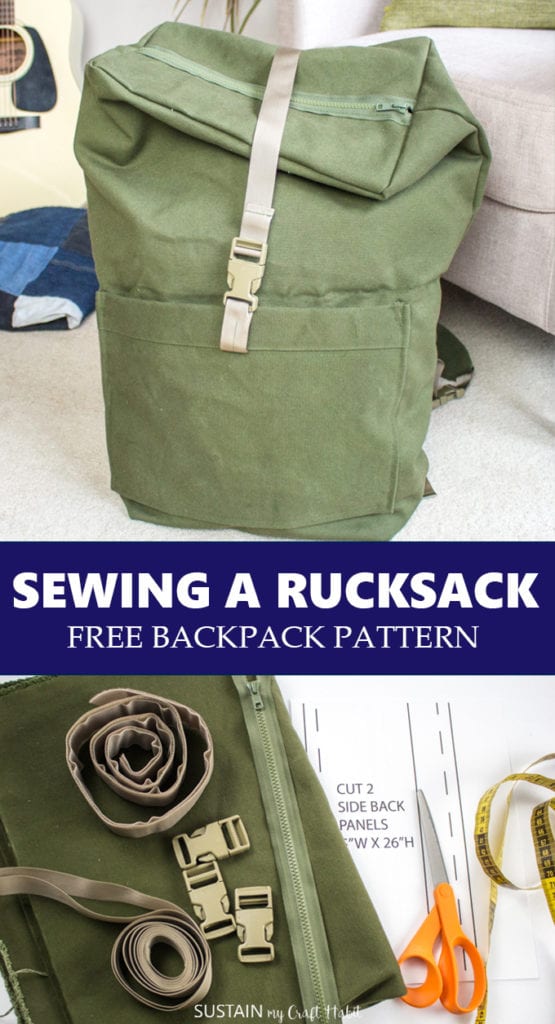
Hi creative friends! We’re happy to share this free backpack pattern with you along with the step by step instructions for sewing a rucksack.
Making a functional canvas backpack
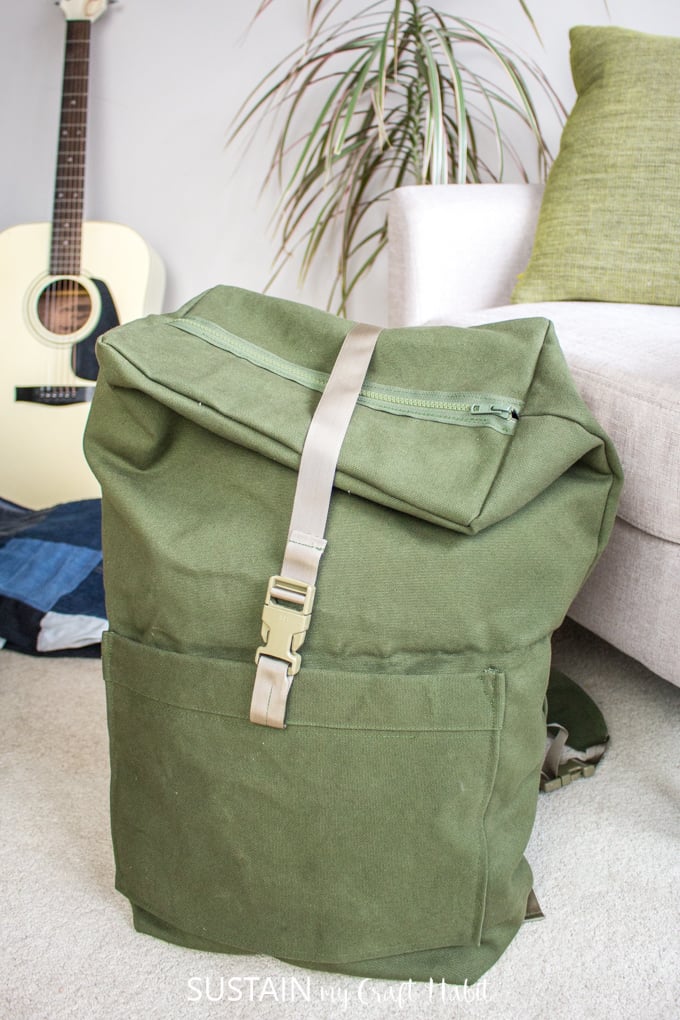
While I do love the outdoors and hiking especially with the family, our hikes are more on the casual side with many “photo-ops” and plenty of stops for snacking. I picture this canvas rucksack coming in handy for our fun outings. Although a true rucksack will have hip belts and likely chest belts, these additional straps can easily be added to your rucksack if you desire.
I chose this rustic olive green color of canvas from Canvas Etc. line of 100% cotton duck-dyed canvas. With it’s fire, water, weather and mildew resistant properties, this canvas is durable enough to withstand the toughest of hikes in the great outdoors. I also selected coordinating buckles, velcro and some grosgrain ribbon from their line of accessories to complete the project.
The finished bag measures 20” high x 12” wide x 8” deep. And although we have made our share of bags at Sustain My Craft Habit, such as this upcycled leather bag and this canvas drawstring bag, this new rucksack will hold a lot more things making it perfect for day trips and weekend getaways. Now that I think of it, my repurposed denim checkered picnic blanket would fit nicely inside this rucksack!
We’ve used the 10oz cotton canvas for a number of recent projects including this removable dog bed cover, DIY hammock chair and canvas camo tote bag. It’s a great weight of canvas – sturdy and durable yet flexible enought for daily use.
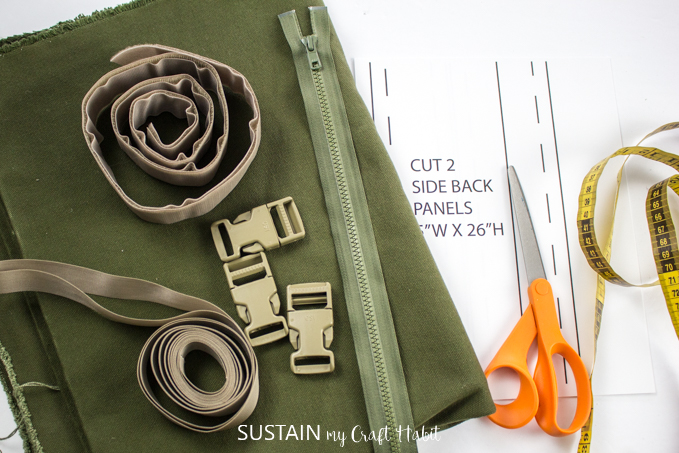
Materials Needed for Sewing a Rucksack:
- 100% cotton canvas – 10oz – 1.5 yards
- Free Rucksack Sewing Pattern – printable on 21 sheets of 8.5×11 printer paper
- Sewing machine with matching thread color
- Fabric scissors
- Buckles in tan, sized 1” – 3 pieces
- Grosgrain tape in tan, 1” wide – 2 yards
- Hook and Loop tape in tan, 1.5” wide – cut to 4″ long
- Vislon closed end zipper in matching color, size 5, 10″ long
- Measuring tape
- Scotch tape
- Iron and ironing board
How to Make a Canvas Rucksack:
Prewash and dry the cotton canvas prior to cutting and sewing. Remove it promptly from the dryer to minimize wrinkles and creases.
Cutting the free backpack pattern:
Download the free backpack pattern.
Print off the rucksack pattern onto 8×11 sheets of paper and tape all the pages together to form the pattern. The measurements of each pattern piece are listed on the pattern for reference and the pattern pieces are color coded for easier matching.
Place fabric on a smooth, flat surface. Next, place the pattern pieces on the fabric and pin in place while being aware of which pieces are cut 2, cut 4 or cut 1. Also, be sure to align the grain lines on the pattern with the fabric grain.
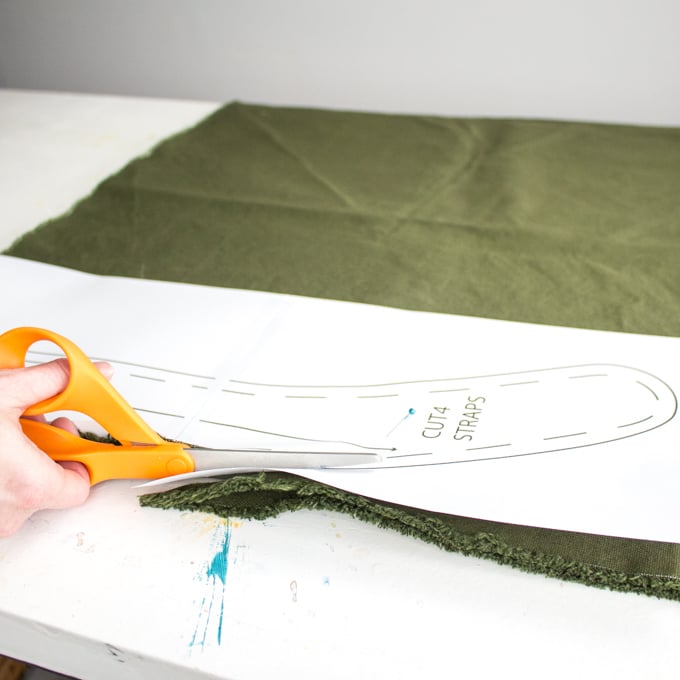
Cut along all the solid lines. The dash lines represent the sewing lines.

Be sure to mark the notches on all the pattern pieces. These will come in handy later when sewing. Mark all dots (for pocket placement) on the pattern using a piece of washable chalk of wax. Poke the center of the dot with a pin, lift pattern up and mark on the fabric where the pin meets the fabric. This step will help you position the pockets properly later on.
Always remember to save your scrap fabrics when cutting out the fabric! These deconstructed pencil case and fabric flowers would turn out great using this canvas. Other examples of projects using scraps include our scrap fabric pumpkins (no-sew), homemade lavender sachets and this pretty scrap fabric heart garland.
Cut the grosgrain tape into 6 pieces with these measurements:
- x3 at 6” long
- x2 at 20” long for the straps;
- X1 at 15” long
- x1 at 3” long
How to Sew a Rucksack
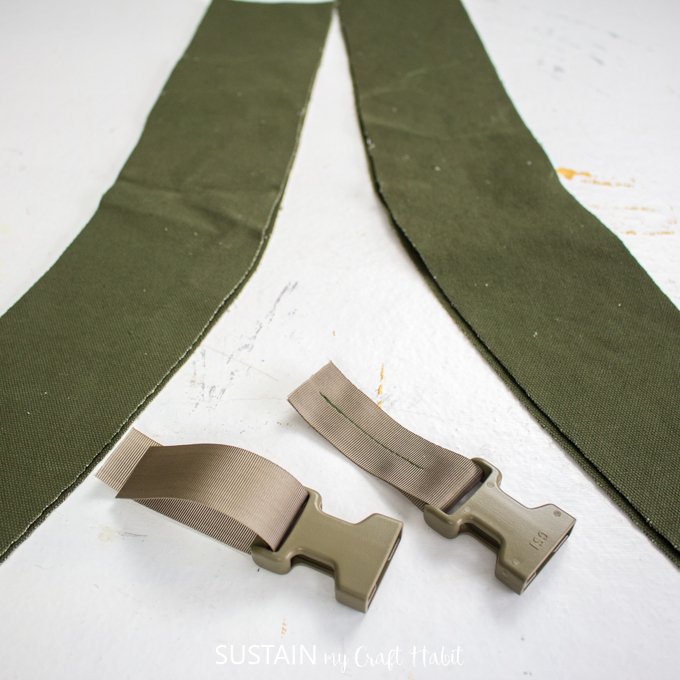
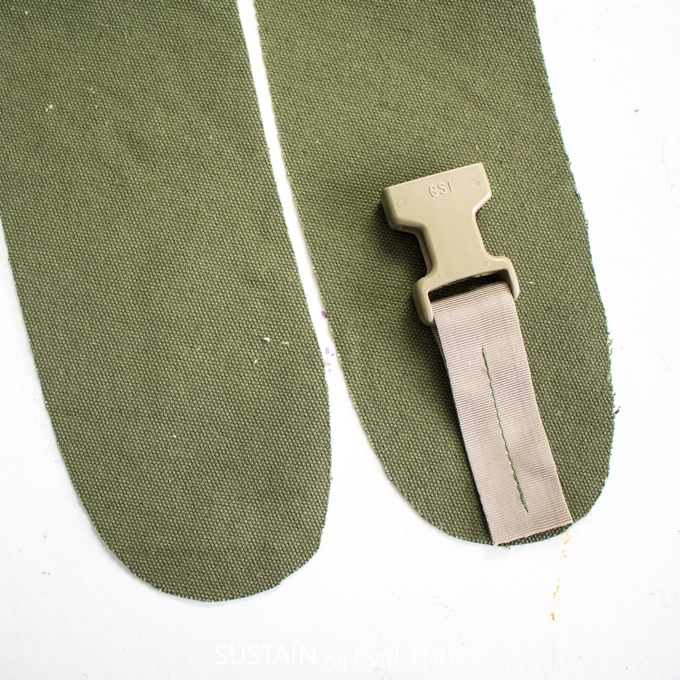
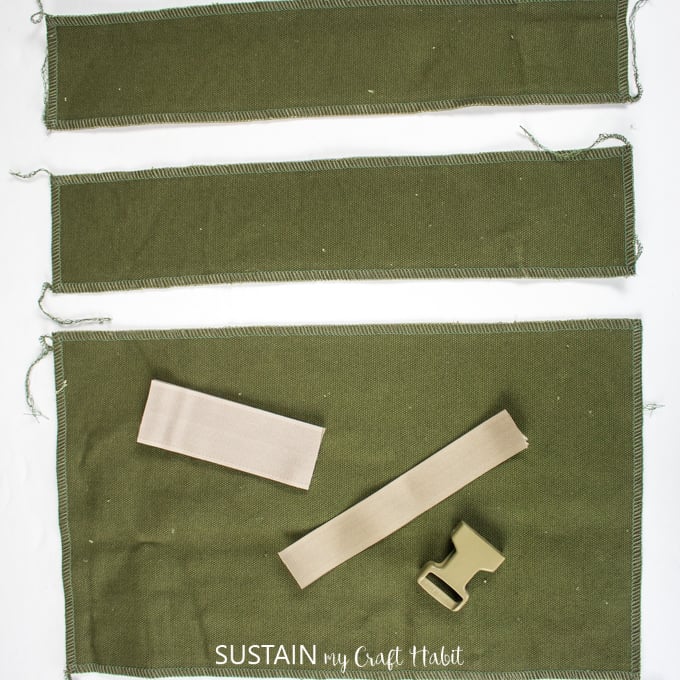
Sewing the Shoulder Straps
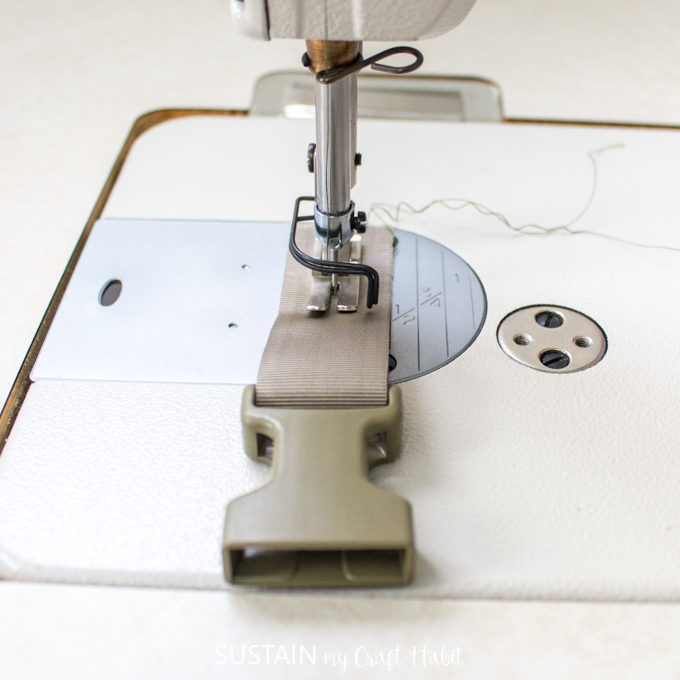
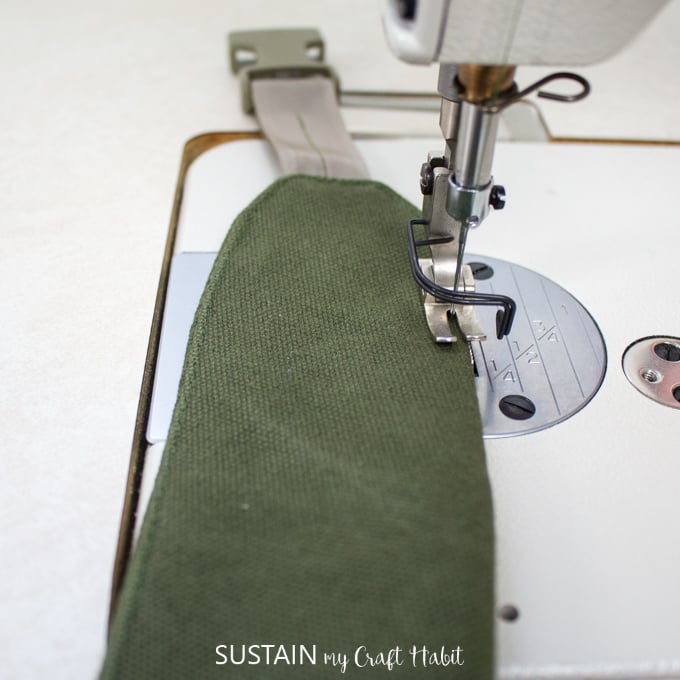
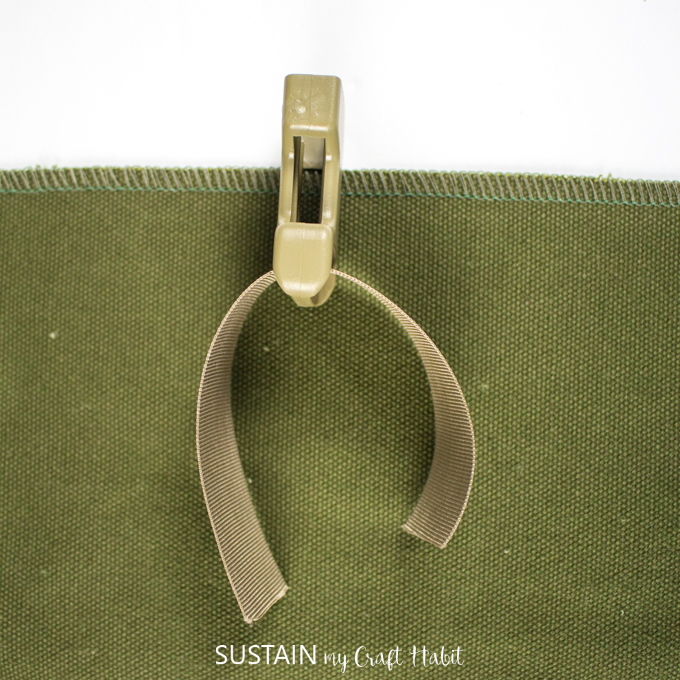
Using one buckle for each strap, loop a 6” long cut grosgrain tape through each of the buckles. Stitch the looped grosgrain lengthwise as shown.
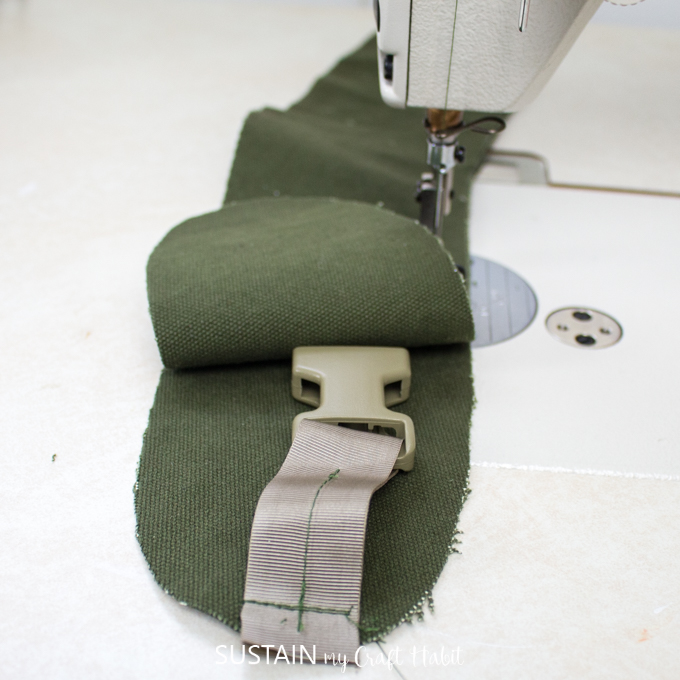
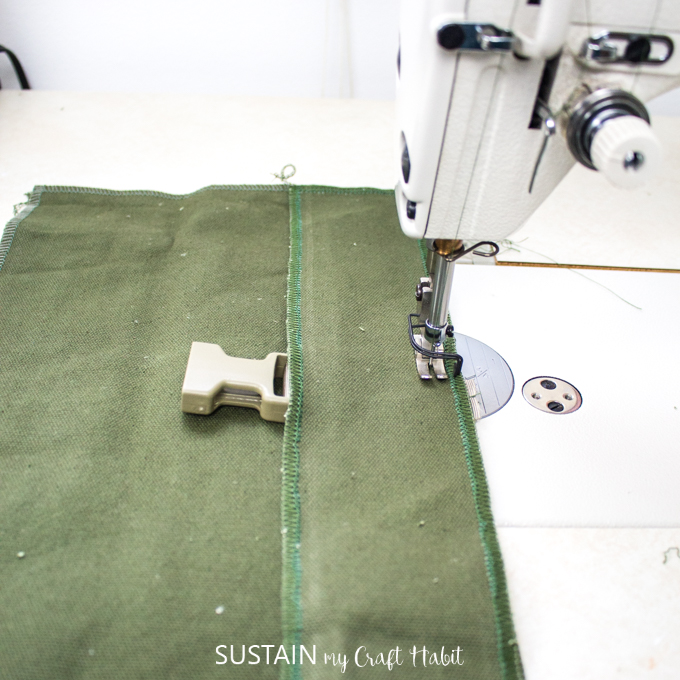
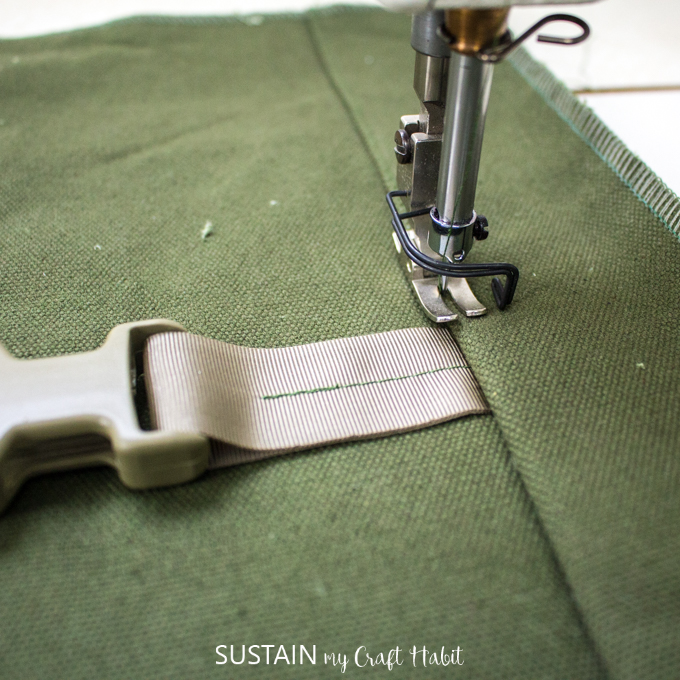
With right sides facing up, place the prepared ribbon at the bottom of each strap aligning the cut edges. Stitch in place.
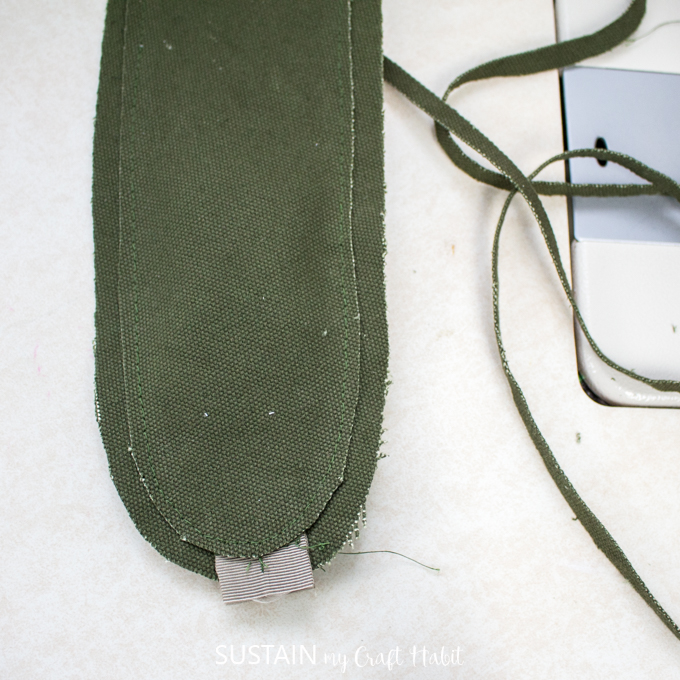
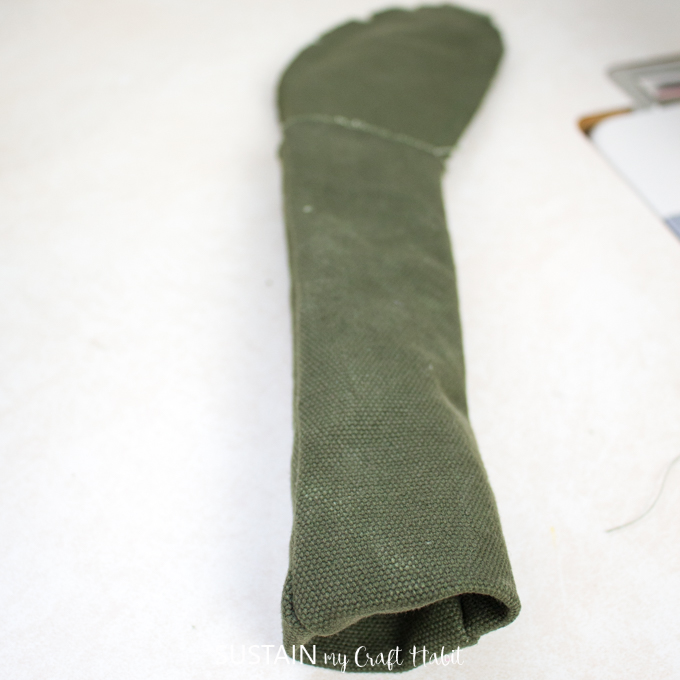
With right sides together, sew the two sides of each shoulder strap together at ½” seam allowance. True the seam allowance to eliminate bulk pefore turning the stitched straps right side out. Press flat and add an edge-stitch around the entire perimeter of both straps.
Place prepared shoulder straps on the lower center back (CB) panel piece aligning the notches as shown. Stitch the straps in place.
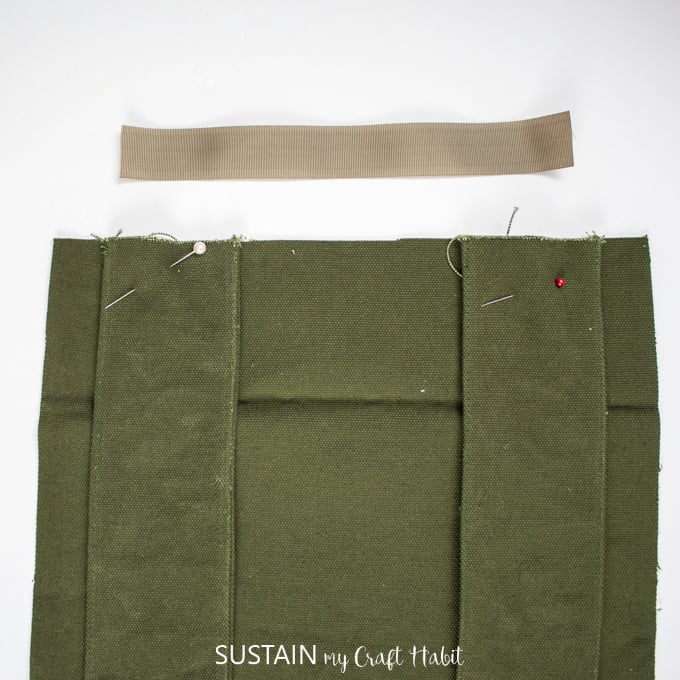
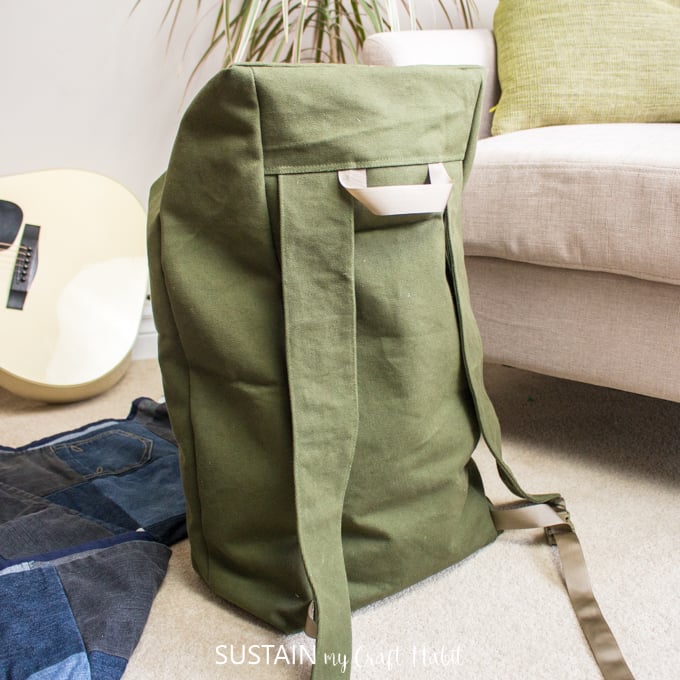
Position a 6” long cut grosgrain tape at the center along the same cut edge spacing the ribbon ends 3” apart. Stitch in place to form locker loop.
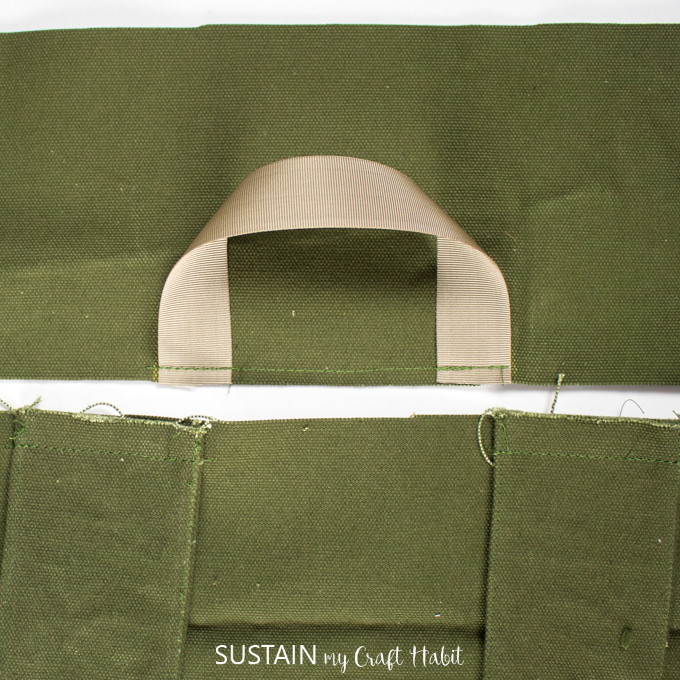
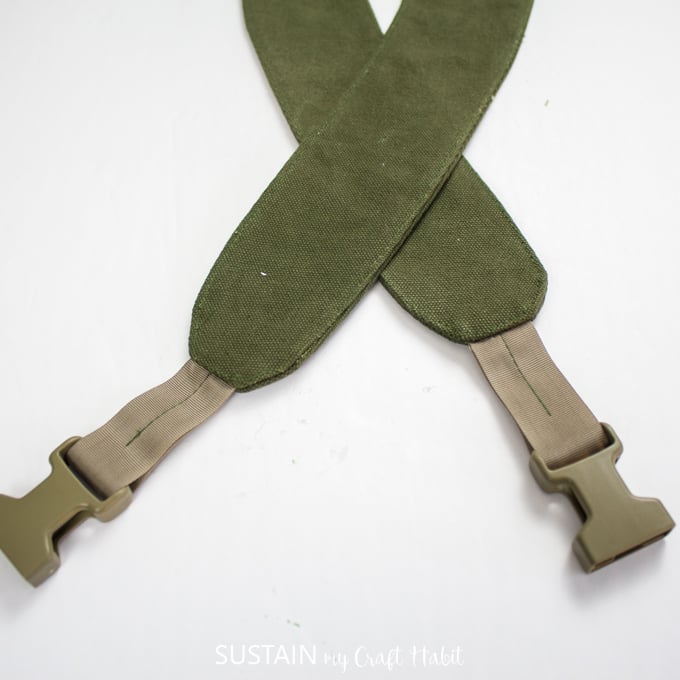
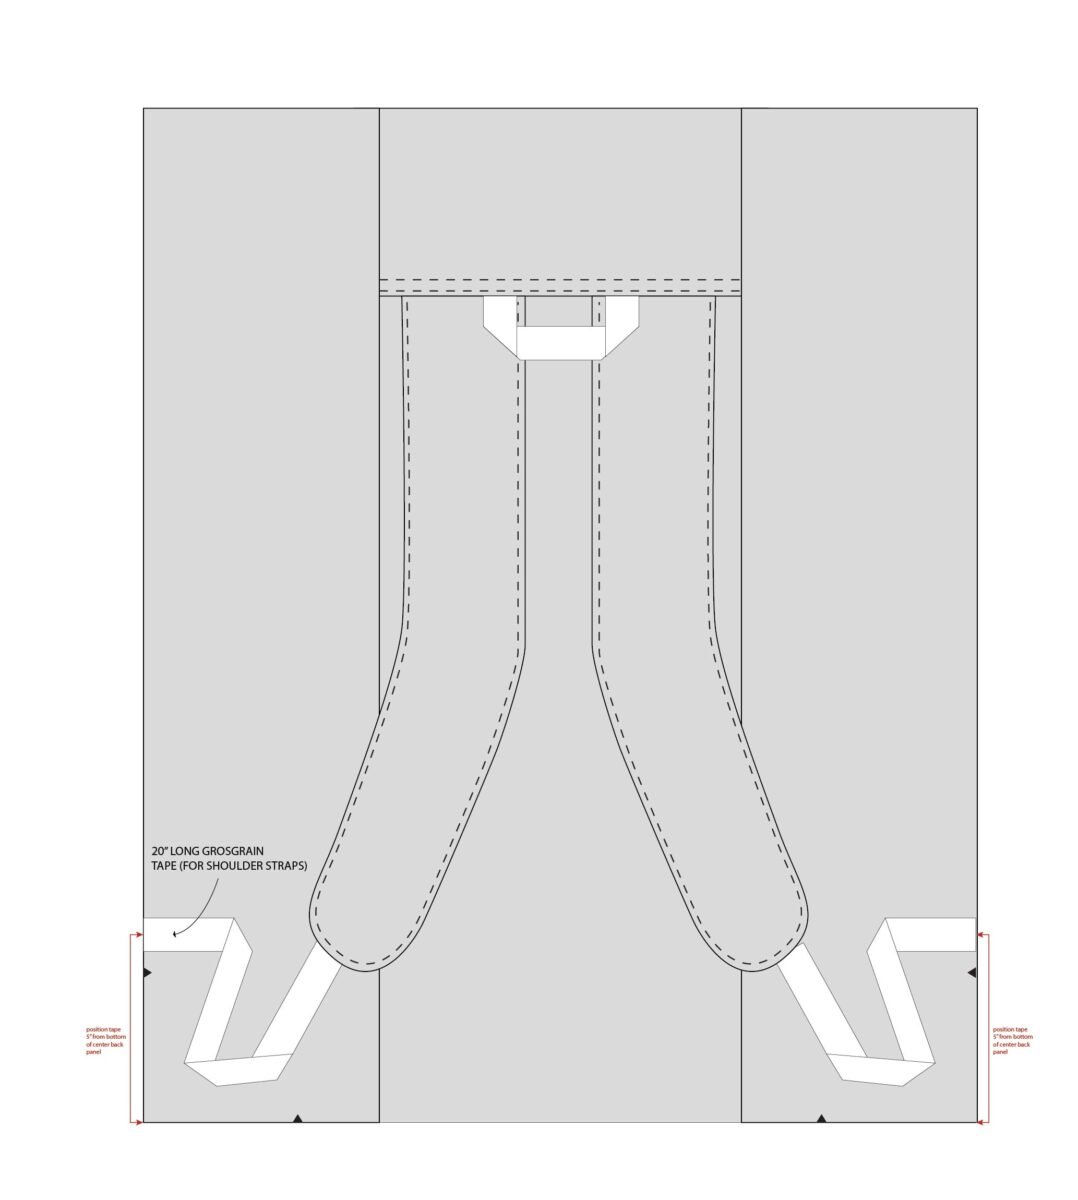
Position the 20” long grosgrain ribbon along the CB side panel, 5” from the bottom hem as shown. Stitch in place and repeat on the other side with the other 20” long grosgrain ribbon.
Loop the ribbon ends through the other buckle pieces and stitch the ribbon ends with a double fold. You’ll know if the ribbon is looped through the buckles properly because it will lock in place when pulled.
With right sides together, sew the upper center back (CB) panel piece to the lower CB panel piece, sandwiching the shoulder straps and locker loop in between.
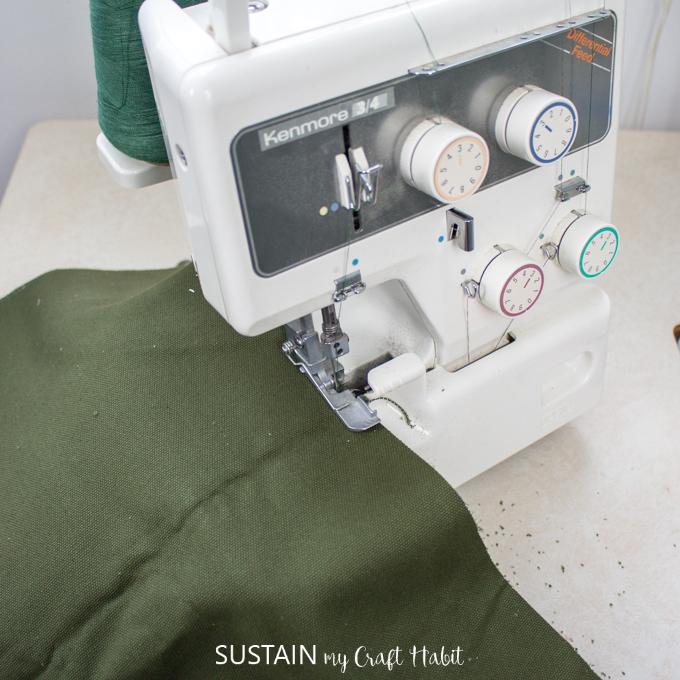
Using a serger or zig zag stitch, clean finish all cut edges to avoid fraying. Alternatively, you can do this step at the very beginning prior to starting.
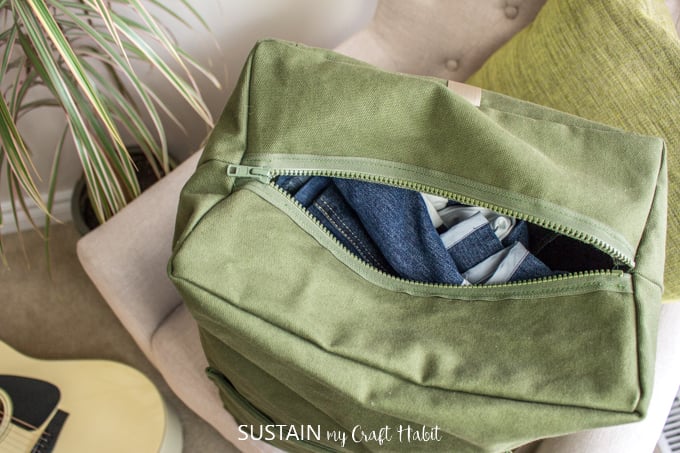
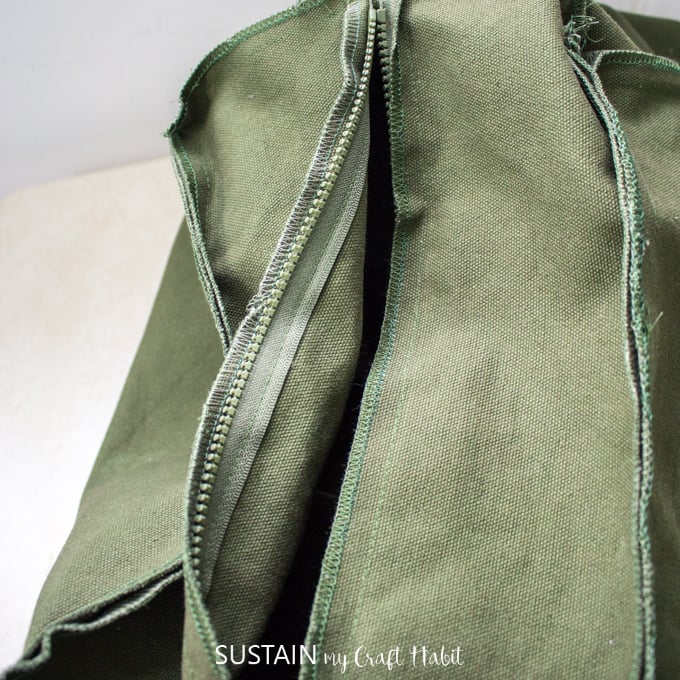
Sewing the Zipper
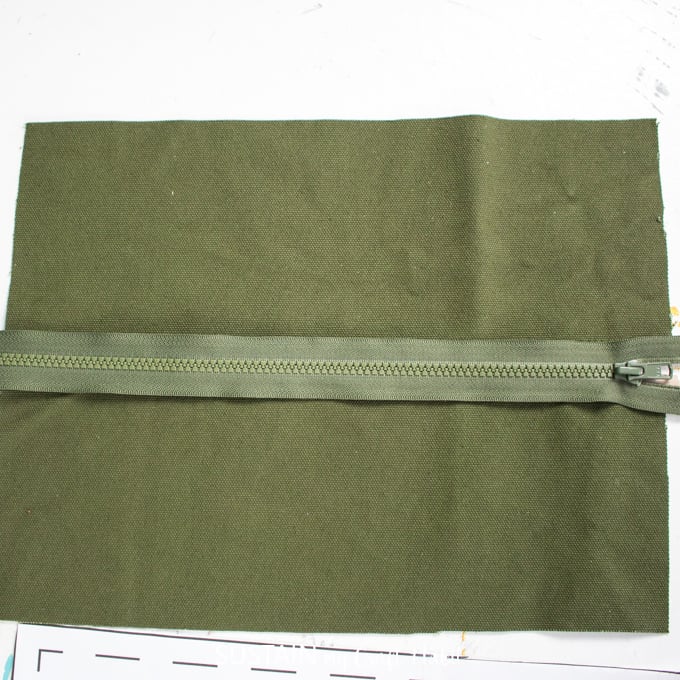
With right sides facing up, align the two lengthwise edges of the upper pattern piece. Place the vislon zipper over top and pin to the fabric, working on side of the zipper at a time.
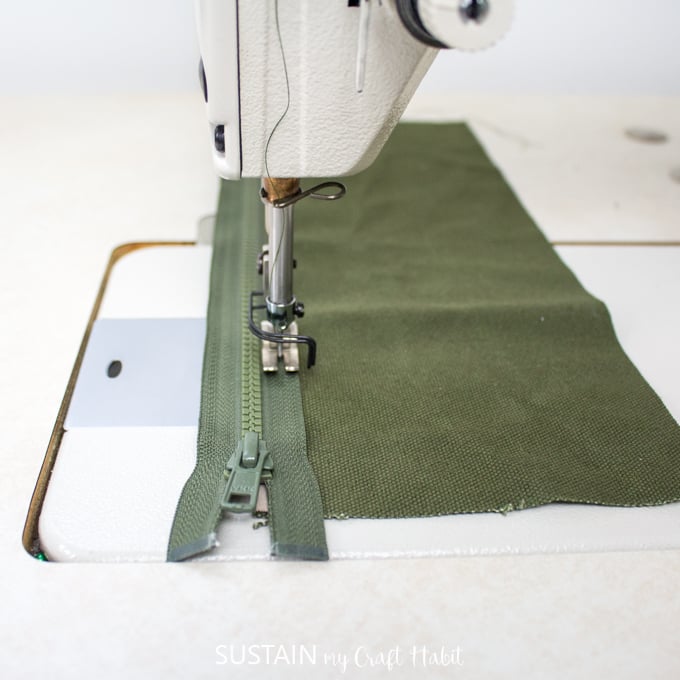
Sew one side of the zipper to the fabric and then repeat along the other side.
Put piece aside until the rest of the bag is assembled.
Sewing the Pockets
Place pocket pieces on a flat surface with right sides facing up.
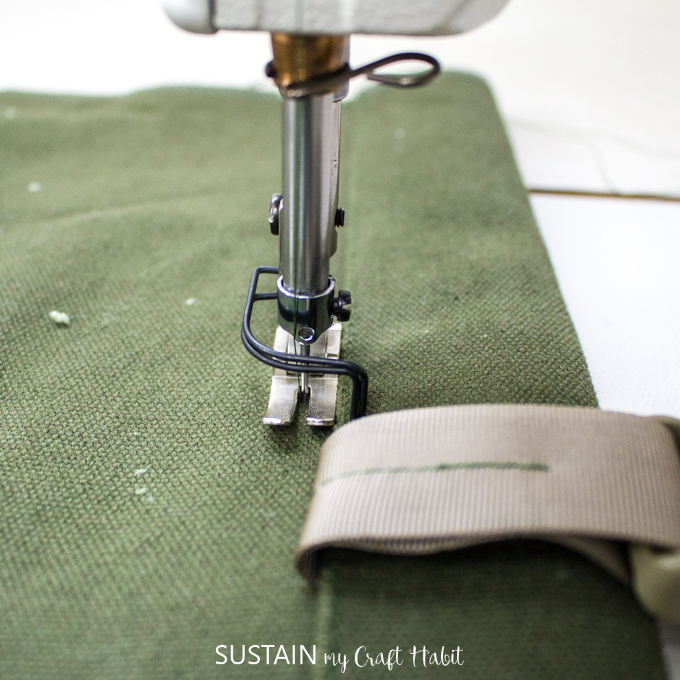
Loop the remaining 6” grosgrain ribbon through the buckle. Stitch the looped grosgrain lengthwise as done with the shoulder strap buckles.
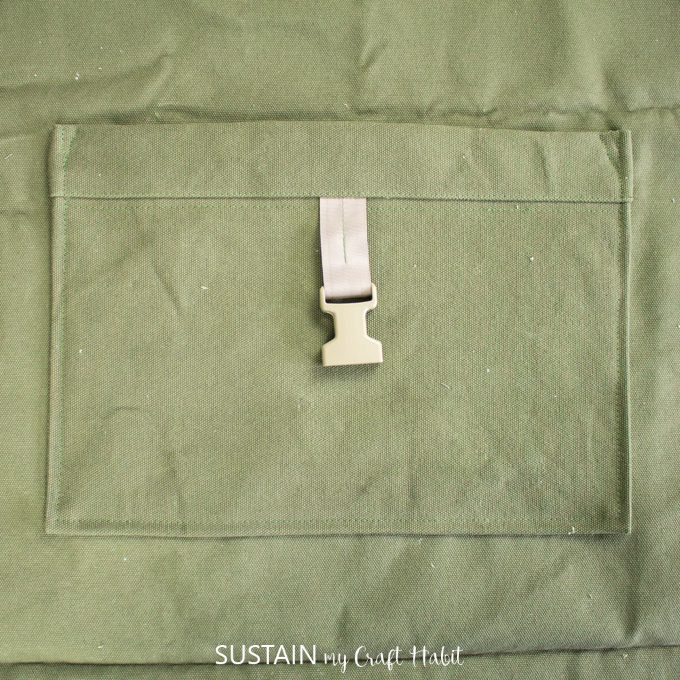
Place the prepared ribbon at the center top of the large patch pocket piece. Stitch in place.

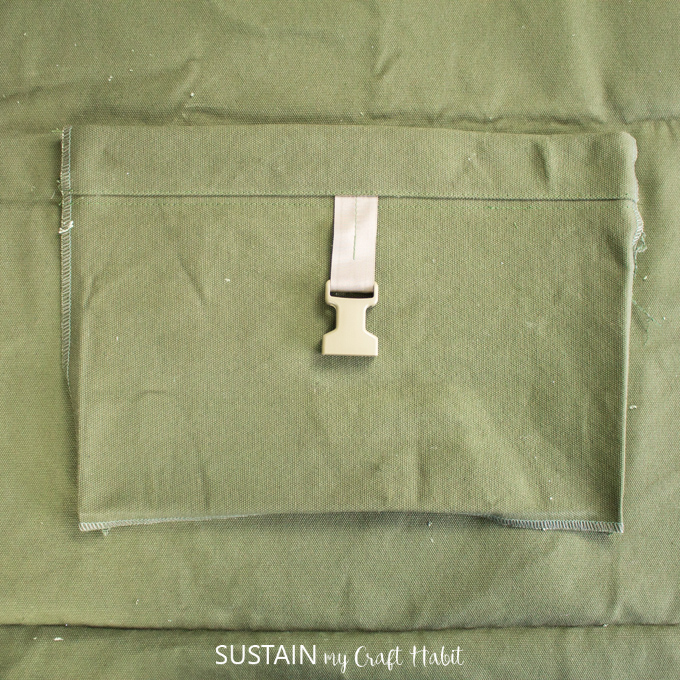
Align the upper pocket piece with the lower pocket piece, sandwiching the ribbon in between and sew pieces together. Fold seam allowance up and edge-stitch in place.
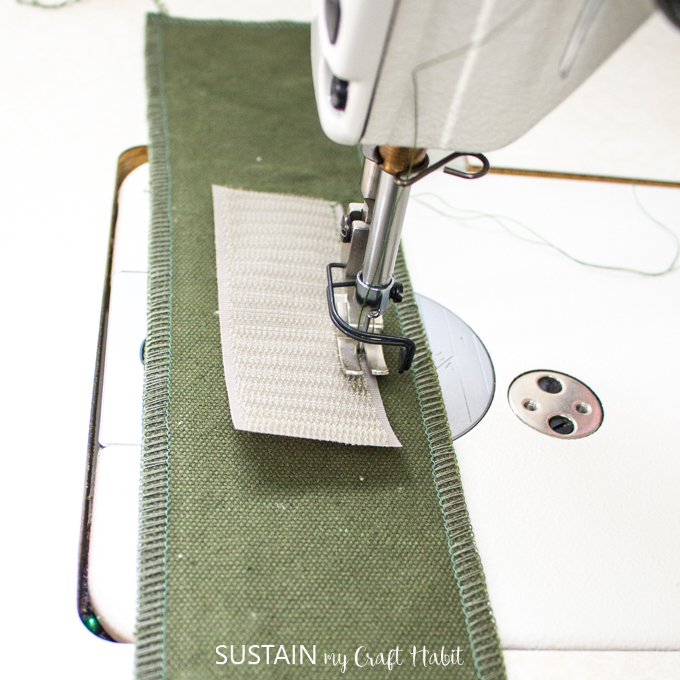
Sew one side of the hook and loop tape to the pocket facing.
Sew the pocket facing to the top edge of the pocket, fold seam allowance upward and understitch the seam.
Fold the facing flap inward and topstitch in place just below the lower seam line.
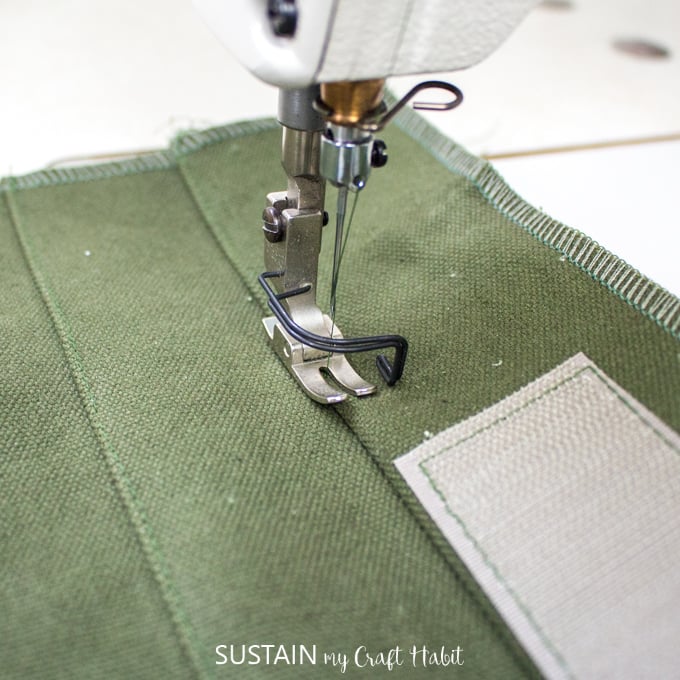
Sew the other side of the hook and loop tape directly on to the front bag piece at the marked position.

Position the pocket onto the front of the rucksack, aligning the small dots. Topstitch pocket in place along all 3 sides of the pocket. For added reinforcement, add a triangle stitch to both corners of the pocket opening.
Assembling the Rucksack
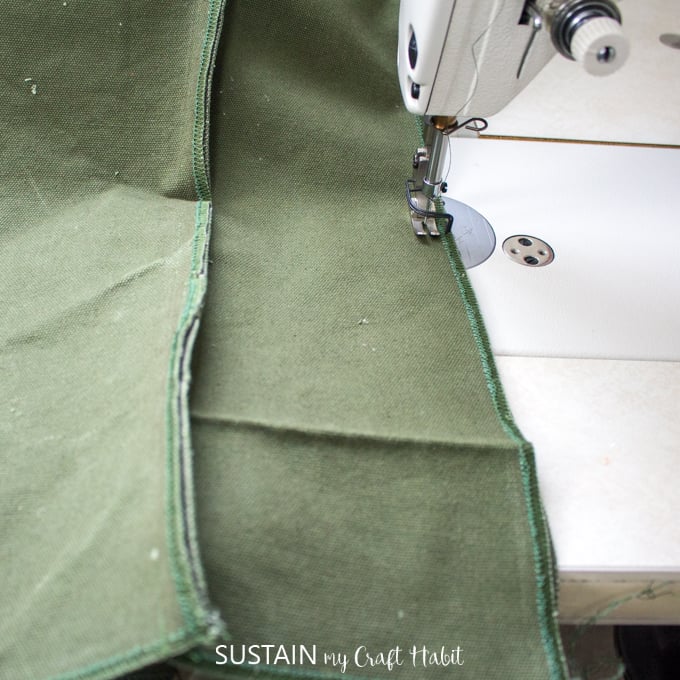
With right sides together, sew the prepared back piece with the front piece along the sides and bottom edge.
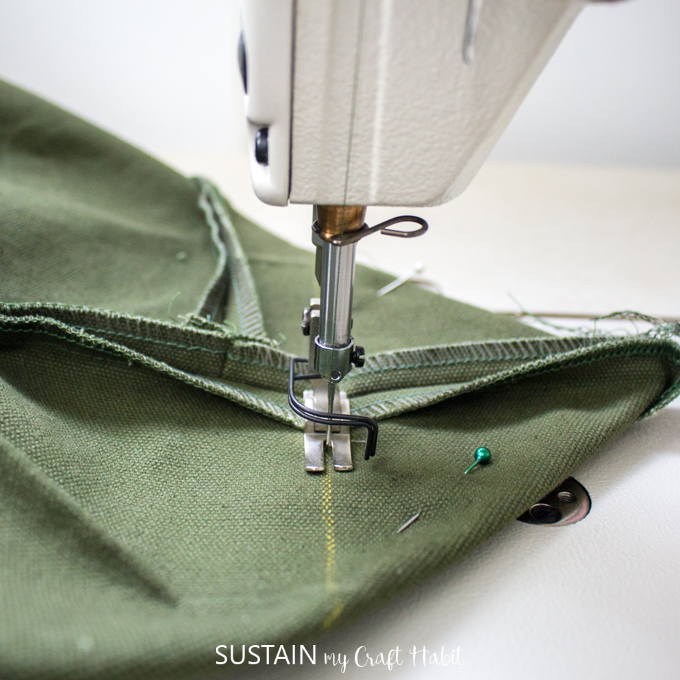
Working one bottom corner at a time, fold the corners inward with the side seam aligning the bottom seam forming a peak as shown.
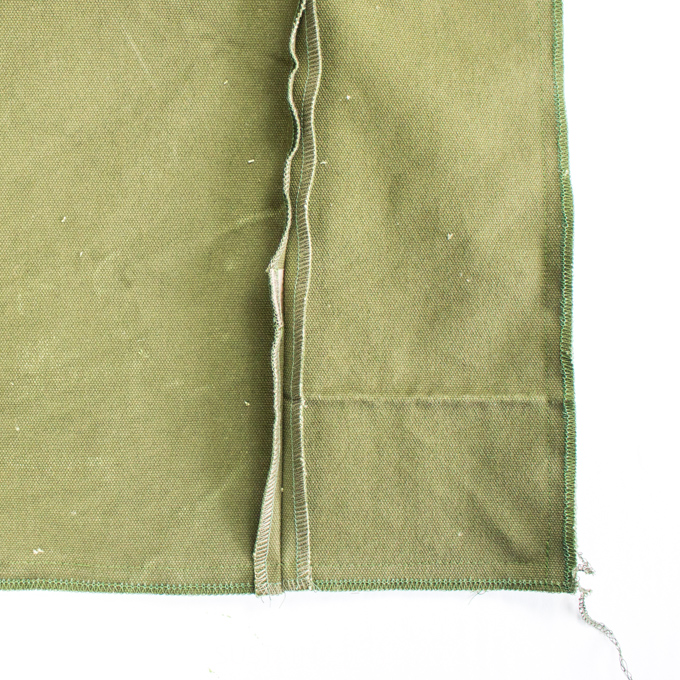
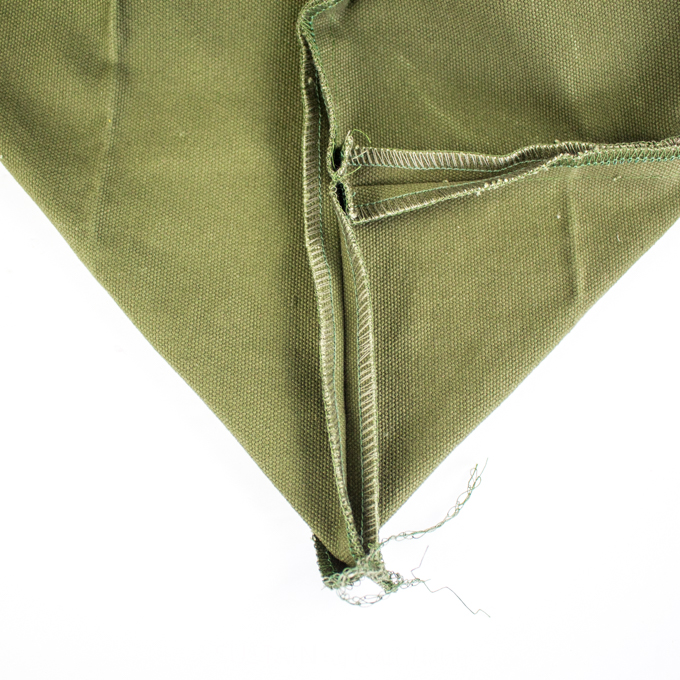
Draw a straight line using removable chalk and a ruler intersecting the notches. Sew over the marked line.
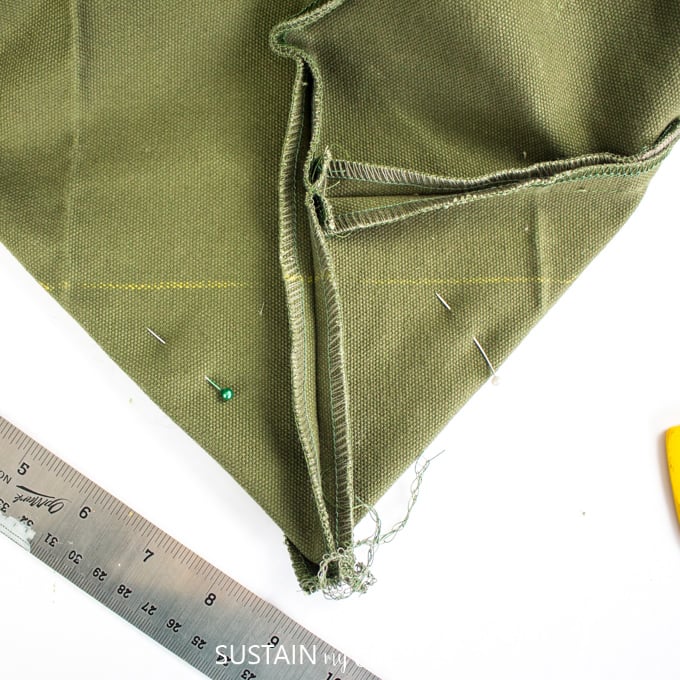
To reduce the bulk, you can choose to cut off the excess fabric from the peak and clean finish the cut edges with a zig zag or serge stitch.
With right sides together, position the upper zippered piece with the opening of the bag aligning all notches. Sew pieces together, pivoting at the corners.
Open the zipper and turn the rucksack inside out. What do you plan to use your rucksack for?
More Creative Sewing Ideas:
If you’re looking for more sewing projects and free sewing patterns, check out these tutorials:
- DIY kitchen apron – free pattern available
- DIY Utility apron – free pattern available
- Canvas table runner
- Decorative wall hanging
- Kids indoor tent
- DIY Drawstring bag pattern – free pattern available
- Christmas tree skirt – free pattern available
Like it? Pin it for later!


Good morning I was want the rucksack pattern to make my 3 grandsons.. but it would not let me get the PDF…Could you send me the instructions and pattern please? Thank you ,Donna.
Hi Donna, that sounds great, I hope they will like it. I will send you the ruck sack pattern to your email. As for the instructions, they are in the blog post. Kind Regards, Sonja
I also cannot. Is there a better link to those patterns?
Hi there, sorry for your trouble! I reloaded the link hopefully that will fix the glitch. Otherwise, please send me an email to smchinfo@gmail.com and I can forward the pattern PDF to you directly.
Good Afternoon, I saw this pattern for the rucksack and decided to make it as a Christmas gift for one of my nephews. I had no problem printing out the free pattern, thank you very much for that, however, when reading the instructions, I am a little confused with the measurements on cutting the Grosgrain tape. In the “Materials Needed” list, the pattern calls for one yard of 1″ tape, however the instructions state cut the tape into 6 pieces: 3 at 6″, 2 at 20″, 1 at 15″ and 1 at 3″. I’ve checked my math and the cut pieces are longer than the one yard measurement. Also, the instructions are very clear except for the placement of the 3″ piece of grosgrain tape and the two pieces of the 20″ grosgrain tape. Am I missing something? Thank you in advance for answering my inquiry. Beatrice
Hi there, thanks for your question! You’re correct, the math does not add up…the total length of grosgrain ribbon tape should say 2 yards (not 1 yard). Also, I’ve added image in the post showing where to position the ribbon along the CB panel, 5″ above the bottom edge. I hope this helps! Let me know. Many thanks, Sonja
This looks great. I do not understand the placement of 20′ ribbon. How about a picture of backside as the front is very clear, but not the back. I have a great piece of canvas just the right amount all waxed and ready to go. Your pattern pieces are great especially since you also put cut measurements on them. Looking forward to getting this done. Thanks much
Hi there, I just added a sketch of the back of the rucksack so I hope you will find it more clear. I will send the visual to your email as well. Many thanks for your feedback and suggestions. Kind Regards, Sonja 🙂
I Love this pattern but there are a couple of questions that I have but I am not sure who to contact would Love a video follow along
Hello, I was able to download the pattern but cannot get the instructions to print. Please help, I don’t have access to my computer in my sewing room…
Thank you so much for sharing this pattern! I plan to cut up my vintage wool check blazer along with my leather coat that I haven’t worn for years. I’ve been hanging on to them with dreams of repurposing. Perhaps a new rucksack will show their beauty once again.
Love this idea! It’s a great way to reuse what you already have. Happy sewing!
Hello! I just downloaded your rucksack pattern and I’m super excited to get started on making it. But I wanted to let you know I encounter a problem. After downloading, I taped all the pieces together, there are 28 separate pieces totaling 10 completed pieces. I double checked the number of separate pieces, just to make doubly sure I had all of them printed. But when I finished taping all the pieces, there seemed to be a few pattern pieces missing, that were not included in the download, so 2 of the 10 pattern pieces are incomplete. Luckily there are measurements on the pieces, and I’m able to draw directly onto my fabric to complete the areas on the missing pieces.
Respectfully,
Suzanne
Thankyou for letting me know, I will have to take a look at the pattern and see what the problem is!
Hey! Do you have any tips for making it as sturdy as possible? My store bought backpacks rarely last more than a year, always ripping at the seams of the straps, (I’ve ripped some straps clean off with regular use) or getting holes in the bottom. I’ve been thinking of just trying to make my own to be able to avoid that, but want to make sure I’m doing everything I can!
@Keegan, you can add interfacing to heavier material and that should make it thicker as well as when you go to make you own, ensure that the areas you see the pulling and threads not lasting go over 2-3 more times and then the inside of seams do a zigzag or reinforcing stitch before finishing. it will ensure that whatever you make lasts a long time. also pay attention to the type of thread. polyester will last longer but if your going for more natural cotton can break more easily and when washing will break down when put in dryer- thus ensuing going over seams 2-3 times for strength, and more for straps and other areas if neccessary
Hi there, Using the proper sewing needle and good quality, durable thread is key. Thread comes in all different types so it’s good to spend a bit more on the right thread to reduce risk of tearing. Also, I’d suggest renforcing the join seams wherever there will be pressure points, such as the straps or ends of pocket openings. And of course, a backpack fabric has to be heavier weight and tightly constructed such as a duck cloth or canvas. Hope that helps!
I am planning on making this rucksack. Your intro says to use prewashed cotton canvas. Will unwashed waxed canvas work for this pattern?
@Angela, unwashed waxed canvas will shrink over time and can not be placed into the washer and dryer. It being waxed does add a water resistant factor but be mindful that caring for it over time is different then unwaxed canvas which can be washed.
the reason we wash materials before sewing is because you can make an item and if you have not washed it prior it can shrink after the fact and not be what you had when you first made it.
Hope this helps
when I print this pattern @Actual Size I am only getting a 3 1/4″ square with a 1/2 seam allowance? To get a 4″ square I have to print @ 123% but then I end up with a 5/8″ seam allowance? Based on the seam allowance I am assuming the 3.25″ square is correct?
It needs to be 4″ in order to print to the correct scale. If you have a screengrab of the printer settings, you can send to me at smchinfo@gmail.com and I can try to help you further with it. Otherwise, I suggest downloading the updated PDF for more complete instructions https://shop.sustainmycrafthabit.com/product/rucksack-sewing-pattern-pdf-pattern-file-s0015/
You missed a step in the directions! Nowhere do you mention adding the top buckle strap when you sew in the zipper panel! I finished the bag then realized it was still on my table. I did figure it out from one of the photos but I had to take one side of the zipper panel apart to add it!
Thankyou for letting me know! I have updated the instructions in the write up and in the free printable PDF found here https://shop.sustainmycrafthabit.com/product/rucksack-sewing-pattern-pdf-pattern-file-s0015/.
At what point do I sew on the two side panels (005)? I can’t seem to find it in the directions. The photo shows the 20″ grosgrain tapes are placed 5″ up on the outer side of the side panels (005), but the placement marks are shown on the center back pattern piece (002). Which location is correct? Also, does the center back Upper panel (003) get top stitched or understitched after it is attached to the cb lower panel (002)?
The grosgrain pieces should be attached to the center back panel at the mark indicated. The side back pieces are sewn to the center back piece after straps and grosgrain tape pieces are attached. Also, I did a topstitch along the upper back panel join seam to help reinforce the strength of the straps. You can find the complete instructions with sketches here https://shop.sustainmycrafthabit.com/product/rucksack-sewing-pattern-pdf-pattern-file-s0015/ Thankyou kindly, Sonja
Hi, I’m working on the rucksack and I’m stumped as to where the 20″ long grosgrain pieces attach. The pattern piece for the back lower panel have markings for placement but the drawing pic shows them placed on the side panels. Please help! I’m trying to finish to take a trip this weekend. This is the perfect carryon size!!! I embroidered on the pocket, it will look great when I get it all together!!! I’m also going to make some in pretty prints for the grandkids!
You can find updated tech sketches and instructions in the free printable pattern file in our Sustain My Craft Habit shop https://shop.sustainmycrafthabit.com/product/rucksack-sewing-pattern-pdf-pattern-file-s0015/ which will help with explaining the placement of the grosgrain pieces. Thankyou!
Hi! I’m excited to make this bag, it’ll be perfect for hiking and camping with the kids. But I cannot for the life of me print it properly. the lines doesn’t add up, margins are missing, line-up points are missing…..it also doesn’t include the measurements, so I can’t even go off of that. Is there any way I can have just the measurements for the pieces? I’ve made enough bags to figure out the rest. Thank you!
Sorry for the delay in responding! I have updated the pattern PDF file so it is easier to print and line up. If you rather, head over to our Sustain My Craft Habit shop and download the free listing here instead https://shop.sustainmycrafthabit.com/product/rucksack-sewing-pattern-pdf-pattern-file-s0015/
Thankyou for the feedback! Much appreciated, Sonja
Hi i am construting this rucksack and the placement for the 20” straps show to put them on after the side panels. I do not feel this is correct .i feel they go on before the side panels