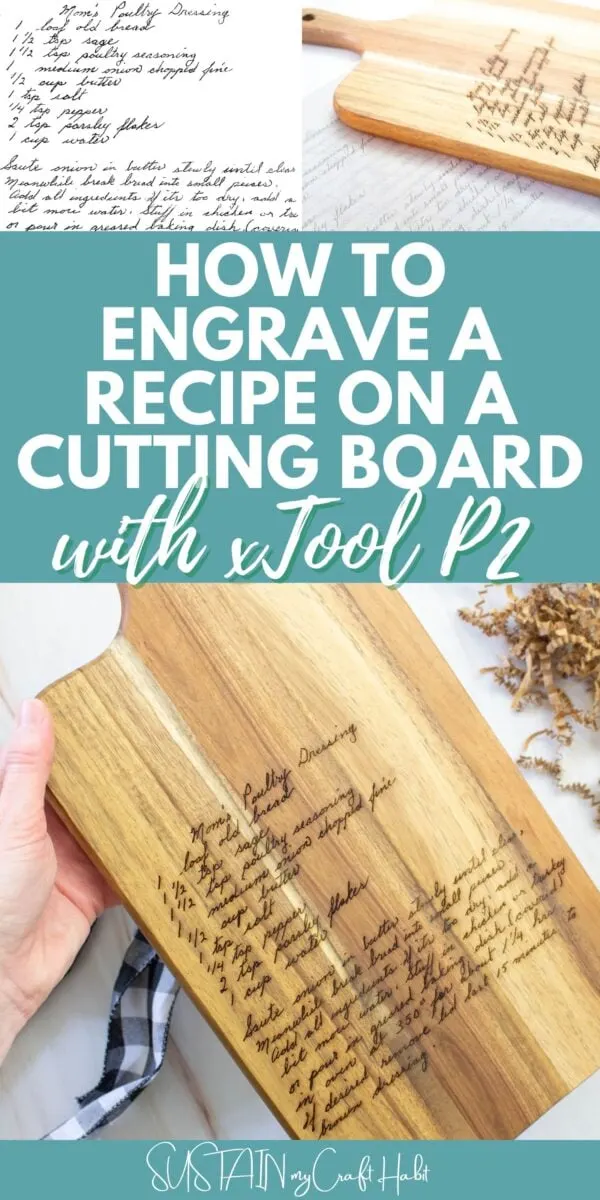
Whether you’re preserving a cherished family recipe or creating a special gift, engraving a handwritten recipe on a cutting board transforms an everyday kitchen item into a treasured keepsake. The xTool P2 laser engraver makes this project doable for a beginner or a laser enthusiast, offering precision and ease of use that delivers professional-looking results.
In this post, I’ll walk you through the step-by-step process of how to laser engrave handwritten recipes on to cutting boards.
The Challenges of Engraving Handwritten Recipes
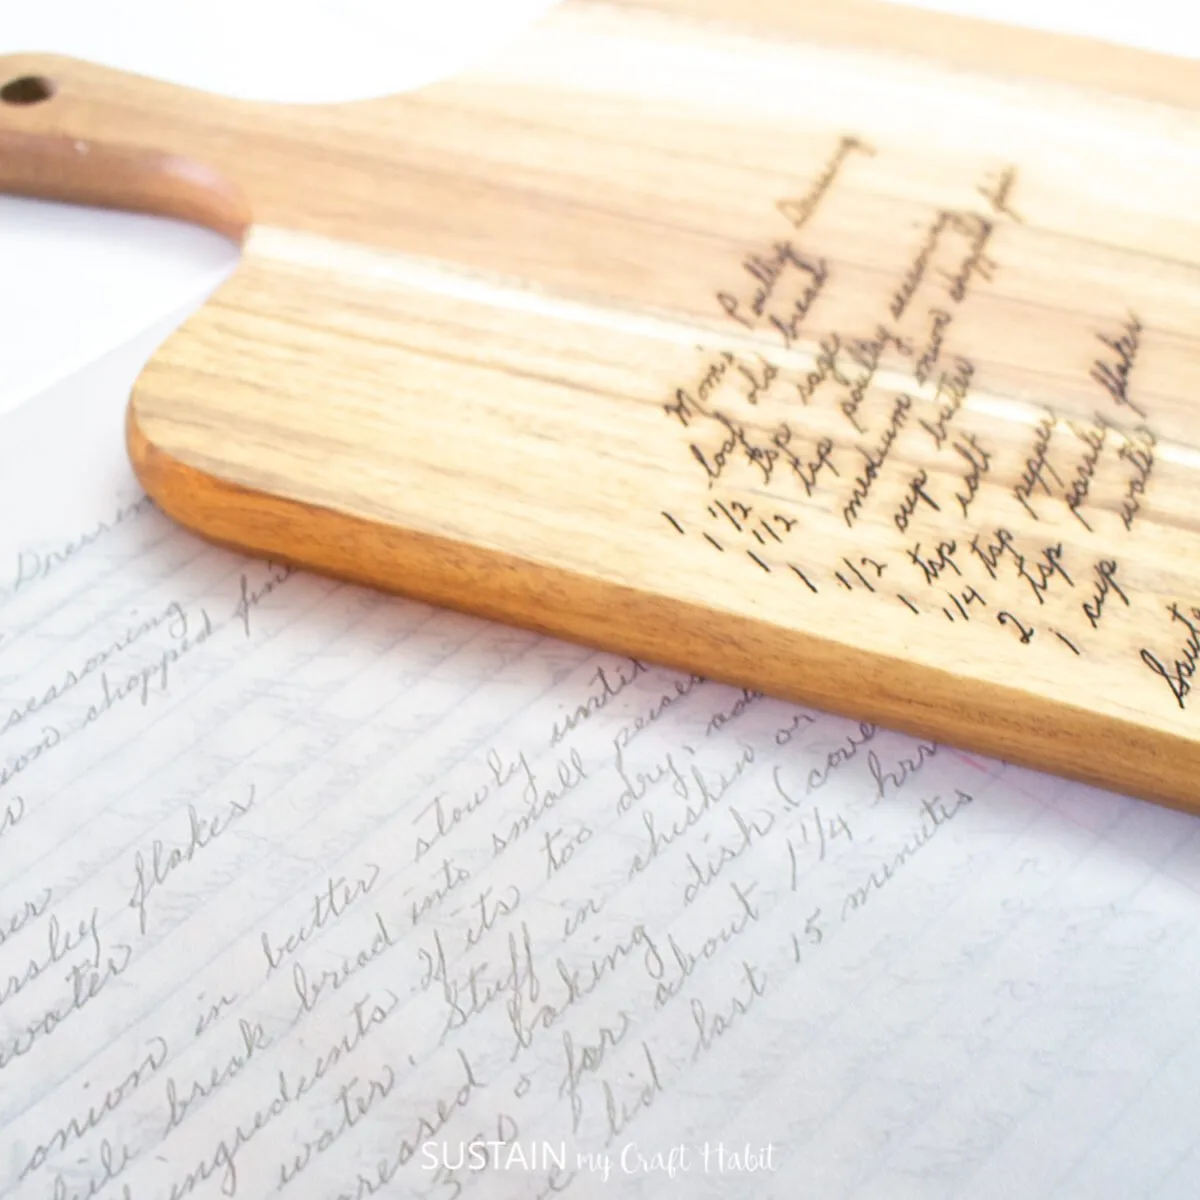
We’ve come across all kinds of handwritten recipes in various conditions ranging from well preserved, clear and legible to grease-stained, faint and well-aged recipe cards! But regardless of the condition of your handwritten recipe, there are steps you can take to “clean up” the recipe making the engraving as flawless as possible.
Why You’ll Love Engraving Handwritten Recipes
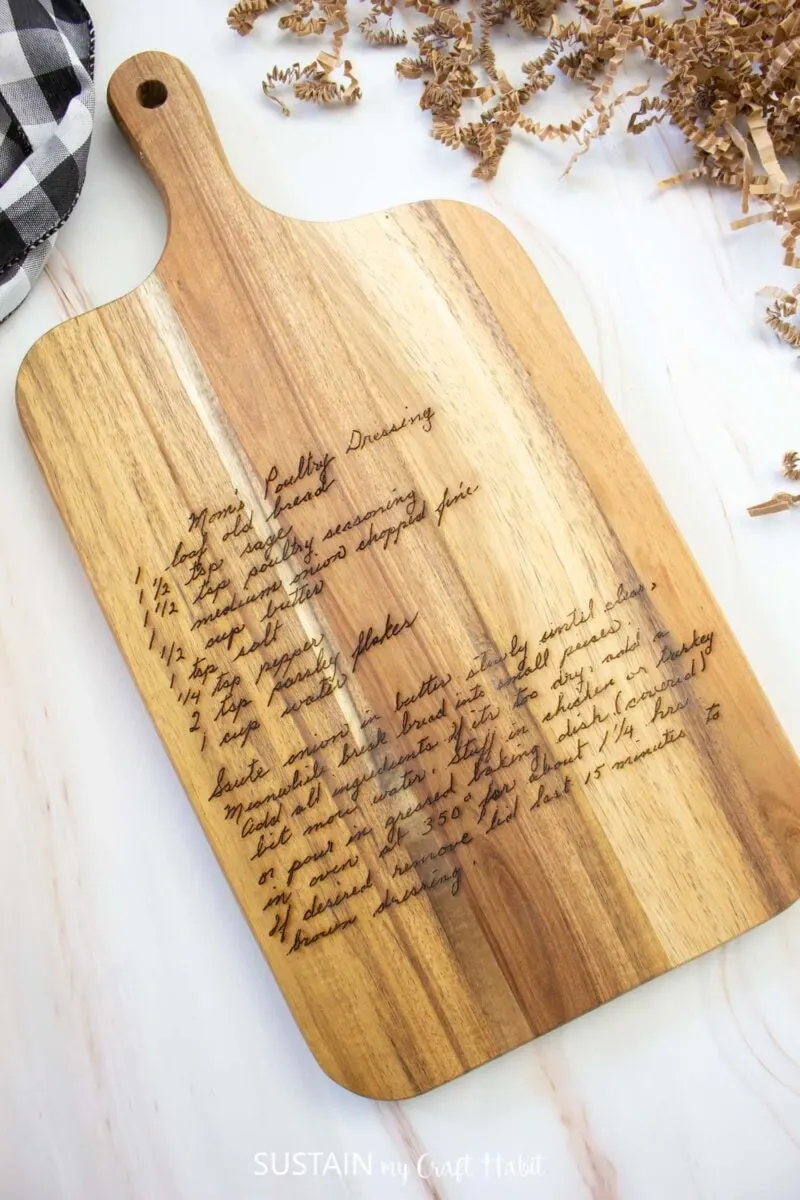
Coming up with the perfect gift has never been so easy, truly! Where you’re preserving your grandmother’s recipe; making a personalized cutting board for mother’s day, or simply wanting to highlight your favorite recipe, engraving a handwritten recipe is a sure way to create a cherished keepsake. Pair it with a lovely handmade kitchen apron or tea towel for that added personal touch!
Best of all, once the hand written recipe is prepared, you can complete most laser engravings (depending on size) in just 20-35 minutes, transforming ordinary cutting boards into cherished family heirlooms that are both beautiful and functional.
What Other Items Can I Engrave On With The xTool P2
The xTool P2’s versatility opens up a world of creative possibilities beyond a beautiful board. For home décor, you can create custom wall art with wood or engrave decorative wooden boxes and trinket holders. In the kitchen, try customizing wooden spoons, coasters and serving trays with a monogram or a unique design.
Get access to our resource library filled with cut files and other xTool craft ideas!
Materials Needed
- Laser Engraver (we used xTool P2)
- Recipe card (scanned or uploaded as a photo)
- Acacia Wood Cutting Board (we love to use this acacia wood cutting board but other board designs (shape and sizes will work well too))
How to Laser Engrave Handwritten Recipes on Cutting Boards with xTool P2
Preparing a Recipe Photo or Scan of Recipe
The first step is to capture a good quality image of the handwritten recipe. Make sure the photo (or scan) is taken with good lighting (no excess shadows) on a flat surface directly overhead.
As you can see, the photo we used was dark, shadowed and imprinted from the back side.
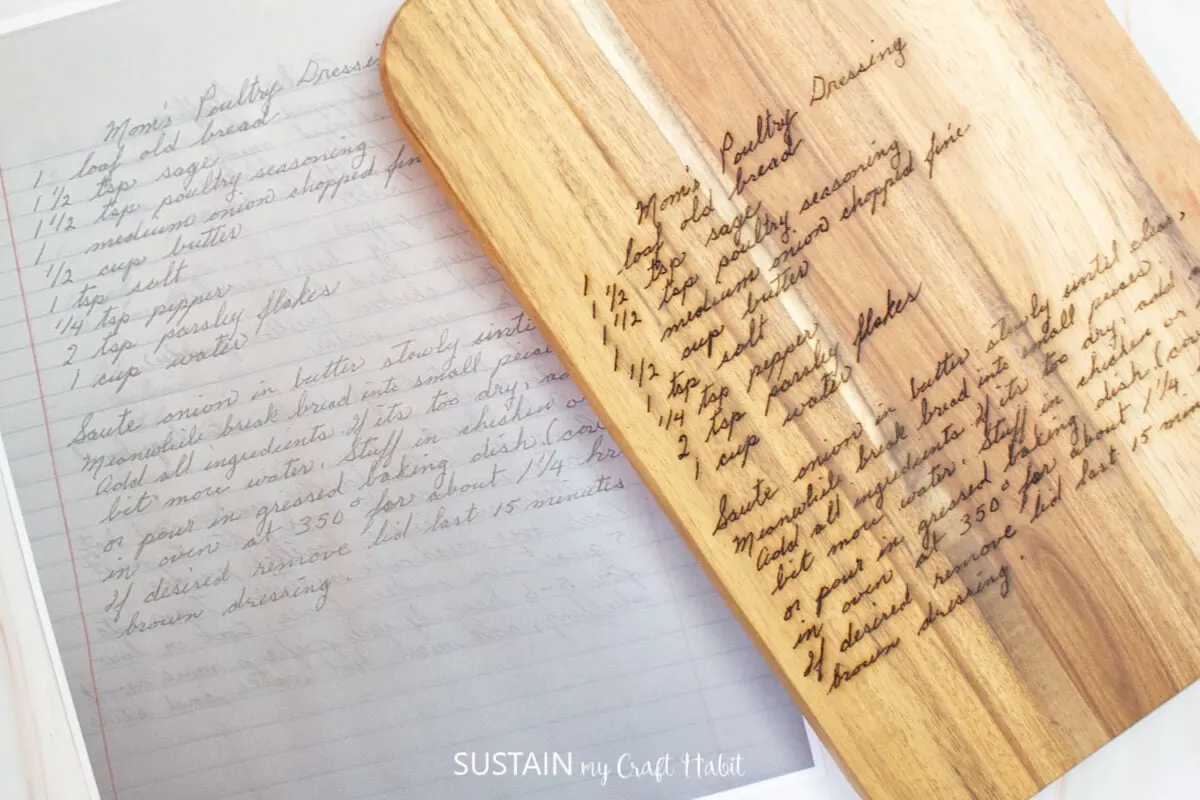
Before uploading in to the xTool Creative Space software, I made some edits to the image using my mobile phone. First, I applied a black filter to enhance the lettering and lessen the background. Next, I increased the exposure to 100 until the text was most visible and then I also inreased the contrast to make the lettering pop. Lastly, I cropped the extra space around the recipe.
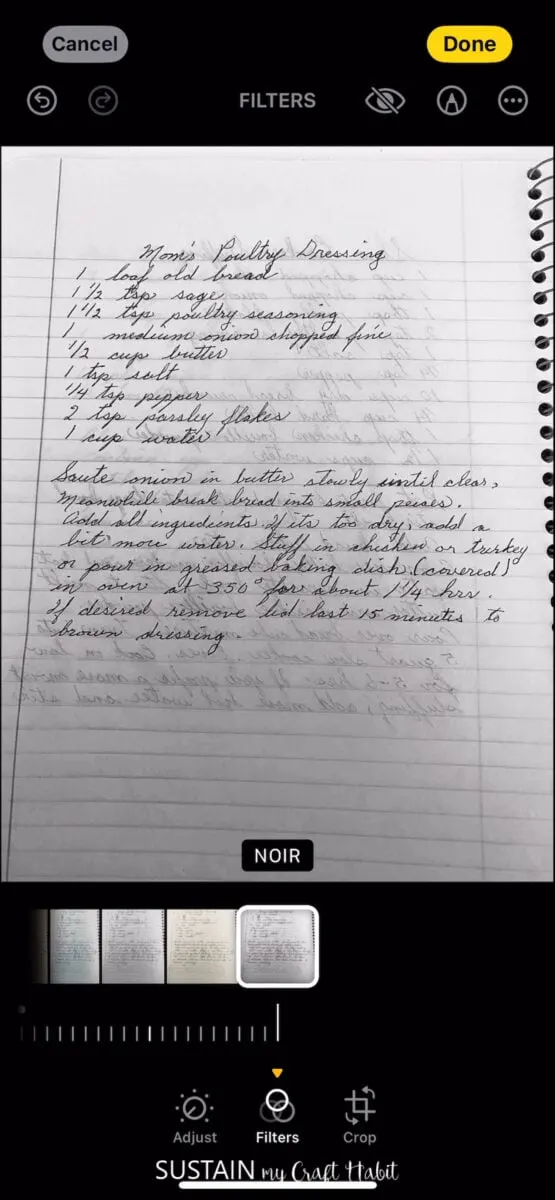
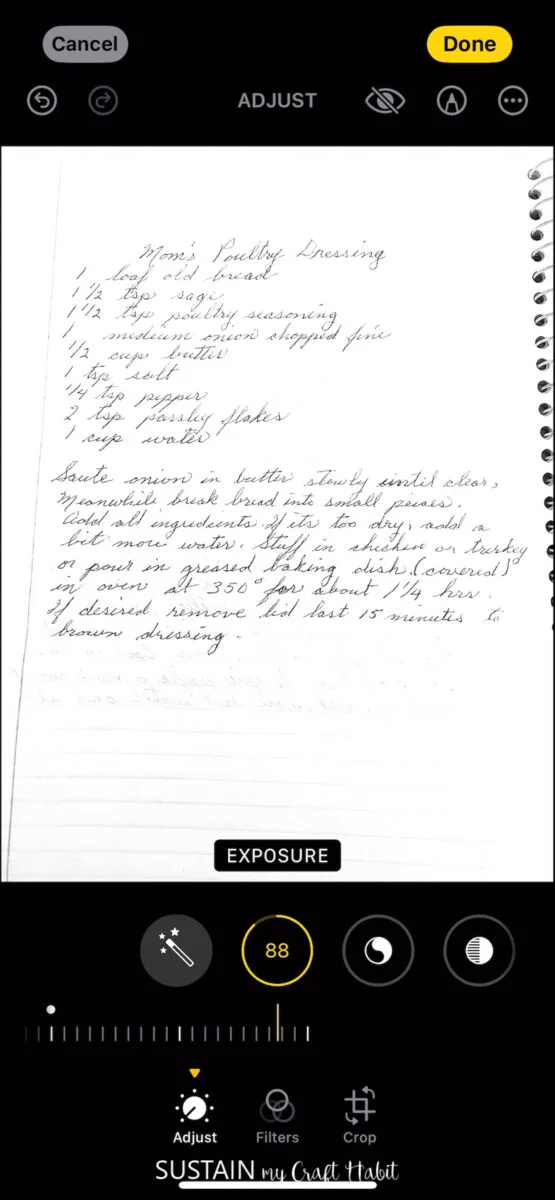


Save the new image with all the edits.
Next, upload the image of the recipe onto a blank canvas in the Creative Space software.
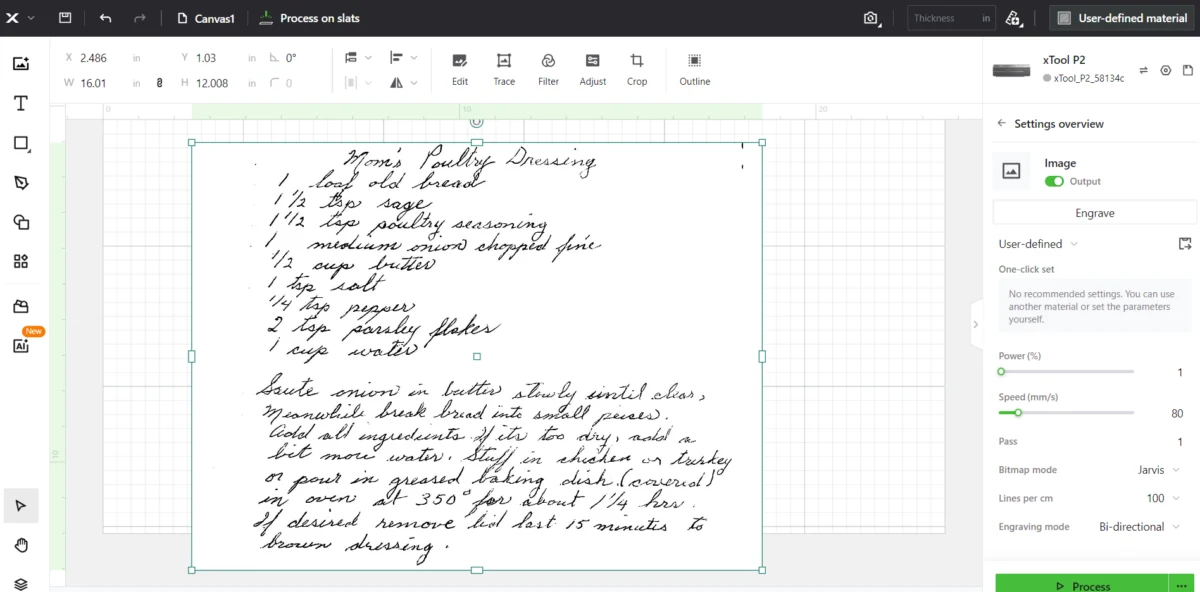
If further edits are needed to clean up the recipe some more (as was the case for us), select the edit image button. Use the magic eraser to erase any large, dark unwanted areas.
Then use the magic tool to remove the blotchy and or shaded areas. Works like magic!

Laser Engraving the Recipe
Next, we suggest doing a test run of the engraving before engraving directly onto the cutting board. I used a scrap piece of 3mm basswood. After the engraving was complete, I found some of the letters were not visible. In this case, I returned back to the original print out of the recipe and re-traced some of the letters with a fine tip black pen.
Now that this step was complete, I repeated the earlier steps of editing on my phone and then to Creative Space. I did a second test on 3mm basswood in the exact size I was planning to do for the cutting board. This would ensure that the engraving would be legible.

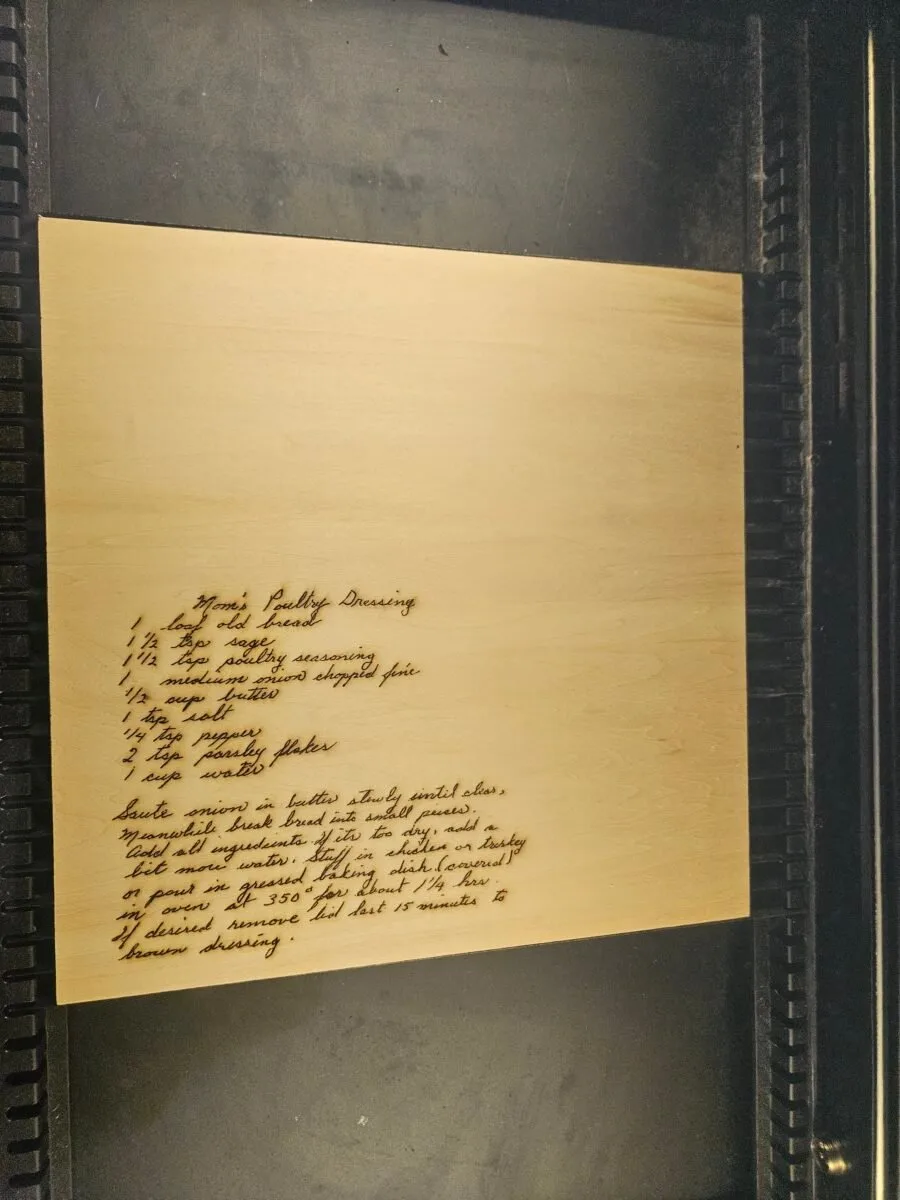
The final test run looked great! So on to engraving the actual cutting board.
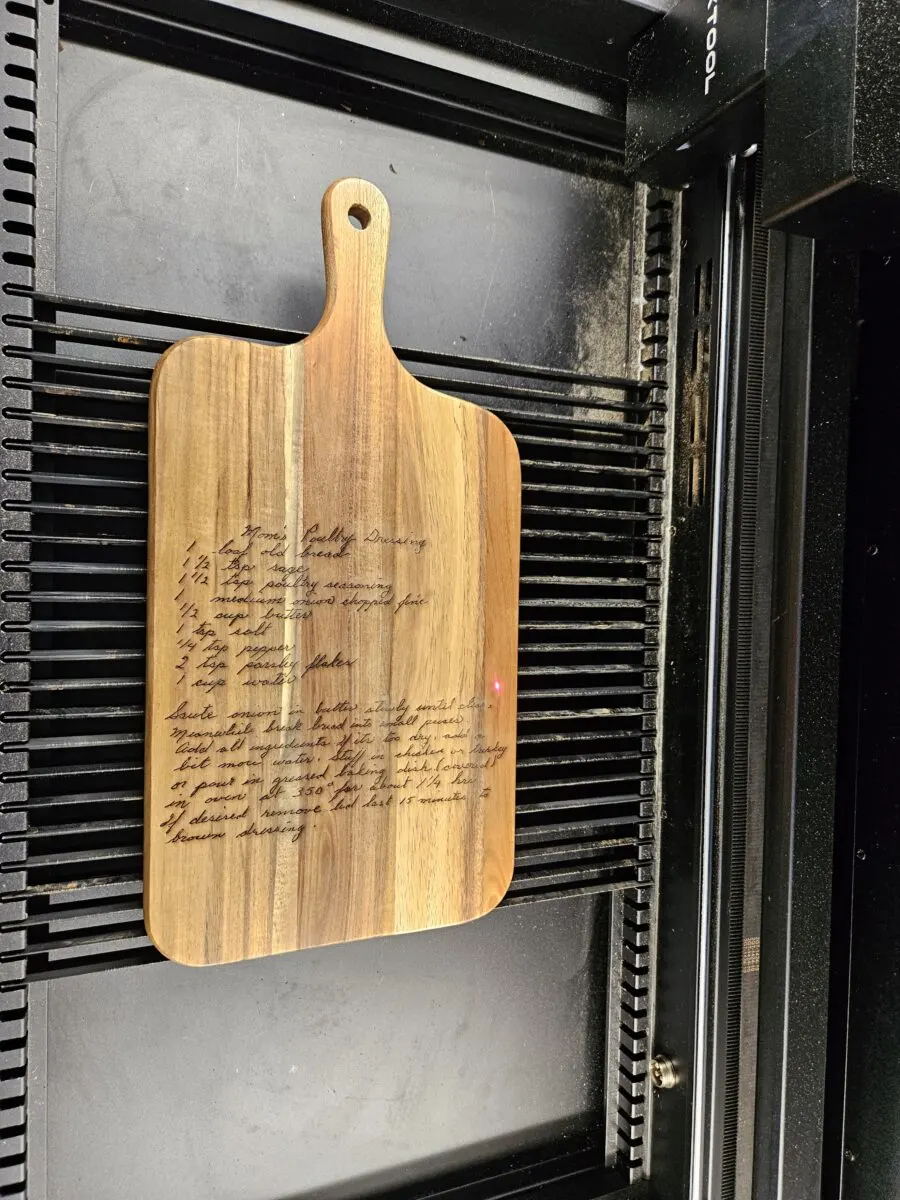
I placed the board in to the xTool on top of the slats. Because of the weight I didn’t use any clamps.

After refreshing the screen, I positioned the recipe on to the cutting board making sure the alignment was perfect. You can use the quick shot to zoom in on the edges of the cutting board.
I selected 12mm cherry wood surface and then adjusted the settings to 35% power with 170mm / seconds. I wasn’t certain if that setting would work but luckily it did.
Pro Tip: If your engraving is too light, then simple hit process again without moving the board for a second time.
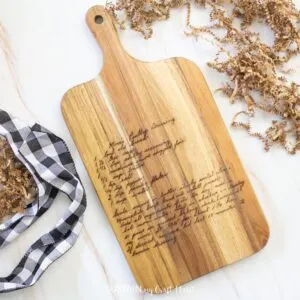
Once the engraving is finished, remove the board from the machine and using a clean damp cloth, gently wipe away the soot until the cloth comes out clean. Lastly, apply a coat of food-safe cutting board oil and reapply regularly depending on the amount of use.
Bringing Your Engraved Recipe Board to Life: Final Thoughts
Creating an engraved recipe cutting board with the xTool P2 is more than just a crafting project – it’s a special way to preserve cherished memories and create meaningful connections through food and family traditions. It’s a great way to capture a favorite handwritten recipe onto a functional piece of art that tells a story.

Once you master recipe engraving, you’ll find yourself inspired to create other personalized kitchen items, making this skill a versatile addition to your DIY repertoire. You may even find yourself taking custom orders!

Get access to our resource library filled with SVG cut files and laser cutting craft ideas!
Bringing Your Engraved Recipe Board to Life: Final Thoughts
Creating an engraved recipe cutting board with the xTool P2 is more than just a crafting project – it’s a way to preserve cherished memories and create meaningful connections through food and family traditions. Whether you’ve chosen to immortalize grandma’s secret cookie recipe or create a personalized wedding gift, you’ve now transformed a simple cutting board into a functional piece of art that tells a story.
More xTool P2 Crafts to Make
- How to Engrave Rocks
- 4 In a Row Game
- How to Cut Mirror Acrylic
- How to Cut Corrugated Cardboard
- Coffee Bar Sign



Like it? Pin it for later!
How to Engrave Recipe on Cutting Board with xTool P2
Materials
- Laser Engraver xTool P2
- Recipe card scanned or uploaded as a photo
- Cutting Board Charcuterie Board or other wood surface
Instructions
- Take a photo of the written recipe from your mobile device.
- Next, upload the image of the recipe onto a blank canvas in the Creative Space software.
- Use the magic eraser to erase any large, dark unwanted areas.
- Then use the magic tool to remove the blotchy and or shaded areas.
- Next, we suggest doing a test run of the engraving before engraving directly onto the cutting board. I used a scrap piece of 3mm basswood.
- I placed the board in to the xTool on top of the slats. Because of the weight I didn’t use any clamps.
- After refreshing the screen, I positioned the recipe on to the cutting board making sure the alignment was perfect. You can use the quick shot to zoom in on the edges of the cutting board.
- I selected 12mm cherry wood surface and then adjusted the settings to 35% power with 170mm / seconds. I wasn’t certain if that setting would work but luckily it did.
- If your engraving is too light, then simple hit process again without moving the board for a second time.

