
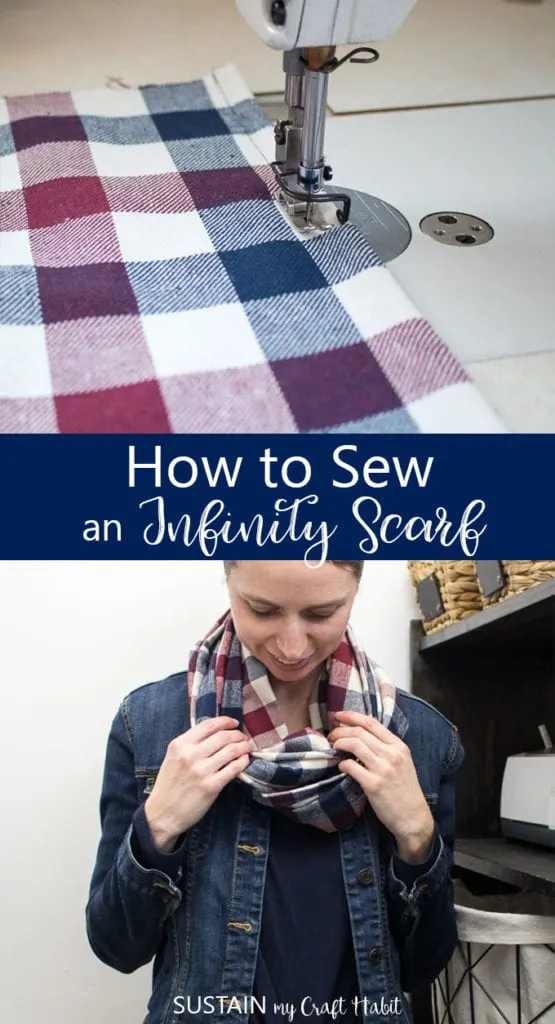
Infinity scarves are a great way to add a splash of color and style to your outfit. Whether you’re new to sewing or more experienced, sewing an infinity scarf is a simple and quick DIY project.


How to Sew an Infinity Scarf
And when I say quick, I mean quick! Just before Christmas, I was able to start and finish this infinity scarf in under 30 minutes making it an ideal gift giving idea.
What is an infinity scarf (…you might be asking yourself)? Well, very simply, it’s a long rectangular scarf that joins at the ends forming a closed circle. Depending on the size of the circle, you can wear it loosely around your neck or if it’s large enough (like this one), you can wrap it around twice to wear it closer to your neck.


From miniature check patterns to large buffalo plaid, there are so many different types of patterns and colors to choose from that you could easily make a different one for every day of the week! And plaid is not just for fashion, you can also use it to make upcycled sweater stockings for the holidays!
Materials Needed:
This post contains affiliate links for you shopping convenience. You can read our full disclosure statement here.
- 100% cotton plaid flannel, 60″ width; 1/2 yard (or 20″ long)
- Sewing Machine with matching thread color
- Fabric Scissors
- Measuring Tape
- Iron and ironing board
How to Sew an Infinity Scarf:
The Prework:
Pre-wash the fabric before cutting and sewing. Depending on the fiber content, some shrinkage might occur. It is always much better for fabric to shrink before a project is finished than after.
The Cutting:
Cut a large rectangular shape measuring 20” long by 60” wide. Fabric is typically sold in 60″ (150cm) widths or 45″ (114cm) widths. For this particular infinity scarf, I chose a fabric that was wider in width.


The Sewing:
What is a french seam?
The best way to finish the joining seam for this infinity scarf is with a “french seam”. A french seam is one that encloses the seam allowance so that no raw edge is visible. This is primarily used on lightweight and sheer fabrics such as chiffon but also comes in handy for this type of scarf. Alternatively, since this is a woven fabric you would have to finish the raw cut edge with either a serger machine or a zig-zag stitch which doesn’t look very tidy.
To begin, fold the fabric in half width-wise with the WRONG sides together so you have a rectangle measuring 20”x 30”. Sew the short ends of the rectangle closed with a 1/4” seam allowance.


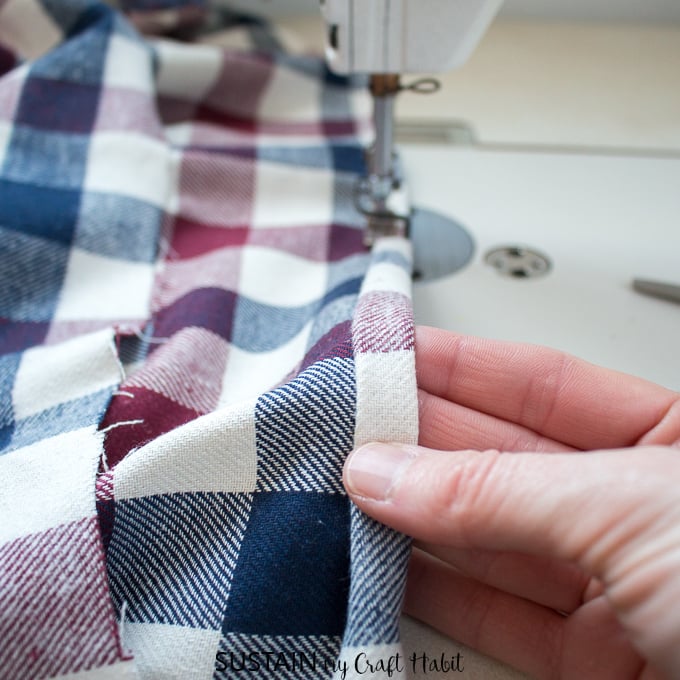
Press the seam allowance open. Turn the right side out and press along the seam line as shown.
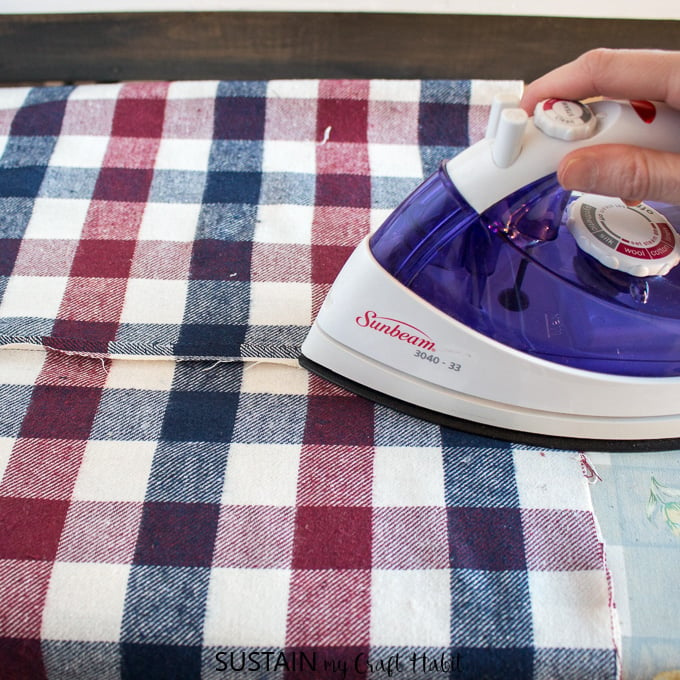


Next, with the right side out, sew another stitch line 3/8″ away from the folded seam edge to finish the french seam.


Press the clean finished seam to one side. This is a french seam: notice how clean the seam is with no raw or zig zag edges visible.


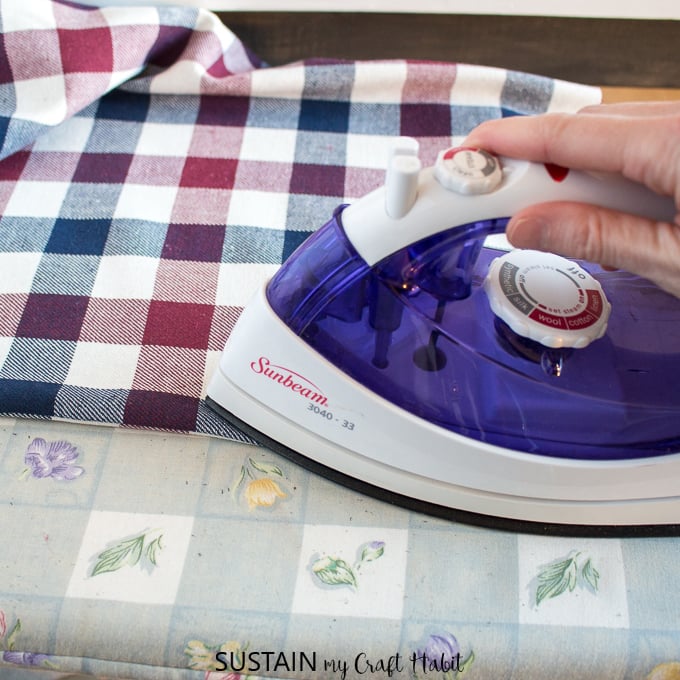
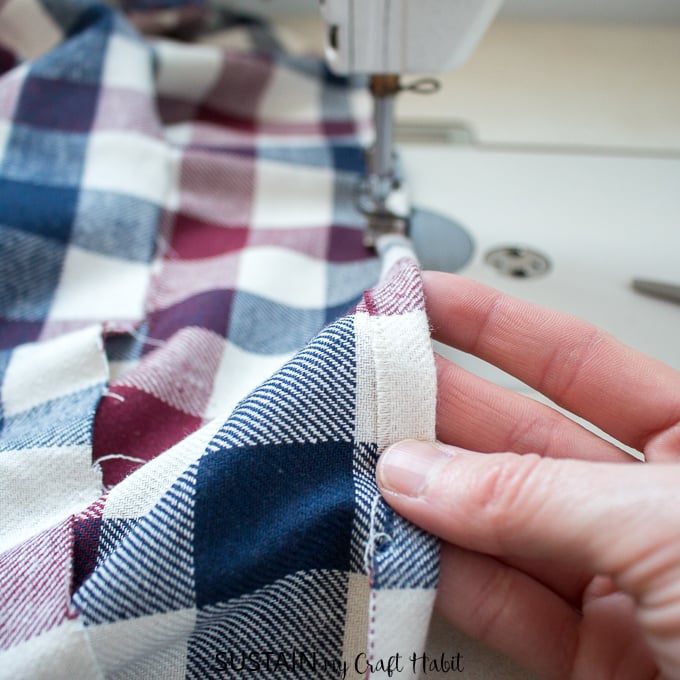
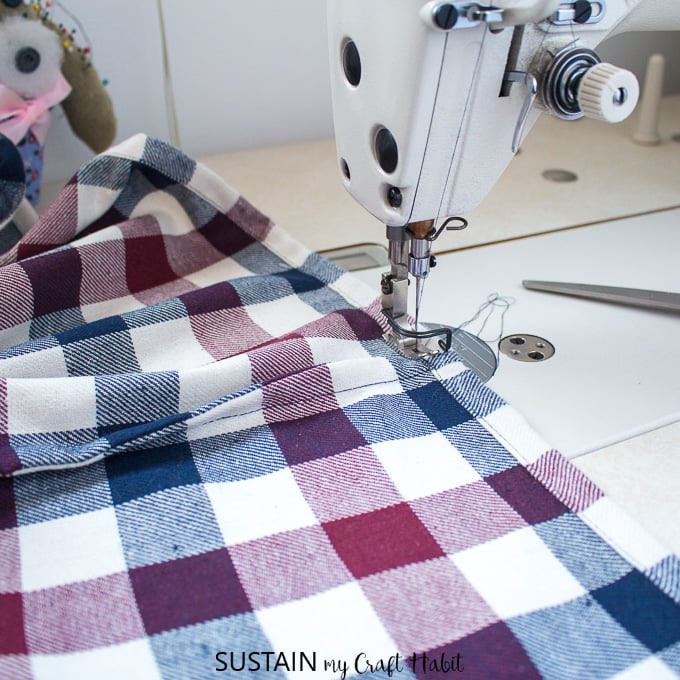
Lastly, finish the remaining cut edges one side at a time. Fold the cut edges in towards the wrong side by ¼” and press in place. Fold again another 1/4″ to hide the raw edge and press in place.


Stitch the hem in place using a regular presser foot.


Give it another iron to get rid of all the wrinkles and creases and the infinity scarf is ready to wear!


If you’re looking for more simple DIY sewing projects, check out these DIY linen napkins and our tutorial on how to make reversible placemats.
Like it? Pin it for Later!